ITTOG's Truck Camper Build (was 6' x 12' Trailer Conversion)

ITTOG

Well-known member
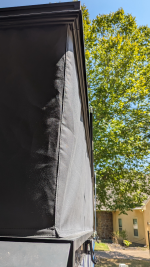
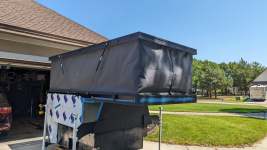
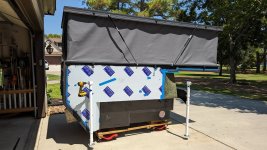
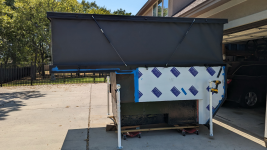
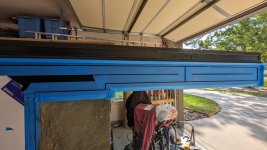
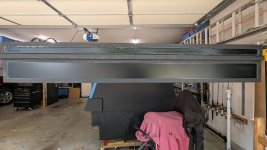
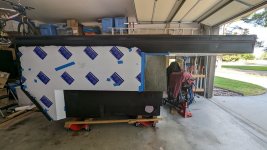
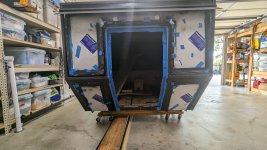
I picked up the camper from Classic Upholstery. Of course I had to pop the top and look at it. It looked great other than it looked a bit loose. So I adjusted the Velcro and tightened it up a bit.
1692882861642.png

1692882889162.png

1692882911743.png

Untitled picture.jpg

Here the canvas is taught.
1692882962749.png

I wish I would have went with one shade lighter to have some contrast with the camper. In the shade it will look like a giant black box.
 

Mules

Well-known member
Looking Great!!

Throw a sleeping bag in it and try it out!!

And an air conditioner:) Damn it's hot in the Midwest.
 

ITTOG

Well-known member
Looking Great!!

Throw a sleeping bag in it and try it out!!

And an air conditioner:) Damn it's hot in the Midwest.
I am hoping to be ready for a trip in October. Time is flying by fast and I haven't worked on it in a while due to family obligations. I hope I am able to get it "ready enough" to use before that trip.

well I was thinking with his hips redone maybe he just wanted more privacy

edit:

Sorry couldn't help myself
Nah, I am more of a public person. :)
 

ITTOG

Well-known member
Time: 3.5 hours
Total Time to Date: 402.5 hours
Rework: 0 hours
Total Rework to Date: 90 hours (not part of time above)
Current Weight: To be weighed, but at least 735 pounds


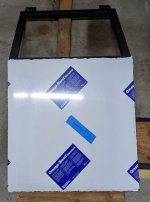
Motivation for the camper has been short over the past month. In addition, with record temps I can't keep from sweating and getting it in my work. But I did decide to skin the door.
PXL_20230823_122507759.jpg

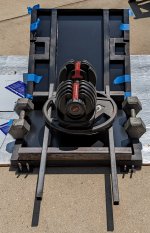
After applying the adhesive, I used some weights to ensure I get good coverage and adhesion.
PXL_20230826_191648118.jpg

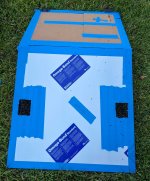
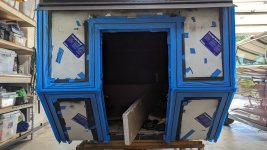
Given the door will be moved around a lot I decided to cover the skin with cardboard. Next I will fabricate the trim and cut holes for the two door handles.
PXL_20230827_145848446.jpg

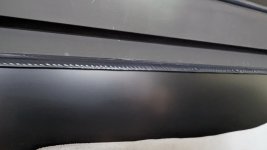
I didn't want to do the caulking myself so I asked a couple of painters and neither one would take me up on it. I knew if I did it the lack of quality in the job would frustrate me. It is just a skill I do not have. Unfortunately, the next two photos prove that.
PXL_20230830_212434061.jpg

PXL_20230830_222840461.jpg

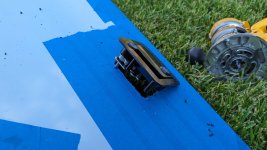
I found an hour of time so I decided to cut the holes in the door for the handles.
PXL_20230830_222919682.jpg

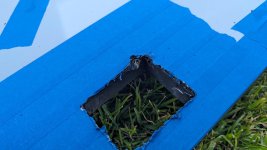
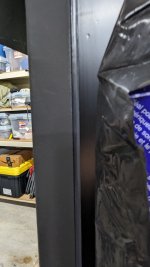
Unfortunately, adding the skin to the door change the clearances and created a problem.
PXL_20230830_223114294.jpg

Luckily, nothing a metal bur couldn't take care of.
PXL_20230830_231345208.jpg

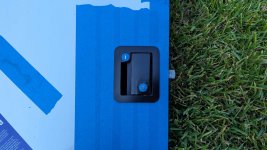
A little grinding with the bur and everything fits!
PXL_20230830_231359732.jpg

Hopefully the work cadence will increase dramatically.
 

Mules

Well-known member
Time: 3.5 hours
Total Time to Date: 402.5 hours
Rework: 0 hours
Total Rework to Date: 90 hours (not part of time above)
Current Weight: To be weighed, but at least 735 pounds


Motivation for the camper has been short over the past month. In addition, with record temps I can't keep from sweating and getting it in my work. But I did decide to skin the door.
View attachment 794398

After applying the adhesive, I used some weights to ensure I get good coverage and adhesion.
View attachment 794399

Given the door will be moved around a lot I decided to cover the skin with cardboard. Next I will fabricate the trim and cut holes for the two door handles.
View attachment 794400

I didn't want to do the caulking myself so I asked a couple of painters and neither one would take me up on it. I knew if I did it the lack of quality in the job would frustrate me. It is just a skill I do not have. Unfortunately, the next two photos prove that.
View attachment 794401

View attachment 794402

I found an hour of time so I decided to cut the holes in the door for the handles.
View attachment 794403

Unfortunately, adding the skin to the door change the clearances and created a problem.
View attachment 794404

Luckily, nothing a metal bur couldn't take care of.
View attachment 794405

A little grinding with the bur and everything fits!
View attachment 794406

Hopefully the work cadence will increase dramatically.
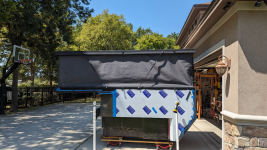
I'm excited to see it without the plastic covering!
 

ITTOG

Well-known member
I think when I do the rest of the caulking I will use tape to get a straight edge and ice to create a smooth line. I use the ice because the caulking, which is actually a 3M adhesive, will not stick to it.
 

Mules

Well-known member
I think when I do the rest of the caulking I will use tape to get a straight edge and ice to create a smooth line. I use the ice because the caulking, which is actually a 3M adhesive, will not stick to it.
I'm not a caulk pro, but have built a few homes.

I'm not sure if you used a caulk gun, but it helps to lay long beads. I cut the tip at an angle, and drag the tube, using the tip to make a nice round fillet. If needed wet your finger to smooth the bead out.

Sometimes, when I caulk, I run tape on both sides, and just run my wet finger over the bead to make a nice fillet. I just use a paper towel to wipe off my finger and dip it back in water to do some more. Seems to work well with Latex and Silicone caulks.

Good luck.
 
Last edited:

ITTOG

Well-known member
Time: 3.25 hours
Total Time to Date: 405.75 hours
Rework: 0 hours
Total Rework to Date: 90 hours (not part of time above)
Current Weight: To be weighed, but at least 735 pounds


Given the caulking on the roof did not go well I decided to take the time to tape the edges around the trim.
PXL_20230904_145802775.jpg


The caulking, really an adhesive, 3M Marine Adhesive Sealant 4000 UV, begins to set up within minutes. If I do not remove the tape quickly it will lift the caulking left on the camper and leave a small ridge instead of it smoothly fading out. Thus, I could not caulk an entire side at once. On the sides, I had to do it in three steps.
PXL_20230904_145816696.jpg

The front could all be done at once. The camper is about 67 inches wide so about 12 feet can be done in one step if there are no complexities, but much more than this has to be broken up. (The camper is 12' long and the sides added complexities.)
pxl_20230904_154614619-jpg.795392


The job is complete and I kind of like the way it looks. I started out by smoothing the caulking using ice. A hack I saw online. It works great but became problematic given it melts. Thus, I tried @Mules suggestion and just wet my latex glove to make the smooth surface. It didn't work as well as the ice but was definitely worthwhile so I finished the job that way.
PXL_20230906_224445701.jpg

PXL_20230906_224459075.jpg

PXL_20230906_224511185.jpg

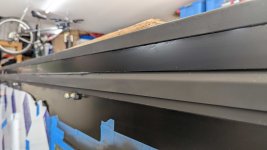
This pic shows a nice spot. Too bad it wasn't on the entire camper like this. This is a lot better than the roof!
PXL_20230907_171929468.jpg

Here you can see the edge (bottom of caulking) I was talking about.
PXL_20230907_171918060.jpg
 

Attachments

  • PXL_20230904_154614619.jpg
    PXL_20230904_154614619.jpg
    607.9 KB · Views: 79
Last edited:

Forum statistics

Threads
188,028
Messages
2,901,380
Members
229,352
Latest member
Baartmanusa
Top