ITTOG's Truck Camper Build (was 6' x 12' Trailer Conversion)

ITTOG

Well-known member
Time: 5 hours
Total Time to Date: 390 hours
Rework: 4.5 hours
Total Rework to Date: 90 hours (not part of time above)
Current Weight: To be weighed, but at least 725 pounds


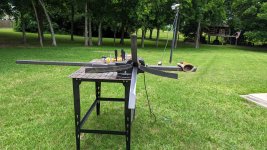
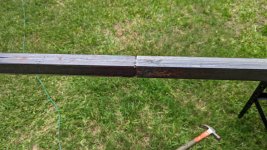
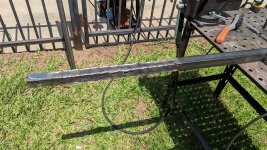
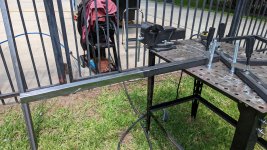
Today I began working on the lift stabilizer bar (in need of a better name, maybe? ). It is the expanding bar to prevent the roof from shifting forward when the front is opened. I cut off about 1/8" at each corner. Due to the heat that is generated you can see how the metal bends.
PXL_20230521_164827139_resize.jpg

PXL_20230521_164840628_resize.jpg

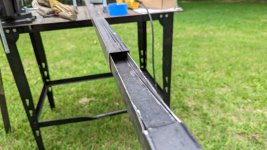
Here I test fit to ensure I have removed enough metal.
PXL_20230521_165424026_resize.jpg

Looks like a good fit. There is a good amount of friction when inserting and removing the tube.
PXL_20230521_165819646_resize.jpg

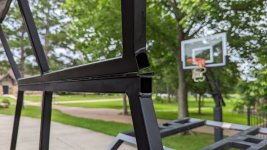
As can be seen in the next two pics I need to work on repairing sprung hinges.
PXL_20230521_174831726_resize.jpg

PXL_20230521_175018378_resize.jpg

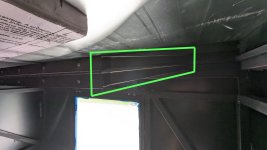
A problem I created when adding the lift stabilizers is that the two sections are so close I am afraid it may damage the canvas once it is added. Thus, I will move the bottom support tube two inches lower. Doing this will require I increase the height of the stabilizers by 2" as well. Thus I will weld on 1" tube on both sections of the lift stabilizer. It is a little dark but you can see in the photo there is about a 1/4" by the hinge and it increases to about 1/2" at the back. Lowering the bottom support should give me ample space for the canvas. (I ended up only doing this on the back because lowering it in the front will interfere with the bed. So I will wait and see if I have any issues with the canvas first.)
PXL_20230521_174603606_resize.jpg

Here part of the bottom support tube has been cut out. It was not easy to cut it out and not damage nearby tubing or the camper skin. The front will be harder due to less space. :(
PXL_20230521_184007228_resize.jpg

The bottom support tube completely cut out.
PXL_20230521_191817107_resize.jpg

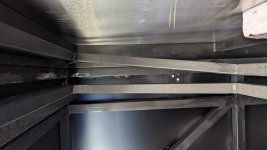
After installing the bottom support tube and the lift stabilizer I know have 3" of space at the camper/roof wall (left side of pic) and 3/4" at the center hinge (right side of pic).
PXL_20230522_221926016.jpg

Continued below.
 

ITTOG

Well-known member
...continued from above.

The lift stabilizer bar fully welded. There are some ugly welds. I only welded 1" at a time to prevent overheating.
PXL_20230522_192324810_resize.jpg

The lift stabilizer bar fully grinded and smooth. It isn't as tight a fit in the 1.5" bar now but it will still work as I need it.
PXL_20230522_202426521_resize.jpg

The hinges are back on and the springs are in good shape. I didn't think about taking close up pic's. Just believe me when I say they are tight again. :)
PXL_20230528_144056108.jpg

The next time I work on it I will make the stabilizer bar connections to the roof and the camper. Skin and trim the door. Install the door handles. Install gas struts on the door. Glue the weather stripping on. Finish the Bondo on the wings. Install final trim pieces (around 4). Caulk all the trim edges. Get the canvas made. The list is getting shorter.
 

Mules

Well-known member
...continued from above.

The lift stabilizer bar fully welded. There are some ugly welds. I only welded 1" at a time to prevent overheating.
View attachment 780734

The lift stabilizer bar fully grinded and smooth. It isn't as tight a fit in the 1.5" bar now but it will still work as I need it.
View attachment 780735

The hinges are back on and the springs are in good shape. I didn't think about taking close up pic's. Just believe me when I say they are tight again. :)
View attachment 780736

The next time I work on it I will make the stabilizer bar connections to the roof and the camper. Skin and trim the door. Install the door handles. Install gas struts on the door. Glue the weather stripping on. Finish the Bondo on the wings. Install final trim pieces (around 4). Caulk all the trim edges. Get the canvas made. The list is getting shorter.
Great progress! Nice catch leaving room for the tent material. One item I missed was leaving clearance room for my mattress and bedding. My 4" mattress gets in the way of the tent material and folding parts, making it a tight fit when I close the top. It looks like you left room below the tent line for your mattress.
 

ITTOG

Well-known member
Great progress! Nice catch leaving room for the tent material. One item I missed was leaving clearance room for my mattress and bedding. My 4" mattress gets in the way of the tent material and folding parts, making it a tight fit when I close the top. It looks like you left room below the tent line for your mattress.
It is a bit of a balancing act on creating room for the canvas versus the bedding. I made my camper to have 6" of space for bedding so that I can leave it up there when the roof is closed. Hopefully the lift stabilizer won't interfere too much with the bedding.
 

Andrew_S

Observer
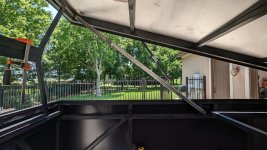
Holy smokes this has come a long way! That lift system looks awesome.
I'm torn on the canvas colour, the red looks good but might get a bit hot?
 

ITTOG

Well-known member
Time: 2 hours
Total Time to Date: 392 hours
Rework: 0 hours
Total Rework to Date: 90 hours (not part of time above)
Current Weight: To be weighed, but at least 725 pounds


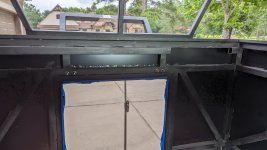
It has been a bit slow lately with a kid graduating high school and other summer time activities so very little to report. I did finished the lift stabilizer barWhile the roof is closed I install the top part of the stabilizer bar on the roof. After I open the back of the roof and before opening the front of the roof, I slide the bottom stabilizer bar onto the top stabilizer bar and then attach it to the camper. In this pic you can see the two sections due to the color change.
PXL_20230603_192559286.jpg

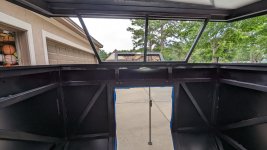
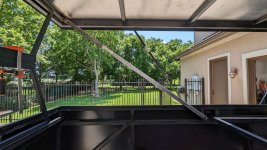
Once the roof is fully open, the stabilizer bar expands about 6". You can see it in this picture if you look closely. Now there is a short shiny section about 1/3 down from the start of the top stabilizer bar(see the color change). It is so much easier to open now.
PXL_20230603_192658480.jpg
 

ITTOG

Well-known member
I really hope to get some motivation for the camper this weekend. If I do, I might be able to take it to an upholsterer next week. That is the goal anyway. I believe a solid 8 hours of work should be enough but motivation has been lacking for some reason.
 

ITTOG

Well-known member
Time: 2.5 hours
Total Time to Date: 394.5 hours
Rework: 0 hours
Total Rework to Date: 90 hours (not part of time above)
Current Weight: To be weighed, but at least 725 pounds


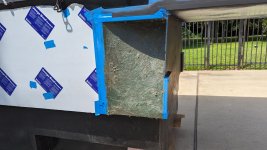
I added another layer of fiberglass Bondo to the front wedges. I have not sanded it smooth yet. You can see I did not do a good job of keeping my color consistent between batches but it hardened without issue. I will sand it smooth and then use normal Bondo to finish a smooth surface.
PXL_20230624_162407630_resize.jpg

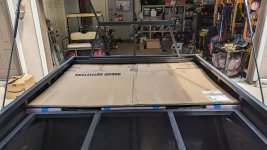
I added insulation on the cab over section and put cardboard on top to protect it.
PXL_20230624_162421652_resize.jpg

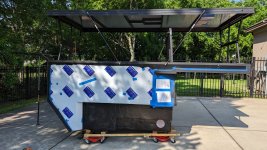
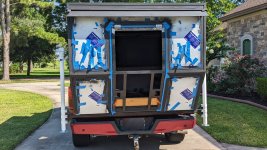
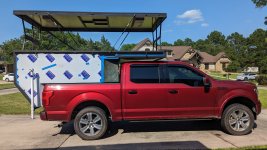
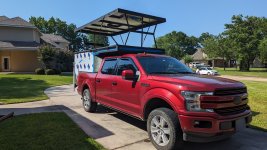
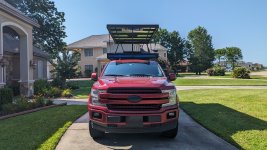
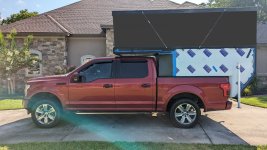
I decided I wanted to take it to a upholstery shop to get a quote for the canvas so I put it in the truck for the first time since December 8, 2020. I cannot believe it has been that long and while putting it in the bed of the truck I discovered it had been too long. Luckily everything worked per design but aligning the camper with the holes in the bed of the truck is 100 times more difficult when there is a floor in the camper that prevents you from seeing the bed of the truck. If you do not remember, the front of the camper is held down by turnbuckles and the middle and back of the camper is held down using four of the truck bed bolts. What I discovered is while moving the back of the camper around, instead of it sliding in the bed of the truck (like it did when it was just the camper frame, it moved the bed of the truck with it so it became very difficult to align the holes of the camper and holes of the bed of the truck with the nuts in the frame. It took me 1.5 hours to mount the camper, when it should have only taken about 30 minutes. Anyway, enjoy the glamour shots.
PXL_20230625_213146020_resize.jpg

This picture is from a driver's position in a car behind me. Unfortunately, you can see that most of the brake lights on the driver side are blocked and all of the brake lights on the passenger side are blocked. Not a big deal because I planned on putting driving and brake lights in the camper.
PXL_20230625_214947748_resize.jpg

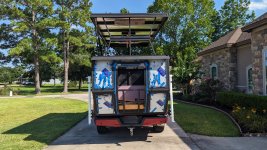
Now with top up.
PXL_20230625_215548568_resize.jpg
PXL_20230625_215609019_resize.jpg
PXL_20230625_215633683_resize.jpg
PXL_20230625_215651175_resize.jpg
PXL_20230625_215701854_resize.jpg

The only other finding when putting the camper on the truck is that I made it too wide at the top of the truck bed rails. I only have about 1 inch of clearance total, if that. It would have been much easier if I had a full inch on each side. Unfortunately I let trying to maximize interior space drive the dimensions and it made everything more difficult.

Oh I almost forgot a photoshopped version with the canvas. It looks much larger with the canvas.
PXL_20230625_215548568_with canvas.jpg
 

Mules

Well-known member
Time: 2.5 hours
Total Time to Date: 394.5 hours
Rework: 0 hours
Total Rework to Date: 90 hours (not part of time above)
Current Weight: To be weighed, but at least 725 pounds


I added another layer of fiberglass Bondo to the front wedges. I have not sanded it smooth yet. You can see I did not do a good job of keeping my color consistent between batches but it hardened without issue. I will sand it smooth and then use normal Bondo to finish a smooth surface.
View attachment 784825

I added insulation on the cab over section and put cardboard on top to protect it.
View attachment 784826

I decided I wanted to take it to a upholstery shop to get a quote for the canvas so I put it in the truck for the first time since December 8, 2020. I cannot believe it has been that long and while putting it in the bed of the truck I discovered it had been too long. Luckily everything worked per design but aligning the camper with the holes in the bed of the truck is 100 times more difficult when there is a floor in the camper that prevents you from seeing the bed of the truck. If you do not remember, the front of the camper is held down by turnbuckles and the middle and back of the camper is held down using four of the truck bed bolts. What I discovered is while moving the back of the camper around, instead of it sliding in the bed of the truck (like it did when it was just the camper frame, it moved the bed of the truck with it so it became very difficult to align the holes of the camper and holes of the bed of the truck with the nuts in the frame. It took me 1.5 hours to mount the camper, when it should have only taken about 30 minutes. Anyway, enjoy the glamour shots.
View attachment 784827

This picture is from a driver's position in a car behind me. Unfortunately, you can see that most of the brake lights on the driver side are blocked and all of the brake lights on the passenger side are blocked. Not a big deal because I planned on putting driving and brake lights in the camper.
View attachment 784828

Now with top up.
View attachment 784829
View attachment 784830
View attachment 784831
View attachment 784832
View attachment 784833

The only other finding when putting the camper on the truck is that I made it too wide at the top of the truck bed rails. I only have about 1 inch of clearance total, if that. It would have been much easier if I had a full inch on each side. Unfortunately I let trying to maximize interior space drive the dimensions and it made everything more difficult.

Oh I almost forgot a photoshopped version with the canvas. It looks much larger with the canvas.
View attachment 784834
Wow! Look at all that room.

She's getting closer to her maiden voyage!
 

ITTOG

Well-known member
If you don't mind sharing, how much was the canvas quote?
Without windows it was $1,300. That is for 36' of 5' wide Sunbrella. I expected the material to cost that much by itself. We will add windows later in the year when he doesn't have so many boat jobs.
 

Mules

Well-known member
Without windows it was $1,300. That is for 36' of 5' wide Sunbrella. I expected the material to cost that much by itself. We will add windows later in the year when he doesn't have so many boat jobs.
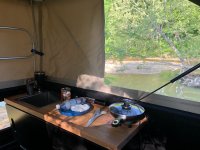
Go big with the windows, and don't forget the screens & shades. At first I thought I overdid my window size, but now I love the size of my picture windows, when the weather is bad. Nothing better than waking up to a beautiful view. I still need to add screens and shades.IMG_8245.JPG
 

Forum statistics

Threads
188,235
Messages
2,904,259
Members
229,805
Latest member
Chonker LMTV
Top