You are using an out of date browser. It may not display this or other websites correctly.
You should upgrade or use an alternative browser.
You should upgrade or use an alternative browser.
ITTOG's Truck Camper Build (was 6' x 12' Trailer Conversion)
- Thread starter ITTOG
- Start date
Mules
Well-known member
Mules
Well-known member
ITTOG
Well-known member
Those are the ones, except I don't have the adjustable feet. I may add them????
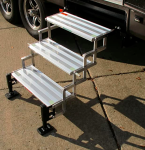
Beleive it or not, Amazon. They had the best price I could fine.One more question. Do you have a link for your jack stands? My scissor lift idea doesn't work as nicely as I'd hoped and maybe I could put casters on the bottom of the jack stands you have. I still have to find a way to extend the jacks from the sides of the truck, like you did.
View attachment 774229
View attachment 774230
Amazon product ASIN B004LEK11E
ITTOG
Well-known member
Time: 5 hours
Total Time to Date: 378 hours
Rework: 0 hours
Total Rework to Date: 79 hours (not part of time above)
Current Weight: To be weighed, but at least 725 pounds
Today I put on the rear trim using Sikaflex 252. in the pic you can see where I roughed up the ACM before installing the trim.
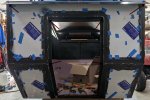
Towards the center of the trim I left it unpainted for maximum adhesion of the Sikaflex.

The trim is on and lightly clamped into place.

Another angle of all the clamping.

Once the adhesive had dried I removed all the clamps and began welding the rear trim to the camper top trim and I added six different spot welds in the doorjamb. None of my trim will come off easily.

The rear trim and the camper top trim freshly painted. I have mentioned before how I hate to paint and usually try to get it over with as quickly as possible. I put three or four coats on and only waited about 15 minutes between coats and noticed about three hours later the paint still hadn't dried. I guess I should read the directions and find out how long the paint needs to dry before I do the next coat. Fortunately the next morning everything had dried.
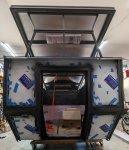
The Bondo had some pits in it so I took them out. The next time I work on the camper I will add what I hope to be the final layer.

This hardware is spacers for the exterior trim.
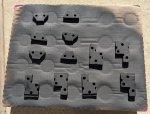

Total Time to Date: 378 hours
Rework: 0 hours
Total Rework to Date: 79 hours (not part of time above)
Current Weight: To be weighed, but at least 725 pounds
Today I put on the rear trim using Sikaflex 252. in the pic you can see where I roughed up the ACM before installing the trim.

Towards the center of the trim I left it unpainted for maximum adhesion of the Sikaflex.

The trim is on and lightly clamped into place.

Another angle of all the clamping.

Once the adhesive had dried I removed all the clamps and began welding the rear trim to the camper top trim and I added six different spot welds in the doorjamb. None of my trim will come off easily.

The rear trim and the camper top trim freshly painted. I have mentioned before how I hate to paint and usually try to get it over with as quickly as possible. I put three or four coats on and only waited about 15 minutes between coats and noticed about three hours later the paint still hadn't dried. I guess I should read the directions and find out how long the paint needs to dry before I do the next coat. Fortunately the next morning everything had dried.

The Bondo had some pits in it so I took them out. The next time I work on the camper I will add what I hope to be the final layer.

This hardware is spacers for the exterior trim.

Mules
Well-known member
Looking great!! Keep it up.Building a camper takes a lot of time so I decided to edit some photos with fake canvas. I will probably use a dark gray but wanted to see what it would look like with red given it would match the truck.
View attachment 774400
View attachment 774401
I decided to make my tent color match my truck's interior color, since I would be looking at all three materials inside the camper (truck seats, camper seats, and tent).
Mules
Well-known member
The gray looks good. I originally was going all black inside, but luckily switched to a black/tan theme. For these small campers I think it's important to use some lighter colors inside, or it can feel smaller than it is.That is a good thought but my cab doesn't connect to the camper, and my cab is black. I definitely need a different color for some contrast.
Sent from my Pixel 7 Pro using Tapatalk
Pacific Northwest yetti
Expedition Medic
Can anyone comment on how the canvas/vinyl is attached on pop top campers? I have never seen one in person so I am curious what commercial builders do.
Thats a great question! My outfitter is sadly still in Reno. I do believe the majority have the lower lip sandwiched between the wall, and then a long piece of (insert what the camper is made off here). I don’t have any pictures, right now. I have seen a few older ones with a secondary canvas flap over the lip, and the inner attached.
Mules
Well-known member
Check out Sailrite's website. They have a hundred videos on DIY sewing products. This is where I bought my material and I figured out how to make my tent. They use snaps and velcro to attach material. I ended up using stick on velcro on one side and sewing to the tent material. I also stapled through the stick on into my wood frame. You could use additional screws every 6" though the velcro for added strength. It's working well for me.
I also added a rain flap on the bottom edge to keep the rain out of my tent. I could have just attached the material to the outside of my fiberglass on the bottom of the tent, but I had already sewn mine.
It also helps to add a bungee to pull the tent in when you put the top down.
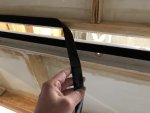
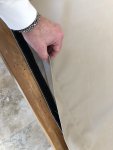
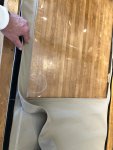
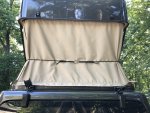
I also added a rain flap on the bottom edge to keep the rain out of my tent. I could have just attached the material to the outside of my fiberglass on the bottom of the tent, but I had already sewn mine.
It also helps to add a bungee to pull the tent in when you put the top down.


Last edited:
ITTOG
Well-known member
Yeah I didn't know if velcro would be strong enough to hold it in a taut install. A bigger issue, high winds. I guess velcro/snaps or velcro/screws would/should definitely hold. The way I made my bottom attachment I won't need the skirt. The rain should roll off the skirt onto the purple horizontal edge and eventually over the edge outside the camper. At least that is the design. May have to dry the ledge before closing if the rain hasn't completed dried off.
Thanks for the responses and the pics.

Thanks for the responses and the pics.

Mules
Well-known member
Your design looks pretty water tight. Your red overhanging piece is key. I was worried about how water tight my top would be, but so far it's working out great in the rain.Yeah I didn't know if velcro would be strong enough to hold it in a taut install. A bigger issue, high winds. I guess velcro/snaps or velcro/screws would/should definitely hold. The way I made my bottom attachment I won't need the skirt. The rain should roll off the skirt onto the purple horizontal edge and eventually over the edge outside the camper. At least that is the design. May have to dry the ledge before closing if the rain hasn't completed dried off.
Thanks for the responses and the pics.
View attachment 775299
The velcro strips from Sailrite are incredibly strong. They will not pull apart in high winds or under tension. It's so strong that you have to make sure the other side of the velcro is attached well to your metal. The 3M adhesive tape on them works pretty good on smooth surfaces, but I added staples anyway. Check out a few of their videos, as they also have other types of attachments like snaps and piping.
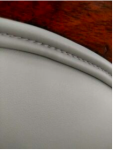
Another way to attach the material is to sew in a piping cord. The piping cord will make a thick edge which could be threaded through a tight slot in your metal frame.
Last edited:
Similar threads
- Replies
- 3
- Views
- 1K
- Replies
- 2
- Views
- 656
- Replies
- 3
- Views
- 675
- Replies
- 3
- Views
- 525

