ITTOG's Truck Camper Build (was 6' x 12' Trailer Conversion)

Pacific Northwest yetti

Expedition Medic
3M(s), dual lock is super strong. 250 or (400) Stems a SQ inch. I actually used it to install the flex panels on my camper. As does my brother for his Business ( Zero Declination) and has for way North of a 1000 flexible panels. ( SJ3550 )
 

ITTOG

Well-known member
I am plan to build my door tomorrow and I am waffling a bit on how much of a gap I should leave between the edge of my door and the door frame. I was leaning towards 1/16th of an inch but do not want to get it too close and if the door ever gets warped or bent create issues for me. The gap behind the door will be one quarter inch to allow for the seal.

I thought about making it wider so I could put a seal on the edge of the door in addition to the one behind the door.

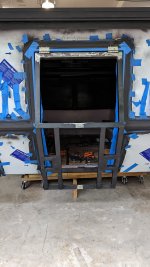
This picture has a 1/8 inch gap. Once I put the trim on the gap will be about 1/16th of an inch.

Anybody have any thoughts.

PXL_20230428_215824916.jpg

Sent from my Pixel 7 Pro using Tapatalk
 

Mules

Well-known member
I would go with 1/4”. Look at the gaps on the truck's doors and match them. There's no reason to go to 1/16", as it most likely will cause you problems later, and isn't needed for the seal, since you have a compression seal. You need to have enough room for the bottom of the door to clear the frame when it swings open. There's my two cents, good luck!
 
Last edited:

ITTOG

Well-known member
Time: 6 hours
Total Time to Date: 384 hours
Rework: 1 hours
Total Rework to Date: 80 hours (not part of time above)
Current Weight: To be weighed, but at least 725 pounds


All the trim on the camper has been painted now. I want to remove the protective plastic on it but I think I will wait until after the canvas has been installed.

Decisions, decisions… How large of a gap should I leave for the door. I was debating anywhere from 1/16" to 1/4". The reason for the narrow gap is more of the door latch will be in the camper frame. Thus making a stronger and safer lock. The downside of the narrow gap is steel moves and in the heat of the summer I may have issues with the door rubbing in the door frame. So, I came to ExPo to crowdsource this dilemma and my crowd was @Mules. He suggested 1/4" and was all I needed to move away from 1/16" to prevent future problems. To keep this topic from getting any longer, I ended up at a 3/16" gap because 1/4" made it where just the tip of my door latch would catch on the camper frame. So I thought 3/16 was a reasonable alternative. Thanks for the help @Mules.
PXL_20230428_215824916.jpg

Starting to put the door back together.
PXL_20230430_162240702.jpg

I found a solution for my issues with raising the roof. Instead of using a strap on the front of the roof, which would prevent me from raising the roof all the way because as the roof raised, the strap wouldn't stretch, I will use tubing to hold the rear of the roof back. In the position the below, the rear of the roof is completely up and the roof lift stabilizer is locked in place. The bar is about 63" long and prevents the roof from shifting forward. When the entire roof is up, the rear of the roof shifts back a little and the distance from the roof to where the tube is locked down is about 67". So I am thinking about making a tube that will expand four to six inches with a spring, similar to a pogo stick. Building the tube will be easy, finding a spring that will fit in 1.5" tubing may be the difficult part.
PXL_20230430_201159876.jpg

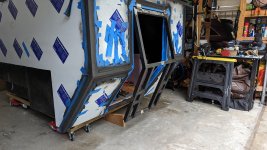
Another view showing the front of the roof is down. Note that the picture angle makes the camper look really short. It is 12' long so not nearly as short as it looks.
PXL_20230430_201240248.jpg

The video below shows how the roof shifts forward if nothing is keeping it in place. Before using the bar on the rear of the roof I would lay down on the cabover and push the front of the roof up with my hands while also pushing the roof back with my feet. Once the roof falls down you can see how it shifts forward about a foot. When doing this it damages the hinges.

The video below shows how to open the roof properly. With the bar holding the roof back, I can easily push the roof up with one hand and lock the roof lift stabilizer with the other hand.
 
Last edited:

Mules

Well-known member
Time: 6 hours
Total Time to Date: 384 hours
Rework: 1 hours
Total Rework to Date: 80 hours (not part of time above)
Current Weight: To be weighed, but at least 725 pounds


All the trim on the camper has been painted now. I want to remove the protective plastic on it but I think I will wait until after the canvas has been installed.

Decisions, decisions… How large of a gap should I leave for the door. I was debating anywhere from 1/16" to 1/4". The reason for the narrow gap is more of the door latch will be in the camper frame. Thus making a stronger and safer lock. The downside of the narrow gap is steel moves and in the heat of the summer I may have issues with the door rubbing in the door frame. So, I came to ExPo to crowdsource this dilemma and my crowd was @Mules. He suggested 1/4" and was all I needed to move away from 1/16" to prevent future problems. To keep this topic from getting any longer, I ended up at a 3/16" gap because 1/4" made it where just the tip of my door latch would catch on the camper frame. So I thought 3/16 was a reasonable alternative. Thanks for the help @Mules.
View attachment 776434

Starting to put the door back together.
View attachment 776435

I found a solution for my issues with raising the roof. Instead of using a strap on the front of the roof, which would prevent me from raising the roof all the way because as the roof raised, the strap wouldn't stretch, I will use tubing to hold the rear of the roof back. In the position the below, the rear of the roof is completely up and the roof lift stabilizer is locked in place. The bar is about 63" long and prevents the roof from shifting forward. When the entire roof is up, the rear of the roof shifts back a little and the distance from the roof to where the tube is locked down is about 67". So I am thinking about making a tube that will expand four to six inches with a spring, similar to a pogo stick. Building the tube will be easy, finding a spring that will fit in 1.5" tubing may be the difficult part.
View attachment 776436

Another view showing the front of the roof is down. Note that the picture angle makes the camper look really short. It is 12' long so not nearly as short as it looks.
View attachment 776437

The video below shows how the roof shifts forward if nothing is keeping it in place. Before using the bar on the rear of the roof I would lay down on the cabover and push the front of the roof up with my hands while also pushing the roof back with my feet. Once the roof falls down you can see how it shifts forward about a foot. When doing this it damages the hinges.

The video below shows how to open the roof properly. With the bar holding the roof back, I can easily push the roof up with one hand and lock the roof lift stabilizer with the other hand.
I suspect you will not need the bar, once you put on the tent material. I had a similar issue before putting on my material. You might want to increase the strength of the pneumatic struts also, but not critical. I returned mine and went to stronger struts. I lift my top about 6inches and the struts lift it from there. They also loose a bit of power over time.
 
Last edited:

ITTOG

Well-known member
What kind of paint are you using?
A tractor supply brand, Majic. It probably will have to be repainted soon. I hate to paint and I am in a hurry. ;)

I suspect you will not need the bar, once you put on the tent material. I had a similar issue before putting on my material. You might want to increase the strength of the pneumatic struts also, but not critical. I returned mine and went to stronger struts. I lift my top about 6inches and the struts lift it from there. They also loose a bit of power over time.
Others have mentioned that but I don't want to put too much stress on the canvas. So I figure the better I make it now the better for the canvas. Thanks for your real world experience because this is the first confirmation of that.
 

ITTOG

Well-known member
I suspect you will not need the bar, once you put on the tent material. I had a similar issue before putting on my material. You might want to increase the strength of the pneumatic struts also, but not critical. I returned mine and went to stronger struts. I lift my top about 6inches and the struts lift it from there. They also loose a bit of power over time.
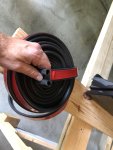
How did you attach your weather stripping? I am not sure if VHB tape or a rubber adhesive would be best. Any thoughts on the topic?
 

Mules

Well-known member
How did you attach your weather stripping? I am not sure if VHB tape or a rubber adhesive would be best. Any thoughts on the topic?
I ordered my two kinds of weather stripping from Amazon. Both had a Chinese knockoff style 3M tape already attached to them. The adhesive has held up well over the six months with no issues.


IMG_6913.JPG
 

ITTOG

Well-known member
Mine doesn't have an adhesive on it but I was leaning towards vhb. Thanks.

Sent from my Pixel 7 Pro using Tapatalk
 

ITTOG

Well-known member
Time: 1 hours
Total Time to Date: 385 hours
Rework: 5.5 hours
Total Rework to Date: 85.5 hours (not part of time above)
Current Weight: To be weighed, but at least 725 pounds


Here is another post with too much detail and boring updates. ;)

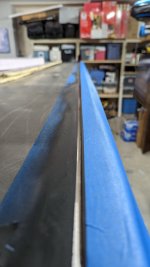
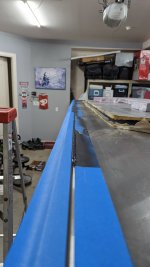
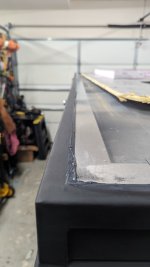
I had one last step to finish all the work required on the top of the roof. Caulking, which I despise. I have never developed that skill. The caulking of choice is 3M 4000UV. I couldn't use the Sikaflex 252 because it is not UV compliant. So I am switching from a very thick material to a very thin material. Even with a battery powered caulking gun this job sucks.
PXL_20230501_154416219_resize.jpg

This is after applying but before smoothing out.
PXL_20230501_154425375_resize.jpg

Tape removed. It wasn't good but it will do. I may hire this job out on the rest of the camper, which is over 200' of caulking.
PXL_20230515_135909192_resize.jpg

PXL_20230515_135953431_resize.jpg
You have seen this pic before. It is early in the build showing the flip up portion of my bed. I only show it so you can see the two parts that stick out. These now stick out too far after applying the top trim on the camper.
IMG_20200808_152152_resize.jpg

After the t-handle was applied
IMG_20200813_190717_resize.jpg

So I had to remove about 3/4" off both.
PXL_20230513_173405205_resize.jpg

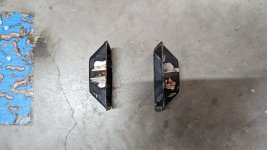
What was removed.
PXL_20230513_195220040_resize.jpg

With the t-handle back on.
PXL_20230513_192159839_resize.jpg

Installed inside the camper. (It is dark because the top is closed. I have some cleanup to do.)
PXL_20230515_140814682_resize.jpg

...continued below.
 
Last edited:

ITTOG

Well-known member
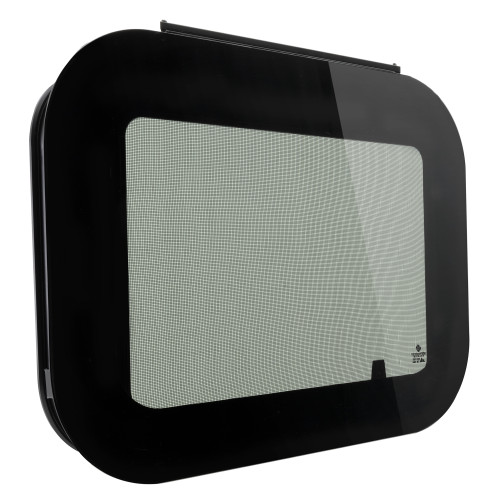
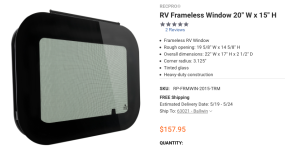
I also finished the door, except for painting and skinning. I guess I should say it is structurally complete. The previous version had a tube in the middle of the top part of the door. This time I left it out because I want to put a window in the door. I believe the opening is about 23" W by 19.5" H. If you know of a window that fits this please let me know.
PXL_20230513_233143302_resize.jpg

I still need to install the door handles and cut a hole for the latches. There will be two door handles, they will be installed in the squares on each side of the lower part of the door.
PXL_20230513_233152939_resize.jpg
 

Mules

Well-known member
Here's a window that might work, or just screw and caulk on a piece of Lexan over the opening. Great job on the build.


Screen Shot 2023-05-15 at 11.18.07 AM.png
 

ITTOG

Well-known member
Here's a window that might work, or just screw and caulk on a piece of Lexan over the opening. Great job on the build.


View attachment 778500
Cool, thanks. I like the way it looks and installs. Too bad no integrated shade. That may be somewhat easy to add though. Instead of blinds maybe just a foam insert on the back of the window to help with insulation?
 

Mules

Well-known member
Cool, thanks. I like the way it looks and installs. Too bad no integrated shade. That may be somewhat easy to add though. Instead of blinds maybe just a foam insert on the back of the window to help with insulation?
Maybe something like this?


Forum statistics

Threads
187,928
Messages
2,900,104
Members
229,205
Latest member
FrostyTaco
Top