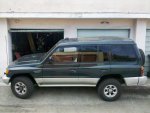
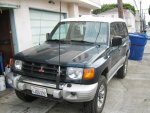
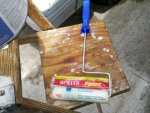
Joinin' the Montero Club with a Gen 2.5

jlocster

Explorer
Junkyard Expediton III

Greetings from the wilds of the Sun Valley, CA junkyards.

It had been a few months since my last Sun Valley junkyard run so I decided it was high time. I went to 2, the first smaller yard was a complete bust...not a Montero in sight.

Fearing the worst after the first yard's slim pickin's, I drove to the second larger yard and was pleased to find it much more bountiful.

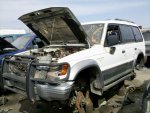
The first find, a white 94 SR.
IMG_20130527_160829.jpg

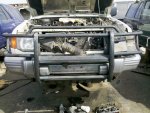
Running gear was largely intact with a locker in the rear. What caught my eye, however, was the brush guard.
IMG_20130527_160856.jpg

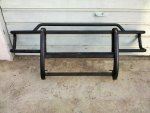
Not very often do you see one of these on a Montero, let alone one in the junkyard. Plus it was perfectly straight. Got me to thinking...Do I need this? I know it's no ARB, but...

...done thinking.
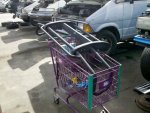
IMG_20130527_162427.jpg

I just couldn't leave it there. It might be useful in making a real bumper or...who knows...but at least it won't be getting crushed.

It's a Waag.
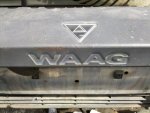
IMG_20130527_160950.jpg

To get to the bumper I removed a perfect skid plate. I stashed it in the back in case someone wants it.
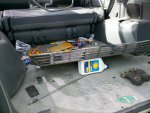
IMG_20130527_162454.jpg

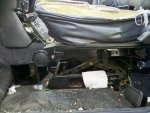
The next find was a white 89. It's drivetrain was intact and the body was straight.
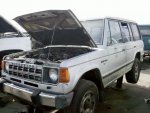
IMG_20130527_160406.jpg

It even had a driver side bouncy seat (ahem, more on bouncy seats later)! Someone go get that seat!
IMG_20130527_160441.jpg

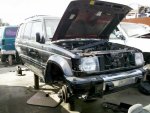
Third, was another 94 SR. It was poorly repainted black over the original burgundy. This one already had the rear locker pulled out.
IMG_20130527_162632.jpg

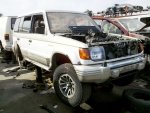
Last up was a white/gold 94 SR. The locker was still in the back.
IMG_20130527_162856.jpg

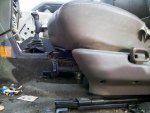
And then...

...lightining struck twice!
IMG_20130527_162956.jpg

I won't say anything more lest I get booed, other than I plan to keep one pair of bouncy seats and offer up my second set to the ExPo/Wire community.

Continued...
 
Last edited:

jlocster

Explorer
Junkyard Expediton III con't.

The final tally:

One brush guard.
IMG_20130527_190429.jpg

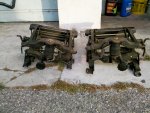
Pair of Gen 2 bouncy seats.
IMG_20130527_190450.jpg

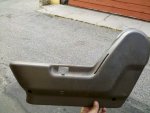
Driver side manual seat trim for bouncy seat conversion from power seat.
IMG_20130527_190708.jpg

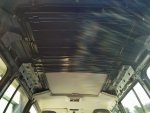
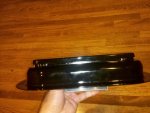
2 Ford Windstar dome light fixtures. To be intstalled in the Montero on a later date as part of the
Great Roof Vent Experiment.
IMG_20130527_190540.jpg

More to come on that one...
IMG_20130526_191521.jpg


The Monteros in this post were located at:
Pick Your Part
11201 Pendleton Street
Sun Valley, CA 91352
 
Last edited:

low_49

Whats this button do...
HAHAHA, Thats who got that brush guard!
My buddy called me up and told me there was a Monty in there with a brush guard I was looking for (said he couldn't pull it due to him having only brought SAE tools), I couldn't make it because I was out of town on the long holiday, went down there today and was like "what was he talkin' about, there 'aint no brush guard on this thing", LOL
 

jlocster

Explorer
Fresh Air

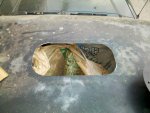
Well, I dun did it. I added extra ventilation. Here's how in 15 easy steps:

Step 1
At 4 pm on Sunday, impulsively decide to cut a hole in your roof.

Step 2
Choose which vent to use.

Option 1 has very poor action and hangs down too low into the passenger compartment.
IMG_20130411_174302.jpg

Option 2 has an improved latching mechanism and elevates the handle closer to the roofline...however, the vent body protrudes farther above the roofline on the exterior.
IMG_20130528_220142.jpg

I chose option 2.

Step 3
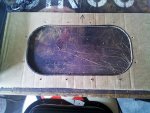
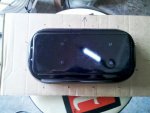
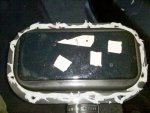
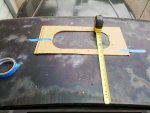
Make a template.
IMG_20130602_161347.jpg

I decided to go with an undermount attachment. Looks cleaner to me.
IMG_20130602_161507.jpg

Step 4
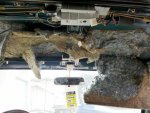
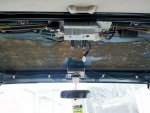
Remove headliner. Remove headliner insulation.
IMG_20130602_162512.jpg

Better.
IMG_20130602_162831.jpg

Step 5
Mark a rough center point. Use rearview mirror to demarcate vehicle centerline. This will give you reference when working outside, up on the roof.
IMG_20130602_163748.jpg

Step 6
Sunlight. No turning back.
IMG_20130602_164321.jpg

Step 7
Poke head through sunroof and position template. Use sunroof opening as reference. Check and recheck and recheck and recheck and recheck...
IMG_20130602_165327.jpg

Step 8
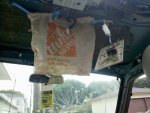
Tape bag on underside of roof to catch metal shavings. Remember to use larger bag next time so as to actually catch metal shavings.
IMG_20130602_171220.jpg

Continued...
 
Last edited:

jlocster

Explorer
Fresh Air con't.

Step 9
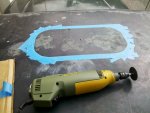
Tape off cutlines. Use dremel with cutting wheel to cut roof.
IMG_20130602_171852.jpg

Step 10
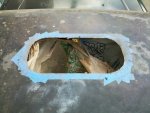
Break all available dremel attachments and resort to careful use of right angle grinder and drill to finish hole.
IMG_20130602_184637.jpg

Step 11
Smooth out hole.
IMG_20130602_191309.jpg

Step 12
Spray paint exposed metal.
IMG_20130602_201935.jpg

Step 13
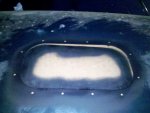
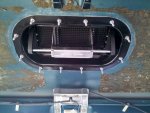
Lay a careful, evenly distributed bead of sealant along vent mounting flange.
IMG_20130602_201546.jpg

Step 14
Finish installing vent and don't take pictures because it's way late into the night and nowhere near when you anticipated finishing.

Step 15
Thank God that it actually came out centered.

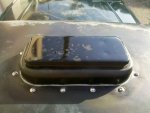
So here's the result.
IMG_20130603_185000.jpg

I used stainless hardware to attach the vent. The #10 1" screws will be cut in half at a later date as they are too long.
IMG_20130603_185940.jpg

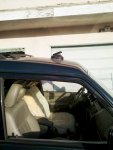
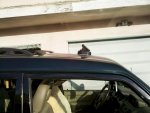
Vent opens forward or back.
IMG_20130603_185135.jpg

IMG_20130603_185232.jpg

IMG_20130603_185146.jpg

I drove down the street at 25 mph and a lot of air comes in.

More pics to follow as I reinstall trim and whatnot.
 
Last edited:

low_49

Whats this button do...
Hey jloc,
Yea, I was able to still grab most of the stuff I needed. Vent looks great by the way, it will come in handy on those hot days!
 
Last edited:

jlocster

Explorer
New Hat

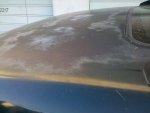
I finally got tired of looking at the failed clearcoat on the roof and decided it was time to do something about it. I was reluctant to get a proper automotive paintjob because I'm a cheapskate.

In looking around the internet for alternative solutions, I started reading both the RV and the school bus forums. I found some people had been using elastomeric roof coatings on their vehicles. On RVs and buses at least, the purpose is twofold: seal against leaks and reflect sunlight/reduce interior temps. People claimed the coatings last a number of years, and when they start to fail, another application is all it takes.

Living in Southern Califiornia where my dark green paint quickly gets hot to the touch, I particularly liked the idea of reflecting sunlight and potentially reducing interior temps. I was sold.

First I removed the roofrack and filled the 8 nutserts with 1/4" stainless screws and a dab of sealant.
IMG_20130609_193221.jpg

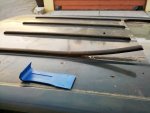
Removed the rubber roof bumpers.
IMG_20130609_194802.jpg

Used 3M adhesive remover on the pesky foam tape.
IMG_20130611_111604.jpg

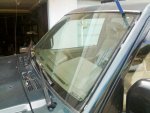
Removed the windscreen trim.
IMG_20130611_111438.jpg

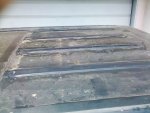
Sanded down the roof with 400 grit to remove the flaking clearcoat and give the coating something to adhere to.
IMG_20130611_123528.jpg

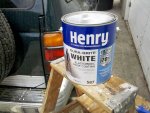
This is what I used. It's supposed to last 10 years...on a house. Home Depot has it.
IMG_20130611_123849.jpg

The consistency is unlike paint and more like hand cream.
IMG_20130611_124735.jpg

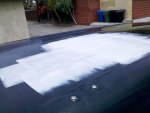
First coat.
IMG_20130611_132808.jpg

Fourth and final.
IMG_20130611_164326.jpg

Continued...
 
Last edited:
jlocster

Explorer
New Hat con't.

A recap...

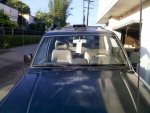
Clearcoat failure.
IMG_20130301_170800.jpg

Roofrack removal.
IMG_20130611_111732.jpg

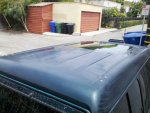
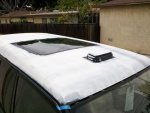
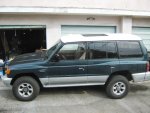
Painted roof.
IMG_6644%u0025255B1%255D.JPG

IMG_6637%u0025255B1%255D.JPG

The finish, even with the use of a foam roller, came out grainy. I have a feeling it will get dirty fast, but we'll see.
IMG_6641%u0025255B1%255D.JPG

IMG_20130611_123901.jpg

Surface temps were noticeably cooler on the coated surface than nearby painted surfaces. I didn't take surface temp readings but the difference in temp when touched was dramatic.
 
Last edited:
Clem

Adventurer
Nicely done, sir...:luxhello:
Gotta love any temp reducing techniques in the California sun.

Did you notice if any of the the RV/School Bus folks were able to get a smooth application? Maybe the texture is how it is supposed to be?

Clem
 

Forum statistics

Threads
188,510
Messages
2,905,989
Members
230,547
Latest member
FiscAnd
Top