You are using an out of date browser. It may not display this or other websites correctly.
You should upgrade or use an alternative browser.
You should upgrade or use an alternative browser.
Kitchen Kit/Chuck Box
- Thread starter jim65wagon
- Start date
Pinnacle Campers
Chateau spotter
Been following this thread since it started. Thought I would make my contribution.
For the past 25ish years I have carried my kitchen kit in many types of containers.
Being a carpenter I always knew I could build a chuck box but felt that wood wasn't the best material for a strong, lightweight box without bulkiness. That is until I started using epoxy.
Unfortunately I lost my build pics.

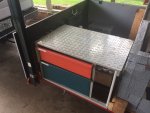
I used 5mm Baltic birch plywood and dadoed/or rabbeted all of the joints.
Before assembly I coated the panels that would be hard to get to afterwards.
Then I started coating the joints with the epoxy and assembling the panels.
The whole box was assembled in one shot using a few micro pin nails from a pneumatic nailer to hold things together while the epoxy set.
I then used 4" wide 4oz fiberglass tape, https://amzn.to/2MzW8U4 on the corners, wet it out and coated the whole exterior in epoxy.
After the lid was cut off I put a double layer of material so the lid seam has an overlap.
Then I added a near full length stainless piano hinge for the lid, and the front panel, https://amzn.to/2JXGqQZ
I used some Southco slam latches for the front door, https://amzn.to/2JM3TbB
I used 1/8" steel cable and ring terminals for the lid and door "catches"
Not shown, I ordered these recessed handles, https://amzn.to/2MxUPVu, they are yet to be installed.
I have considered (and even ordered) some sort of hardware for the lid closure but haven't really seen anything I want yet. Where mine stows, on my under bed slider I don't feel it really needs a lid catch.
The epoxy I used was this, https://amzn.to/2tfAcVf, I only used about 1/4 gallon
I had intentions of doing a final coat of either, Monstaliner or, Raptor liner but thought the natural finish looked cool and showed off the construction details better. The surface isn't perfect because of the fiberglass tape edges and a textured paint would be the way to go to help hide that. Additionally the epoxy I used isn't UV resistant so it will fade or get chalky eventually.
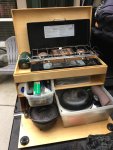
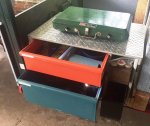
All opened up, on the right lower is double containers. We usually throw/do our dirty dishes in the lower one. The top one has cups, mugs, sauce pan, plates, a fry pan and other misc.
The left lower has the dutch oven, tongs, hatchet, coffee mug.
The upper right is silverware, upper left is seasonings, tin foil, ziplocs, soap, scrubby pads, IR thermometer (essential for dutch oven cooking IMO)
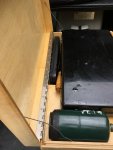
The right side cubbies are shallow allowing a slot for my griddle behind the stove.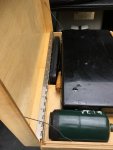
This box fully loaded is 65lbs and measures 15 1/2" wide x 16 1/2" tall x 27 1/2" long
Hope you enjoy checking it out and that it inspires others.
For the past 25ish years I have carried my kitchen kit in many types of containers.
Being a carpenter I always knew I could build a chuck box but felt that wood wasn't the best material for a strong, lightweight box without bulkiness. That is until I started using epoxy.
Unfortunately I lost my build pics.

I used 5mm Baltic birch plywood and dadoed/or rabbeted all of the joints.
Before assembly I coated the panels that would be hard to get to afterwards.
Then I started coating the joints with the epoxy and assembling the panels.
The whole box was assembled in one shot using a few micro pin nails from a pneumatic nailer to hold things together while the epoxy set.
I then used 4" wide 4oz fiberglass tape, https://amzn.to/2MzW8U4 on the corners, wet it out and coated the whole exterior in epoxy.
After the lid was cut off I put a double layer of material so the lid seam has an overlap.
Then I added a near full length stainless piano hinge for the lid, and the front panel, https://amzn.to/2JXGqQZ
I used some Southco slam latches for the front door, https://amzn.to/2JM3TbB
I used 1/8" steel cable and ring terminals for the lid and door "catches"
Not shown, I ordered these recessed handles, https://amzn.to/2MxUPVu, they are yet to be installed.
I have considered (and even ordered) some sort of hardware for the lid closure but haven't really seen anything I want yet. Where mine stows, on my under bed slider I don't feel it really needs a lid catch.
The epoxy I used was this, https://amzn.to/2tfAcVf, I only used about 1/4 gallon
I had intentions of doing a final coat of either, Monstaliner or, Raptor liner but thought the natural finish looked cool and showed off the construction details better. The surface isn't perfect because of the fiberglass tape edges and a textured paint would be the way to go to help hide that. Additionally the epoxy I used isn't UV resistant so it will fade or get chalky eventually.

All opened up, on the right lower is double containers. We usually throw/do our dirty dishes in the lower one. The top one has cups, mugs, sauce pan, plates, a fry pan and other misc.
The left lower has the dutch oven, tongs, hatchet, coffee mug.
The upper right is silverware, upper left is seasonings, tin foil, ziplocs, soap, scrubby pads, IR thermometer (essential for dutch oven cooking IMO)
The right side cubbies are shallow allowing a slot for my griddle behind the stove.

This box fully loaded is 65lbs and measures 15 1/2" wide x 16 1/2" tall x 27 1/2" long
Hope you enjoy checking it out and that it inspires others.
Attachments
Last edited:
another_mike
Adventurer
Where do I even begin with my questions?!Been following this thread since it started. Thought I would make my contribution.
For the past 25ish years I have carried my kitchen kit in many types of containers.
Being a carpenter I always knew I could build a chuck box but felt that wood wasn't the best material for a strong, lightweight box without bulkiness. That is until I started using epoxy.
Unfortunately I lost my build pics.
View attachment 455125
I used 5mm Baltic birch plywood and dadoed/or rabbeted all of the joints.
Before assembly I coated the panels that would be hard to get to afterwards.
Then I started coating the joints with the epoxy and assembling the panels.
The whole box was assembled in one shot using a few micro pin nails from a pneumatic nailer to hold things together while the epoxy set.
I then used 4" wide 4oz fiberglass tape, https://amzn.to/2MzW8U4 on the corners, wet it out and coated the whole exterior in epoxy.
After the lid was cut off I put a double layer of material so the lid seam has an overlap.
Then I added a near full length stainless piano hinge for the lid, and the front panel, https://amzn.to/2JXGqQZ
I used some Southco slam latches for the front door, https://amzn.to/2JM3TbB
I used 1/8" steel cable and ring terminals for the lid and door "catches"
Not shown, I ordered these recessed handles, https://amzn.to/2MxUPVu, they are yet to be installed.
I have considered (and even ordered) some sort of hardware for the lid closure but haven't really seen anything I want yet. Where mine stows, on my under bed slider I don't feel it really needs a lid catch.
The epoxy I used was this, https://amzn.to/2tfAcVf, I only used about 1/4 gallon
I had intentions of doing a final coat of either, Monstaliner or, Raptor liner but thought the natural finish looked cool and showed off the construction details better. The surface isn't perfect because of the fiberglass tape edges and a textured paint would be the way to go to help hide that. Additionally the epoxy I used isn't UV resistant so it will fade or get chalky eventually.
View attachment 455126
All opened up, on the right lower is double containers. We usually throw/do our dirty dishes in the lower one. The top one has cups, mugs, sauce pan, plates, a fry pan and other misc.
The left lower has the dutch oven, tongs, hatchet, coffee mug.
The upper right is silverware, upper left is seasonings, tin foil, ziplocs, soap, scrubby pads, IR thermometer (essential for dutch oven cooking IMO)
The right side cubbies are shallow allowing a slot for my griddle behind the stove. View attachment 455128
This box fully loaded is 65lbs and measures 15 1/2" wide x 16 1/2" tall x 27 1/2" long
Hope you enjoy checking it out and that it inspires others.
Im an amateur woodworker, never knew 5mm plywood existed like that!
The epoxy... says self leveling. How did you apply? brush? Did you have to work fast with it?
During the assembly, besides the epoxy, did you use anything else for assembly for the dado/rabbet? woodglue? nailer?
Pinnacle Campers
Chateau spotter
Where do I even begin with my questions?!
Im an amateur woodworker, never knew 5mm plywood existed like that!
The epoxy... says self leveling. How did you apply? brush? Did you have to work fast with it?
During the assembly, besides the epoxy, did you use anything else for assembly for the dado/rabbet? woodglue? nailer?
Howdy, thanks. Yes, I mostly applied with a brush, I did use a plastic scraper to help push the epoxy into the fiberglass tape and spread it around. I did a final pass with the brush using the "tipping" method. I was working quickly to assemble it because I didn't know how much time I had. I did dry assemble the box a couple times thinking through the process as I went.
I also used the slow hardener, and it was cool out. I more recently did some work in much higher temps and found the working time was shortened dramatically. I did use some very small pin nails (1" 23ga.) to hold things together as I went, there is probably only 6-10 of them in it.
I purchased the 60"x60" Baltic birch locally at Idaho Wood Products but I did find smaller partial sheets on Amazon, https://amzn.to/2LYW5QA
Last edited:
Atourgates
New member
How do you feel about the overall strength of the box? I've been planning to use 1/2" baltic birch for the exterior "box" of my chuck box, and then 1/4" / 5mm for the interior shelves and drawers. But I'd be thrilled if I could have the weight savings of going with 5mm for the whole thing.
I split the difference on my box, using 3/8 (9.5 mm I believe it sold as) and feel like I could have done 1/4 on most of the box, but would stick to 1/2 for the bottom and fold down door.
The issue with the thinner woods is that most hardware seems to be made for at least 1/2" thicknesses, so things like hinges, handles, and latches are more tricky on the thin stuff, even if the strength is there.
The issue with the thinner woods is that most hardware seems to be made for at least 1/2" thicknesses, so things like hinges, handles, and latches are more tricky on the thin stuff, even if the strength is there.
Pinnacle Campers
Chateau spotter
How do you feel about the overall strength of the box? I've been planning to use 1/2" baltic birch for the exterior "box" of my chuck box, and then 1/4" / 5mm for the interior shelves and drawers. But I'd be thrilled if I could have the weight savings of going with 5mm for the whole thing.
I'm pretty confident in the strength of the box.
The strength doesn't really come from the thickness of the wood so much as the multidirectional panels, their joints and the epoxy's ability to make that more of a monocoque. https://en.wikipedia.org/wiki/Monocoque
Its stiff, solid, beats like a drum when you bang on the bottom empty.
The epoxy floods and fills the joints and corners, you could even add "fillets", building up the epoxy in the (inside) corners and laying fiberglass tape there too. I didn't feel it was necessary.
Would it survive a 3' drop to the ground fully loaded? I'm not really sure, although I'm curious. Short of that I think it will last my lifetime.
Knowing that the epoxy is the key, I think you can go as thin as you want. If I do another, it will have 1/8" shelves and top.
The epoxy is actually really easy to work with, not much different than painting but the cleanup is worse. Need to use acetone.
I have more wood/epoxy projects in the works, as a carpenter for the past 30+ years I'm pretty bummed that I just discovered the benefits of epoxy and fiberglass only recently.
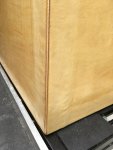
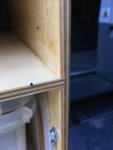
Last edited:
ChinaLakePW
Member
A coating of Spar Varnish for woodwork on boats will protect it from UV. I like small, hobby-type foam rollers for applying the epoxy. mixing it in a disposable roller pan for the foam rollers helps keep it spread out and gives you more working time before it begins "cooking" and curing.
Man! This has me REALLY considering going this route for my big 5’ slide out drawers!!!I'm pretty confident in the strength of the box.
If you ever do another one you MUST document the process!!!
Question; you only fiberglassed the corners? Any thoughts as to weather doing the whole exterior would be overkill???
I’d love to have strong, thin walled drawers, to maximize space!
Lucky j
Explorer
The fiberglass in flat surface would only give strengh for impact protection. Nothing in stifness. The tapped corner like he did is just great!
I have personnaly used 3/8" birch ply for my drawer sytem in the back of my jeep and just love it. Lighter and just as much space saved for storage. Anything thicker than that is good for house drawers where space and weight is not an issue. I have been using it for over three years now on washboard and dirt road of over 300 miles and no issues at all. Hols a 38 quarts arb firge on 32" hd slides and aluminium framed drawer, an other lower drawer made of the 3/8 stuff with same slider that can old my 50 lbs tool bags and more and an other smaller drawer, plus an upper drawe like space where i slide 2 folding table. On top of all that, ancor track where I stape down bulier stuff and my drone and computer casses.
I use t nut to fix sliders and folding handle. The ply will never gives. But I have only ised glue and nails. But so far so good.
Coachgeo
Explorer
Chuck Box..... Kitchen
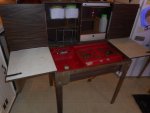
well... mine (just arrived) is vintage.... not like the awesome sturdy ones in here with bells and whistles. Well be doing faux cabin look inside camper (Ambulance box mounted to truck in my avitar) so this works for me both inside and outside.
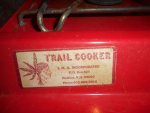
it is a vintage "Trail Cooker" camp kitchen. Folded up it is about the size of a military trunk?. It can be used when only partially unfolded and that will be the plan. Can easily be moved outside for cooking which was its intended design. Well.. not super easy. It is actually sorta heavy.
As one can see it has a small sink with an LP cook top. I will modify it to little more modern but try to hide the mods.... such as use the same sink faucet parts but make faucet into one like pull out type in below vid. Maybe a way to add more depth to the sink... not sure how to do that. possibly make a cut out in the back that's held in place by velcro. Pull it off to allow for a deeper sink to swap in place OEM one for normal use?
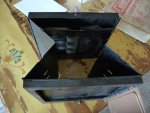
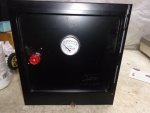
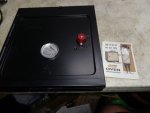
Just found a vintage folding oven to go with it.
Attachments
Last edited:
Very nice. Brand? Link to vendor? Not finding a lot with a search for "klep"
Similar threads
- Replies
- 0
- Views
- 451
- Replies
- 0
- Views
- 390
- Replies
- 5
- Views
- 1K
- Replies
- 10
- Views
- 1K

