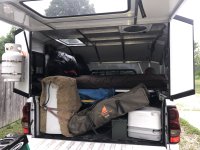
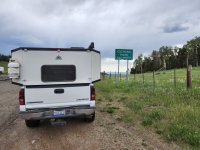
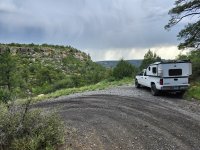
Lee's '04 Chevy Silverado 2500HD and Radica MoonLander camping shell

Lee

Member
@Jacobm some follow up notes on the ARB bull bar.

Overall I really like the ARB bull bar but there are a few points to consider (this is the stuff I could not find on-line).
There are some significant gaps between the bumper and the body work.
I suspect this is to accommodate the Chevy and the GMC variations over several years.

Here you can see the lower valance around the grill the bumper dose not follow the body line but is in front of the valance.
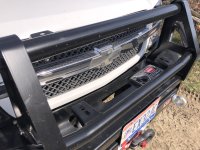
IMG_3120.jpg

Under the headlights and under the front fender there is a large gap.
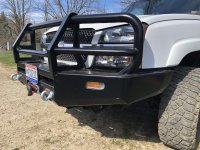
IMG_3117.jpg
Also, the marker lights that come with the bumper took me a minuet to figure out.
The OEM light cluster has a separate turn and marker light right there, once you find the correct wires its all good.

On the inside of the fender wheel opening the back side of the bumper follows the line of the inner fender really well.
I'm running 33" tires with no problems.
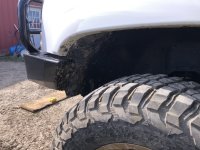
IMG_3119.jpg

I pulled the truck in to the barn to show how the lights shine on the upper hoop.
This is most noticeable with the high beams, it's a little annoying but I suspect any bull bar will do this to some level.
IMG_3124.jpg

There is recess that makes a flat mounting surface for the winch fairlead.
The recess is 12" wide, sufficient for most roller or hawse fairleads.
I was wanting to fit a Yankum Rope Grooved fairlead that allows for elimination of the hook.
But the Grooved fairlead is 13" wide and it needs space to loop the rope over the end.
For now I'm using the stock Warn hawse, I may revisit this in the future.
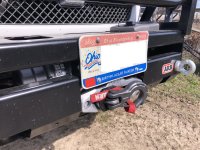
IMG_3122.jpg

Overall I'm pretty happy with the ARB bull bar.
My intent was to provide a hoop in front of the radiator so (hopefully) a deer strike would not strand me and to provide a winch mount.
It dose that and it looks good too (yes I know, needs an aluminum skid plate).
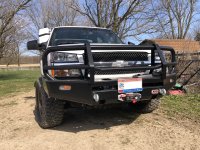
IMG_3121.jpg
 

Lee

Member
Made a little bit of progress getting ready for a trip.
We trailered the SxS down to Tennessee to for a couple of days riding.
I know, SxS and ATVs are the devil but the SxS cost less than the tires, wheels, bumper and winch on the truck and it will go places the truck never will for the kind of money I have.

When the shell was installed Radica used a trailer plug to wire the marker lights and a high mount center stop light.
I needed to be able to use the trailer socket on the rear bumper for the trailer so I ordered a 5th wheel trailer harness / socket from e-trailer.
The harness has a male and female plug at one end, and a socket for a trailer at the other.
So it plugs in between the OEM trailer socket and the harness in the truck with a 6' lead to mount the new socket.

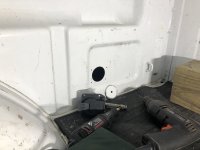
I drilled a hole in the inner panel of the bed in front of the wheel well.
Deburred the hole with a Dremel.
Painted the exposed metal, spray some paint in to the spray can cap and use a Q-tip as an applicator.
Note, roll the Q-tip between your fore finger and thumb, don't try to drag the Q-tip or the cotton will rip of in a big blob on the first rough spot.
And yes I did all this laying under sleeping platform because I was in too much of a hurry to remove it.

installing 5th plug.jpg

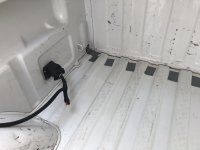
Installed the new socket with a little Sikaflex to seal the hole and plugged in the wiring to the shell.
Clean way to deal with the wiring and the trailer plug will support a key on 12 volt, 10 amp circuit for something in the bed.
5th plug done.jpg

This was the first time towing my 17' enclosed trailer with the Moonlander shell.
The trailer is 8' 6" wide and has 6" extended height - there is a lot of parachute factor going down the freeway.
Before the shell my numbers say we where averaging 9.72 mpg, on this trip we got 10.5 mpg.
So filling the gap between the cab and the trailer is a net positive.

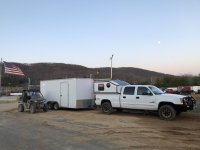
View of the rig, I turned the running lights on - if you squint you can see the marker lights on the Moonlander.
(It was more dramatic in person, the sun had just gone down - not a photographer, just a cell phone warrior)
RRB 1.jpg
 

Lee

Member
Those are great trucks!
Preaching to the choir there bro.

When I decided to hang on to the Duramax I read up on any build threads of GMT800 platforms i could find, including yours 'Yetti .
Seams like most have graduated on to a new platform now but I appreciate the wealth of information made avalibe to me.
I may be one of the last to pour money in to this platform but hopefully there is some general pick-up information that will help some one.
 

Pacific Northwest yetti

Expedition Medic
I still have her, start it up and drive a loop every few weeks. My brother still uses his, the one that went to Argentina as a shop truck in Reno. I am chasing a gremlin in mine, which is part of the reason I have not loaded the camper up and gone anywhere.

I still enjoy seeing them out and about. And being used as trucks should. Still great value with them.
 

Lee

Member
So I got a little bit more done.
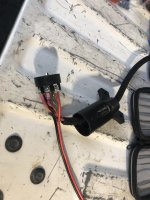
I pulled apart the trailer 7 pin connector for the running lights on the MoonLander and added a jumper for a 45 Amp Anderson plug.
I’ll use this temporarily to charge my power station while driving.
I was pleasantly surprised to see Radica had added connectors to the ends on the wires, I’ve had a few trailers with twisted wire shoved under the screw.
1719711920283.jpeg

Wiring ready to go.
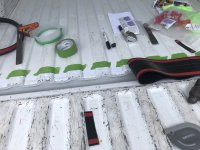
I also taped up the holes in the bed.
I’ll find out how many holes l missed soon enough.
IMG_3172.jpg

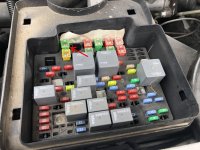
To make the wire live you have to replace a dummy fuse in the fuse box under the hood.
It's difficult to find solid information on this, if you google it there is a plethora of bad information.
I have the 5 volume service manual for my truck so I spent an evening paging through the electrical section.
The information I was looking for was split on 2 different pages, yes its a 40 amp fuse, and once the dummy fuse is replaced the circuit is live (as in it dose not turn off with the key).
In the picture below the red arrow in the upper left corner points to the 40 amp fuse.
I didn't find the dummy fuse to take a picture of it but it is a red solid plastic plug the same size and shape as the 40 amp fuse.

2024-06-29_21-22-50.jpg

Next up is a seal for the tail gate to stop the dust.
I ended up using Extruded Solutions Inc (ESI) tailgate seal and Rok Block.
I selected this product because I saw it on YouTube and I was in a hurry.

The installation was a bit fussy but I'm sure this is to be expected with a generic product that fits all tailgates.
I followed the instructions that ESI has on YouTube.
There are also many YouTube videos of installations that show a common pitfall - with the corrugations of the bed more of the Rok Block is used on the bed side than the tail gate side.
This causes the membrane to wrinkle and stretch towards the outer edges.
To counter this I stuck the bed side first, then I stuck the center of each corrugation on the tail gate side.
This caused the rubber membrane to bow up in the center, so I stuck the center of the bow down next.
Then I used a hammer to press down the small bows, this gave a relatively uniform appearance.

1719713141420.jpeg

The final appearance is not too bad (the bed mat covers the edge of the Rok block).

1719713197511.jpeg

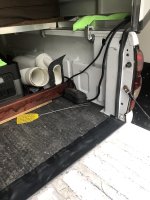
In the picture above you can see the temporary structure I put in to hold my power station.
It's a 1/2 sheet of 3/4" plywood with a pair of 2x4s that fit in to the slots in the bed side.
On a GMT800 bed the 2x4 is too long to fit by the upper bed side rails without twisting the 2x4.
So I had to assemble this in place.
I pre drilled hoes in the plywood then supported it on jack stands.
Placed the 2x4s on top held on with clamps.
Then I crawled underneath and inserted 3" screws.
The tailgate end went OK but when I shimmied underneath to get the rear side I couldn't twist my shoulders to use both hands.
I got it done but not a fun trick.
Couple of eye bolts (strategically spaced to coincide with the corrugations for nut clearance on the bottom) and a ratchet strap hold the power station in place.

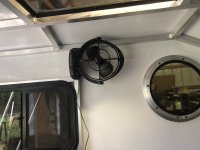
I also temporarily mounted a Sirocco fan, and by temporarily I mean it has sheet metal screws to hold it in place.
1719713899970.jpeg

And finally, Loaded up ready to roll out tomorrow morning.
As my Dad would say, it looks like 10 pounds of "product" in a 5 pound bag.
There's some stuff I'm just not sure I will need or not, and there's stuff I wouldn't normally take but I don't have the final configuration so ...

1719714108605.jpeg

The plan is two days of driving to get to western Colorado (Rabbit Valley overlooks Utah).
Head south along the Dolores River to the 4 corners area.
Dart to Tucson for the weekend and to visit the wife's family.
Dart to central New Mexico (if its not burned to a crisp) and mosey back up to Colorado.
15 days, 5 nights in hotels and 9 nights camping.
(probably should have done a shake down trip)
 

Lee

Member
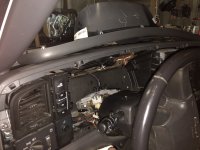
So, anyone own a GMT800? Dose this look at all familiar?
IMG_3182.jpg

I went to back the truck out of the barn Sunday bright and early and the instrument panel was blank.
No nothin’.
I told the wife there might be a little delay and started in to looking for the issue.
There are 4 fuses that are related to the I/P and there are 2 power inputs (1 switched with the key, 1 always hot).
Once those were confirmed OK my assumption was the I/P was bad.
To dig in to the I/P any further would require diagnostic tools I do not have access to.

I ordered a rebuilt I/P from Doorman.
About two years ago I had an issue with scrolling language and high parasitic drain of the battery.
At that time, I ordered an exchange I/P from one of the smaller companies online.
There was some delay in receiving that part because they did not have the correct part in stock.
Dorman is large enough that their website was able to tell me they actually had the part in stock.
So, I ordered the part and delayed the start of our trip a few days.

To be continued...
 

Lee

Member
I live about a mile off I-70 as it passes between Dayton and Springfield Ohio.
So our trip started with two days of driving west on 70, jumping off at the last exit in Colorado.
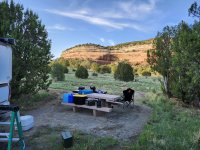
We had stayed in the Rabbit Valley area before; it is a convenient overnight stopping point along I-70.
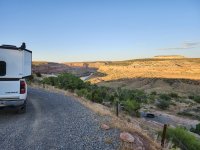
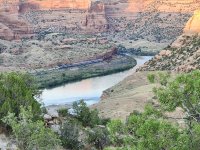
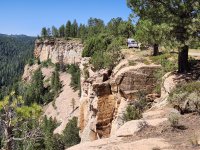
However, a little deeper into the area is the Knowles Overlook Campground.
From looking at the location on Google Maps I surmised the view from the campsite would be good and it did not disappoint.

20240707_201343.jpg

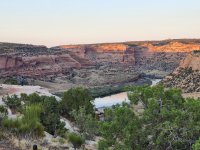
Colorado River.

20240707_203019.jpg

Amtrak’s California Zephyr snaking along the Colorado River in the aptly named Ruby Canyon.

20240707_202621.jpg

The Rabbit Valley area in early July is a little warm during the day but quite comfortable at night.
The temperature was in the high 90*s when we arrived, but the temp dropped to the mid 60*s at night.
There was another vehicle in the area when we arrived but we soon had the whole place to ourselves.

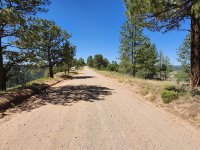
Knowles Overlook is about 5 miles off the interstate. The trail is mostly hard pack dirt, nothing my Honda SUV couldn’t have handled.

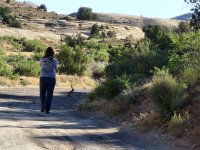
My wife, determined to get a picture of a Jackrabbit.
20240708_081150.jpg

Out to Knowles Overlook campground and back ~11 miles on dirt.

On Monday we packed up and headed out for the Uncompahgre National Forest.
Before the delay to repair the truck the plan was to spend a night in the forest but with the truncated schedule, we would head on to Hovenweep National Monument.
But to get there we drove Divide Road through Uncompahgre National Forest from the north end where it meets Colorado 141 to Columbine Pass.

Divide Road climbs out of Unaweep Canyon with a few switchbacks.
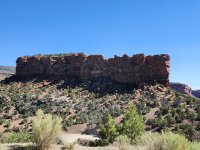
Off to the east there is an impressive looking fin.

20240708_101320.jpg

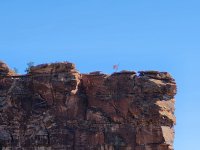
And If you look close, someone has erected a flag on top!

20240708_101330.jpg

Divide Road has a ‘land isthmus’ on it. It looks more impressive with a drone but all’s I have is my cell phone (am I really an ‘overlander’ with out a drone?). Here you can see the level of the ground is lower on both sides of the road.

20240708_105248.jpg

And another view showing the south side of the road.

20240708_105045.jpg

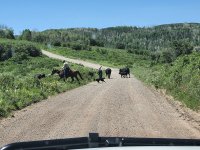
We had a little bit of traffic up on the mesa.
It was interesting watching this guy and his horse work.
For every foot the cows moved the horse probably ran 100 feet.
He worked the cows over by the cattle guard then jumped off the horse and opened the gate.
Back on the horse and drive the cattle threw.
The show was good enough that I really didn’t mind waiting.

20240708_112629.jpg

From Columbine Pass (9,171’) we headed down to the town of Nucla and then back to state route 141 but headed back towards Grand Junction for a bit.
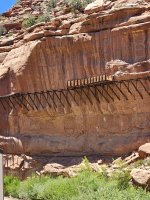
Following County Road Y11 we stopped to see the hanging flume.
Near the confluence of the Deloris River and San Miguel River a section of the flume has been reconstructed to study how it was constructed and to show how it might have appeared back in the day.

20240708_134707.jpg

More to follow...
 
Last edited:

Lee

Member
Continuing on…

County Road Y11 is rough.
It’s not difficult to drive, just it’s surface is the bare rock and you get what you get.
I was considering going back to the highway but decided to push on for 9 more miles.
The road follows the San Miguel River into the Paradox Valley.
So named because the river cuts across the valley on the short axis.
For years people wondered how the valley was formed, turns out Paradox Valley was a salt dome.
As the salt pushed out and was washed away the ground above collapsed forming the valley.
View up stream showing the opening into Paradox Valley.

20240708_141001.jpg

About 75 miles on dirt this day.

More to follow...
 

Lee

Member
Continued from above…

We camped at the Hovenweep National Monument campground for 2 nights.
My plan was to try and stay at a high enough altitude to escape the summer heat, Hovenweep was the lowest camp at 5,200 ft and the hottest.
High 90*s during the day but at night it cooled off to the mid 60*s.
20240708_201630.jpg

Bright and early on Tuesday we set off on a 8 mile return hike to the Holly unit ruins.
The trail drops down into a valley, follows the dry river bottom for most of the 4 miles then pops back up at the end.
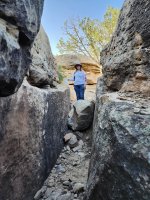
At both ends there is a slot canyon that gets as narrow as 18”.
I think the Jeep crowd would call this a gate keeper – this fat boy got through.

20240709_072602.jpg

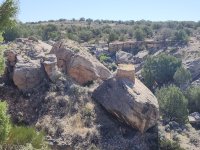
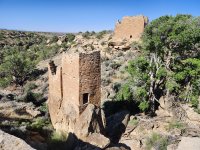
The ruins at Hovenweep are different than pueblo ruins I had seen before.
I would describe them as a collection of towers.
And some of the structures are stuck on to rocks that amplify the tower effect.

20240709_093759.jpg

There are still some of the wood roof supports built into the walls.
This site has been abandoned for ~800 years, I’d say they are doing better than my roof…

20240709_095259.jpg
20240709_094410.jpg

You can drive over to this site from the campground, but it was worth the hike to see the desert terrain.
By the time we got back to camp the temperature was in the high 90*s.
I brought a room air conditioner so I plugged it in to the power station and we took a nap during the heat of the afternoon.
My final solution is to use a small portable AC from Zero Breeze.
I paid into a kick starter like thing for the mark 3 but they are not quite to market yet.
I thought I might need the AC for a couple of evenings to get to sleep, set the timer for 2 hours till the temperature dropped a little.
But in the end I really didn’t need the AC at all.

On Wednesday we packed up and headed southeast towards Rio Del Norte National Monument.
The drive took us threw Durango, Pagosa Springs, Chama and finally to the small town of Pilar New Mexico.
We passed through some pretty areas that deserves re-visiting someday.

I wanted to stop in at the visitors center to ask about camping.
From what I could determine online it looked like the southern end of the Rio Grand Del Norte NM overlaps with the Orilla Verde recreation area.
I was concerned that we would not find camping in this area so I wanted to understand where the BLM dispersed camping started. In the end, as we toured around the Orilla Verde area there was plenty of camping available and the wife opted for the campground with showers.
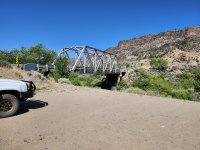
Thursday we headed up the Rio Grand River to the Taos Junction Bridge.
From there the road climbs the canyon wall to the Taos Plateau.

20240711_093836.jpg

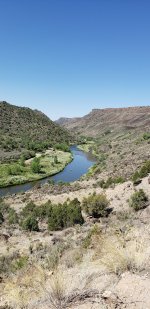
View of the Rio Grande from halfway up the canyon wall.
Camp the night before was just around the bend in the river.

1065089832657391707.jpg

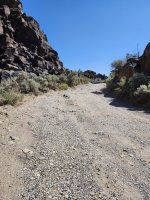
View of the road.

20240711_100159.jpg

To be continued…
 

Lee

Member
Continued from above.

So most of the Rio Grande Del Norte National Monument is on the Taos Plateau.
Our plan was to crisscross the southern end of the Plateau and then drive the length of the National Monument.
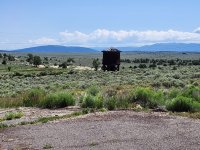
So we headed off to the town of Tres Piedras to see the remains of the Denver and Rio Grande Railroad water tower.
There isn’t good access and the water tower has seen better days.

20240711_105958.jpg

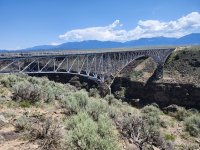
We then crossed to the center of the plateau to see the High Bridge.
You can walk across the bridge, something like 700 feet over the river below.

20240711_114256.jpg

The view is fantastic. The clinch factor is equally fantastic.

20240711_113322.jpg

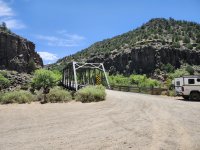
From there we continued across the river then north to the John Dunn Bridge and another climb up the canyon wall on a gravel switch back road.

20240711_124041.jpg

Houston, we have a problem…

20240711_123652.jpg

Apparently the road has been closed for several years.
The county is responsible for the road maintenance and cost but because the road is inside the National Monument the required studies and paperwork have slowed things down.
So we crossed back over to the west side of the plateau to access the one road that travels north south up the Rio Grande Del Norte National Monument.

20240711_145247.jpg

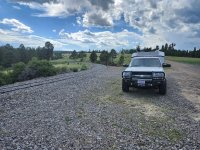
In roughly 56 miles of dirt road and track we saw one other vehicle. Just one.

20240711_155135.jpg

But the scenery was fantastic.
From the end of the track we hit Antonito, Colorado and a short transit to our camp in the Carson National Forest.

On the way we crossed the D&RG RR tracks.
I grew up in a narrow-gauge rail head town so I have a thing for train tracks spaced too close together.

20240711_165732.jpg

And finally, camp on the Pinos. Camped this close to the creek the water seamed loud during the night.
This was another epic camping spot on a trip with several epic camp spots.

20240711_182847.jpg

This was an epic day of travel but only around 170 miles total, 100 of that on dirt.
To be continued...
 

Lee

Member
Continued from above…

Friday morning we packed up headed north to Alamosa.
A quick stop at Walmart to replace our 38 year old Colman stove that gave up the ghost and then East to La Veta pass.
La Veta pass (9,380 ft) was the old narrow gauge railroad route, later when the line was converted to standard gauge they routed it threw a pass to the south, naming the new pass Veta pass.
Later when the road was paved it was routed threw a pass to the north, named New La Veta pass.
So the old pass has a gravel road that follows the old railroad grade. I managed to not get any pictures in La Veta pass.

We were making our way to Mills canyon in the high planes of New Mexico.
Instead to hitting I-25 we opted to take Colorado State Highway 12. It kind of circles around West and East Spanish Peaks.

Cuchara Pass 9,995 ft.

20240712_132112.jpg

As we entered the Mills Canyon area there was a storm in the distance.
The smell of rain (Petrichor) is something my wife and I both grew up smelling but Ohio it is too damp.
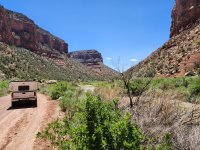
Just for nostalgic reasons, this might be my favorite part of the trip.

20240712_163105.jpg

The gravel road into the canyon is only 10 miles to the campground, and only the last 3 miles are in the canyon but this narrow, winding road took better than an hour between the slow driving and the stopping for pictures.

20240712_164520.jpg

20240712_165925.jpg

Along the road we saw a juvenile pronghorn antelope cross the road and jump up on the high side of the road.
Then he just stood there looked at us.

20240712_165130.jpg

This was our third sighting of pronghorn this trip.
We saw two while crossing the plane of Rio Grande Del Norte NM.
When I saw them, I stopped the truck, grabbed my phone to get a picture and they where already too far away.
We just sat and watched them recede in the distance at an amazing rate.
Then while driving across the plane to get to Mills canyon we saw a group cross the road and ducked under a fence.
I was able to take a picture but they are too far away to really make anything out in the picture.

Down in the canyon we crossed the Canadian River, just to say we did it.

20240712_172401.jpg

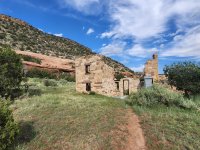
And had a look around the abandoned homestead.

20240712_173933.jpg

There where several people camping in the campground on the rim of the canyon and there where two other groups down in the canyon.
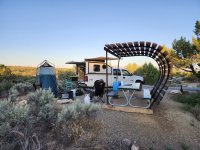
We set up and had a quite evening watching the sun set on the east canyon wall (in the morning we watched the sun rise on the west canyon wall while eating breakfast).

20240712_185454.jpg

Saturday morning we started our long drive back to Ohio.
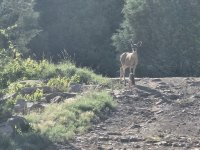
On the way out of Mills Canyon we came across this doe and faun.
I took a few pictures than slowly creeped towards them not wanting to scare them too much.

20240713_081914.jpg

Momma scampered back 10 or 15 feet but the faun just stood there.
So I crowded the other side of the trail and creped by.
Looking at him as I passed by the faun was dry but his fur was matted as if he was just born that morning.
After I passed by I could see Momma come back and start the lecture about steering clear of man.

On an impulse we decided to stop in Hannibal, Missouri.
This is the hometown of Mark Twain (Samuel Clemens).
Not knowing anything about the place I put in the location of a ‘steamboat captain’ statue in to my GPS.
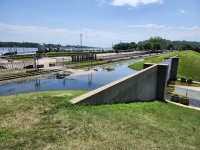
The GPS kept trying to take me down a dead-end street.
Turns out the river was in flood stage and I was seeing the flood gates, not a wall at the end of the street.

20240714_115704.jpg

Thus ended out shake down trip for the Moonlander.
 

Lee

Member
After action report.

Little bit of a delay from getting back, work is making sure I make up for the time off.

The good:
The Moonlander fulfills the basic camping functionality I was looking for.
We where able to rock up to camp fairly late, pull the camp chairs and the fire can out the back and camp is basically set up.
Packing up in the morning was equally fast.

On top of that the wife was pretty happy with the futon.
It’s a little bit much to manhandle (post #5, it’s an 8” wool/cotton stuffed futon mattress).
But we slept well.

The truck ran like a top, well almost.
The AC gave some issues with the blend doors.
I had to do the re-learn procedure several times to get it working correctly.
In the middle of dealing with it the wife asked me if my parents’ cars had AC growing up in Australia, no they did not.
She grew up in Tucson Arizona, I grew up Alice Springs we both know what 115*F is.
But no AC In 95* Colorado and I was pretty motivated to get it going.

The Bad:
Did you see the pictures of the trip?
I was 1200 miles away from my desk, there was no bad.


Lessons Learned:
One of the mods high up on the priority list has to do with the fuel system.
I replaced the injectors two years ago, it’s a thing with the LB7s.
Specifically I had a cracked injector and the oil level kept rising.
But one of the ways to improve injector life is to add a lift pump.
It doesn’t help the cracked injector body issue but helps with seat life by eliminating cavitation.
The pump I want is an in-tank pump that uses the same technology I’m used to dealing with at my job.
So if I’m dropping the tank a bigger tank is going back in and while the tank is out I will add the tap for a diesel heater.
A heater would have been nice a few mornings this trip but wasn’t a necessity, but winter is coming (well, fall is coming I’m not really a 4-season camper).

Next on my list is some front suspension mods.
An upper control arm, improved front suspension travel with longer shocks and heavy-duty tie rods and center link.
While I’m at it I’ll add the Cognito pitman arm support kit.
I did a major re-build of the front suspension a year and a half ago.
At that time I pulled the arms off and sandblasted and painted them as well as the torsion bars.
New lower ball joints and I replaced some of the bushings with stock replacements.
One of the front wheel bearings was loose so I replaced both.
At that time I did not replace the upper ball joints thinking that I would do the upper arms, it’s just taken me a minute to decide what all I want to do.
On this trip I carried a spare stock tie rod (both ends) knowing that the 20-year-old tie rods may not like a long drive on a remote track.
The tie rods were front and center in my mind while we were driving through the remote Rio Del Norte National Monument. I think it’s time.

Also on the list is addressing my spare tire situation.
I put 33” BFG KM3s on 2 years ago.
At that time dropped the spare out from under the truck, the 20 year old tire and steel rim where both toast.
I asked the tire shop to toss them and one of the 29” cooper Discoverer’s that I was replacing went back up in the spare spot.
I’m not in a hurry to put miss matched size tires on the ground, I’ll do it to get out of the bush but it would be straight to the first tire shop.
So my plan is to make or buy a rear bumper with a spot for a tire (or two).
I started working up a plan for making a rear bumper but then I found a company that still lists bumpers for the GMT800 platform.
With my reputation for finishing projects I might just order it.

I still haven’t figured out what to do about water.
On this trip I had 3 five-gallon water jugs strapped to the front wall of the bed.
It was a bit of a chore to move the bedding to dig a water jug out.
I definitely need some type of installed system to open a tap or turn a pump on and have water.
The question I haven’t settled yet to have some type of removable water jug inside the shell or to mount a tank under the truck.
In the shell is better for cold weather and if it is removable it should be easier to re-fill it.

There are plenty of other mods I’ve been thinking about but the ones above should keep me busy for a bit.
 

rgv

New member
Thanks for all this, it has been useful as I have been contemplating something smaller than my Northstar TC650 and bigger than my Leer shell.

I was in a similar boat, I needed to replace a miled out 2003 2500HD with a 6.0, but I just wasn't going to pay covid prices and luckily stumbled into an identical low mile 2004 with the LLY duramax for a couple $k more than I got for the old truck.
 

Forum statistics

Threads
188,206
Messages
2,903,770
Members
229,665
Latest member
SANelson
Top