Lifted MKV Golf

Anti Bling

Off Road Rabbit
The tire you posted looks good. I do not have any experience with them. I have owned a few sets of BFG AT's although they were on a K5 blazer. They dry rotted before they wore out. I plan on getting 55,000-60,000 miles out of these. Plus they work very well in the desert where they will be primarily used. The drawback is price. Discount tire list them at $139.00 each. The tire you listed might work better in your area than the tire I chose.
 

nickw

Adventurer
Looks awesome! I'd love to see some closeups of how things were mounted. Feel solid? Foresee any durability issues long term being used on rough terrain?

N
 

Isgro

Member
I'm loving what's going on in here. Nice work guys. I STILL haven't gotten my car sorted out. Everything seems to be working against me these days. I'm hoping to order my tires and get the springs in soon.
 

Anti Bling

Off Road Rabbit
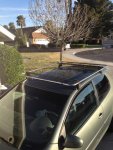
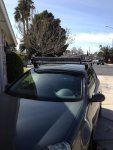
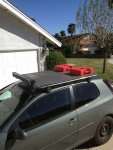
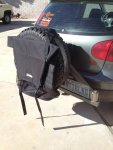
I got to get more stuff done this week. I trimmed the factory rabbit lower bumper to fit around the tire carrier and got it installed. my buddy Devvon at SinCity metal works machined some plugs to integrate a roof basket to the Yakima rack. he machined plugs that insert into the aluminum Yakima crossbars then welded one inch .120 wall tubing. we only got as far as to build the lower loop. I will be adding additional cross braces and floor then a raised loop to create a roof basket. I welded a couple of tabs to the front so I could mount a 40 inch LED combo spot/flood light bar. I needed this installed so I could determine how high to put the upper loop.

installing the trimmed lower rear bumper.
you can also see the delrin on top of the cross bar of the carrier. the swinging part rests on this when in the closed position so it wont rattle.
1234e.jpg

the beginning of the roof rack

1234c.jpg

1234b.jpg

welded light tabs. LED light bar mounted

1234a.jpg

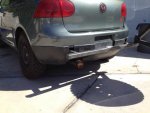
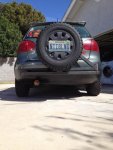
rear bumper finished. I will make some kind of covers to fill in the holes in the upper part of the lower bumper. you can see in this picture the additional super trap muffler/spark arrester that I added to the exhaust. this really quieted down the tone of the exhaust. adding back pressure. I gained a boost in low end torque that I had lost when I did the 2 1/2 cat back exhaust with a single muffler.

1234.jpg

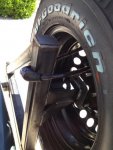
a picture of the upper part of the swing out behind the wheel. I added a cable lock so the spare tire wont grow legs and wander off.

1234d.jpg
 
Last edited:

Anti Bling

Off Road Rabbit
Looks awesome! I'd love to see some closeups of how things were mounted. Feel solid? Foresee any durability issues long term being used on rough terrain?

N

I don't have pictures of the mounts. everything seems very solid. no rattles or shakes. the carrier is mounted to where the steel bumper (behind the plastic) was mounted. right now I am using the factory bolts to hold the carrier into place. while it works fine, I will be drilling out the blind nuts in the sheet metal, adding larger diameter grade 8 bolts and weld heavy duty nuts to a backing plate to take and spread out the load. I will take pictures of that process when it get done.
 

Anti Bling

Off Road Rabbit
Cars coming along great,Is that roof basket still going to allow for bike racks/kayak racks? That light bar is crazy,Is it blinding?
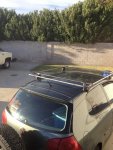
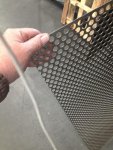
the light bar has yet to be wired up. it should throw a good amount of light. the light bar is a cheaper unit so i don't think it will be too blinding to people in the next town over but it is sort of overkill for this build. i was going to install it onto my chevy truck but it was too tempting to toss it onto the rack. i got a chance to stop into Industrial metal supply in Sun Valley California today. in their remnants section i happened to find a sheet of perforated steel. it was the perfect size for my rack. so, after dropping $98 it was mine. i liked this better than the expanded steel. as for still using the bike rails, i'm not sure if they will be remounted to this rack. i can still add some fork mounts to it if i need to bring bikes with me.

1234f.jpg

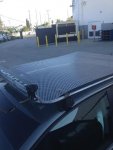
the metal sheet wouldn't fit inside the car. i had to tie it to the rack with twine and drive slowly back to were I'm staying here in L.A. and of course i forgot to bring tie down straps with me. but I'll figure something out for the 270 mile drive back home tomorrow.
1234g.jpg
 

ihatemybike

Explorer
Really liking this build. You need to find one of those "hella flush" groups and show them what real modifications look like.
 

Anti Bling

Off Road Rabbit
I got some more work done on the rabbit. I tacked in a few cross bars to the roof rack frame to support the floor then tacked the floor on. the perforations in the floor allowed me to bolt two Rotopax 3 gallon fuel cans. I will be removing one of the Rotopax mounts and double stacking them as my easy up will take up that space on one side of the rack.

I hope to finish the roof rack by next weekend.

I also relocated the license plate from the hubcap on the spare tire to the swing out and test fit the Trasharoo to the spare tire. its a little large compared to the small tire I'm using. but it beats packing trash inside the car.


IMG_3779.jpg


IMG_6290.jpg
 

Thirty-Nine

Explorer
I think I'm going to get some of those Rotopax containers for my roof rack. The Sidekick doesn't have too much water/fuel storage places.
 

WagoneerSX4

Adventurer
Love the pirate rabbit sticker!

I'm also planning on some rotopax pretty soon. The further I go up north the more carefully I have to plan my fuel stops. 40L runs out pretty darn quickly! I keep 10L on my trailer usually as a back up but that's just for an emergency.
 

Isgro

Member
Man, you're doing some fantastic work. That rack looks great. I need to get ahold of some of those Rotopaxes. They'd be great to have in the car and I could use them on my longer moto trips, too. Good stuff.


On a separate note, I'm going with a strut spacer setup instead of the H&R lift springs (my friend owed me some machining work, so I took him up on it). If anyone is interested in taking these lift springs off my hands toss me a PM. :)
 

WagoneerSX4

Adventurer
On a separate note, I'm going with a strut spacer setup instead of the H&R lift springs (my friend owed me some machining work, so I took him up on it). If anyone is interested in taking these lift springs off my hands toss me a PM. :)
I'd go the other way if I were you. The lift springs are going to get you a lot more load capacity, a good thing when you start loading stuff in the back. A weak point of any small vehicle used for expedition type stuff is the rear spring rate.
 

Thirty-Nine

Explorer
I'd go the other way if I were you. The lift springs are going to get you a lot more load capacity, a good thing when you start loading stuff in the back. A weak point of any small vehicle used for expedition type stuff is the rear spring rate.

Great point. A lot of people go with a spacer lift on the Suzuki Sidekicks, too. I actually have different springs.
 

Forum statistics

Threads
188,367
Messages
2,906,112
Members
230,117
Latest member
greatwhite24
Top