DAMN, that's expensive.
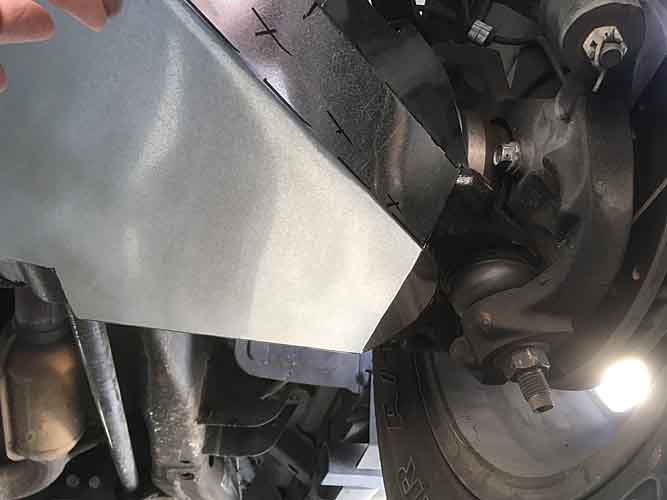
Honestly, what are you going over that needs a deflector there? I go through some pretty crazy ********, off trail and on, and never once had a boot rip, or anything else there. I understand it happens, but now with the miles and miles off road and it never close to happening I'd say the extra CV we carry is the insurance itself, no need for the complication and weight of these deflectors.
In fact, I'd be incredibly worried about the deflectors being worse for this problem. They'll just become a basin for mud (and then rocks) to get stuck up there and cause some real trouble. Also- if it bent or ripped (or even just the mud caking up) and it contacted the boot, it would cause a continuous friction point on the boot, and thats what would cause the boot to fail.) As well, if it's big sticks and riff-raff you're worried about, it will just cause another point for getting stuck and then leverage to break/rip something like a brake line rather than just pass on through. You don't see that type of protection on really much out there, because IMO there's really no need. The closest thing is protection for the bottom of the control arm itself as a skid , but our front lower control arms are pretty beefy and not thin stamped metal, so they can take a beating.
I have some video somewhere of me going through some washboard roads that were underwater for 2-3 weeks, and all of the sticks/ logs ended up being the trail. We're talking about 2-4 foot diameter trees stacked all over the trail, plus all pointy, broken branches that come with it. You can see the broken branches go through the suspension and everything stayed intact (most important thing there is not the boots, but the brake line). What was most worrying there was the gas tank........
Even more recently, I ended up "ice breaking" through 3-4 inches of ice in a mud puddle. That was the first time I actually thought about the boots getting friction, because by the time I ice-breakered through the puddle, the ice had refrozen in the wheel wells as giant chunks- again no damage. What did happen was my rear emergency brake froze on, because the water inside the lever in the axle froze. After getting to camp, there was at least 100 pounds of ice sitting throughout my front control arms, IN the subframe braces, and on top of all skid plates.
Video is below. I was in fact not stuck on a log. It was all the ice I had broken up, and it stacked underneath my truck and I high centered. Remember, I am lifted, and on 35's. It was a ton of ice. I ended up backing up and out, and we went on a "bypass." When I first hit the puddle, " I knew I had screwed up when I started seeing chunks the size of a grapefruit shooting 30-40 feet in front of me. If I didn't have steel bumpers and front skids, it would have been a bad story. The area around the hubs were unscathed.
Last edited: