Los Angeles -Class Attack Sub(urban), Build / Collected Werks topic - '02 k1500 Z71

rayra

Expedition Leader
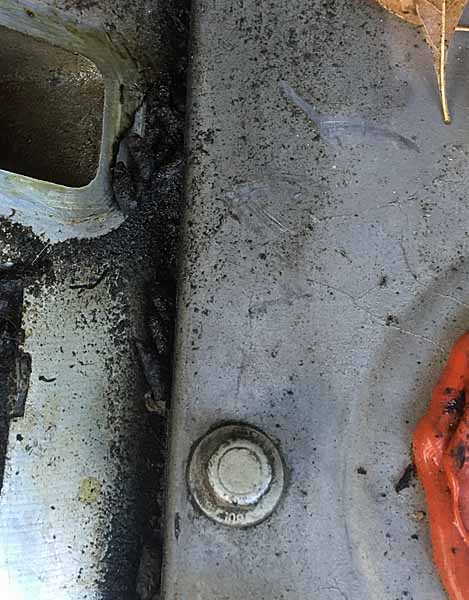
well spent this morning excising my intake manifold and clearing the way to go after presumptive oil leaks in the upper back / top deck area of the motor. And it certainly looks oily enough for there to be some.

I also found a similar array of rat / mouse poop, and a chewed up snail shell supper. Definitely have some local rodentia that like to climb up on top of warm engines to shelter for the night.
engineoilleakhunt200502-01.jpg
engineoilleakhunt200502-02.jpg


It's been 2-3yrs / ~10-15k mi since the last time I had this apart and cleaned it all thoroughly. And this is after degreasing yesterday. Somewhere in the upper front I am blowing oily sooty schmutz and I have no idea from where. The oil filler tube is properly seated and sealed, as are the valve covers. All my radiators / condensers are dry and clean, so it's not coolant, trans oil or R134. At least not from those sources or airflow direction. Factory air intake works, in good order. There's one fuel vapor vent / solenoid on the top front of the vortec manifold and it was wobbly-loose despite being bolted tight. IT should be under suction when the engine is running and the vent solenoid (evac) is triggered, so it should not be blowing ******** all over. The throttle plate has a coolant circ / warmer line attached, no signs of leaks on it.
That's going to take some more examination / detective work.


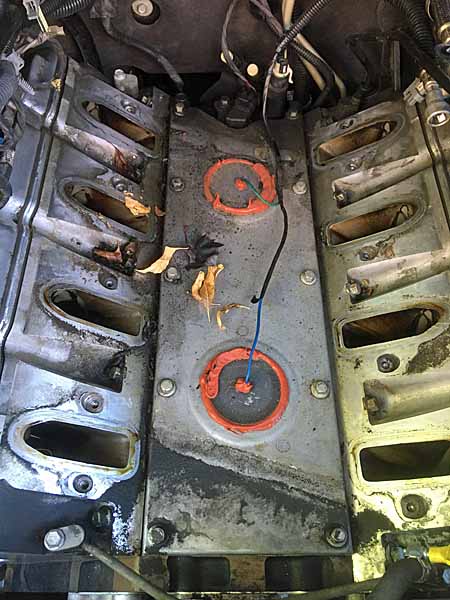
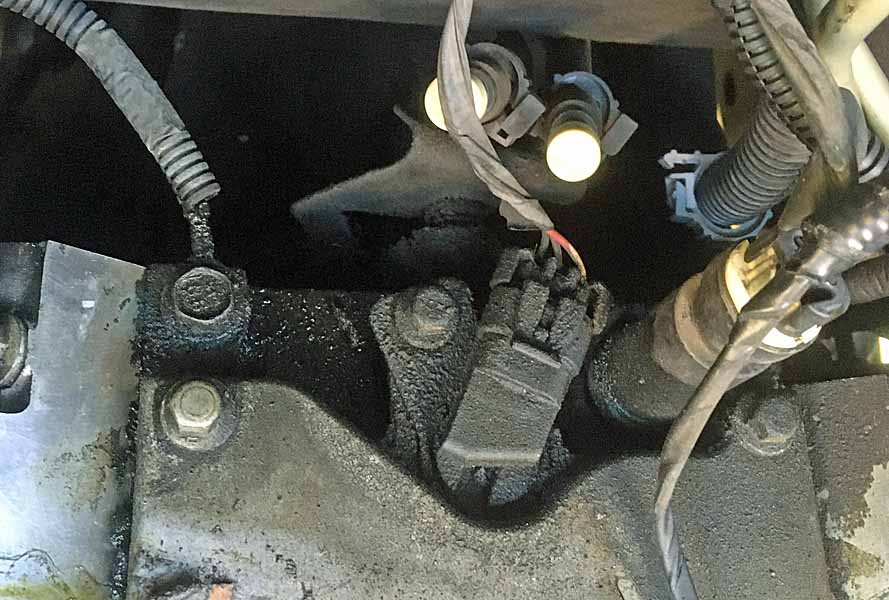
On to the upper back deck / end of the galley cover plate. 'yep, there's yer problem right there'.
engineoilleakhunt200502-03.jpg


Oil sender on the right, middle I think is the crank/cam position sensor? Left is the sopping wet flow area that corresponds roughly to where I have oil trickling down, having my Sub mark it's territory. Rains down and over the starter location. I'm probably going to cover the intake runners and hose some degreaser on that back shelf area and down the back of the block and transmission bell and carefully hose it down, before continuing with disassembly on the knock sensors and galley plate. And on that crank sensor setup. After first seeing if any bolts are loose. I have a galley cover plate gasket to install and it looks like my knock sensor sealing job is holding great since the last time.


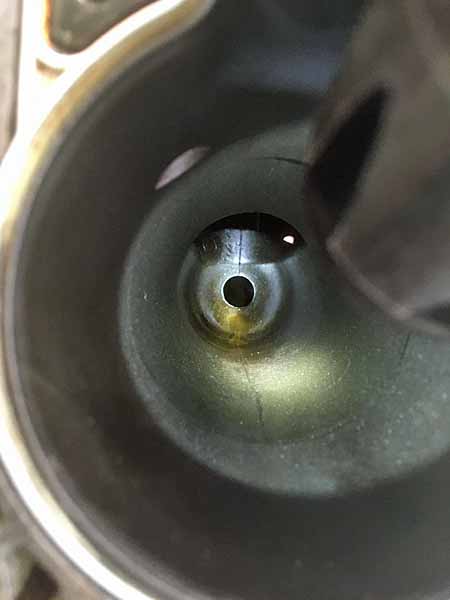
Last is a shot down the front chamber of the Vortec manifold.
engineoilleakhunt200502-04.jpg


Very little oily residue. the blurry gray gasket around the edges of the image is the gasket / plane that the throttle plate bolts to. Just air goes in here, and the fat line from the PCV dumps into the top of the manifold, about that shadowed recess, top middle of the pic. The half-dollar? sized hole center-back is part of where the air enters the main chamber of the manifold before flowing down the intake runners to the heads. These motors are port-injected, the fuel spray is right before the transition from manifold plastic to aluminum head intake runner. So basically a lot of oily air swirling around with the fuel only injected right at the end.

so after lunch and some cold water, and rigging a patio umbrella for some shade, I'll get back to rectifying the oil leak and hopefully get it all back together and running by dinner time.
 

rayra

Expedition Leader
'Oil Leaks, Oil Leaks Everywhere'

/Buzz Lightyear

Lessee, oit filler tube o-ring misaligned, crankcase pressure spraying fine oil mist towards the forward and inboard. Grunge on the front of the head, top of the water pump front of the galley plate and intake foam.

Galley cover plate pulled, signs of oil seeping thru back / rear of flattened factory gasket, 146k mi. Cleaned and replaced knock-sensor grommet-seals and nice new felpro gasket for the galley cover.

Huge oil mess on back deck area, cam position sensor coated in oily muck. Oil pressure sender likewise. Turns out there was a hairline crack at base of the plastic body of the sender, right above its metal base / nut. No idea how it cracked / failed. Didn't have a part on-hand and had to go to NAPA before they closed, $54.

cleaned and degreased all that and pulled the camshaft position sensor to get a good look at it, looked fine and mostly dry. Cleaned it all up, silicone-spray-lubed the o-ring and re-installed it.

Cleaned up the galley pan and knocked out the rubber seals at the bottom of the knock sensor wells (who knew that was rubber down there?), likewise silicone lubed those before seating the plate onto the pylons the knock sensors screw into, down in the bottom of the galley.

Two big holes in the bottom of the galley, about 4"x2" looking down on the cam lobes. the lobes looked a little worn out. Vehicle has some sticking lifters on cold startup, but I'm not tearing it all up until one fails for good. Will probably rue that decision when one collapses on the continental divide with a trailer camper in tow.

Got the knock sensors back in and the rubber hole caps sealed in place and then called a halt, let that stuff cure overnight before I ease the intake manifold in place.

I've got THREE injector electrical clips on the driver side fuel / injector rail that came loose on their own. These are complicated little clips meant to stay in place. I have no idea yet if they are broken. I had elected to dismantle the fuel rail assemblies to make it easier to get the intake out. Might regret that later.

Tomorrow morning it all goes back together.

engineoilleakhunt200502-05.jpg
engineoilleakhunt200502-06.jpg
engineoilleakhunt200502-07.jpg
engineoilleakhunt200502-08.jpg
engineoilleakhunt200502-09.jpg
engineoilleakhunt200502-10.jpg
engineoilleakhunt200502-11.jpg
 

rayra

Expedition Leader
'mostly' fixed.
Finished assembly this morning, got a torrent of gasoline all over when I primed / tried to start it. Seems somewhere in my industrious cleaning of the greasy parts I managed to strip / wipe off the o-rings on the ends of the crossover tube that connects the fuel rails. There's a smaller tube / o-ring that the fuel return line connects to, its o-ring stayed in the pressure valve / return assembly on the driver side rail, I could see that. And didn't think about the bare crossover tube ends I was clamping into the plastic fuel rails.

3 o-ring kit, $19+8 shipping and a few days rock auto.
$35 at NAPA but they're closed today.
Dealer closed today and screw their pricing.
Harbor Freight 180-pc viton o-ring kit $10 -20%. Done. Installed.

Along the way during assembly the top front evac solenoid to inhale gas tank vapors into the intake was very wobble / loose before disassembly. Could find nothing wrong with it just would fit snugly even with it's single bolt completely tight. On re-assembly a tried adding a washer to that bolt as a shim and the washer with a large enough hole to fit the bolt was too wide adjacent to the vertical structure of the solenoid assembly and something cracked before I could even draw the bolt all the way down. Pulled the washer, could see no visible damage, re-attempted the assembly and wobbly as ever. But all back together.
I hear a little 'flutter' that I didn't hear before. Even the missus noticed it (heh). But zero performance or code issues. Vehicle runs, runs well, idles well, no leaking fluids. I'm calling it done, on to the next thing. Which is finding and stopping the leak in my AC system.


eta No o-ring to rule them all

engineoilleakhunt200502-12.jpg
 
Last edited:

Overlandtowater

Well-known member
Its nice to have all the oil leaks buttoned up. I wish I would have pulled my valley pan and installed a new gasket. I never thought about Harbor Freight for O-rings and the funny thing is I've heard good things about them too.
 

rayra

Expedition Leader
well they certainly solved my problem on a Sunday afternoon. Was a sort of desperation play. I could have waited for rockauto parts, few things take more than 2-3 days from ordering, for me. But I just dislike having the vehicle down for any length of time.
Ironically this morning I moved the vehicle out of the driveway while the missus was out and walking back up it I spy on the ground before me one of the missing o-rings. This driveway and undercarriage or the vehicle being degreased and hosed down twice during this wrenching session AND having thoroughly washed the whole vehicle yesterday evening. Yet there it was, laying there, right in the middle of the driveway. I really have no clue where and how they came off in the process. Which is mildly disturbing.

Next thing to mess with is the Air Conditioning leak. Need to find some UV dye leak detector.

And sometime later this month I'll do the rear bearings / rear axle service. And that should be the last of the planned maintenance before driving it around the countryside. Everything greased and and suspension refreshed, it's riding around like new.
 

rayra

Expedition Leader
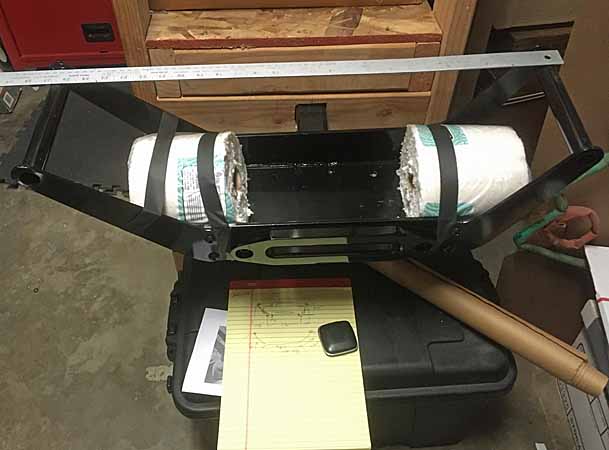
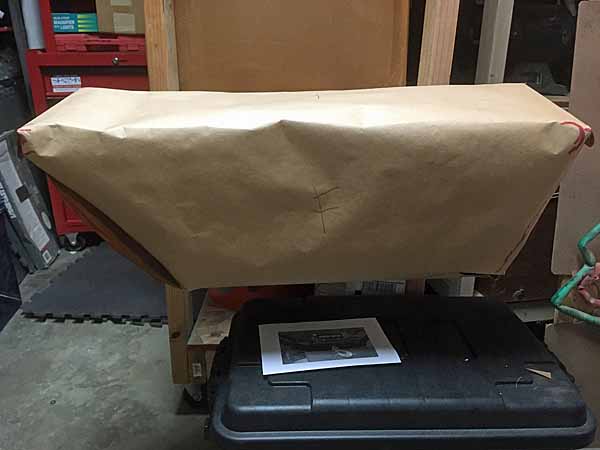
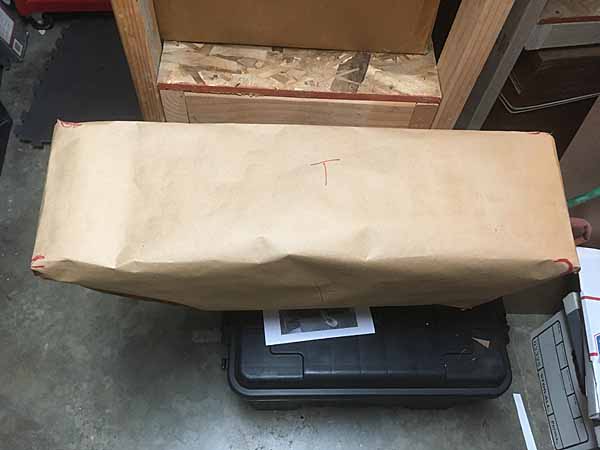
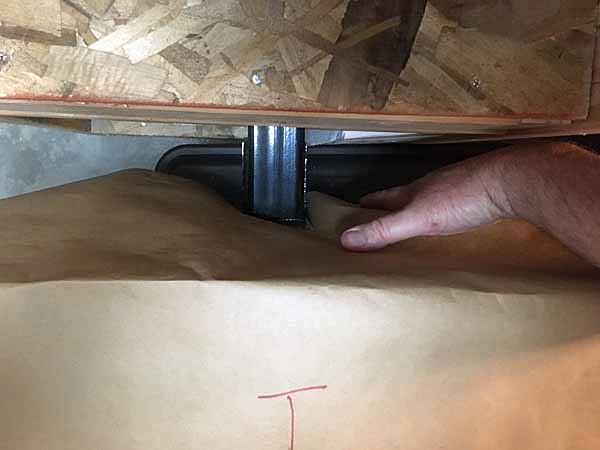
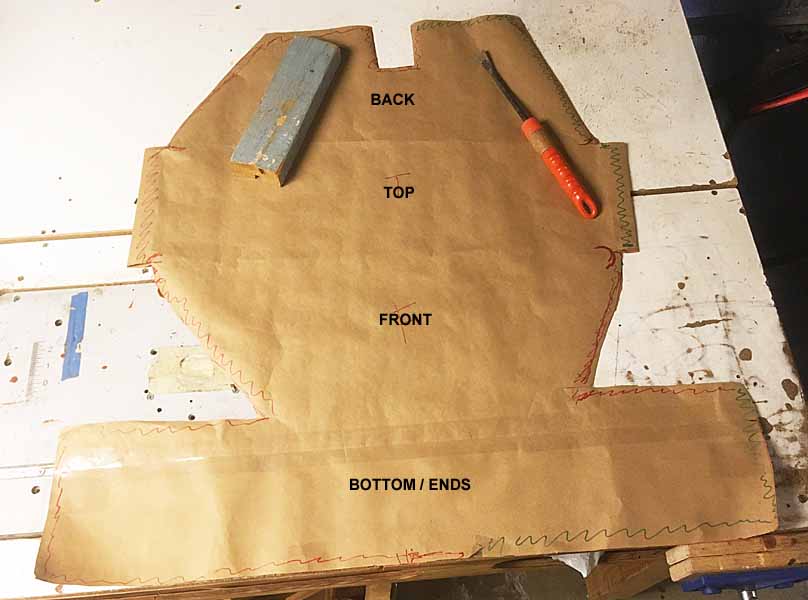
Spent some time midday proofing a sewing pattern idea for making the heavy fabric cover for the winch in its carrier. Idea is wrapping one piece of fabric around the winch/carrier, from the back bottom edge, up the front, over the top and down the back. With the bottom potion folding up on the ends to follow the inverted trapezoidal shape of the carrier. Zipper on the right end along the upper carrier handle and down diagonally on the back and bottom to the receiver hitch tube. The whole cover going on like a sock from left to right.
Sacrificed a roll of paper towels to serve as a mockup for where the ends of the winch will protrude from the carrier.
Not the best idea to cut and sew before I actually have the winch, but I have its dimensions and am sanguine about fitment.
I need to study up on sewing in zippers and how I want to arrange that seam. Either 'hidden' zipper or maybe incorporating a flap on what will be the 'upper' side, so moisture etc is shed over / past the zipper. And I still need a zipper. Looks like it needs to be about 25". but a 24" can be made to work, if there is such a constraint in what is available.
The fabric requirement is about 37"x37", including overlaps for seams. May also sew in some interior reinforcement over the carrier handle edges, area of worst wear and greatest aerodynamic load. Might incorporate some 1" webbing straps that wrap around at about the 1/3 intervals and buckle at the rear, sewn attached to the front face, so all the slack can be cinched out.

winch179 cover template.jpg
winch180 cover template.jpg
winch181 cover template.jpg
winch182 cover template.jpg


The blue sguiggles are the zipper interface, the red will be sewn seams

winch183 cover template.jpg


eta
Got some AC recharge + stop leak + UV dye to load in early Sunday morning before visiting my folks on Mother's day. And a UV flashlight due a couple days after that. So will see how that goes. $30 vs paying an AC shop $300++

found a No10 size medium-large zipper, 24"L for the winch cover, coming around the same timeframe. Have a pattern template to make to double check the angles I'm marking on my 1000D fabric, expecting to cut the fabric for the cover tomorrow morning.

Not a lot else going on, vehicle-wise, right now. Other things need doing.
 
Last edited:

rayra

Expedition Leader
just a re-post of some aux gas tank ideas from another topic -

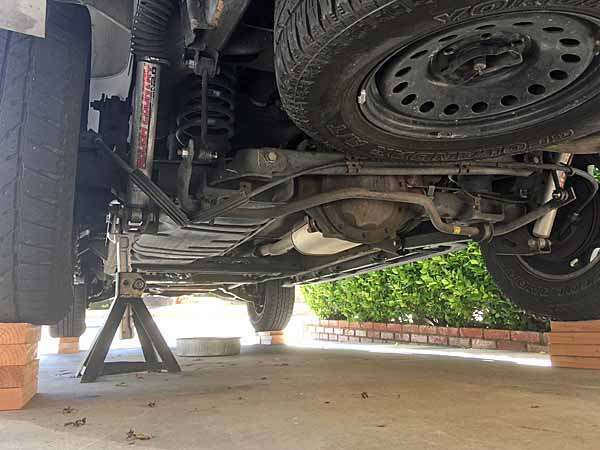
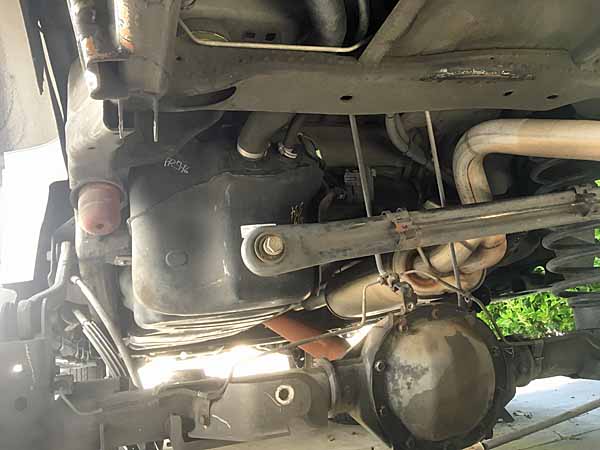
The GMT800 Subs & Tahoes are down the driver side, from under the 2nd row seat to just ahead of the rear axle.

I just took mine out <2wks ago to change my fuel pump. If one had big tires and/or a big lift, it would be pretty straightfoward to put a 5-6" tall rectangular space and drop or duplicate the whole framing support for the standard spare tire mount below the added tank and double the fuel capacity of the vehicle.

I've already seen some dual tank mods on these vehicles where two filler necks / caps are fit behind the factory door. Fill them both, rig the secondary as a transfer tank with a hard-plumbed pump on a dash switch. Run down the stock tank and flip the switch to dump the other into it.


hmm I didnt' take any pics of that big space while I had the spare and fuel tank out...

fuelpump003.jpg
coilsprings04.jpg


There's steel intermediate plumbing in the fuel filler and primary vapor vent lines running from tank to filler. Be easy to re-work or tap into that section for transfer plumbing. Any muffler shop could weld a 1/4"-5/16" barbette onto that metal section, after you dismount it. and 12v fuel pumps are cheap -
38"x38"x4" is 5,776cu",~231cu"/gal, that's 25 gallons. Call it ~6gals per 1" of tank height. 5" equals / double your stock tank.

Cost a lot more than 5-6 20L jugs, but if you can fab much of it yourself you'd save a lot of the cost. Having a custom aluminum tank with some slosh baffles in it would be real nice, with a filler neck and a 5/16" out the bottom. You could literally hit the transfer pump while you are runnign down the road. And THAT would be worth the cost and inconvenience of dealing with 5-6 jugs. Too, that's another ~200# at the rear of the vehicle. Either way.


eta here's a guy that can build any tank, $400 starting price

Too, I can envision a tank made to fill that spare tire area rectangle, with a (square?) 'donut hole' which fits around the spare tire winch mechanism, which could literalyl allow you to bolt in the tank to the existing vehicle framing and keep the spare right where it is at. A 3-4" tank at max width and length for the space would be at least 20gal. You'd have to change / modify the fuel filler location a little to fit two necks / caps. And plumb the transfer pump, which would be attached to the new tank. And a wiring kit

eta another custom tank builder
 
Last edited:

rayra

Expedition Leader
That is a fine kit. Has all the bells and whistles, fuel level, a redundant filter. Very costly though.

I'm still very enamored with the idea of an additional 20-25gal sandwiched between the vehicle frame and the spare. be easy enough to mock one up with some 1" foam insulation to figure the max x,y dimensions and some mounting tabs or straps. If I could weld aluminum I'd go for it myself.
 

Fierokid

New member
A suburban 2500 already has a tank over the spare tire area in addition to the regular tank. Why not copy/source that?
 

rayra

Expedition Leader
doing some quick researches on DIY car panel painting and improvised 'fender stands'.


I'm looking at creating support jigs that I can attach to my rolling workbench so I can once again create a temporary spray booth in my garage to so some spray painting. I figure I can pull the hood and do all the sanding prep in the driveway, wash and blow it off, roll things back in the garage, set up the booth and prep the surface for paint. I've got the compressor, the well regarded small, inexpensive (practically disposable) sprayer(s), prior experience. Have to source the auto paints and see what I can get here in CA. and then well I'm going to re-paint my hood and then all four doors.
I'll do as much of the surface prep and minor body work that I can on the vehicle itself, so the panels will only be off overnight. And I just might try to paint the doors ON the vehicle.
And the big section of degraded paint over the windshield is going to have to be dealt with as it is.

in June / Summer. Which means a narrow window of temperature and humidity and morning spraying.

I'm also considering making the 'fender stand' completely from EMT, bent cut and bolted to form a rollign stand which the parts can both be sanded and prepped and then painted upon. It would be a sort of double A-frame with a rectangular tube frame base with casters.

The vehicle is basic black. and painting whole panels ought to let me get away with it fairly easily. Been a long time since I prepped and painted whole vehicles for paint. But I'd done a tremendous about of trades and crafts and painting work, at all scales and levels of equipment. So I figure I can get this done. And however it comes out, it won't be worse than it looks right now.

I'll add some pics of the paint damages I'm trying to rectify
 

rayra

Expedition Leader
A suburban 2500 already has a tank over the spare tire area in addition to the regular tank. Why not copy/source that?
The rear tank i sin place of the spare, isn't it? option rear tank, spare goes up in the cargo area?

I don't recall room between the frame and cargo floor to fit a tank. And then have the spare suspended under it. That's what I was describing a custom solution that would do that.
 

Fierokid

New member
I am 90% sure I have both on my 8.1L. I will have to crawl under and double check in the AM. I currently dont have my spare under there because it touches my exhaust (didnt know that until I needed my spare) but when i fill up its almost 40 gallons from empty. I dont think the drivers side tank is that large
 

Buddha.

Finally in expo white.
From my research the extra tank is something like 7 gallons. Info for it is scarce. It’s not clear if it is gravity fed or if there’s an extra fuel pump. Seems like much ado about nothing.
My stock 2500hd is 36 gallons and I’d love more fuel.
 

rayra

Expedition Leader
iirc the older subs were 42gal, when the spare was in the cargo area, then down to 32 with the spare underneath. But I haven't looked it up. Mine is 32 now, and don't see how a tank and a spare go behind the axle.

eta
'78 Sub, 40gal 'classic' tank, big squarish thing.


mid 80s C20 looks the same

eta

 
Last edited:

Forum statistics

Threads
188,132
Messages
2,902,557
Members
229,582
Latest member
JSKepler
Top