Los Angeles -Class Attack Sub(urban), Build / Collected Werks topic - '02 k1500 Z71

rayra

Expedition Leader
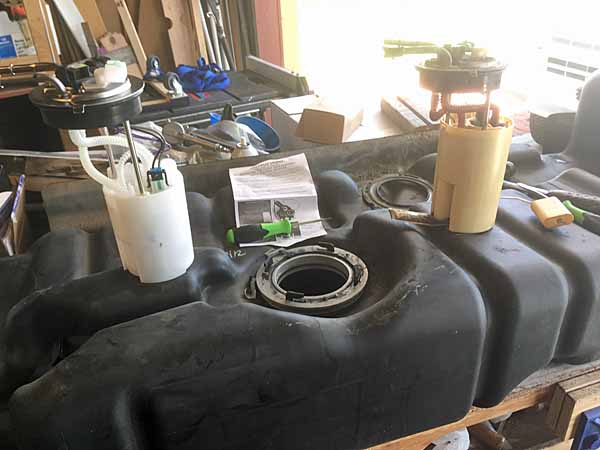
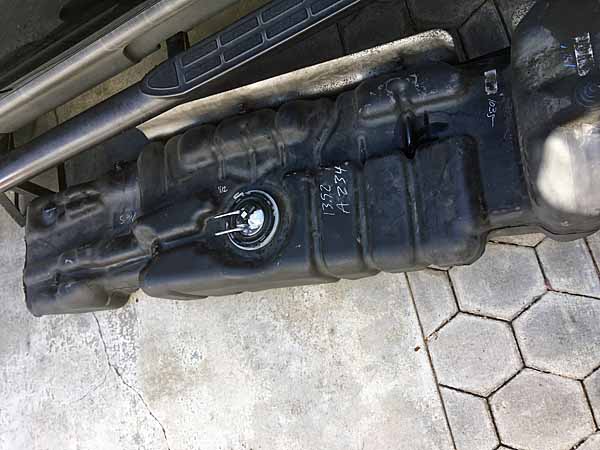
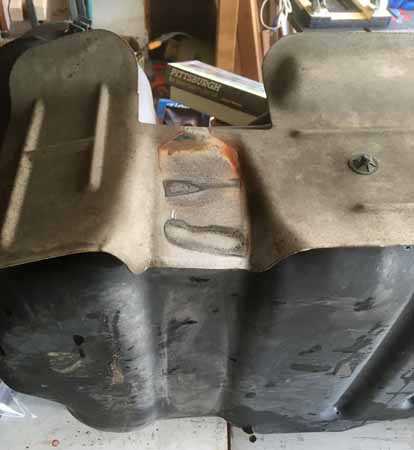
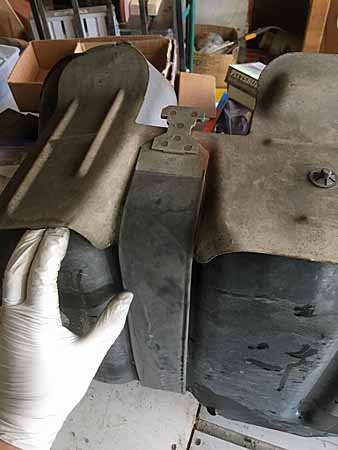
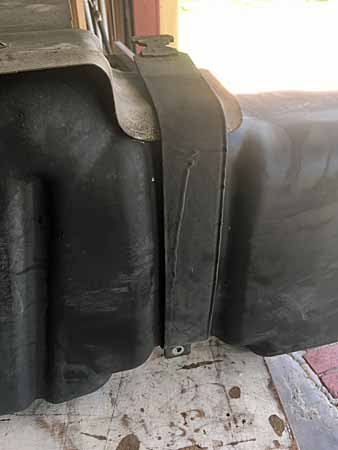
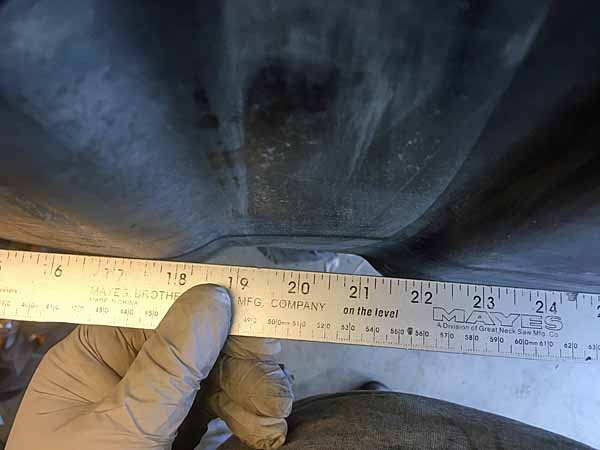
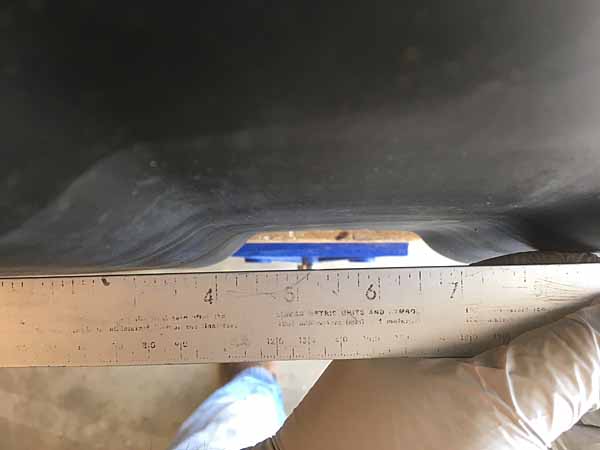
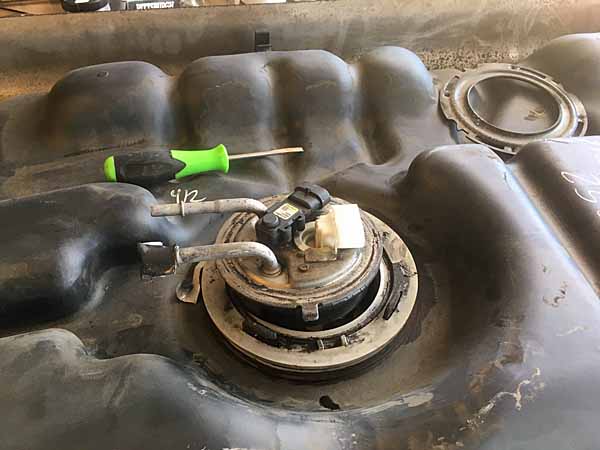
well, success. New pump in, transferred the ~2gal we took out and another 20L jug into it and fired it up to run while I put the skid plates back on and jacked it down off the redneck hoist. Took it for a spin inside the neighborhood and throttle response seemed zippy. Lot less drivetrain noise with all new u-joints, too. I never checked the fuel pressure, so we'll see if the 'zippy' impression holds over the next few drives. I think I have the fuel tank aluminum skin attachment figured out, got some solid measurements of the saddle strap notches in the tank bottom.

fuelpump006.jpg
fuelpump007.jpg
fuelpump008.jpg


fueltankskin015.jpg
fueltankskin016.jpg
fueltankskin017.jpg
fueltankskin018.jpg
fueltankskin019.jpg
 

rayra

Expedition Leader
All the stockings hung with care, work tables bare, tools put away over there, not much to share. Burma Shave.

Got the rearmost u-joint fully lubed and took off to fill my tank completely for the first time in several weeks. And at $2.59/gal, so that was nice.
Took some fenderwell height measurements, prior to replacing the rear springs. Heights taken with a full tank and without my fat butt in the driver seat (which are about the same weights, and both on the drivers side of the vehicle).

FL 38-5/8" FR 38-5/8"
RL 38-1/8" RR 38-3/8"

Also received the 'special' silicone grease tube, for the Spohn trailing arms / bushings.

So right now the plan is jack up the rear end, dismantle what is necessary to fully lube everything and to drop out the old coil springs. Then set them alongside the new to compare their unloaded heights. I hope any height differential can be matched with some combination of either the 3/4" or 2" spacers I have on hand or even none at all. But I'd be fine with the new coil plus a spacer coming in a tad higher than the front measure. Or even in the same ballpark as the old. Although I'd prefer a tad higher, given future towing expectations.

But I kind of want to wait on that work until I have the rear brake upgrade parts in hand as well as the rear bearings and seals. Just do it all in the same go. Maybe not, need some money coming in before any more goes out on 'elective' work.

I'm also sitting on partial parts to pull the top of the motor off again. I've got a persistent oil drip coming from somewhere high on the back of the motor.
It's either coming out of the galley cover plate or oil pressure sensor. I've got the galley cover plate gasket, want a fresh set of intake manifold gaskets before I pull things apart. Degreased all the undercarriage yesterday after I put that side back together, before I took the vehicle off the hillbilly lift. Already got a drip today.


eta
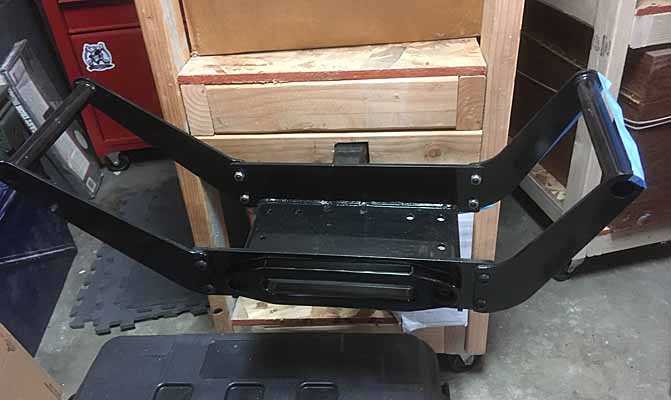
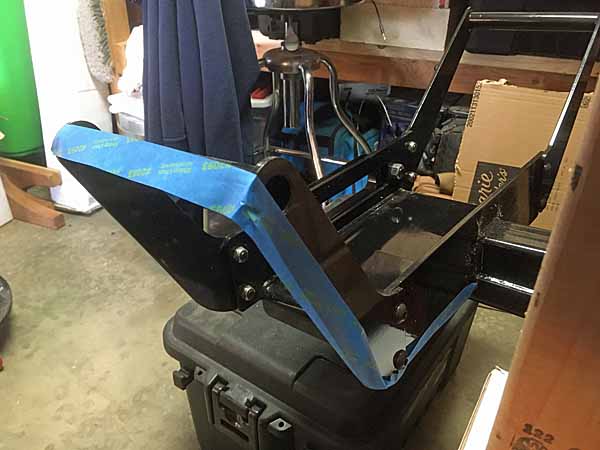
another shot of the winch carrier, working up the sewing plan for the zippered cover. The blue tape traces the path of the zipper.

winch177 cover plan.jpg
winch178 cover plan.jpg


and a random shot of Suburban suburbica in its natural setting. Lovely plummage.

Suburban suburbia 200417.jpg
 
Last edited:
D

Deleted member 374434BT

Guest
Also received the 'special' silicone grease tube, for the Spohn trailing arms / bushings.


Super Lube. Synthetic non-petroleum based and food safe. Spec'd for Poly/Delrin slides on JLG lifts. Looks and feels eerily similar to Energy Suspension's "gorilla snot" lube. NAPA stocks it.
 

rayra

Expedition Leader
Super Lube. Synthetic non-petroleum based and food safe. Spec'd for Poly/Delrin slides on JLG lifts. Looks and feels eerily similar to Energy Suspension's "gorilla snot" lube. NAPA stocks it.
Got some more via Amazon, amusingly part of the 'essential' category still. About the same price as Spohn offers it, but free ship Prime so sorry Spohn.
Have it sitting around right now. Will probably do my partial dismantle of the rear suspension linkages as part of my coil spring swap anyway, so do a little more and lube everything.
Still have the remnants of the tube I got with the lower (trailing) arm kit a couple yrs ago, loaded in an air-powered gun. The guns are cheap enough especially with a 20-25% coupon at Harbor Freight that I keep a couple guns, one with the silicone, one with multipurpose. And I'll probably buy a 3rd for high temp disc brake / bearing grease.


Probably wait a bit and do the rear bearings and seals after I get the Powerstop rear brake upgrade parts in. Will be removing the brakes etc anyway, so can just bolt in the new parts then. I changed the axle and transfer case fluids when I got the truck 5yrs / 25kmi ago. And need some more to do the rear again, since I'll be draining and opening it for the bearings. I've had the diff cover gasket laying around forever.


Today it was fabbing up some 1" spacer barrels and re-re-installing the rear tow hooks, with some longer grade-8 1/2" bolts and washers. Wanted the hooks to ride a little lower, more clearance up out of the U-channel of the rear hitch mounting frame that they are nestled in. Not really a great idea, I should instead be using a 1"x1" piece of bar stock with holes drilled thru it as a spacer block.
And then I had to go after the water accumulated in my cheap-assed new lower front signal fixtures. Their plastic is so thin the gaskets on the light bulb sockets don't seal them, driving in heavy rain or the heavy hosing I gave the front end degreasing mess the other day results in water inside the lenses and immediate degradation of the daytime-driving lamp sockets.

Got another set of intake gaskets inbound and an AC belt tensioner. Found its pulley to be badly loose even under tension, when I was messing about under the front end the other day.
So will probably replace it and pull the top end chase that oil leak later this week.

I hope to do some camper trailer towing in CA later in the Summer and some much bigger trips across the upper tier States in early Fall, if everything isn't shut back down by then. So I'm cranking it up on all the road-worthiness stuff that has been on my list for a long time, that could be ignored for shorter trips with just the vehicle itself. Running around with 5000#+ is a different matter altogether.
 
D

Deleted member 374434BT

Guest
Lol, I didn't even look that up on Spohn until now. Been using it for years on out lifts at work and everything else with polyurethane bushings. Works good on OEM Deere John Gator suspension bushings too.
 

rayra

Expedition Leader
Lol, I didn't even look that up on Spohn until now. Been using it for years on out lifts at work and everything else with polyurethane bushings. Works good on OEM Deere John Gator suspension bushings too.

I made the mistake of putting poly control arm bushings in my C-10 decades ago without proper silicone lube and lord how they squeaked for many years. I've been using silicone spray lube as much as I could. But only really starting keeping the Super lube on-hand when it was recommended with the Spohn trailing arms. It's good stuff. I'll be slathering it on rear components soon, got all kinds of squeaks back there every time the vehicle weight shifts on stopping and starting movement.


rayra

Expedition Leader
Today it was replacing the AC belt tensioner and while I had the skid plates off, shot some lube in the steering linkages. The idler arm in particular is impossible to get to without either taking the lower plate off or the from the top side, the air box.

Also got my new fel-pro intake manifold gaskets. So as far as I know I've got everything I need to take the intake manifold and galley cover plate off the engine and do my 'somewhere high' oil leak hunt and replace the galley cover gasket. I've got some fine oil crud on the top area of the engine well, so I think some crankcase pressure is blowing out somewhere under hard accel and is probably the source of both issues. And I don't thing the oil fill pipe is seated properly in the valve cover, either. So going to degrease it all and do it all, some day very soon.

And I've got an AC leak somewhere for sure. I put a can of R134 in there a couple weeks ago, got the system pressurized enough to activate, see that it runs, but didn't find a leak or put more R134 in it to top it off. And today the system pressure is again low enough that the pressure switch won't activate. So it's a UV dye can next time. Probably after the top end work.

But first and next, tomorrow midday it's installing the new coil springs and greasing up all the bushings in the rear suspension

oh and that damned CV boot is indeed leaking, fresh splatter / ooze after yesterday's 40mi trip. So I've dug out the stashed used CV I've been keeping since the new ones were installed. Was going to be an offroading spare (still might be). Will have to look and see what a replacement boot costs. Either way, that passenger CV axle is coming out again.
eta replacement boot is $20 and comes with a packet of grease to re-fill it, which is nice.
But what I might do is just temporarily re-install the used axle to stop the mess and buy some time for me to fix / replace the other's boot.
 

rayra

Expedition Leader
finished some post-sunset wrenching on the rear suspension. School went after noon today, temps already over 90F, then in the late aft when it cooled somewhat it got very windy. So I waited.
Pulled the spare wheel. Stripped out the sway bar, its bushings / mounts and the end links. Pulled the rear shocks. loosened the bolts on the upper control / trailing arms at the axle.
Tomorrow morning I chock the front wheels, jack it up and set jackstands at the rear frame forward of the lower trailing arms, jack up the rear axle at the diff. pull the rear wheels. Pull the panard / track bar. Dismount the lower control / trailing arms. Disconnect the upper arms. Pull the diff bolt that anchors the brake line T. Lower the axle fully and remove the rear coil springs. Measure and compare to new and determine which spacers to use, if any. Install the new springs and grease the hell out of everything as I re-install all of it.

All of this is intended to yield a firmer rear suspension, less body roll, less rear squat when towing and get rid of all the squeaking going on back there.

Leaving the rear bearings and seals, new diff oil and brake upgrades for a later evolution. Need to fix the grease leak in the front CV boot and the oil leak at the top of the motor, first.
 

rayra

Expedition Leader
I finally have all my leaks fixed....feels good when you get it done.

Find any high / rear on the motor? That's my next quest.

Finished the rear springs / suspension grease up today.

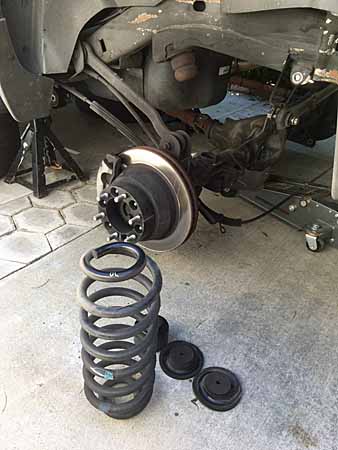
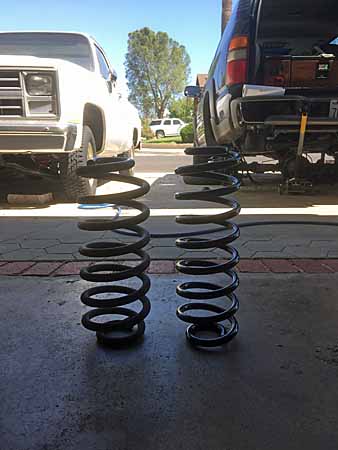
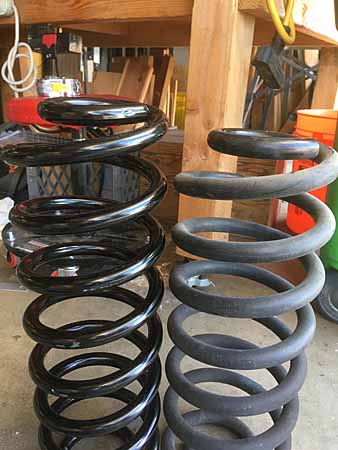
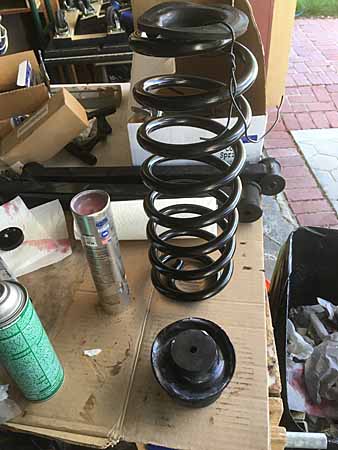
I didn't get started out there today until just before noon and it wound up being a long slog on a hot day. Pulled the rest of the suspension apart, all but the top control / trailing arms. With the vehicle rear braced about 8" in the air and the floor jack under the rear differential, it was easy to remove the rear wheels and disconnect almost everything and then lower the rear axle until the rear coil springs practically fell out. A little rocking of the axle was enough to get them free, even with the 2" spacers in the spring stack.

coilsprings02.jpg
coilsprings03.jpg
coilsprings04.jpg


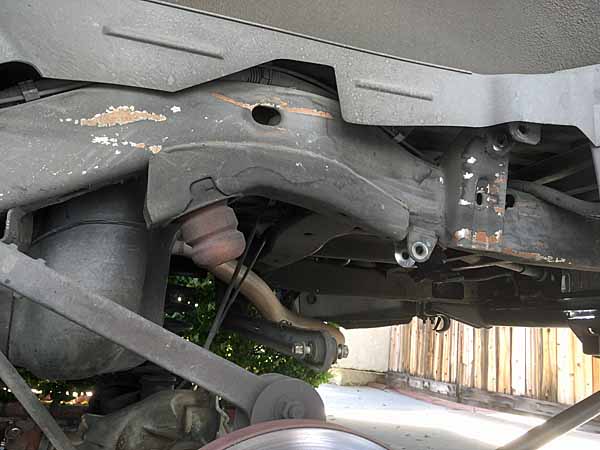
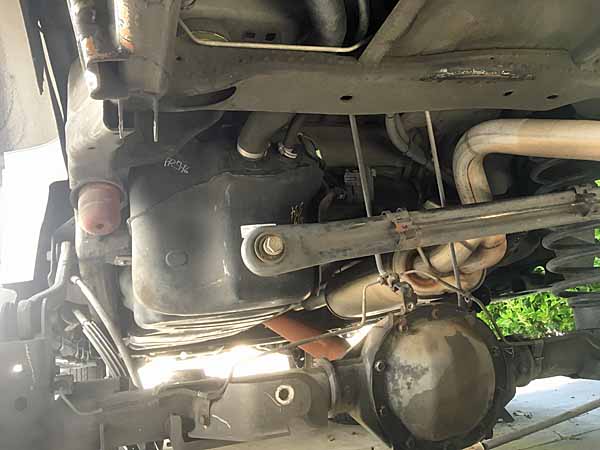
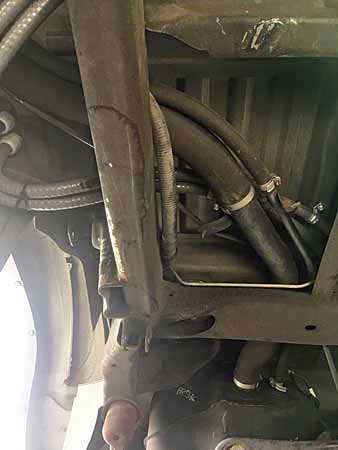
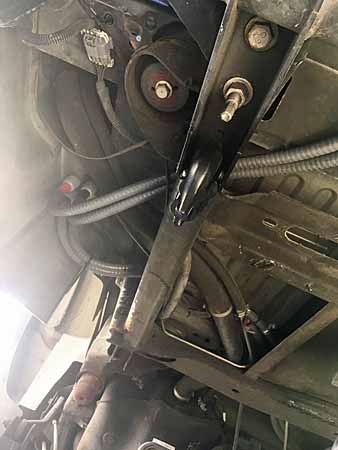
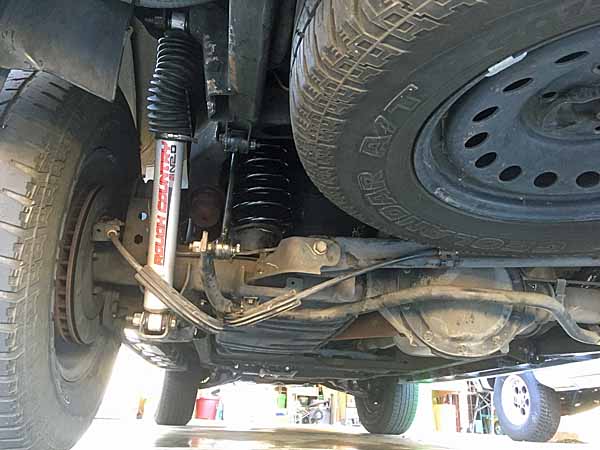
couple undercarriage shots showing long fuel filler path on these vehicles and the extra power cabling and conduits that I added.

coilsprings05.jpg
coilsprings06.jpg


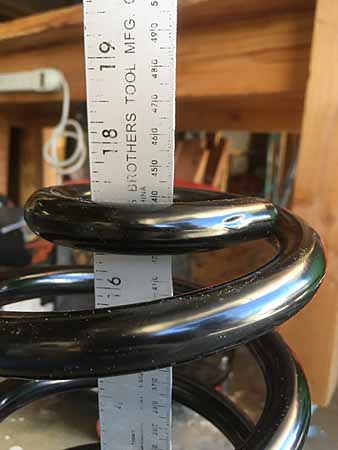
The new Moog HD 'stock' spring replacements stood about 5/8-3/4" taller uncompressed than the original springs with 145k mi on them. Ride height went up about 1/2" at the rear hubs. Now at 38-5/8" at the rear. I put the 2" steel spacers back in, as well as the poly spring seats top and bottom. I used the last of the silicone grease in the old tube to hand-grease all the suspension components as things were re-assembled. And the new tube in the air-powered greaser to really fill the bushing spaces on the Spohn lower rear trailing arm upgrades. Did that before tightening their mounting bolts, to allow the grease to ooze all over. Spohn should be happy to know I took the effort to swap sides when I reinstalled those so their brand sticker is now visible down near the rear brake discs / calipers (I installed them 'backwards' the first time, but they're symmetrical, doesn't really matter). I also finger-greased all the mount flanges before putting the various bushing-fitted parts back together. Ever flange and bushing on everything. Track bar, sway bar, sway bar end links, the lower arms, the shocks, all of it.
When it was all done all the suspension squeaks were gone. Should be quiet for a very long time.

coilsprings07.jpg
coilsprings08.jpg
coilsprings09.jpg
coilsprings10.jpg
coilsprings11.jpg


Next up is the passenger side CV axle temp swap and then pull the intake manifold and galley cover and snuff the oil leaks up high. And that will be the last of the stockpiled parts and it will be time to order the rear upgrade brakes (PowerStop Z23 drilled and slotted rotors and ceramic pads) and new rear axle bearings. And I'll be ready to drive it anywhere and tow some camper trailers.

 
Last edited:

ejwebb

Member
looking good, I run the Power stop brakes and I love them, I ordered a adjustable pan hard bar for the rear. I also run a two inch lift spacer and I run a 285/70-17 and had rubbing in the rear. I added 1.25 inch wheel spacers last week and no rub at all. Check to see if you get any rubbing at full stuff. Keep up the good work.
 

rayra

Expedition Leader
I've got 2" wheel spacers and a 2" coil spacer in the back. If I wind up rubbing anywhere it will probably be on the inner top edge of the fender well opening. But I'm still running stock size 265/70-17 and try to avoid going anywhere that I'll wind up with a wheel stuffed like that. That kind of wheelin' is decades behind me. And I don't have a passel of friends and their trucks to pull me out anymore.

Next up is swapping in that used CV axle Wed. morning and the motor intake and gaskets / oil leak hunt starting Fri morning
 

rayra

Expedition Leader
welp, got the CV axle swapped, the original is back in. Not liking what I found on the leaking one I took out. I changed both front axles about 14mos ago, <5k mi. I cannot recall the exact timing. But a couple weeks ago I took my Sub into a hole in the wall one man shop that I've used twice before to get my alignment done. This after a year+ during which I basically changed the entire front suspension and steering. Basically rebuilt the entire front end. Including new CV half axles. I got things close and left my oldest pair of tires on front, getting chewed up as everything was off.

So I tried to take it in during the holidays, guy was closed for the holidays. So several weeks ago I started doing a series of projects on the vehicle (documented here and elsewhere) and right about the same time as the alignment, I saw some grease cast in the passenger front wheel well. I cannot be sure if it was days before the alignment or days after. And also I would think if it was before, the alignment guy would have brought it to my attention. It's literally right where he was working. The squared-off wrench location on the inner tie rod shaft is right adjacent to this boot is in fact right in plane with this damage.

So I fortunately had retained one of the old CV shafts as a spare. They were functional when they were pulled at 140k mi. It was the wheel hubs that were worn the hell out. So I did both as part of the same evolution.
Thus this morning I could just pull the leaking CV and swap in the 'spare'. So the vehicle can be driven while I figure what to do. It will cost me almost as much for a replacement boot and the specialty tool needed to stretch and guide it over the CV knuckle, as it will to just buy another complete CV of the budget brand I'd bought. And doing the latter I won't have to mess with all that grease mess.

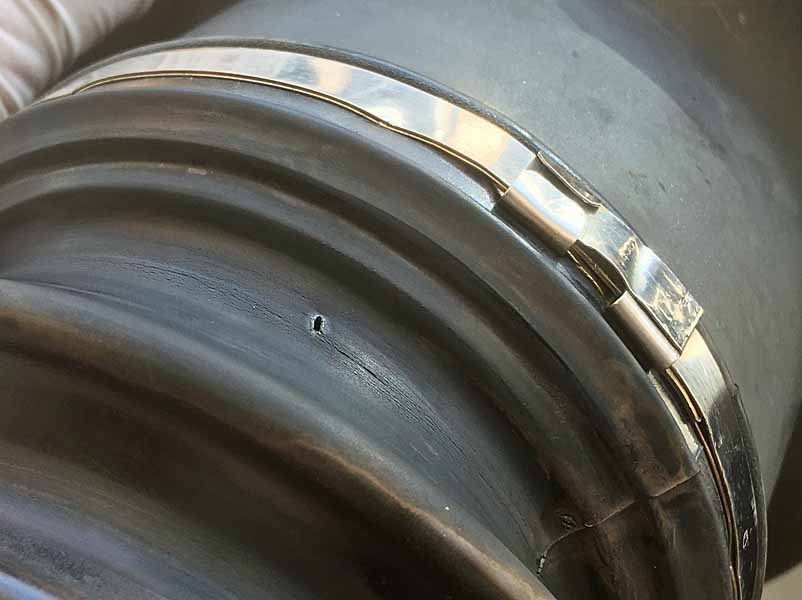
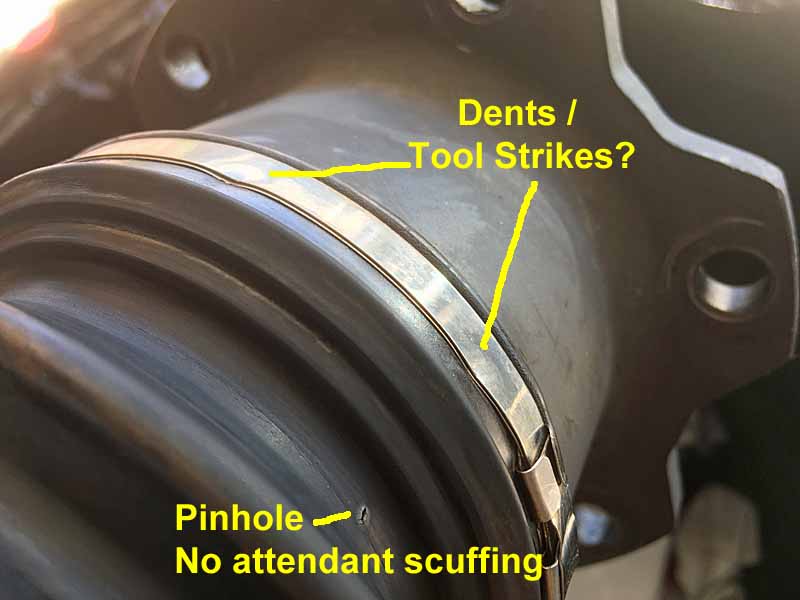
Here's a couple pics of the pulled part and the oddities and tool damage. The pin hole thru the bellows doesnt have any attendant scuffs or marks that ought to be there if it was a plier or open end wrench strike. I don't want to say 'looks like a deliberate puncture' but oops there I just said it. And the two dents on the band clamp do look like tool strikes.

CVbootleak04.jpg
CVbootleak05.jpg


Anyway, swapped and degreased, ready to roll. But not yet going anywhere. Friday morning the intake manifold comes off, the knock sensors come out, galley plate comes off, as I try to find and correct an oil leak in the high rear of the engine block. Got a new galley cover gasket, new intake manifold gaskets. Really ought to get a new screen or oil pressure sender, no better time to change it. And need some more RTV to re-seal the knock sensor boots.

And still have an AC leak to find and deal with.
 

rayra

Expedition Leader
Stage set for top end work tomorrow / saturday. I didn't have a good supply of hi temp RTV for putting things back together so I chose to forego the work for the day. Went to the market instead, then degreased and hosed the engine and drove it to the parts store for more degreaser and the RTV sealant. I'll hit it first thing early tomorrow and get it done.

In the meantime, I'm drafting up a bumper to bumper description of all the electrical mods and upgrades, to post here and elsewhere. Mostly to pull it all together in one post. I find I keep referring to past work and having trouble digging it up. Easier to put it together in one place and say 'look here'.

so this is sort of a draft in progress.

dual battery / simple solenoid. Choice / rationale of batteries.
1/0 cabling between batteries and to rear of vehicle / cargo area.
rear 'power module' and wealth of power sockets, plugs, inverters
addition of rooftop solar and integration to rear power module, backfeeding the under-hood Aux battery
additional power mods for Liftgate / cargo area lights, additional 12v sockets in various consoles, overhead console.
alternator upgrade, charge lead upgrade, re-arrangement of solenoid / Aux battery connections
final extensions of 1/0 cabling to front and rear Anderson power plugs for winch power, with jumper cable adaptation.

Future work
mod of existing factory power ports and added 12v receptacles to be powered by Aux rather than Factory / Starter battery
Addition of power switch / rheostat and diode to allow powering of rear AC vent fan to push air thru rear AC ductwork when vehicle is off.
Addition of power circuit from rear module fuse panel to power onboard air compressor.
Addition of second / fixed rooftop solar, forward of the removable folding panel kit, doubling solar generation
Future camper trailer plans, with its own standalone solar solution. Trailer power connected to vehicle Aux bus thru 200A bumper connector, for shared battery and solar capacity in trailer camping mode. And for recharging the trailer batteries while driving to next camp.


Need to write up all that with some general circuit diagrams and some detail pics of the major elements / installs. Will probably post the whole thing as a new topic in the 12v subforum and just link it here.
 

rayra

Expedition Leader
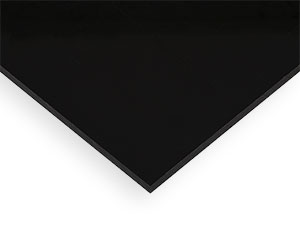
Also pretty sure the next and last edition of my roof deck is going to be 1/2" thick HDPE sheet in black, ~$200 +tx and I'll pick it up in person in L.A.
 

Forum statistics

Threads
188,334
Messages
2,905,584
Members
229,959
Latest member
bdpkauai
Top