Los Angeles -Class Attack Sub(urban), Build / Collected Werks topic - '02 k1500 Z71

rayra

Expedition Leader
Stirred out in the warm spring day to do a little vehicle work. I regretted it very much, later.

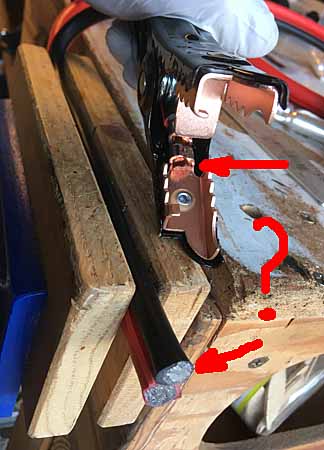
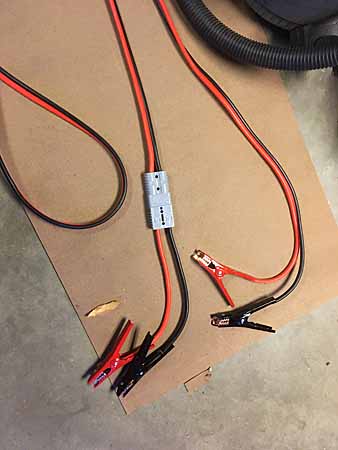
I laid out the recent Amazon 'Hecho en China' stuffs in the hot sun, let Mr Sun blast everything with IR and UV. HEre's a pic of the fresh jumper cables I'm going to cut apart near one end and install Anderson couplings on. The jaws are apparently copper-washed 100% Chinesium. I'll be drilling thru those jaws in an inconspicuous place to see what they are. Or I suppose I can just try sticking a magnet on them. The plating appearance also makes me suspect the fine strand 4AWG, which you can see clamped in the other end of the clamp jaws.
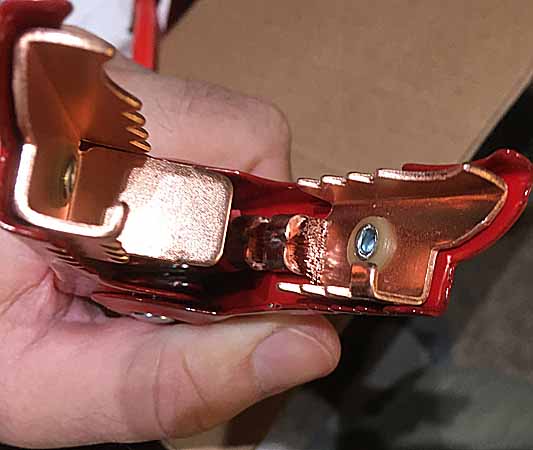
jumpercablesrework200329.jpg


Frankly even for China-Amazon their price is too good to be true copper, 20' set of 4AWG, 40' really, two runs. But they are still better than the crusty ancient set of falsely thick jumper cables I've been using for decades. Still a lot more 'conductor' whatever they actually are.
But I'm going to find out when I cut them apart about 1' from one end, sometime in the next couple days.


I also picked up a couple 2"x6"x10' and a 1/8" sheet of pressboard in preparation for my under-vehicle work, which I hope to commence this weekend. I have a couple 'heavy duty' jackstands, but I've cut the 2x6 into 1'L chunks to use as cribbing to gain even more height under the vehicle in the driveway, for the fuel tank removal. I'm pulling the rear driveshaft first for easier access while removing the fuel tank. And I'm taking advantage of that by replacing all four u-joints - will be pulling the front driveshaft too. I've got a lot of slack in the drivetrain. I changed all fluids when I got the vehicle over 5yrs ago, and I think it was the first time, at about 120k mi. They were all pretty cruddy. Haven't yet laid eyes on the gearing in either diff or transfer case, but I already know there's slack in there somewhere, can see / feel / hear it. So got u-joints about a year ago, they've been sitting around waiting to be installed.

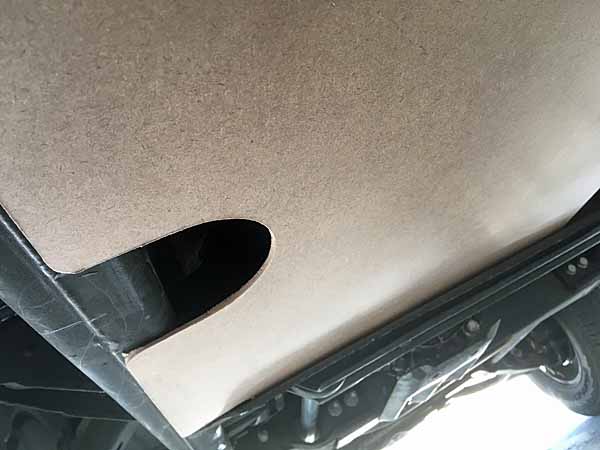
The other under-vehicle project is furthering the work on a protective metal plate for that huge expanse of plastic fuel tank. Been sketching sketchy ideas off and on for a couple years. This afternoon I was squirming under there to take some rough dimensions and start some prelim fitting of a pattern board, using that 1/8" pressboard as a stand-in for a future 3/16" aluminum plate.

Anything that hangs below the tank is immediately intruding into ground clearance. I've looked previously and there's no convenient way to raise the tank higher. No room in the Inn. Then I settled on the idea of rivnuts in the frame rail and also attaching the new skin to the stamped steel immediately forward of the tank.
That's front and partial one side of of the tank.

One of the big design problems is putting a plate on what is basically a zero-clearance space. The tank is pretty much flush with the bottom of the frame rails. The second major issue is that about 1/2 of the tank projects rearward beyond that pivot / attachment point for the rear axle control arm / trailing link. So the back half of a tank skin is unsupported.

So I've been coming up with various attachment ideas utilizing the saddle straps on the tank. The straps are recessed about 1/2" into the bottom of the tank, into molded indentations. So how to attach a plate to those? Been working various ideas for that. Still am, but I have at least three that I think will work. I'm going to be exploring all of those when I drop the tank and as I have the straps loosened, either before or after the fuel pump swap. The leading idea was to use a press break to put the needed bends in the plate so that it too is secured in part by the saddle straps, sandwiched between then and the tank itself. But there's some negatives in that, not least of which is bending the plate 8x.
The other idea is a series of brackets on the plate, like inverted stirrups, which the saddle straps pass thru. Some form of that will probably be the final solution, as that leaves the bottom of the plate smooth and uninterrupted by a couple crossign troughs - just the thing to snag on an obstacle.

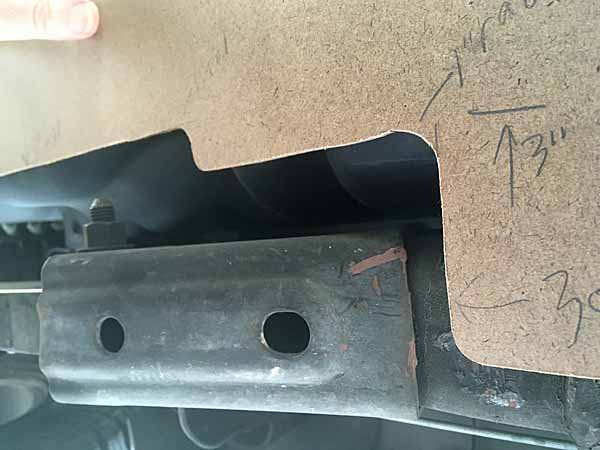
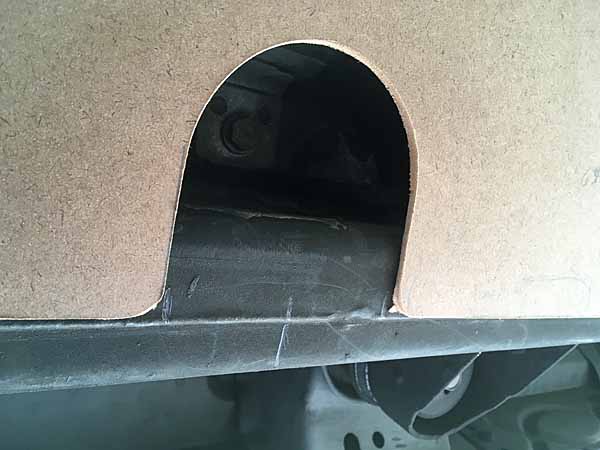
Anyway here's a couple shots of the fitting in progress. Trying to do whatever advance work I can before the weekend.
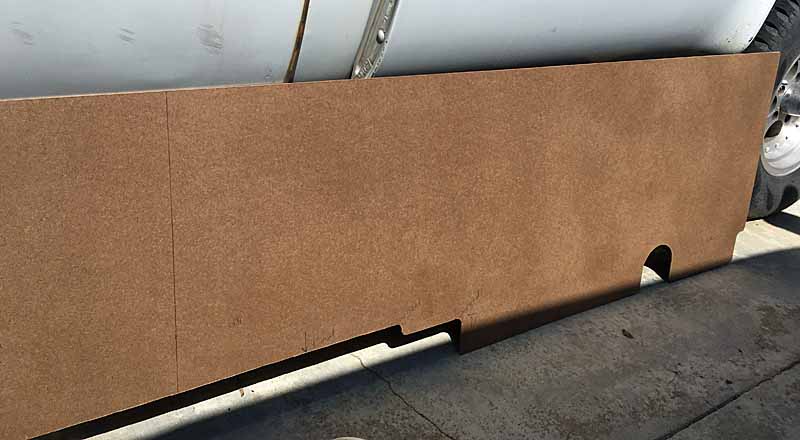
fueltankskin011-200401.jpg
fueltankskin012-200401.jpg
fueltankskin013-200401.jpg
fueltankskin014-200401.jpg


The rear end of the plate narrows (as does the the tank) for the rear suspension articulation. And I've put an access cutout for the forward tank strap bolt head. But IIRC that's the fixed end of the strap. Might forego that cutout altogether.

I also am considering some tabs or 1" square tubing as an inboard rail, that will either be held by the inboard saddle strap bolts or possible attach to the sheet metal protective plate on the inboard side of the tank, facing the driveshaft. Haven't looked at that enough.

The plate is roughly 63"L x 21" wide. My plan is getting a 4'x8' sheet of plate and having the tank plate(s) and the lower control arm plates I previously prototyped all cut at once. I've been learning SketchUp finally and will figure out how to translate that into the control code needed for an automated (plasma?) cutting bed.

And this is where the 'regret' comes in. Been sick with a 'head cold' that waxes and wanes. Been going on for weeks. It's never got below my palatte. It came on strong a few days ago and laid me low again. I'm taking Day/Nigh Cold/Flu meds now. I've had trouble also the last few years with BPPV - Benign paroxysmal positional vertigo - and lately the headcold / sinus congestion and inflammation has been setting that off. Seems to be always in my left ear canal. It's been triggering off an on again since I've been ill. And the decongestants and anti-inflammatories seem to aggravate things. So there I am getting up and down off the ground and wiggling under the Sub messing with this template, rapid head orientation changes, laying down and tilting my head 'up and back' relative to my body and WHAM, wild swooning and nausea. Once, twice, thrice back unto the breach my friends and the third time I barely got out from under the vehicle to puke alongside it. Done for the day, done for the afternoon. Have no idea how I'm going to accomplish all that work under the vehicle starting this weekend. I may very well not. Might do the front and rear end wiring that I can do mostly standing up, instead.
 

jgaz

Adventurer
Before you spend a ton of time trying to learn to translate your drawing to control code, be sure that your CNC
cutting vendor can/will accept it.

The drawing/ design program we used at work was CATIA. I had a VERY basic knowledge of this program. I never attempted to convert my drawing into something that could be used by our machine shop. That was way beyond my scope of understanding.

I had to coordinate with the machine shop foreman and a designer familiar with the machine language that was required by a specific machine tool. From what I understand that language varied depending on the age or model of the machine tool.

For my purposes, it was easier to do my drawing on an old school drafting board. I gave this drawing to a designer or an intern that was waaaay better at CATIA than I. After I had the CATIA file I then approached the machine shop with a work order and found out who to contact to convert that to machine language. YMMV

Sketch Up is a useful drawing program but may or may not let you make chips without a third party, no reflection on your skills.

I follow this thread and respect your work. I’ll be watching this with even more interest.
 

Overlandtowater

Well-known member
Ive been tooling around with the same idea on the skid, after two trips I now have gouges in the plastic tank. I also thought about the inverted stirrup over the straps but was afraid it would be a damage multiplier. I too have settled on riv-nuts to the frame and for the passenger side I think I will use a 3/16ths or possibly 1/4" strap that come down from the strap bolts and bends on each end to make a mounting point I can have a little flex and the tank can support some weight the only thing I'm concerned about is if a rock gets trapped between the skid and the tank and I sit the truck on the tank it may pop a hole. I may use a large piece of foam glued on top of the skid just to keep rocks from getting up there.
 

Overlandtowater

Well-known member
Sorry I had the strap placement back wards....I plan on drilling a whole a mounting a riv-nut or bolt where the straps lock in on the passenger side of the tank....its been a while and I don't have my drawing in front of me.
 
If you need a stud to mount something instead of a threaded hole, do a search for hurricane studs. They are a miniature version of a wheel stud. Just drill a hole and drive them in. I used them on the inside of my frame rails to mount padded clamps for the new stainless fuel lines I ran. If I remember correctly they were 1/4-28 threads and I used nylock nuts.
 

rayra

Expedition Leader
Unless I'm mistaken the main Sub frame rails are fully enclosed / boxed, except for a few access holes. They're basically two C-channels overlapped and fully / welded / seam sealed. You can see that join in the 2nd pic above with the big U-shaped cutout in the pressboard. Why I figured rivnuts. THose coupled with some button-head or pan-head screws would probably be the least-worse solution.

jgaz I figure to use Sketchup to do my full scale dimensional drawing and then figure out how to get that translated into machine controls. There's a farmer I follow in YouTube that does a lot of metalworking projects and a year or so he got a computer-controlled plasma cutting table and he works wonders with it.
Rainfall Projects
And he starts his process with Sketchup, so it's possible somehow. My hope is to work up a template to cut two tank plates, whatever attachment method for the saddle straps, the lower control arm plates / covers I previously prototyped in sheet metal, as well as a bunch of the fender top angled tie-down plates I showed very early on here and fill the sheet with everything I can fit within the 4'x8' sheet and get the whole mess cut up in one go, yielded a mess of parts for me to process and bend up.

dobbler, closed-cell foam insulation strip as a gap filler sounds like a good idea.
I intend to make the plate as close fitting as possible. But not touching, to alleviate the friction of grit between plate and tank bottom. THining about stiffening bends, maybe some slots, but that may let in as much junk as they keep out.

As for the passenger / driveshaft side, I've been considering 1"x1" tubing as an inboard edge support for the plate and rigging some sort of depending bracket down off the inboard saddle strap studs.

/
I'm officially on 'spring break' for the next 11 days, but right now the forecast says clear enough the next three days and then rain every day after. And my sickness and positional vertigo pretty much mean I'm not crawling under the vehicle during those three clear days. So I'm doing a few 'stand up' electrical things instead. Just got the cable terminal lug crimping tool today.
 

jgaz

Adventurer
Yes sir, I’m sure Sketchup will do just fine.
In my experience, all that’s needed by the programmer is a properly done, correctly dimension drawing, paper or otherwise. I only meant that I wouldn’t recommend trying to learn to write the machine language yourself unless you owned or used the machine regularly. Your time is better spent on other things IMO.

As for a properly done drawing, I’ll bet since you’re of the generation that still had drafting classes you already possesses that skill. Remember practicing lettering and arrowheads anyone?
 

rayra

Expedition Leader
I did actually, Drafting and Architecture in High School. My stylish block lettering has degraded mightily over the last 40yrs, but it's often my default handwriting.
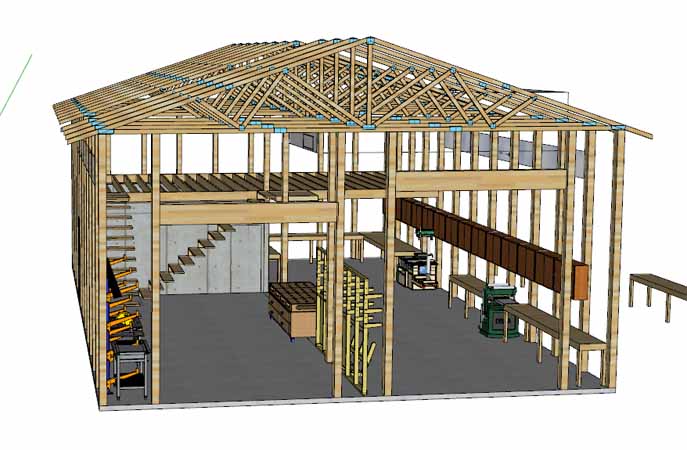
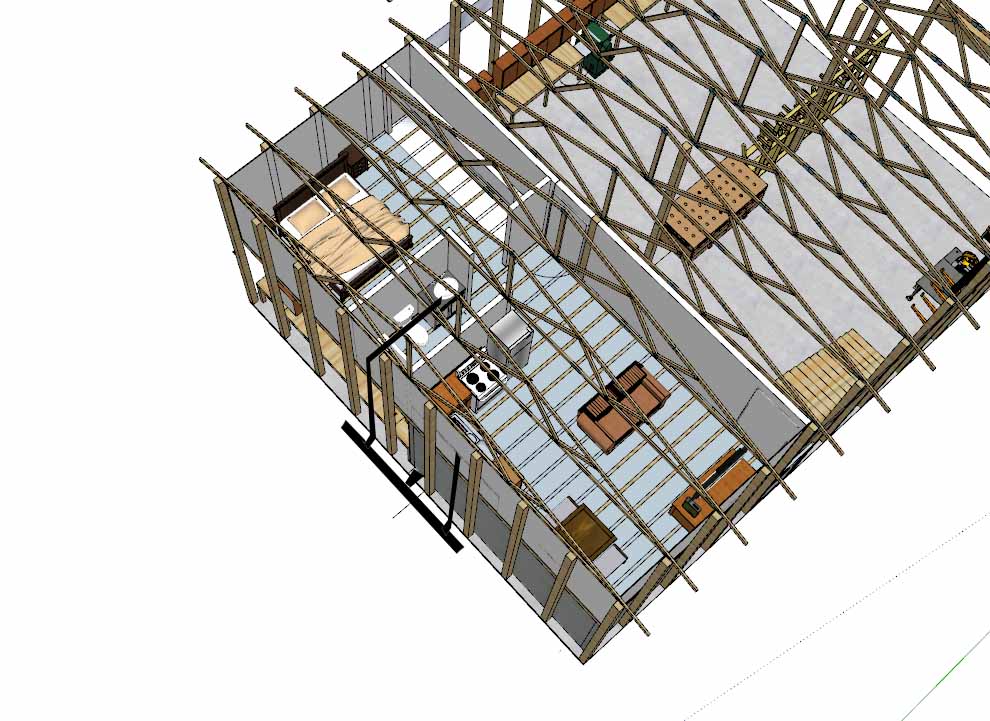
I've been threatening to get conversant with Sketchup for literally four years. I finally started messing with it in earnest just a few weeks ago, exploring various 'Barndominium' layouts I'm considering building when we finally get to TX. -

barndominium009.jpg
barndominium010water.jpg
promenade003.jpg
 
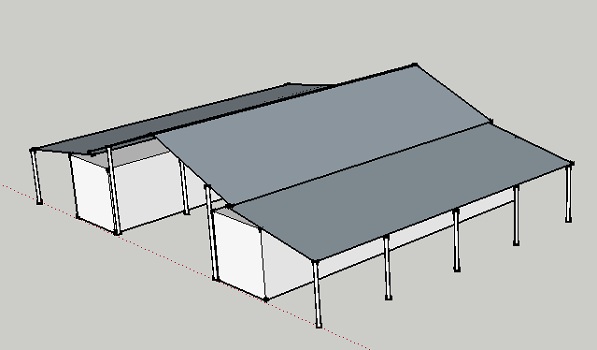
Wow!! Now I know who to ask to design my 40x60x14 shop when I get ready. Also going to take 2 45 foot hi-cube shipping containers spaced apart for tractor and implement storage between them with a roof over and walled in on both sides and one end. 3 sided pole barn
 

rayra

Expedition Leader
I've got design ideas for that too ;)

container barn.jpg


I've been doodling a few ideas along those lines for a few years. My hope is to get 10ac+ of semi-rural land in the eastern third of TX where it's wetter and there's actual soil. Got a lot of 'homesteading' and food-growing ideas I want to pursue. As well as a few money-making hobbies that need a better workshop environment. So want to combine things in a 'Barndominium' design. Too, for reasons of economy, I want to find a property that already has a house and full utilities already, the shabbier the house is the better. Plan to build the Barndo well to the rear of the existing house and tie into the utilities. Then at some future date drop the house and build a house that would better serve as a wedding venue / B&B / large family homestead. So the 600sq' loft apartment in the Barndo will serve for a couple years while the property is developed. Considering even refurbing bath, kitchen, bedroom in the purchased house, right after the barndo is built, and while all my long-term orchard, hedge and vineyard plantings mature 2-3yrs.
Big vegetable garden, small fruit and nut orchard and vineyard, lots of spiny perimeter hedgerow, lots of blackberry, some bee hives. pistol bay / horseshoe revetment in the back middle, road up the middle past the house and barndo serving as a 100yd range.
Bunch of other plans and revenue streams envisioned, near and long-term.
 
I purchased 20 acres this summer. Stole it actually. No one wanted because a timber company came in and harvested all the pulp wood trees. They knocked down and left laying everything else. That was 2 years ago. Now it has grown chest high covering all the hard wood that was left laying. For someone to come in with a dozer to clean it up runs about 2-2500 an acre. Plus I would be losing the ability to recover the hardwood for firewood. A good friend of mine who owns an industrial construction and crane company has offered to cut a driveway access and vehicle path so that I can access the back corners of the property.

The front 10 acres will be used for a fruit and nut orchard. I have contacted a local honey producer about placement of the their hives on the property. The back 10 will be for home and shop use that does include a ready made natural pond site. One side of my property is bordered by a creek that I can feed the pond from. A section will be fenced to house chicken coop and pygmy goats.

Here is a general layout. None of it to scale except black property line. Creek is on the left Red is driveway and temporary access. Blue is pond. Yellow is structures. Orange is fenced livestock lot. Placement is due to elevation changes. House is highest point and bottom left is lowest about 30 feet variance. To give an idea of size Frontage is 1000 feet and depth is 800 feet. It doesn't look bad till you try to walk it and have obstacles to climb over or around.
Generall Layout.jpg
 

rayra

Expedition Leader
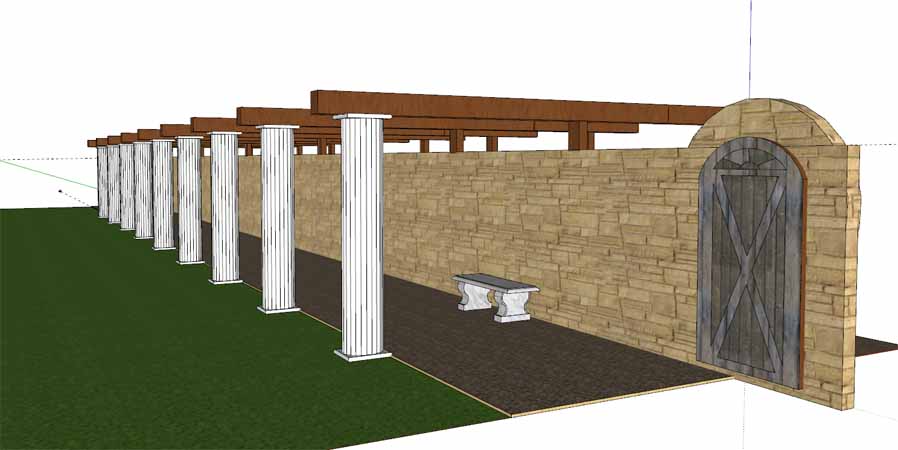
HIllbilly, that's very much the sort of thing I'm after, except with a house on it. Sounds like a wealth of resources to be harvested there. I'm looking somewhere in or near Smith county centered around Tyler. sandy-loam soil, pine scrub, 35-40" of rain / yr, same desire for a stream or creek access and desire for a pond. I figure 10ac+ with a bit of grazing in the 'front'. 10ac also being the minimum for ag exemption, iirc. Been reading a lot of stuff about permaculture design methods, swales, laying out property to make it as self-sustaining and efficient as possible. Going to take a lot of work to set it up, but hopefully not a terrible amount to sustain and maintain. Stagger the fruit and nut varieties so I'm not having to harvest everything at the same short timeframe. I'm trying to lay things out so there's a 'public' front quadrant that social gatherings can be held on, outdoor wedding venue sort of thing, with central buildings, interior hedges / gates separating front 'public' half from rear 'private' half for both access and view. flower garden between wedding area and deer-fenced vegetable garden, the walled inner yard between house proper and barndo being private. The sketchup wall I posted above would have the columns on the 'public' side and posts on the inner side, that being the west wall of the inner yard. Something photogenic for wedding parties. and in general. Flowering / grape vines up top.
Same idea for a house plan, akin to old Victorian designs with a public parlor and a private family room, the house would have big kitchen and dining and lounge space(s), covered wrap around porch, can serve as a catering base for an outdoor social function, with the rest of the house partitioned off behind locked hallway doors.
I'm very slowly shaping up the ideas in Sketchup. Been seeing it all in my head for years, trying to make the models and see how things really fit together and do some rough cost estimating.
I figure I can get on the property and do my long-term-growth plantings right away, get the property secured, get the post-frame barn shell up in a hurry, with all the plumbing and shelter provisions in place, and develop the rest as I go. In the 3-4yrs range should have everything growing in and some fruits, nuts, grapes, etc coming in. And have the gardens in full development and the public spaces groomed for use. And then I can really try to make something of the place.

If it doesnt' take me too many years to get there, I'll be able to do a great deal of the work myself, and hire specialized equipment operators or small crews for the things too big for me to do alone (or with the missus). I've been accumulating ideas and research for about 4-1/2yrs so far. And probably about that many out still from actually buying the property and building something.

Been watching a lot of Youtube vids from a lot of categories, learning about stuff and techniques, I have a huge amount of experience in all the trades, and mechanics, all sorts of fabrication. I think I can make a good go of it. On of the channels I watch regularly is RR Buildings, Kyle and his 2 man crew make excellent post-frame / pole-barn type buildings, I intend to use a lot of their methods and design elements.

Alrighty I have to quit lollygagging and get busy making 1/0 electrical cables for the Sub work. I've got about 48hrs before it's supposed to start raining again. ..
 

rayra

Expedition Leader
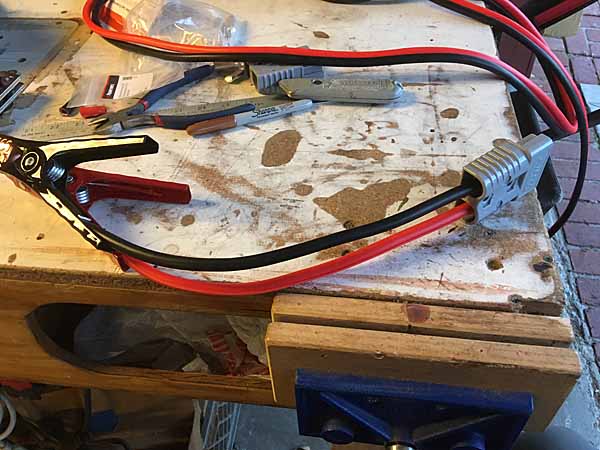
This evening I got some of the final cabling prep work done, and I modified my shiny new set of jumper cables.

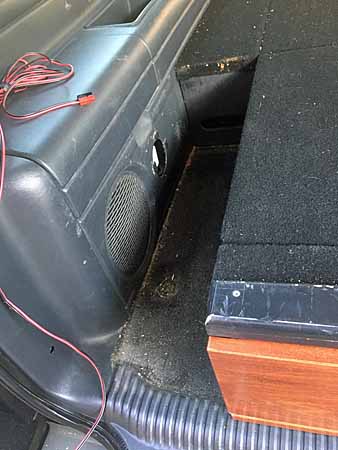
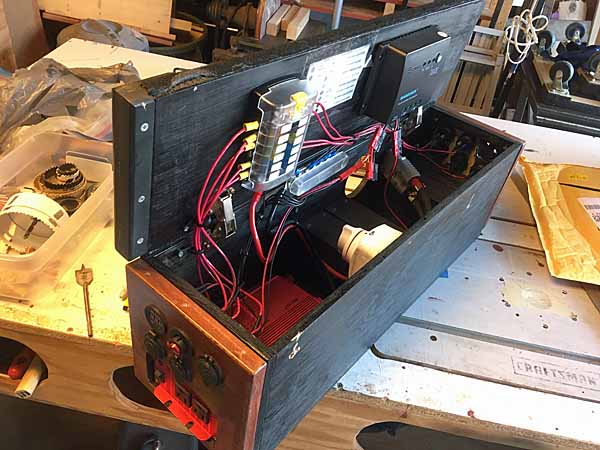
Pulling the 'power module' from the back is pretty easy. Pull a couple plugs from the rooftop solar and the heavy feed plug in the cargo sidewall, which runs to the Aux battery under the hood. Then a bolt thru the bottom to the factory floor tiedown location and a couple wood screws that tie it to the drawer module alongside, and out it comes. I'll be adding some short cables and another SB175 plug stacked alongside the existing one. One brings the power into the box and feeds all the inverters and adapters there, the new plug will take it back out to the rear bumper plug.

winch135 power module pulled.jpg
winch136 power module guts.jpg


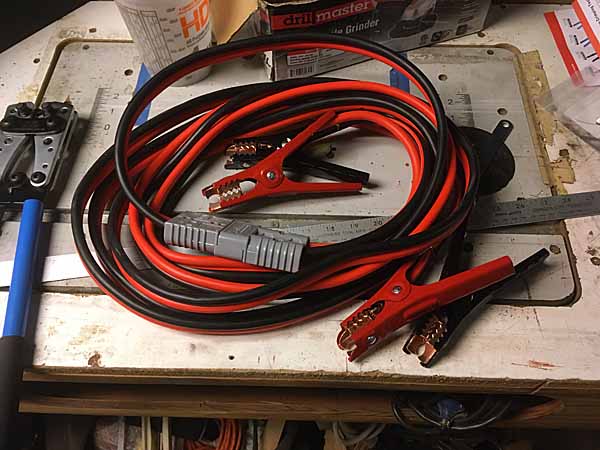
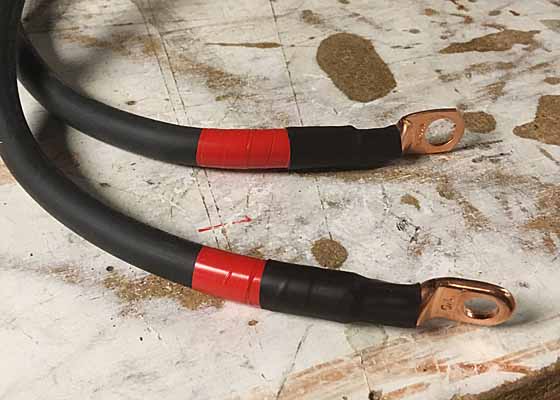
Then it was on to the new crimper and modifying my brand new jumper cables. I was originally going to mod my very old jumper cables but upon close inspection I discovered they at best at a 12awg wire in their very thick insulation. Very disappointing, sinc emy plan was to mod the cables to plug into the front and rear heavy plugs, wired with 1/0 cable. So decided I wanted at least a 4awg thick jumper cable set. And found a 20' set, a kit with some cheap gloves, wire brush, bag, copper fine strand, suspiciously cheap at $24. The raw cable alone at Home Depot would cost well more than that. But the reviews were numerous and good enough so I went for it - https://www.amazon.com/gp/product/B00F9RNIPI/ref=ppx_yo_dt_b_asin_title_o04_s00?ie=UTF8&psc=1

I got them, they looked ok. The jaws were suspicious, looked possibly plated. Fine strand copper at the base of the jaws. So I clamped them up where I wanted to cut the new new cables into two portions and hit them with a cutting disk and when I was done I though, well damn, I figured that. They looked like aluminum.

winch138 jumper cables.jpg


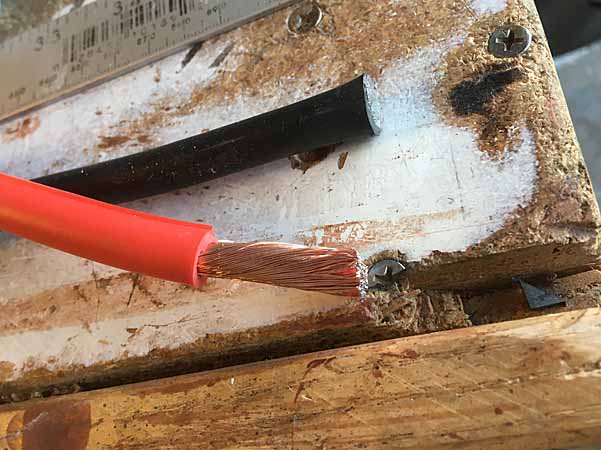
Anyway, I stripped the cut ends for crimping and then found fine strand copper wire after all. The appearance on the ends was metal transfer from the cutting wheel, last used to cut some aluminum strapping.

winch139 jumper cables.jpg


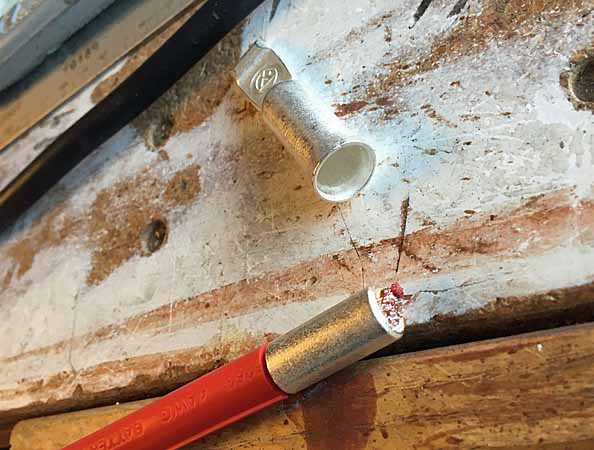
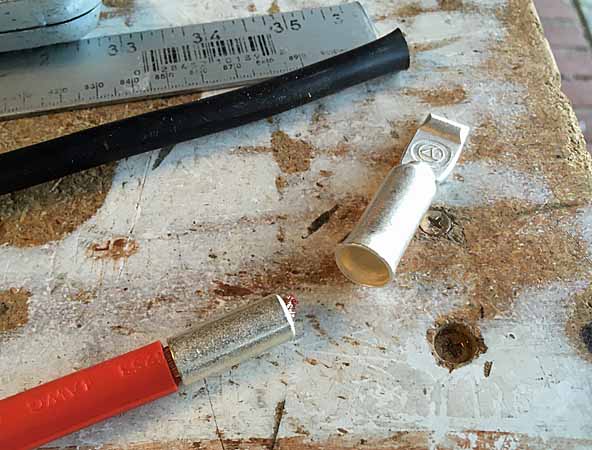
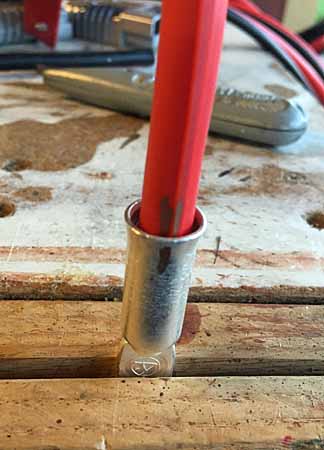
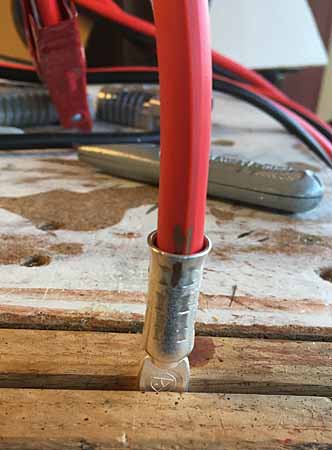
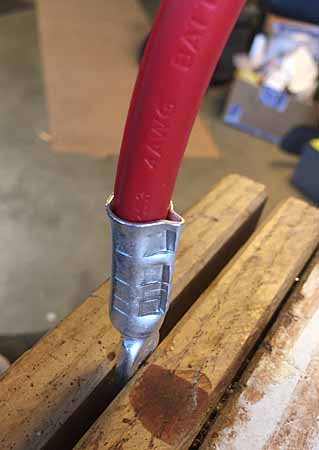
Once stripped I couldn't stuff the cut ends in the size-reducing bushings. The SB175 come with contacts sized for 1/0 cables. To use a smaller gauge with an SB175 you need the appropriate-size bushings. So I needed to trim the disc-cut ends, fanned them out and nipped the ends. Then I was able to stuff the wire in the bushings and get on with the stacking and crimping. I also figured out the proper orientation of the clamps, wire, and SB175 terminal lug - it matters which way it goes in the plug housing. So I put alignment marks on things before crimping.

winch140 jumper cables.jpg
winch141 jumper cables.jpg
winch142 jumper cables.jpg
winch143 jumper cables.jpg
winch144 jumper cables.jpg


Then I put the short end together and repeated the process on the much longer other portion

winch145 jumper cables.jpg
winch146 jumper cables.jpg
winch148 jumper cables.jpg


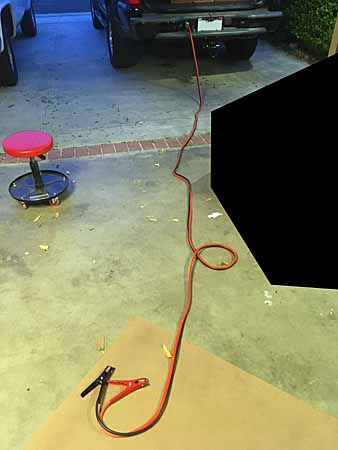
When it was done I plugged them in for the hell of it. 18.5' jumper cable reach off the back bumper. Either bumper.

winch147 jumper cables.jpg


I envisioned that about 4yrs ago. It's modeled after the 'slave cable' used on 24V military vehicles. They have a heavy cable set with plugs similar to a 7-pin trailer coupler, which can be used as a jumper cable between vehicles. Always liked the idea that you didn't have to screw around under the hood or get vehicles nose to nose for such things. So once I planned to have a carrier-mounted winch that could be powered at both ends, my mind immediately went to this jumper cable idea too. And now it is done. Or almost done. I'm going to poke around and release those lugs from the connects and fit the rubber boots I'd bought for the rear bumper and future winch connector. I'll get some more of those before I need them.

Tomorrow I'm going to try to put the rooftop solar bulkhead connector in the roof rack footer and run the wire thru a bolt hole in the roof and down the D pillar to the power module connection hole. and maybe even pull the driver side cargo trim and install the rear bumper power runs. I still haven't made the firewall mounting plate for the front plug rotary swtich. I'll try and fab that tomorrow night and attempt the front run installs before the rain comes Sunday.

I've been getting all of my Anderson connector materials and most of my round panel-mount connectors and inverters thru Powerwerx.com, their service has been very good and prompt.
 
Last edited:

rayra

Expedition Leader
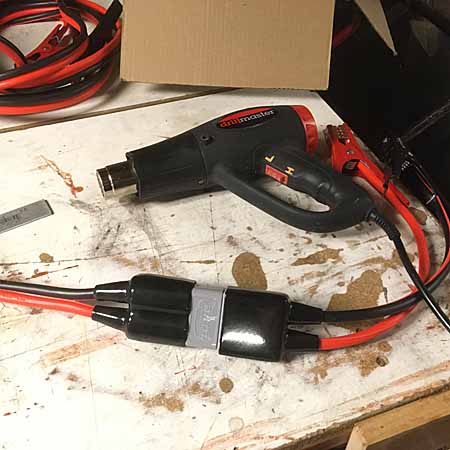
I just went ahead and put the boots on the jumper cable connectors. Only took a few minutes. Usually you snip the ends off the boot cones so they fit snug to the wires and you put the wires thru the boot before you terminate them and lock them into the connector housings. Oopsie. They're a pliant PVC sort of thing, so I dismantled the plugs - you have to poke a small tool in past the ends of the metal lugs to depress the piece of spring steel that locks them in place, freeing the cable/lug from the housing.
Anyway, got them loose, snipped the boots, and used a heat gun (hot water will do, too) to warm up the boots enough to jam them over the crimped terminal lugs - double-check orientation / polarity alignment, boot direction matters. One the boot is on, re-seat the cables / lugs and snug the boot down into place.

winch149 jumper cables.jpg


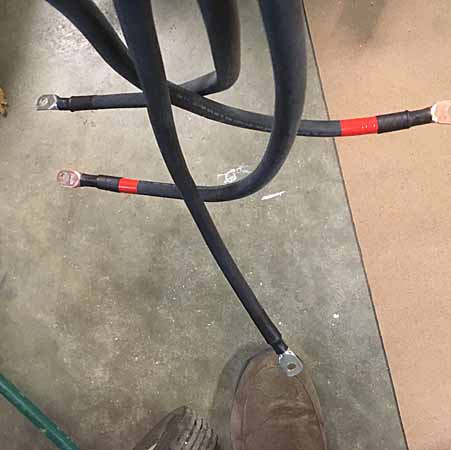
I also bought (2) 15' 1/0 weldign cables, each came with (10) plated 5/16" ring terminal lugs and about 3' of black shrinkfit. At fist glance the cables were about $3/ft, which is roughly market price. even my electrician neighbor really couldn't be that by much. But when you factor out the costs to order the other included pieces it really drives the per foot cost down around $2.40per, which is a good deal for 1/0 thin-strand copper welding cable.

As a pre-work prep I went ahead and crimped ring terminals on all four loose ends. I'll start those where those connections are needed (in the power module and from the rotary switch) and route the cable where I want it and cut the cables to the exact lengths. Then terminate the ends again and repeat. As long as I don't mix up which strands get which segments - with two separate 15' pieces this may be easy to screw up. I have 8 pieces of various lengths to cut. Do it wrong and I run out of cable. I measured and estimated 30-32'. I bought 30'. I have a 6-7' piece of 1/0 THNN cable which is stiff as hell and a pain to route. I'm going to try and use it up on one of the rear runs. And then not sweat the welding cable cuts as much.

winch150 front plug cable.jpg
winch151 front plug cable.jpg
 

Forum statistics

Threads
188,334
Messages
2,905,616
Members
229,959
Latest member
bdpkauai
Top