Los Angeles -Class Attack Sub(urban), Build / Collected Werks topic - '02 k1500 Z71

mizedog

Observer
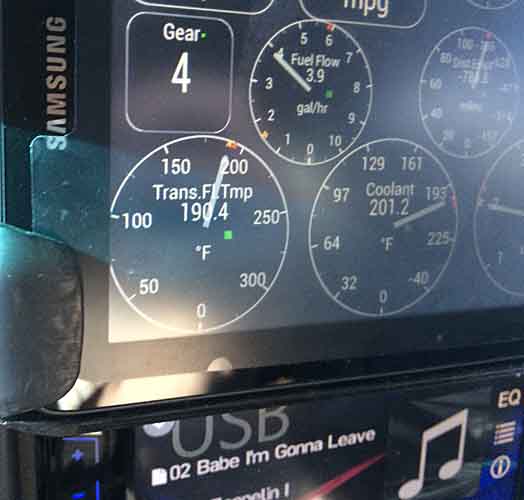
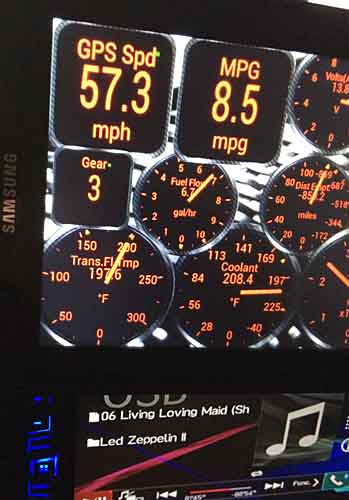
Driving across inland SoCal yesterday afternoon / evening, some moderately high temps and the reason I think I need the trans cooler upgrade. This was essentially unburdened. Just myself and a couple hundred pounds of tools and materials in the Sub. Outside temp 104F, relatively flat 215 fwy between Menifee and Perris, about 75mph

transcooler06.jpg


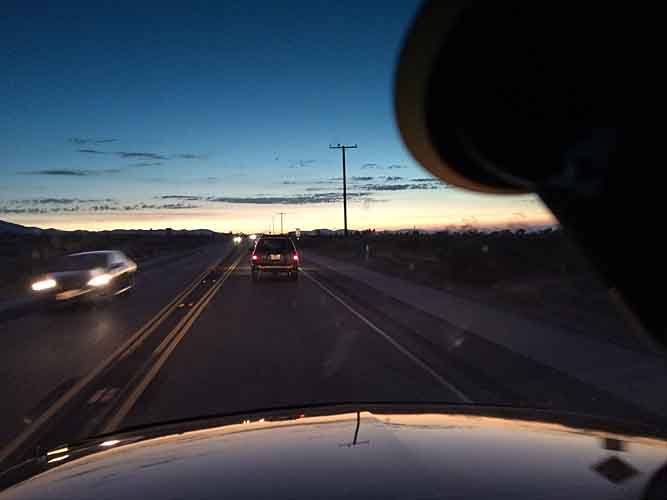
And then a couple hours later, after sunset, traversing from the 15 to the 138, in antelope valley, heading for Palmdale, after heading up part of the Conejo Grade.

transcooler07.jpg
transcooler08.jpg


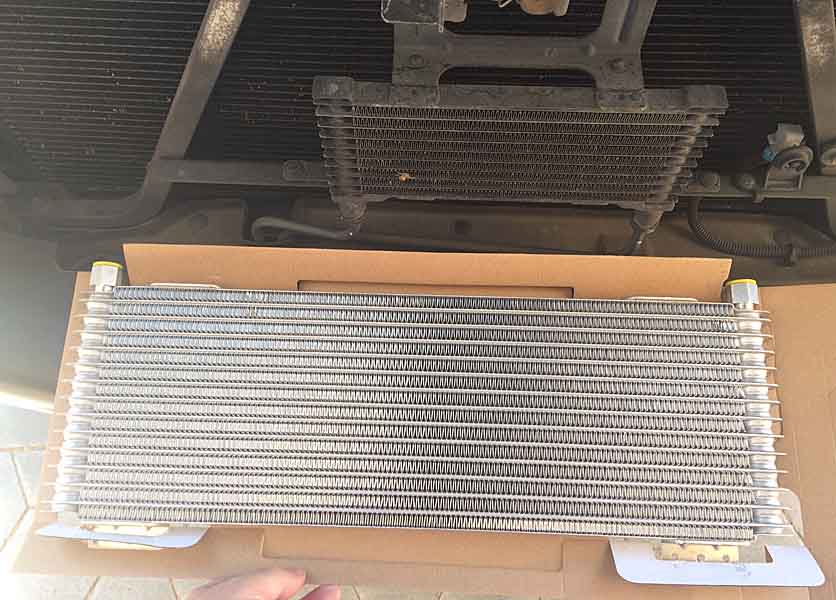
The new cooler ought to be good for something between 20-40F reduction in trans temp. Probably the lower end of that range, already having a factory external cooler, but it's small and positioned poorly. The new cooler is about 4x the area and I'll be striving to position it for best effect.
I know northbound 15 up the pass can be rough; even if you bailed at 138. Incidentally, Mormon Rocks, on the west side of the 15, and on the north side of the 138, has some deep sand to play in and could give your tranny a nice test.

Sent from my SAMSUNG-SM-N900A using Tapatalk
 

rayra

Expedition Leader
Mormon rocks was right about where I was stuck in a long line of single lane traffic when that latter red-tinged temp pic was snapped. I hadn't realized the cut-across from Victorville was re-opened, after being closed for so long. Previously I only went thru this little road when I was heading into Crestline on ski trips to Big Bear, many years ago. I've been making more frequent trips to Temecula and coming home thru 15 / 210 / monrovia / Azusa has been terrible on Sunday evenings. It's only 14mi farther for me to go all the way around, using the 138. Even with the recent road work after the big fire, that crappy stretch I was on Sunday night is STILL better than the westbound 210, that time of day.

--

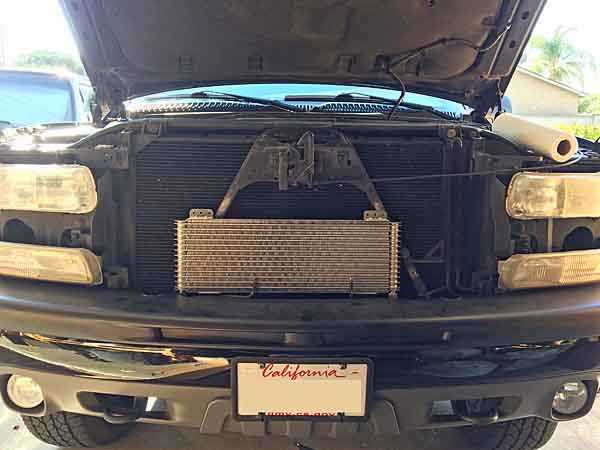
So I farted around with the trans cooler this morning, popped the shroud and grill off the Sub to examine the factory cooler setup and confirm the trans cooler piping sizes. Which is 3/8" and the cooler kit comes with 3/8" hose and 3 pairs of barbed connections, with different size threading. I THINK the factory cooler threaded connections will fit the new cooler.

The pump line from the trans enters the radiator tank at the lower 3/8" connection, exits at the upper 3/8" connection. And on this factory towing option vehicle, the upper line comes out of the radiator and loops down and under the radiator and rises up in front of the AC condensor to make a couple 90deg bends and connect to the passenger side of the factory cooler. Then the driver side of the cooler returns to the trans.

transcooler09.jpg


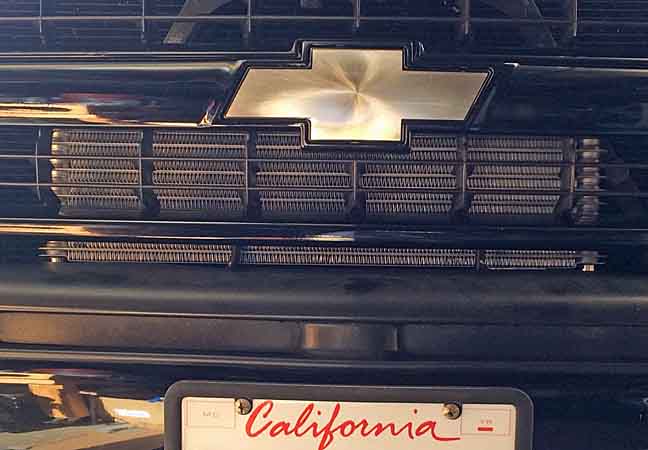
Here's the grill laying flat below the cooler, you can see the Chevy 'Bowtie' is as big as the cooler. And the upper half of the factory cooler sits fully behind it.


transcooler10.jpg


And compared with the new cooler, you can see how much larger the latter is.

transcooler11.jpg


The A-frame that supports the hood latch and the trans cooler is a natural mount for the larger cooler. Centering it though still puts the bowtie square in the middle of the new much larger cooler. And I'll have to flip the lower cross brace such that its L-angle structure faces back towards the AC condenser, there's plenty of room for that.

I'm intending to cut the incoming line near the bottom shroud and flip its cooler end 180deg, to the left. And use a 3/8" double-ended compression union to reconnect that line. And/but that will shift the new cooler far left. But that's OK by me. And I'll likely use a converter fitting with a female thread on one end and a 3/8" barb on the other, put that on the outbound factory fitting and use a kit-provided barb on that end of the cooler and use some of the provided rubber hose to bridge the distance. That will get it done with a minimum of fuss. My first searches of the big box stores fails to turn up a simple / direct combination of fittings for a direct connection, without being some Rube Goldbergian (Super Mario Bros, for you younger folk) plumbing mess. I SHOULD use metal line and compression fittings and avoid hose altogether. But there is factory hose in some segments already. So I don't think it matters much.

Also briefly considered filling the Bowtie with expanded metal mesh, so air goes straight thru it.
 

rayra

Expedition Leader
Bear, does the cooler you see span across to that skinny vertical (power steering) cooler, does it sit in front of that A-frame structure? The 'cooler' behind the A-frame is the AC condenser. It completely spans the area of the radiator proper, which is a couple inches behind it. If you've got a cooler structure that spans all across and in front of the A-frame structure, I'd love to know what it is.

I'm going to make a run at installing my new cooler in the morning. But the first thing I'm going to do is make sure the factory cooler couplings will bolt up to my new radiator, before I start cutting an lines or modifying anything. More to come.
 

Bear in NM

Adventurer
Rayra,

It is obvious I do not have a clue what is on my vehicle. I did not realize that the large cooler in front of the radiator is the AC condenser. I should have snapped to that when in the videos you linked the poster was referring to it as the "condenser". I'm a bone head. I appears that I do not have any kind of trans cooler in my rig, which did come with the tow package (2002).

Sorry for the confusion, but a big thanks for straightening me out. Looks like I may have to visit my rig now, with something. And I better bookmark the videos, think I am going to need them at some point.

Craig
 
How did the wife take the news you leaving with the maid? LOL
transcooler06.jpg
transcooler07.jpg

Now for a serious question what is the gauge to the right fuel consumption gauge that reads in miles? And is the MPG instant or average? If it is average can it be reset when you manage to fill your gas tank?
 

rayra

Expedition Leader
Mpg is instant, gauge to right is estimated remaining range iirc but it seems to not run on the instant data. It's a good substitute for the driver info available on the steering controls in the 03-06 models
 

Stryder106

Explorer
Bear - you have a transcooler - it's just inside of your radiator. The trans line goes into one port and out the other back into the trans. The issue is you water temp is going to be between 195-210 - which will then pull your trans temps up that high was well. I added an additional transcooler to my Av and it's mounted to the front of the AC condenser to the right side, the trans tubes run to that cooler only and I bypassed the in-radiator cooler. I am considering doing the full cluster swap to get transgauge, since my harness already is wired fir it,
 

jgaz

Adventurer
I SHOULD use metal line and compression fittings and avoid hose altogether. But there is factory hose in some segments already. So I don't think it matters much.

My comment may be too late to be of use but if you haven't tackled you cooler connections you might consider this.

I've installed about a dozen, added on, trans coolers on motor homes that are mounted on van chassis when I worked in a very small Chevrolet dealership. We had a NAPA store that catered to the local farmers hydraulic hose needs. On most of the installations I ordered custom hoses to go from the factory fittings to the added cooler. No barb fittings, no hose clamps, and enough flexibility to make the installation clean and quick. The cost wasn't bad, IIRC, and in my cases was somewhat offset by a reduced labor charge to the customer. However this was 30+ years ago. If I wasn't sure what fittings I needed I would go ask the guy making the hose.

Here in Phoenix there is a similar hose company next to where I buy my steel so I'm sure LA has something similar.
 

rayra

Expedition Leader
Got the trans cooler mounted and operational, but not satisfied with my installation. The supplied kit worked well. I was readily able ot use its parts to hang the cooler, after removing the factory cooler and its bracket. The bends and placement of the factory cooler lines and a factory baffle made my choice of install more difficult, as I chose to balk / chicken out at the idea of cutting my factory lines. GM uses a stab-in coupling with a wire retention clip. The threaded portion of this cooler coupling could not be removed by me (in a short period of time). Wasn't even sure it wasn't soldered into the cooler.

So I went with the kit-supplied hose barb fittings on my new cooler. And chose to use the existing flared ends of the 3/8" metal cooler lines, working the kit-supplied 3/8" ID rubber hose over that flare sufficiently to lock it down with supplied hose (ladder) clamps
I mounted the cooler low and to the passenger side, making a few new holes in the factory cooler support A-frame. I did not cut the factory metal line and flip it 180deg as originally intended. At this point I was figuring to mount the new cooler withOUT making any permanent mods to the factory installation. So to temporarily solve the L-R up-down alignment issues in the plumbing I just went with a loop of hose rising up from the factory tubes and circling clockwise and under and up onto the kit barbed fittings.

The mounting itself, I deliberately chose to mount the cooler as low as possible to get as much as possible in the direct wind and out from directly behind the bowtie and the major horizontal bar of the grill. The bottom of the fins is even with the very top of the bumper. I then chose to shift it towards the passenger side and anchored the upper right cooler tab (as you look at the front) directly to the factory cooler A-frame support, drilling a new hole to do so. This served as the fixed anchor point so the other 3 corners could be mounted using the supplied flat straps without the cooler being free to scissor around. I then used the supplied straps to anchor the other three cooler tabs to various places on the A-frame's square tubing. I could not find a good combination that would let me re-use factory threaded holes for these mountings. But the A-frame tubing is aluminum and easy to work with a step-drill.
I will later re-work this mounting arrangement and use aluminum long horizontal flat straps, bolted to the A-frame, with the cooler mounted to those flat straps. All for better vertical rigidity / durability. I'm also considering some rubber vibration-isolation washer.


There's a small sensor facing forward on the factory trans cooler frame. No idea what it was but I got the part number off it and looked it up, it is the outside / ambient air temp sensor.
I've temporarily mounted it to the new cooler with some heavy duty double sided tape. That won't last long, just for the test drive. I had drilled some holes in the side face of the A-frame to relocate the sensor but only after drilling did I notice there was insufficient clearance behind at the condenser.
When I re-work the mounting bracket I will have part projecting to put this sensor near the same original placement.

Short test drive for a cheeseburger and a chocolate Frosty, under surface traffic loads, Trans ~140F, eng coolant temp 208F, ambient temp 110F. No leaks as of yet.
I put in about 8-10oz of trans fluid, without knowing what my trans fluid level was. After the food run, properly checking trans fluid level I was right on the top of the crosshatched zone. So no appreciable fluid level change / capacity with this cooler swap.

So it's back together right now, good enough for running errands around town. I want to make some improvements to the mounting and plumbing before I drive it hard anywhere. Or beat things up offroad.
transcooler12.jpg
transcooler13.jpg
transcooler14.jpg
transcooler15.jpg
transcooler16.jpg
transcooler17.jpg
transcooler18.jpg
transcooler19.jpg
transcooler20.jpg
 
Is the part number for outside air temp that number that is molded in the top of it? You must have a rear view mirror with compass and temp display. That is usually what that sensor is for.
 

rayra

Expedition Leader
Still holding up ok, no leaks or issues. Taking it for a highway jaunt later this evening. And / but we just has a big thundershower blow thru, took a good 10F off our temps, it's about 95F out there right now.


eta
running about 140F on a good highway run in the evening heat. At a guesstimate I'd say it's running about 20F lower than the factory cooler setup.

Tempted to flog it up the Grapevine in daytime heat, up to Vista del Lago to try and get some pictures of the Canadian fire Scooper planes doing their thing on the reservoir, but it's Labor Day weekend and f that idea. Place will be chock full of upset drunk boaters.
 
Last edited:

rayra

Expedition Leader
Started messing wtih the folding solar panel kit.
http://forum.expeditionportal.com/t...-seeking-inputs-on-my-inputs-and-ouputs/page4
http://forum.expeditionportal.com/t...-connection-as-a-solar-panel-input-connection


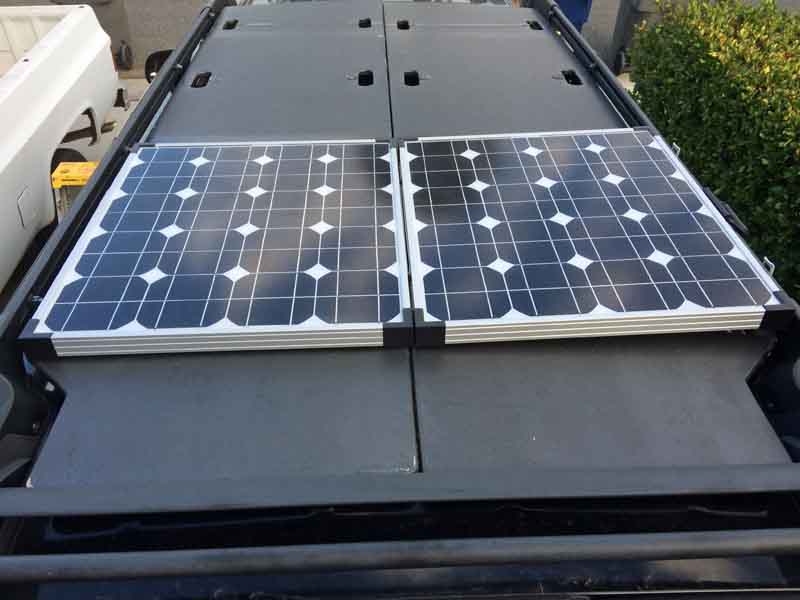
Looks like the panel will just fit across the rear of my roof deck, between the rack side rails. Their spacing is 44" and the open panel is 42-7/8" + the latch hardware. So I'm going to go for a transverse mounting, as far to the rear as I can get. I'm going to have a sort of C-channel front rail that the leading edge of the panel will socket into. The trailing / rear edge of the panel will be locked down with a hinged piece and I'm going to try and use the flush style hood locks as the means of locking the panel in place.
I'll run some wire / ports thru the bulky footings of the Z-71 rack, plenty of room and down thru the C- or D-pillar space and on into a coupling in my Cargo area power module. That way I can get some daily trickle power to keep my Aux system topped up.
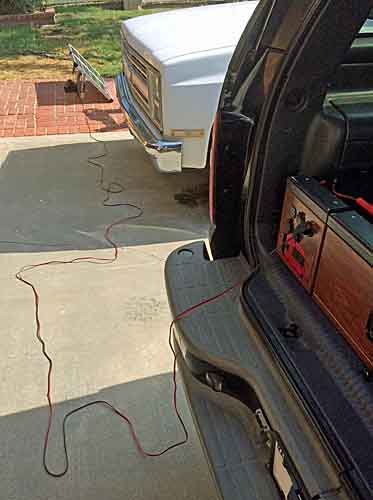
Unlocking the panel will let me angle it on the roof to best effect. And the kit is meant for ground deployment as well, coming with a 30' lead. Which I've already modified with an Andersen Power Port (APP) coupling so I can swap the connection ends of the lead to clamps or a 12v power receptacle. And plug the APP directly into my power module.

solarpanelmount06.jpg


I'm also investigating the idea of using a flatscreen mounting armature with a pivoting head. Make that part of the roof deck solar panel mount, so the panel can be unlocked / released and the panel can be lifted and pivoted for best power gathering.
 

Forum statistics

Threads
188,151
Messages
2,902,835
Members
229,582
Latest member
JSKepler
Top