Los Angeles -Class Attack Sub(urban), Build / Collected Werks topic - '02 k1500 Z71

rayra

Expedition Leader
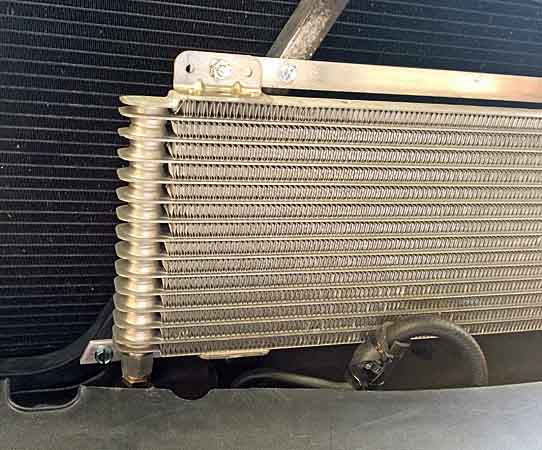
Reworked the trans cooler mounting brackets. Went with transverse flat aluminum straps on the A-frame bracket, extending to the left for the cooler mounting tabs on that end. The top right corner remains a direct mounting to the A-frame. This flat strap layout also works out nice in that the offsets of the cooler mounting tabs and the vehicle A-frame (hood latch support) mean that the different bolts and screws don't overlap each other.
Went ahead and painted it, too. Didn't really want to, but it was just too obvious. Still haven't reworked the connection hoses.

transcooler22.jpg
transcooler23.jpg
transcooler24.jpg
transcooler25.jpg


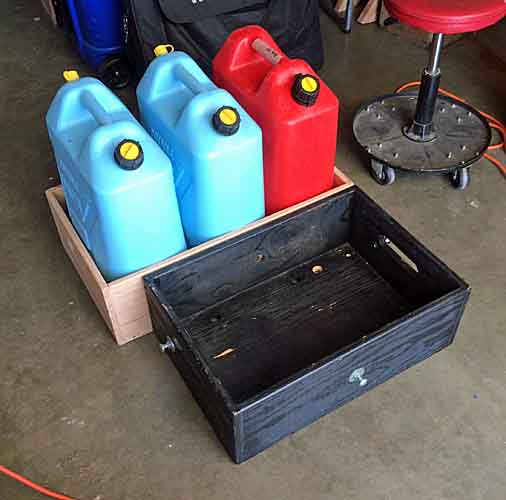
Yesterday I also built a revised fuel jug carrier for the fatter-bottomed Scepter 'civilian' 20L jugs
http://forum.expeditionportal.com/t...C-MFC-stowage-box-build?p=2358452#post2358452

jerryboxmk2-01.jpg


Next up is the revised roof rack deck, followed by the solar panel roof mount. Then the revision / enlargement of my awning panels. MkII all the things. Then maybe after that Santa will bring me an Aries Grill Guard and a wire-feed welding rig.
 

rayra

Expedition Leader
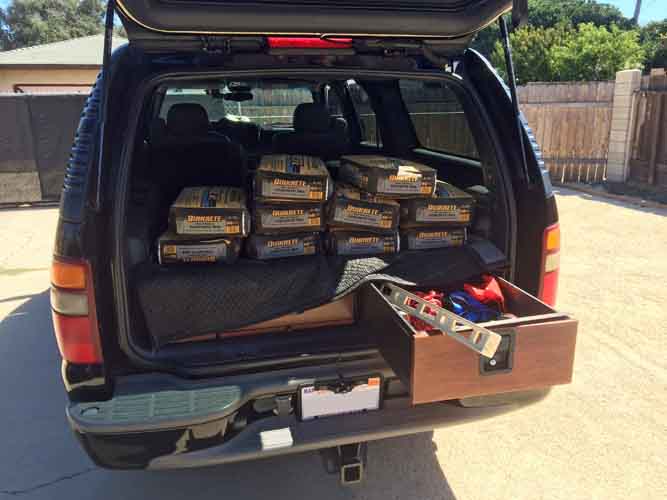
Did a small home improvement project for the nephew this weekend. Had 600# of bagged concrete in the far back. The drawer platform worked fine, took it like a champ. And I noticed very little droop on the stock / original rear coils with added 2" spacers. Tongue weight rating is 500#. So I'd call this a good example of the vehicle stance with a loaded trailer.

suspensionloaded600pounds.jpg
storagebuild155.jpg


Made a nice little road trip out of it. The weather on the Santa Barbara end of the CA central coast was fantastic this weekend. Warm sun, cool breezes, calm sea. Good views of the Channel Islands (30mi+) and all the shuttered drilling platforms, too.


subgaviotabeach.jpg
 
Last edited:

rayra

Expedition Leader
oh and words on the trans cooler performance. Working great. Even with the radiator in-tank cooler still in the loop, I'm getting an average 25F reduction in operating temps. I was averaging around 165F before in easy driving both around town and on the freeway. I'm getting a good 140F now. And anywhere below 65F ambient, the trans is running right about 40F over ambient. Above 65F ambient that starts to diverge into a bigger and increasing spread. Running down the coast highway this afternoon at 82F ambient I was running about 145F. But running in the mountains in the 50s(F) and the trans doesn't break 100F, even with the engine clocking 198F
 
Keeping the engine to as close to 190 degrees is key to effiency and longevity on this engine base. If you see increased engine temps in hotter weather take the internal radiator transcooler out of the circuit. Doing so reduces heat load on radiator. Your aftermarket cooler is more than large enough to be used standalone. One item I going to research is oil temps and if there is any benefit to keeping it at the 180-190 degree mark. The thought is to measure temp in the oil sump. Using a thermostat on the oil cooler will prove key in faster warm ups in winter.
 

rayra

Expedition Leader
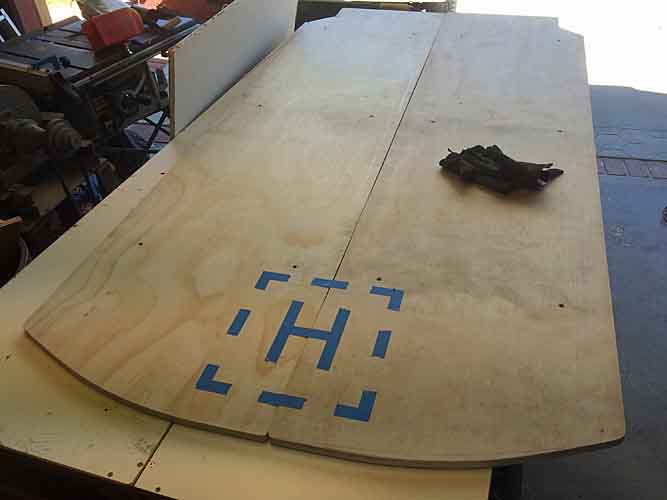
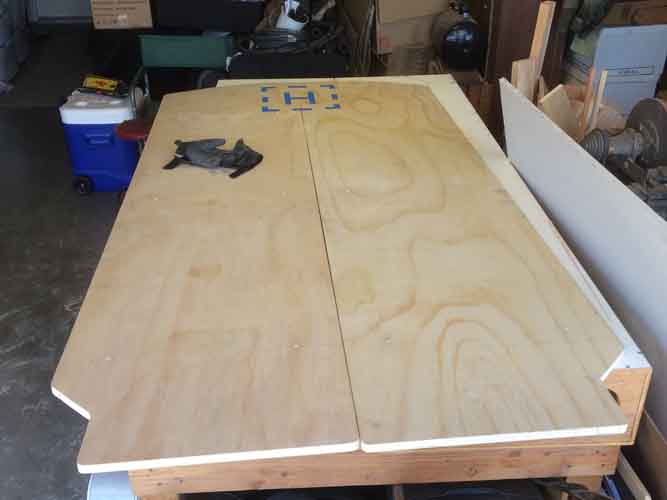
Today I started construction of the MkII Roof Deck. Still going with the 2 longitudinal halves, 'back boards', but for now with no handhold holes.
I am considering slightly notching their edges, so ropes or flat webbing could be tied around the boards and cinched to form handholds. The notches would keep the ropes / straps from slipping along the board.
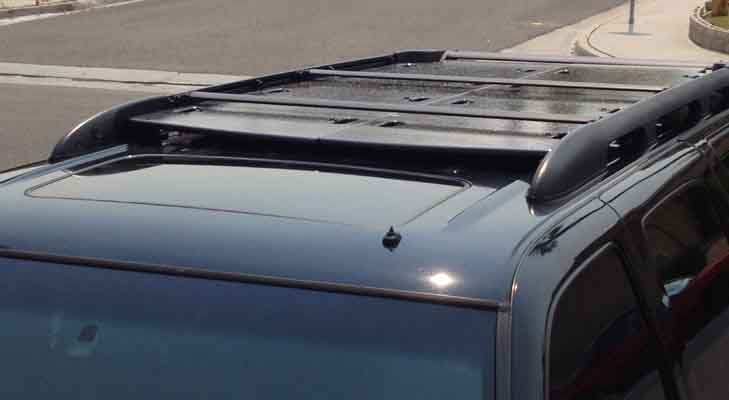
I've chopped 1-1/4" off the tail end to preclude any interference with the factory Z71 rack's rear airfoil.
I've also extended the nose area quite a bit. +3" forward on the outer edges, right up to where the inner side of the rack side rail nose caps cruve inward. And +5" forward on the centerline. And changed the curvature of the front end to broaden / blunt the curve, put more material forward of the roof luggage rail ends, so I can better block the front gap with pipe foam insulation.
I also put a more pronounced slope on the leading edge.
I've also elected to go from 4 cross braces to 3, to change the layout to work better with my intended rooftop solar panel install. I'm fabricating new more rigid cross braces out of 3/4" square tubing.

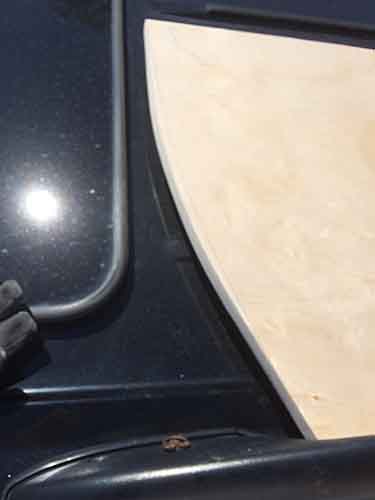
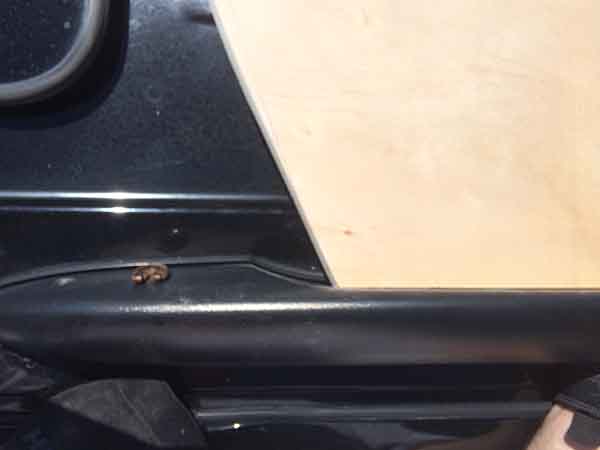
Couple early fitment checks on the first piece. These are both the driver side front end. The front of the deck will now be less than 2" from the sunroof opening.

roofdeckmk2-01.jpg
roofdeckmk2-02.jpg


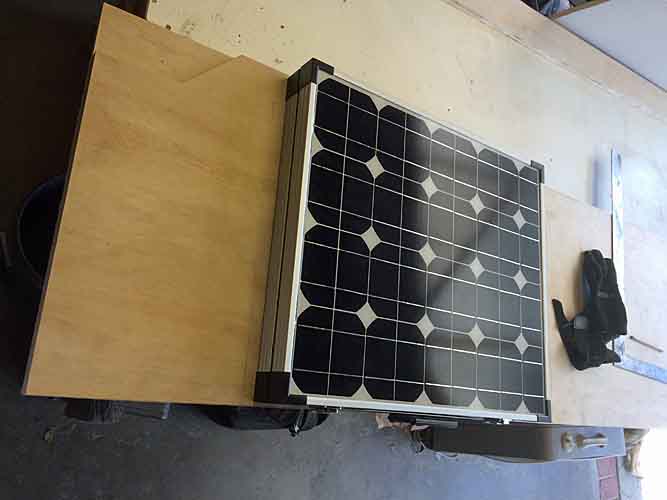
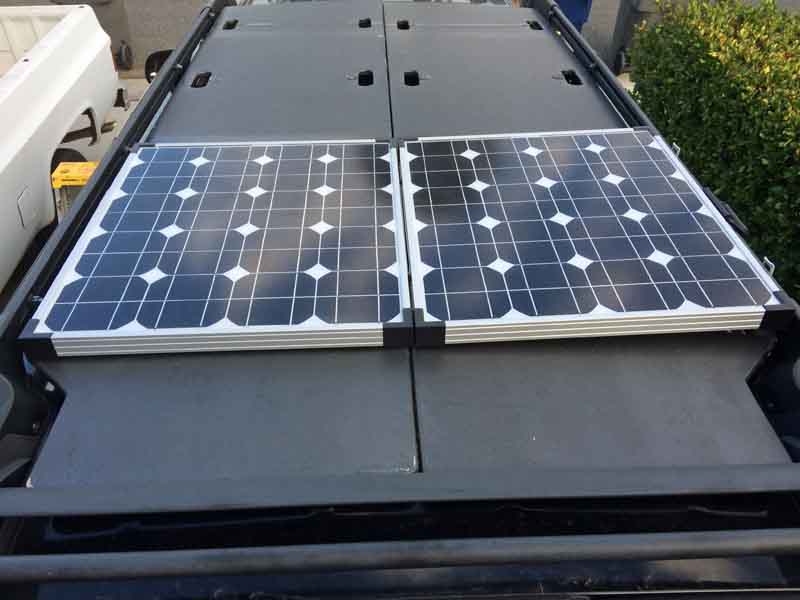
Here's a sneak peek of a coming attraction

roofdeckmk2-03.jpg


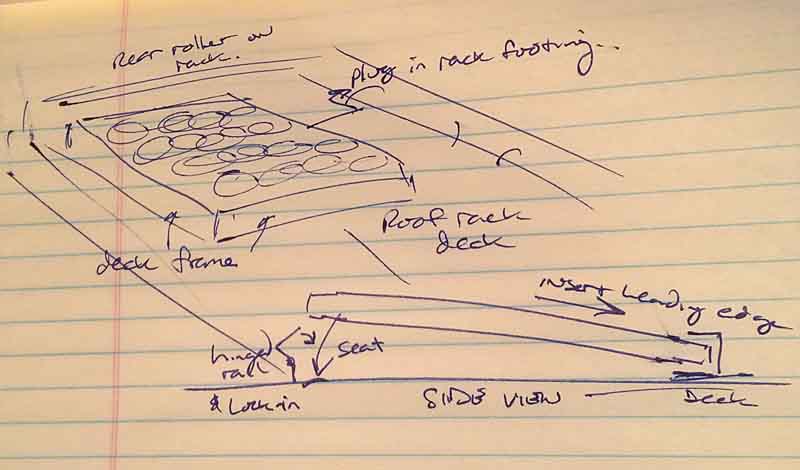
The folding solar panel kit JUST fits the width of the deck / roof rack inner dimension. As it it was designed to do so. I intend to install a sort of picture frame mounting bracket, with a C-channel to trap the leading edge of the panel. And that C will have a sloped fairing to the front. The rear will be a sort of split C, with a piano hinge. You insert the panel into the front C-channel, set the trailing edge down and swing the rear bracket shut and use a pair of flush hood locks to latch the panel into place. Rubber gasketing to make a rattle-proof grip on the panel kit.

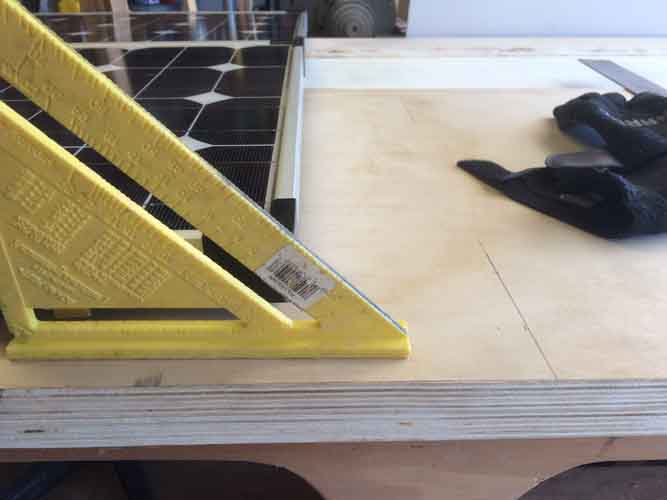
roofdeckmk2-04.jpg
roofdeckmk2-05.jpg


The pencil mark on the preceding pic is where the central brace will be. Ensuring the solar panel mounting frame will clear it.

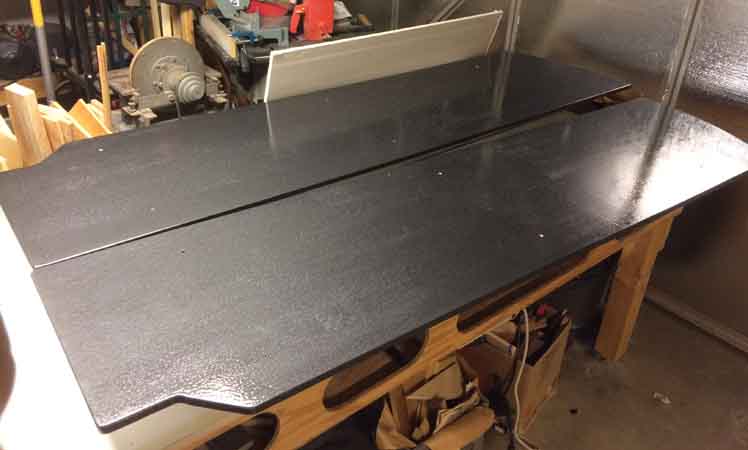
I'm going with the same 'hammered finish black'. It held up very well in Socal heat and brutal sun. That is until I started going to a drive thru car wash. It lost it's gloss after 4-5 washes.

Hopefully the solid design and blocking the front end will eliminate the drone / moan at my preferred cruising speed.

roofdeckmk2-06.jpg


Top side has been primed, priming the underside tonight, hoping to start paint tomorrow, after shaping the tubular steel cross braces.


eta
here's the original topic on the roof rack deck build -
http://forum.expeditionportal.com/threads/156783-Building-a-roof-rack-deck-on-a-GMT800-Suburban-Z-71

roofrack51.jpg
 

rayra

Expedition Leader
roofdeckmk2-07.jpg


I've rushed the painting stage on this, as I have a bunch of home renovation projects stacked up thru the Fall, commencing soon. But I still haven't fabricated the new square tube steel cross braces / mounting brackets for the deck. And that painting table is also my fabrication space. Should have done the brackets first. Stuck watching paint dry. I'll get them out in the sun tomorrow.
 

Bear in NM

Adventurer
Looking forward to seeing the completed rack, with the solar. Looking good so far. And yes, watching paint or varnish dry is not much fun.

Craig
 

rayra

Expedition Leader
That 'watching paint dry' is kind of key with this 'Hammered Finish' paint. You have to put it on a little thick - and it is a very thick and gooey paint, to begin with - for it to develop the intended finish. Near as I can figure, this toxic goop develops its finish by using materials with different drying / contraction rates. Even after the 'hammered' look starts to form you can still plow a brush thru it and as long as it's fresh, the patterns re-form.
But it also has a short working time before it off-gasses and starts firming up. If you spill stray drops ahead of your painting area, or are prone to having paint slop down the sides of your cans, you need to promptly brush it flat.

The first time - on the MkI deck - I used a standard 4" paint roller. Big mistake. The gooey paint developed strands much like cotton candy, from the surface to the roller. Fortunately that was re-absorbed as the paint laid down. I switched to closed-cell foam rollers after that first side application. Thie time around I'm again using the closed-cell roller to shove paint around. But I'm also using cheap disposable 2" brushes and deliberately going a bit thick.

Something else with this paint over KILZ primer, it's developing pinholes as the 'hammered finish' does its thing, the paint drawing up and actually pulling away, despite a very thorough application. IIRC on the MkI I put a second coat on, which worked fine. These pinholes are only visible I think because I used a white primer.

You also ought to give that 'hammered' finish time to develop, before setting the piece out in the sun or breeze to dry. It's a bit like wrinkle-finish paint in that regard. It seems to work better for the appearance.
It also helps a great deal in 'keeping a wet edge' with this Hammered paint. Despite being labeled 'black', it's really more of a dark gray / gunmetal color and vaguely metallic in appearance. And due to the nature of the paint it tends to show roller or brush marks if you don't keep it wet as you go. Putting it on thicker than you would a normal paint also helps mask this effect, as the thicker coat develops the hammered look. Sort of acts to camouflage brush strokes.

-

On the panel install, it's going to be something like this -

solarpanelmount07.jpg


I'm also thinking to make its mounting frame in two halves, so the roof deck can still be taken off a half at a time, without having to dismantle the solar panel mounting.
The mounting frame will be painted satin black to blend in with the roof rack. Shouldn't be very noticeable from the ground.

An early sketch, I haven't put refinements on paper yet.

solarpanelmount01.jpg


I already have an 18" bending break, but it isn't wide enough for this project. Even in two halves, the sections are ~22" wide. I'm probably going to buy the 30" model from Harbor Freight, if I can't find a local fabrication shop that can bend my front fairing, inexpensively. It will be a shallow Z-bend. At least 45degrees. Or as much more as I can fit between the panel mount c-channel and the middle brace of the roof deck. Might be able to get as much as a 60deg 'angle of repose' out of it.

I'll be working out the solar mounting frame details on paper within a few days. I've got most of it in my head already. And what I can recall of the flush hood locks should be workable. But that memory is ~30yrs old. I need to look around and see what sort of new security panel fasteners are out there. I want something that takes a key or unique tooling. That can't be worked with a screwdriver.
 

Bear in NM

Adventurer
Thanks for the detail on the paint. I too live in a place where the sun is great for solar, but bad for everything else with a finish. Can't beat the UV's, only prolong....

I get the situation with security on your panels. It sucks we have to deal with that potential, and build around it. For my large glass panel, I have square U-rail that slides into my Yakima bars. The front rail is a rubber snug fit, and I use U-clamps on the rear to hold the channel to my rear bar. I have nuts for the u-clamps that require a socket or wrench, and I created knobbed-nuts to use for quick install/removal. Nuts when I want a little more security, knobs for speed. Basically a non-permanent install, but I could rig up a lock to the bar affair if I wanted.

But my thinking is that with my Avalanche, if someone really wanted a locked solar panel, they would just smash my tailgate lock, and probably steel my panel, my 3 bed covers and two Yakima bars. What I settled on is not stressing over theft while out camping, and plan for a back-up. I added a portable 100W foldable panel, and if I were to camp in a situation where I would be away from my rig and portable panels, I would only deploy my glass one. If it gets stolen, I have my foldable.

I like your stealth idea, to help with security.

Craig
 

rayra

Expedition Leader
This is the style of latch I was recalling, albeit sexed up with 'carbon fiber!'

1.jpg
st-t400__6.jpg


There's an even sechsier thing out now called an 'Aerocatch', both locking and non-locking.

Aerocatch120%20-%202100.jpg


And the old school way would be something like a Dzus fastener. But that only needs a flat blade screwdriver or pocket change.


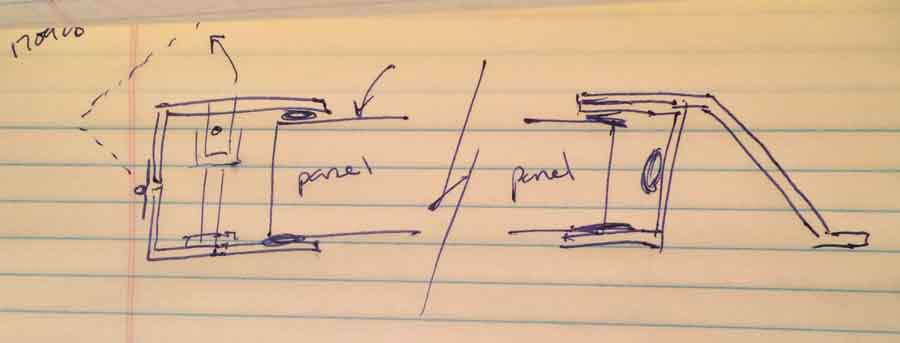
Cross section on the mountign frame C-channel idea, predicated on using the hood lock pictured at the top of this post.

solarpanelmount17.jpg


Have to figure how to anchor its post in the bottom of the channel. If I used steel I'd just weld the nut in. I could use a block of material attached to the bottom rail with countersunk screws from below, and drill / tap the block to accept the post of the locking mechanism. That portion of the design is dead space anyway. Or the block(s) could even form stops to prevent rearward motion of the panel when it is in place. There, solved that.

I'm also thinking of radically re-working my solar panel kit, cutting down the height of the sides of the aluminum L-angle framing. I'm considering making the charge-controller readily removable / relocatable and mounting it in the Power Module in the Sub. Only pulling it out if the panel kit is being used away from the vehicle or loaned to someone else.
I have to alter the suitcase latches and spring-loaded heavy duty carry handle that are on the panel kit anyway. And maybe changing the flat metal folding legs of the panel too. They're sharp as hell and dangerous. I'll surely slice the hell out of my hands at some point. And they are poorly positioned for winter use at my latitude, anyway. So I want to substantially change those too.
When I'm done with it there won't be any wires flopping around on it, there will be more modularity in its parts and it will lay flatter and have more angle adjustment when optimally placed, loose of the roof mount.

Dropping the side wall height of the panels themselves will also help with concealing it from notice.
 

rayra

Expedition Leader
meh. The panel kit channel frame is more problematic than I thought. The face side is about 1/2" wide. The panel / substrate itself is caulked against the inside of or this face. The side of the 'C' is just shy of 1-3/8" OD. The back / inner face of the 'C' is 1-3/8"

I'll have to do a more thorough exam of it. Have to take a closer look at the corner plastic caps, too. Not sure if those are cosmetic, shock abosorbing, or elemental in the construction of the perimeter frame. I suspect the latter and if so that's another technical problem. Right now my intention is to dismantle all the added bits from the two framed panels - latches, handle, hinges, support legs, corner bracing - and then put my best-worst carbide-toothed blade in my tablesaw and deliberately cut the panel frames down by half their height. And then I might retrofit the cut-off portions as an inset frame into the front half, pop riveted in place. That will return the panels to something with a wide back flange, while halving their height. And since I'm already intending to remove the charge controller from the panels in the vehicle-connected setup, I don't need height under the panels for that, either. Better to mount it in my vehicle power accessory box anyway, than leave it baking on the roof under the panels.

I'd like to get the panels as slim as I can but still be rigid. I'm also toying with the idea of using some sort of inexpensive 3-axis armature as a roof mount, so that once freed from the flat / travel security mounting, I can erect and face and tilt the panel array any direction I want. If I can find a flatscreen TV wall mount with enough head pivot, I might figure a way to integrate that in the roof mount too. some sort of peg and slot attachment to the panel so it can be readily attached / held. Lock the panel on the armature, compress the panel / armature into the roof mount, fold that mount trailing edge over and down and lock it in place. Get where you are going, step up on the bumper, turn two key locks, panel is free and oriented in just a few seconds.
 

Bear in NM

Adventurer
A keyed lock would sure be handy. With your sketch, it is easy to see where you are headed.

I did wonder about lowering the frame height, in terms of strength for the panels. Insetting the remainder into the cut off sounds like you would not be sacrificing strength. Maybe cut some breather holes in the side rails, to allow for some ventilation? On my glass panel, I do not worry about debris or hail being hard on the glass, I worry more about flexing while driving, especially off road. And all of those solder joints inside the arrays.

I too would likely relocate the controller. If it has temp compensation, no way it will want to work correctly under the glass. I guess I would also worry about having a "live" voltage under the glass, as the panels will be producing volts whether hooked up to a battery or not. Pretty easy to plug or cap the end of a live wire v. having voltage rattling around in the controller, not easily seen or monitored.

Craig
 

rayra

Expedition Leader
Well my idea is kind of worse in that regard, as I intend to pass a power line thru the rear footer of the roof rack, thru the roof and inside the headliner and D pillar and behind the interior trim panel, to where my 1/0 power line passes thru to my power box. With some sort of (mostly) sealed marine connector at the rack foot skin. One of the things on my 'to figure out' list is some in-line fusing and some sort of heavier duty / shielded cable. It's all overkill, there's no more power passign thru the panel connection line than is available to or passing thru any of the factory power port or courtesy light wiring.


I am indeed thinking about putting some vent holes / skeletonizing the panel frame. The mounting frame will only have vertical walls along the sides and a bit of a gap between it and the panel, so it ought to be able to breathe a little. Maybe put some holes in the vertical face of the rear mounting bracket. Thinking about it some. Probably be November before I get it built and maybe even longer before I get it internally wired.
Probably also rededicate one of the rear 12v power ports in the module as a line-in to the controller, when using the panel on the ground.


eta

second-coated the top surfaces today. Violated the can directions, same as last time. Can says re-coat within 4hrs or wait a week. There was still some tack to the surface, so I slopped on another coat. Hopefully they'll fuse together. Worked for me ~18mos ago on the Mk1 deck.

roofdeckmk2-08.jpg
roofdeckmk2-09.jpg


In the meantime I'm using the Mk1 deck as a cutting template for laying out a fabric deck / cover experiment. The fabric deck will get laced on something like a Hobie Catamaran deck. A proof of concept exercise.
 
Last edited:

rayra

Expedition Leader
Well they're done, two coats both sides, baked in the sun. Hard and non-tacky and set aside while I take care of other things. I'm going to take a whack at fabricating the 3/4" square tubing braces in a couple weeks. I'm in the middle of a yet another bathroom shower remodel right now and this month is packed with other projects and travel.

I'm looking for a vaguely / mildly contrasting paint for adding the drone [H]elipad markings to the deck. Maybe a gunmetal epoxy sprayed thru a template. It will be very close to this hammered finish, but the spray application should stand out without being highly visible. All subtle-like.
 

Stryder106

Explorer
Looking good. I'm finishing up my punchlist from the UT-CO trip. Had to do some rewiring and have some reconfig to do on what goes where, along with a couple of things to buy. I'm now on the hunt to change the interior of my Av given my driver's seat is pretty well worn and the NFE material is non-existent.
 

Forum statistics

Threads
186,582
Messages
2,887,698
Members
226,608
Latest member
DQblues
Top