Lowly the Lorry. . .

Lowly Update:

Big shout out to the crew at Rogue Gear Works for being my freight delivery location as I don't have a forklift, let alone semi truck access at my shop. A couple days ago the Carefree of Colorado awning showed up and I managed to get it home on the wagon without it tearing off the roof rack!
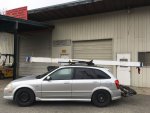
IMG_9027.JPG

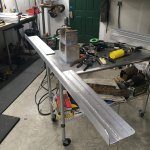
The next day I picked up a load of aluminum from RGW for fabricating some of the habitat's external components. The 20' long sticks of angle necessitated a "don't rear-end me" flag.
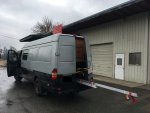
IMG_9035.JPG

3D printed the custom worm gear housing out of PETG+Carbon Fiber and began assembling the components scavenged off of the Harbor Freight winch. So far, so good!
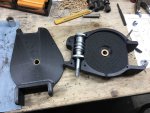
IMG_9036.jpg

Started assembling the other components that will ultimately make up the pivoting rear rack assembly. Flange bushings and custom set collars are fitting nicely into the 3D printed parts. This crazy contraption just might work!
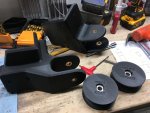
IMG_9037.JPG

- Sheik
 
Last edited:
Lowly Update:

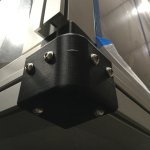
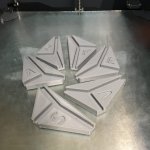
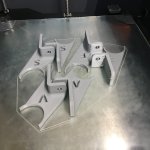
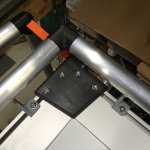
Aluminum corner covers were supplied by RV GlobeTrekker but since I was printing the rear corners for mounting the hoist system I decided to print the front corner covers as well to complete the look.
IMG_9039.JPG

One of the RV Globetrekker gents stopped by the shop over New Years and liked what he saw; currently in dialogue to supply them with printed corner covers.

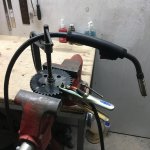
Had a machine shop modify the toothed gear (for the rear hoist worm gear drive) to accept a set screw collar on each side. Dusted off the welder and welded on the collars.
IMG_9052.JPG

- Sheik
 
Last edited:
Lowly Update:

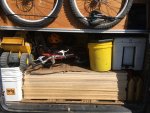
Made the annual pilgrimage to Mecca (California, that is) to visit snow-birding kinfolk and soak in some sunshine. On the way back we picked up a van load of Baltic Birch plywood for the lorry's cabinets.
IMG_9311.JPG

"Day late, dollar short" should have been my middle name. Baltic Birch ply comes from the land of the Ruskies and thanks to their current aggression with neighboring Ukraine and the USA's resulting stance on its previous Cold War foe, the supply of BB has all but dried up. Any student of high school macro economics would be able to tell you that decreasing (or non-existent) supply with ongoing demand will produce increased prices; in this case, dramatically increased prices!

I'm not a big fan of the City of Angels, its crush of humanity and resulting traffic nightmares, but I must say that its surrounding industrial areas have everything one needs within an hour's drive. Still, I can't imagine how people put up living in that place!

- Sheik
 
Last edited:
Lowly Update:

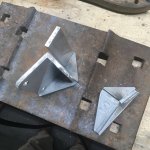
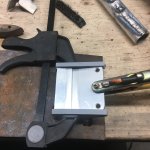
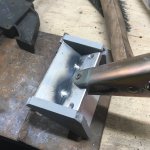
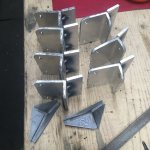
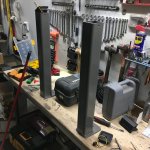
Brush guard work commenced. Using geometry from the CAD solid model welding jigs were printed for the brackets that will weld to the 1 1/2" SCH 40 aluminum pipe and bolt to the habitat's integrated t-slot channels.
IMG_9061 2.JPG

1/4" aluminum architectural angle was then cut into the pieces that would get welded in the jigs. Using a spool gun attachment for my MIG welder, I was able to tack the 3 different types of brackets together to be TIG welded by the gents at Rogue Gear Works.
IMG_9111.JPG
IMG_9112.JPG
IMG_9113.JPG
IMG_9114.JPG

Location cradles were then 3D printed to hold the pipe in the correct stand-off locations (corresponding to the welded brackets).
IMG_9086.JPG

Starting with the vertical guards at the front of the habitat, using the location cradles and the 3D printed brush guard corners we were able to size and cut the remaining top perimeter brush guard tubes.
IMG_9326.JPG
IMG_9323.JPG
IMG_9325.JPG
IMG_9327.JPG

With that done, I will locate the welded brackets on the habitat's edges so they don't interfere with the solar panel mounting brackets and awning, hoist my welder into the air and tack the guard tubes to the brackets. Then it will be a careful disassembly and transport to Rogue Gear Works for finish TIG welding the tubes to the brackets.

- Sheik
 
Last edited:
Lowly Update:

Diesel tank, gray water tank and under-habitat storage boxes will be mounted to the sub-frame cross bars. An additional set of "cross bars" was needed under the front end of the habitat to handle the loads of full diesel and gray water tanks. Fabricated one of these bars to be bolted onto each side of the habitat's subframe with pieces of remnant tube.
IMG_9372.JPG

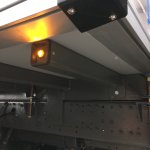
Incorporated 3D printed end caps with marker lights to provide mid-lorry blinkers and then bolted them up to the subframe.
IMG_9376.JPG

- Sheik
 
Last edited:
Lowly Update:

Lots of work happening but nothing getting "finished". Here's one:

When I purchased the Carefree of Colorado awning I had to decide on what mounting brackets to use - there are several options for a roof-top mount.

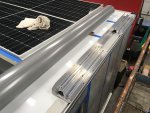
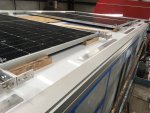
I ended up designing my mounting system using their "flat roof" mounting brackets that the awning fits into. Another set of brackets had to then be designed to securely attach the CoC mounting brackets to the roof and edge of the habitat taking into account the proper clearances. I also planned to use these brackets as a support/mount for the solar panel mounting structure.

2 large brackets for mounting the awning to the roof/edge of the habitat were cut and welded out of flatbar and angle. This was my first project welding aluminum; the welds ain't too pretty but I'm pretty sure they will hold. I wasn't prepared for how much Argon gas would be used!
IMG_9408.JPG

The CoC mount brackets were then bolted up to my fabricated brackets in order to test fit the awning and locate/adhere 4 threaded bars for additional hold-down security.
IMG_9432.JPG
IMG_9591.JPG

Once the adhesive was cured the mounting brackets were bolted back down to the T-slots on the habitat's aluminum extrusion edging along with the threaded bars.
IMG_9592.JPG

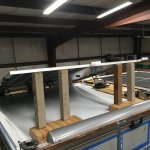
With all the hardware holding the mount brackets down and in alignment I was finally able to mount the awning.
IMG_9593.JPG

The solar panel mounts are nearly complete along with the perimeter brush guards. Stay tuned.

- Sheik
 
Last edited:
Lowly Update:

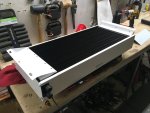
Purchased a 12V air conditioning unit from UndermountAC.com to provide more creature comfort to both the habitat and cab of the truck. The A/C comes in three separate parts that can be mounted in different locations from each other. The compressor pump along with the condenser (and its fans) will mount below the habitat and the exchanger unit will mount inside a cabinet inside the habitat. I was able to purchase an exchanger that also houses an additional radiator for a hydronic heater loop. This will allow the fans that push the cold air through ducting around the truck's living space to also push hot air through those same ducts.

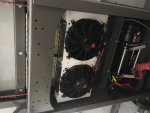
I was able to find some real-estate between the chassis and sub-frame rails to nestle in both the compressor pump and the condenser. It was a bit of a shoe-horn but they tuck up nicely out of sight.

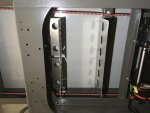
The mount brackets that came with the condenser unit weren't going to work in the space I had so custom housing end caps and mount brackets were fabricated out of aluminum. Holes in the brackets were to allow air passage to the top side of the condenser unit.
IMG_9443.JPG
IMG_9458.jpg

The space behind the winch and in front of the rear chassis cross member was just the right size for the condenser. Brackets were bolted to the cross-members of the habitat sub frame. All hardware was through-bolted. Pictures below are looking straight up toward the bottom side of the habitat.
IMG_9459.JPG
IMG_9460.jpg
IMG_9461.JPG

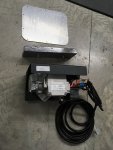
The space in front of the winch was just the right size for the compressor pump. The pump came mounted to a steel bracket that allowed for a 2-bolt mount to the truck. I fabricated an angle bracket to mount to a chassis cross-member as well as an aluminum plate to provide overhead protection from the winch cable. The aluminum plate came from salvaged parts off Lowly's old fire truck box.
IMG_9462.JPG

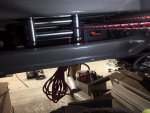
It was a tight squeeze, especially with the winch's cable run going over the top of the pump but it managed to fit with adequate clearance. The cheap red rope is for helping run fresh cable through the truck to the winch once I get it sourced.
IMG_9463.JPG
IMG_9464.JPG
IMG_9590.JPG

- Sheik
 
Last edited:
VerMonsterRV

Gotta Be Nuts
Lowly Update:

Purchased a 12V air conditioning unit from UndermountAC.com to provide more creature comfort to both the habitat and cab of the truck. The A/C comes in three separate parts that can be mounted in different locations from each other. The compressor pump along with the condenser (and its fans) will mount below the habitat and the exchanger unit will mount inside a cabinet inside the habitat. I was able to purchase an exchanger that also houses an additional radiator for a hydronic heater loop. This will allow the fans that push the cold air through ducting around the truck's living space to also push hot air through those same ducts.

I was able to find some real-estate between the chassis and sub-frame rails to nestle in both the compressor pump and the condenser. It was a bit of a shoe-horn but they tuck up nicely out of sight.

The mount brackets that came with the condenser unit weren't going to work in the space I had so custom housing end caps and mount brackets were fabricated out of aluminum. Holes in the brackets were to allow air passage to the top side of the condenser unit.
View attachment 776782 View attachment 776783

The space behind the winch and in front of the rear chassis cross member was just the right size for the condenser. Brackets were bolted to the cross-members of the habitat sub frame. All hardware was through-bolted. Pictures below are looking straight up toward the bottom side of the habitat.
View attachment 776784 View attachment 776785 View attachment 776786

The space in front of the winch was just the right size for the compressor pump. The pump came mounted to a steel bracket that allowed for a 2-bolt mount to the truck. I fabricated an angle bracket to mount to a chassis cross-member as well as an aluminum plate to provide overhead protection from the winch cable. The aluminum plate came from salvaged parts off Lowly's old fire truck box.
View attachment 776787

It was a tight squeeze, especially with the winch's cable run going over the top of the pump but it managed to fit with adequate clearance. The cheap red rope is for helping run fresh cable through the truck to the winch once I get it sourced.
View attachment 776788 View attachment 776789 View attachment 776790

- Sheik
Hey Ryan, any more info on the AC? What's the minimum power draw? Can it run in motion? Really wishing we would've swapped out the ac AC for a DC AC.
 
Hey Ryan, any more info on the AC? What's the minimum power draw? Can it run in motion? Really wishing we would've swapped out the ac AC for a DC AC.

There are a couple of options that I found for this type of 12V AC. UndermountAC.com was who I eventually chose. They have several setups to chose from and I ended up getting the 12V system that also allows for a hydronic heater loop to be plumbed into the same distribution blower box that the AC unit uses. The thermostat/control that came with the UndermountAC will supposedly work with the hydronic system and allow for both hot and cold controls in one unit. Nice to know I will only have to do one set of ducts. Good interaction with Tom at UndermountAC and I was very impressed with the care taken to package the parts for shipping. Haven't hooked it up and run it yet but I don't see why it wouldn't be able to operate when the truck is in motion; I hope it is able to!

Here are the stats from the manufacturer: 14V, 78A, 1100watt

- Sheik
 
I get nervous when awesome build threads dry up. I'm assuming you're in your work season and hopefully will be able to update soon. Incredible fabbing you've done. I love the details like the end caps with lights. Impressive truck.
Seeing Lowly right after you purchased it reminded me of a Vario firetruck for sale on one of the Euro sites a week ago where they didn't even get rid of the original box- they even kept the aluminum roll-up doors and put windows right into them and built the interior out like a typical DIY camper van. It was all wood paneling inside but looked pretty cramped.
I'm still here and chipping away at the truck. Had a busy summer season so most of the work was digital in finalizing the interior with all of the components finding their place. Lots of purchases so components could be measured (and digitally modeled) to make sure their placement and cabinetry is appropriately sized. Making sure access can be had for wiring and HVAC runs.

Planning to post some more but also hoping ExPo can figure out what happened to the thumbnail images on all of my previous posts before I pour more work into a thread that doesn't view well for the folks who find it interesting enough to keep reading! I also find a sliver of satisfaction by skimming back over this thread to see progress made over the years - without those thumbnails it is hard to perceive how much of the elephant I've already eaten.

Stay tuned.

- Sheik
 
Lowly Update:

Exterior electrical work completed on the habitat.

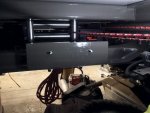
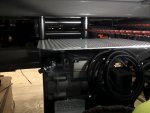
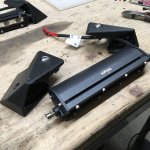
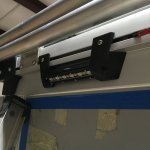
3D printed custom mounting caps for attaching perimeter lighting to the T-slot extrusions on the habitat's edges. Mounted them up and ran the wiring - was able to hide the wiring inside the caps for a clean look and no snag points for the inevitable roadside limbs.
IMG_1096.JPG
IMG_1097.JPG

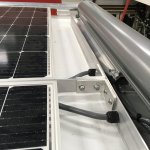
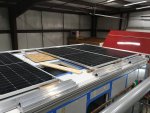
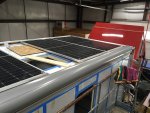
Finished wiring and mounting the solar panels to the top of the habitat. 3 of the 4 sides of the mounting scheme utilize the T-slot extrusions on the habitat's edges (see post #375). The 4th side utilized the awning's mount bracket, enabling all the solar panels and awning (and brush guards) to be mounted to the habitat without drilling a single hole.
IMG_1107.JPG
IMG_1116.JPG

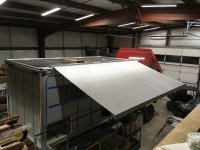
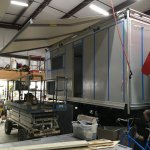
With the solar panel's fully installed the awning was finally able to be deployed. It is self-supporting fully deployed but I wouldn't trust that in any sort of breeze; support legs are included and will be utilized.
IMG_1114.JPG
IMG_1115.JPG

This is my first update since all of the thumbnails in this thread decided to stop behaving. Hoping ExPo can get this sorted out but so far I'm not impressed with their follow-through. We'll see if this post behaves the way all the other ones are.

- Sheik
 
Last edited:
Lowly Update:

Well, ExPo's thumbnails continued to poop their pants so I took the time to go back and swap out every thumbnail I've posted with its full sized image - not as easy to view with the included text, but hey, this is a free service so I can't complain too much.

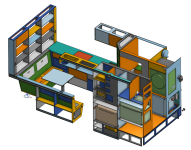
Lots of CAD work has been accomplished with the anticipation of releasing files to get parts built for the interior and exterior of the truck.

Interior cabinetry to be CNC routed from the Baltic Birch plywood we sourced a year ago (see post #378):
Screen Shot 2024-02-17 at 9.30.46 PM.png

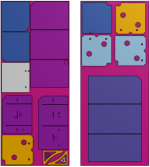
Here's all of the plywood cabinetry components nested together in groups corresponding to the (13) panels of 12mm and (9) panels of 18mm thick plywood:
Screen Shot 2024-02-17 at 9.42.08 PM.png

Exterior design of tanks, storage boxes and stairs to be plasma cut and fabricated out of aluminum:
Screen Shot 2024-02-17 at 9.34.54 PM.png
(6) sheets of 4'x8' 1/8" thick aluminum will be needed along with (2) sheets of 5'x10' 3/16" thick aluminum for these parts:
Screen Shot 2024-02-17 at 9.43.13 PM.png
Screen Shot 2024-02-17 at 9.43.31 PM.png

I'm looking forward to building in real life after staring at these designs on the computer for so long!

- Sheik
 
Last edited:
Geo.Lander

Well-known member
Lowly Update:

Well, ExPo's thumbnails continued to poop their pants so I took the time to go back and swap out every thumbnail I've posted with its full sized image - not as easy to view with the included text, but hey, this is a free service so I can't complain too much.

Lots of CAD work has been accomplished with the anticipation of releasing files to get parts built for the interior and exterior of the truck.

Interior cabinetry to be CNC routed from the Baltic Birch plywood we sourced a year ago:
View attachment 820359

Here's all of the plywood cabinetry components nested together in groups corresponding to the (13) panels of 12mm and (9) panels of 18mm thick plywood:
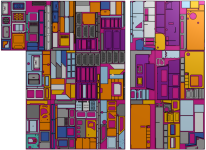
View attachment 820361

Exterior design of tanks, storage boxes and stairs to be plasma cut and fabricated out of aluminum:
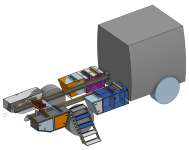
View attachment 820360
(6) sheets of 4'x8' 1/8" thick aluminum will be needed along with (2) sheets of 5'x10' 3/16" thick aluminum for these parts:
View attachment 820362
View attachment 820363

I'm looking forward to building in real life after staring at these designs on the computer for so long!

- Sheik

Seriously impressive, cant wait to see the CNC results!
 

Forum statistics

Threads
188,214
Messages
2,903,869
Members
229,665
Latest member
SANelson
Top