You are using an out of date browser. It may not display this or other websites correctly.
You should upgrade or use an alternative browser.
You should upgrade or use an alternative browser.
Lowly the Lorry. . .
- Thread starter jaleel_da_sheik
- Start date
jaleel_da_sheik
Observer
Lowly Update:
Just back from another trip down the Grand Canyon and the CNC router was busy while I was away. A van full of 12mm and 18mm Baltic birch plywood pieces was waiting my return:
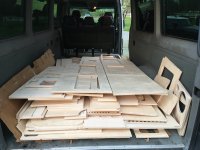
Many of these parts need secondary operations (bevels on the table saw or blind slots on the back side) so installation is still not ready to start.
In anticipation of the cabinetry going it, it was time to cut the remaining access hatch, shore power and water inlet holes in the habitat figuring it was easier to do without having to contort my body through cabinetry in order to cut out the interior sides!
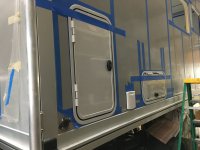
I measured measuring the to-be-installed components 3 more times to verify the correct layouts, checked their dimensions on the solid model, printed layout drawings of the cut lines and transcribed them onto the side of the habitat. I then used a combination of drill guide, 3/16" feeler bit, cordless drill, twin-bladed hole cutter, oscillating saw with diamond encrusted cutting disk, hacksaw blade and wood rasp to get the cutouts finished.
- Sheik
Just back from another trip down the Grand Canyon and the CNC router was busy while I was away. A van full of 12mm and 18mm Baltic birch plywood pieces was waiting my return:

Many of these parts need secondary operations (bevels on the table saw or blind slots on the back side) so installation is still not ready to start.
In anticipation of the cabinetry going it, it was time to cut the remaining access hatch, shore power and water inlet holes in the habitat figuring it was easier to do without having to contort my body through cabinetry in order to cut out the interior sides!

I measured measuring the to-be-installed components 3 more times to verify the correct layouts, checked their dimensions on the solid model, printed layout drawings of the cut lines and transcribed them onto the side of the habitat. I then used a combination of drill guide, 3/16" feeler bit, cordless drill, twin-bladed hole cutter, oscillating saw with diamond encrusted cutting disk, hacksaw blade and wood rasp to get the cutouts finished.
- Sheik
jaleel_da_sheik
Observer
Lowly Update:
Part of the shop has been turned into a cabinet preparation workspace. The backside of a multitude of these components will need additional dados (the side that was faced down on the CNC router table). These will be achieved by layout drawings off the solid model, straight edges, clamps, pencils, lots of precision measuring, hand routers and prayers. Not a lot of room for error on these as I've exhausted my supply of plywood for this build!
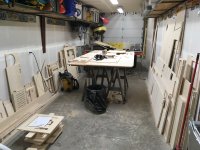
With all the parts stacked on the walls (18mm on the right, 12mm on the left) this portion of the build is daunting. I'm hoping all of the CAD that went into these parts will pay dividends when it comes to assembling inside the habitat.
- Sheik
Part of the shop has been turned into a cabinet preparation workspace. The backside of a multitude of these components will need additional dados (the side that was faced down on the CNC router table). These will be achieved by layout drawings off the solid model, straight edges, clamps, pencils, lots of precision measuring, hand routers and prayers. Not a lot of room for error on these as I've exhausted my supply of plywood for this build!

With all the parts stacked on the walls (18mm on the right, 12mm on the left) this portion of the build is daunting. I'm hoping all of the CAD that went into these parts will pay dividends when it comes to assembling inside the habitat.
- Sheik
jaleel_da_sheik
Observer
Lowly Update:
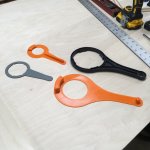
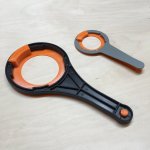
As cabinetry component preparation continues the various 3D printed parts I've designed to integrate into the plywood cabinets were needing to be fabricated for test fitting purposes.
Mount brackets for the two types of water filter wrenches:
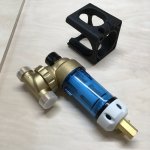
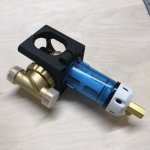
Mount bracket for the 50 micron water filter:
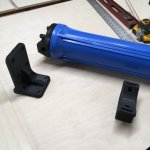
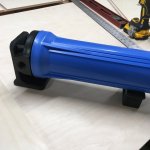
Mount brackets for the 5 micron and carbon water filters:
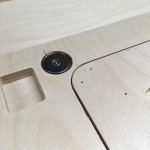
Magnetic insert mount tabs for vertically oriented access hatch:
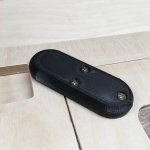
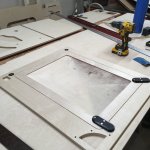
The 3D printer has been running almost continuously for the past few days and there's still many more components to make. Viva la additive manufacturing!
- Sheik
As cabinetry component preparation continues the various 3D printed parts I've designed to integrate into the plywood cabinets were needing to be fabricated for test fitting purposes.
Mount brackets for the two types of water filter wrenches:


Mount bracket for the 50 micron water filter:


Mount brackets for the 5 micron and carbon water filters:


Magnetic insert mount tabs for vertically oriented access hatch:


The 3D printer has been running almost continuously for the past few days and there's still many more components to make. Viva la additive manufacturing!
- Sheik
jaleel_da_sheik
Observer
Lowly Update:
Dry fitting of cabinet components continues.
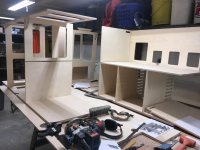
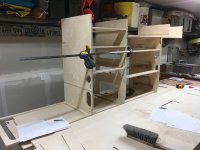
The interior sides of the electrical cabinet were laid out, components were distributed and their mounting holes marked/drilled for ease of installation once the cabinets are installed.
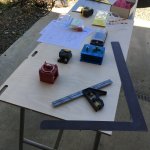
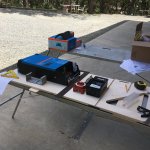
The nerve wracking process of cabinet installation should begin shortly. Stay tuned.
- Sheik
Dry fitting of cabinet components continues.


The interior sides of the electrical cabinet were laid out, components were distributed and their mounting holes marked/drilled for ease of installation once the cabinets are installed.


The nerve wracking process of cabinet installation should begin shortly. Stay tuned.
- Sheik
jaleel_da_sheik
Observer
Lowly Update:
Cabinet component installation has begun. Started with the front area of the habitat that contains the fresh water tank:
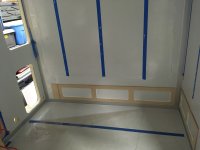
Glueing these parts in place was like setting a cornerstone - hopefully they are in the correct place because everything else will be located off them! Water tank was then set in place:
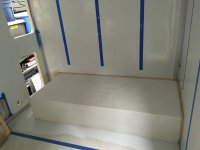
Tank was then wrapped and capped - the buildout of the cabinets around the tank will provide the bones to keep the weight of the full tank from moving around when the truck is in motion:
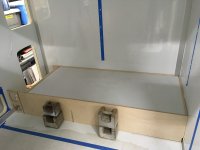
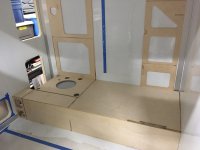
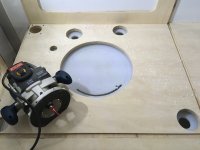
With the fresh water tank sealed in, drill jigs, hole saws, templates and a router was used to cut the 4 holes into the tank: depth indicator float, inlet, outlet and inspection port. The remaining small plywood hole is for a downward facing light to help provide a visual indication of tank level as well (viewing slots on plywood below, viewed from side looking thru cargo hatch).
- Sheik
Cabinet component installation has begun. Started with the front area of the habitat that contains the fresh water tank:

Glueing these parts in place was like setting a cornerstone - hopefully they are in the correct place because everything else will be located off them! Water tank was then set in place:

Tank was then wrapped and capped - the buildout of the cabinets around the tank will provide the bones to keep the weight of the full tank from moving around when the truck is in motion:


With the fresh water tank sealed in, drill jigs, hole saws, templates and a router was used to cut the 4 holes into the tank: depth indicator float, inlet, outlet and inspection port. The remaining small plywood hole is for a downward facing light to help provide a visual indication of tank level as well (viewing slots on plywood below, viewed from side looking thru cargo hatch).

- Sheik
jaleel_da_sheik
Observer
Lowly update:
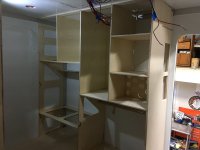
Cabinet installation continues. Despite my best efforts to dial in the solid models while designing the cabinets there is enough out-of-square-ness in the CNC cut cabinet parts and the habitat that nearly every part is needing some sort of "customization" to make it possible to properly assemble.
The electrical/chest cooler cabinet assembled up pretty good:
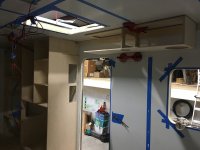
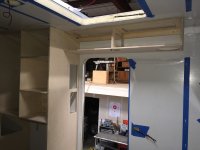
Next came the over-door cabinet that took a bit of persuasion to get it into its final resting place:
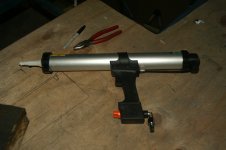
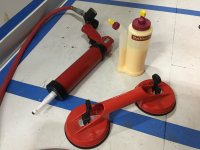
For those of you thinking of following in my footsteps and building out an overland truck - for the love of Pete, DON'T! But if you don't heed that advice, at least invest in the following tools: pneumatic caulking gun, wood glue bottle & suction cups.
- Sheik
Cabinet installation continues. Despite my best efforts to dial in the solid models while designing the cabinets there is enough out-of-square-ness in the CNC cut cabinet parts and the habitat that nearly every part is needing some sort of "customization" to make it possible to properly assemble.
The electrical/chest cooler cabinet assembled up pretty good:

Next came the over-door cabinet that took a bit of persuasion to get it into its final resting place:


For those of you thinking of following in my footsteps and building out an overland truck - for the love of Pete, DON'T! But if you don't heed that advice, at least invest in the following tools: pneumatic caulking gun, wood glue bottle & suction cups.

- Sheik
Iain_U1250
Explorer
whomisi
Active member
Looking good, thanks for sharing.
This is exactly how I want to do my interior also, mainly because I'm better on Solidworks than I am with woodwork!
When you say out of square, do you mean the X and Y axis were not sufficiently perpendicular to each other? Or something else I should look out for when I reach this stage.
This is exactly how I want to do my interior also, mainly because I'm better on Solidworks than I am with woodwork!
When you say out of square, do you mean the X and Y axis were not sufficiently perpendicular to each other? Or something else I should look out for when I reach this stage.
VerMonsterRV
Gotta Be Nuts
What??? Don't build an overland truck? After a few years the pain will fade, then if you're really nuts you'll sign up to build a second one (well we are....). I need to get my head examined.Lowly update:
Cabinet installation continues. Despite my best efforts to dial in the solid models while designing the cabinets there is enough out-of-square-ness in the CNC cut cabinet parts and the habitat that nearly every part is needing some sort of "customization" to make it possible to properly assemble.
The electrical/chest cooler cabinet assembled up pretty good:
View attachment 835592
Next came the over-door cabinet that took a bit of persuasion to get it into its final resting place:
View attachment 835593
View attachment 835646
For those of you thinking of following in my footsteps and building out an overland truck - for the love of Pete, DON'T! But if you don't heed that advice, at least invest in the following tools: pneumatic caulking gun, wood glue bottle & suction cups.
View attachment 835647
- Sheik
Oh, and while building ours I thought that the box would be all square angles, so easy. But everything needed to be fit carefully and took more time than I had hoped.
jaleel_da_sheik
Observer
Lowly Update:
Cabinets toward the front of the habitat are now installed (mostly).
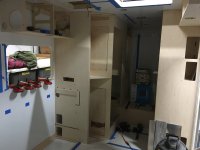
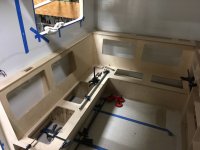
With front cabinetry stuck in place, the rear cabinetry was dry-fit. Everything in the rear ties together so it was one gigantic 3D puzzle that took custom fitting for every part.
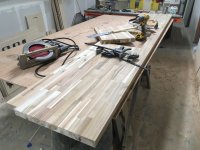
With kitchen cabinets dry-fit, it was time to make the countertop. An acacia wood butcher block countertop slab was sourced through Home Depot awhile back. A circular saw was used to cut it down to its rectangular size. Cutouts for the cooktop and sink were made using the circular saw and pull saw. Interior and exterior edges (along with an underside drip edge) were finished up using a router.
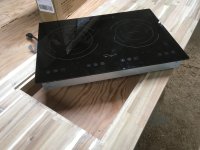
The countertop was then dry-fit onto the kitchen cabinets. It fits!
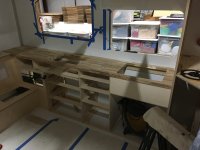
The countertop was then removed and finished with Tung oil:
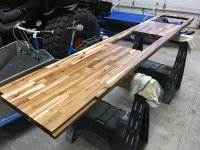
- Sheik
Cabinets toward the front of the habitat are now installed (mostly).

With front cabinetry stuck in place, the rear cabinetry was dry-fit. Everything in the rear ties together so it was one gigantic 3D puzzle that took custom fitting for every part.

With kitchen cabinets dry-fit, it was time to make the countertop. An acacia wood butcher block countertop slab was sourced through Home Depot awhile back. A circular saw was used to cut it down to its rectangular size. Cutouts for the cooktop and sink were made using the circular saw and pull saw. Interior and exterior edges (along with an underside drip edge) were finished up using a router.


The countertop was then dry-fit onto the kitchen cabinets. It fits!

The countertop was then removed and finished with Tung oil:

- Sheik
jaleel_da_sheik
Observer
Lowly Update:
With the countertop curing its Tung oil coating I located, drill and installed helical screw inserts into the end to help fasten the right end to the pantry wall.
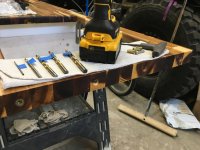
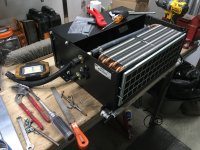
Before the kitchen cabinets could be glued in I took the opportunity to shoehorn in the air conditioning / heating dispersion unit under the sink. One of my many faults as a design engineer is to try and figuratively stuff 10 lbs of flour into a 5 lb sack. This could be another one of those situations with how tight I've made the cavity compared to how much piping and ducting is coming into/out of this unit; good thing I've got small hands.
I first had to rework how the air filter screen is removed from sliding vertically to pulling out the front:
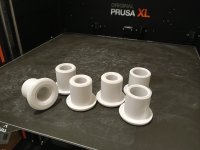
Next was 3D printing pass-thru bungs for the various hoses and electrical feeds for the AC side of the unit:
With the unit set into its little hidey-ho under the kitchen sink area pass-thru locations were drilled:
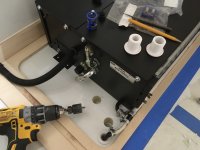
Pass-thru bungs were then glued into place, both inside and underneath the habitat:
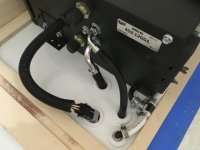
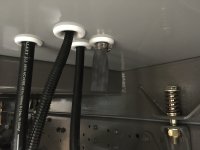
With the AC/heater distribution unit located it was time to start hard mounting the kitchen cabinets and the seating area:
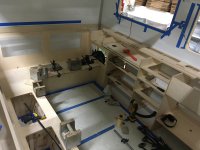
- Sheik
With the countertop curing its Tung oil coating I located, drill and installed helical screw inserts into the end to help fasten the right end to the pantry wall.

Before the kitchen cabinets could be glued in I took the opportunity to shoehorn in the air conditioning / heating dispersion unit under the sink. One of my many faults as a design engineer is to try and figuratively stuff 10 lbs of flour into a 5 lb sack. This could be another one of those situations with how tight I've made the cavity compared to how much piping and ducting is coming into/out of this unit; good thing I've got small hands.
I first had to rework how the air filter screen is removed from sliding vertically to pulling out the front:

Next was 3D printing pass-thru bungs for the various hoses and electrical feeds for the AC side of the unit:

With the unit set into its little hidey-ho under the kitchen sink area pass-thru locations were drilled:

Pass-thru bungs were then glued into place, both inside and underneath the habitat:


With the AC/heater distribution unit located it was time to start hard mounting the kitchen cabinets and the seating area:

- Sheik
jaleel_da_sheik
Observer
Lowly Update:
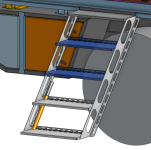
Steps into the habitat are now and will be sorely needed. It is designed to hook into the habitat's T-slot exterior edging when deployed and slide under the back of the chassis when stowed. Despite its awkward size it will hopefully be light enough to easily move by hand.
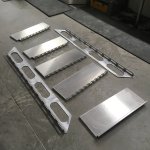
The fine folks at Rogue Gear Works CNC plasma cut the parts out of 1/8" thick aluminum and formed them on their press-brake:
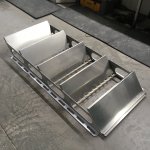
Loose assembly was accomplished by riveting the components together:
The riveted assembly was then test-fit - it seems like it just might work!
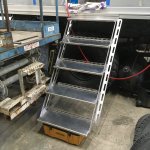
The toolbox in the above picture is a place=holder for telescoping leg assemblies. The sockets were cut using 1.5" square tubing and then some drillium was applied for weight reduction:
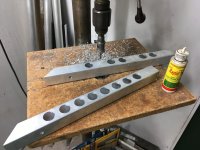
The internal telescoping tube that will extend down to the ground is 30mm square T-slot aluminum extrusion. The assembly is now back at Rogue Gear Works for finish welding. Looking forward to getting this back so I can get into/out of the habitat without having to monkey up/down our scissor lift.
- Sheik
Steps into the habitat are now and will be sorely needed. It is designed to hook into the habitat's T-slot exterior edging when deployed and slide under the back of the chassis when stowed. Despite its awkward size it will hopefully be light enough to easily move by hand.

The fine folks at Rogue Gear Works CNC plasma cut the parts out of 1/8" thick aluminum and formed them on their press-brake:

Loose assembly was accomplished by riveting the components together:

The riveted assembly was then test-fit - it seems like it just might work!

The toolbox in the above picture is a place=holder for telescoping leg assemblies. The sockets were cut using 1.5" square tubing and then some drillium was applied for weight reduction:

The internal telescoping tube that will extend down to the ground is 30mm square T-slot aluminum extrusion. The assembly is now back at Rogue Gear Works for finish welding. Looking forward to getting this back so I can get into/out of the habitat without having to monkey up/down our scissor lift.
- Sheik
Last edited:
Similar threads
- Replies
- 2
- Views
- 368
- Replies
- 16
- Views
- 3K
- Replies
- 9
- Views
- 2K
- Replies
- 11
- Views
- 3K

