M416 Build

dieselcruiserhead

16 Years on ExPo. Whoa!!
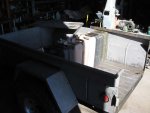
The tub back on, starting to look like the trailer again...

attachment.php


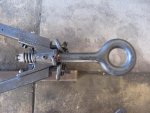
The lunette, closer up. Looks great, may need one more coat or light touch ups.
attachment.php


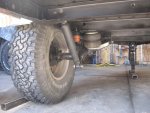
Suspension again, installed & in place...
attachment.php


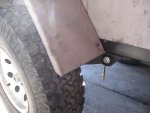
A little booboo on both sides. I will probably notch both sides of the tub for it, or again, might move the inflation valves to the front of the trailer..
attachment.php


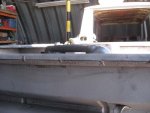
LOL, the 'alignment' worked...
attachment.php
 

Attachments

  • SM_083.jpg
    SM_083.jpg
    80.1 KB · Views: 1,287
  • SM_081.jpg
    SM_081.jpg
    81.3 KB · Views: 1,290
  • SM_070.jpg
    SM_070.jpg
    83.7 KB · Views: 1,284
  • SM_066.jpg
    SM_066.jpg
    64.4 KB · Views: 1,283
  • SM_065.jpg
    SM_065.jpg
    68.7 KB · Views: 1,283

dieselcruiserhead

16 Years on ExPo. Whoa!!
Other side...

attachment.php


6 cans fit across the middle "just barely" for a secure/snug fit. You'll see how we address this later..
attachment.php


Notice their height, just a hair over the lip of the tub so it will be interesting. The trailer has so much room that I'm planning to carry any fuel or water in the trailer rather than attached...
attachment.php
 

Attachments

  • SM_063.jpg
    SM_063.jpg
    64.9 KB · Views: 1,273
  • SM_060.jpg
    SM_060.jpg
    64.7 KB · Views: 1,276
  • SM_054.jpg
    SM_054.jpg
    75.2 KB · Views: 1,284

dieselcruiserhead

16 Years on ExPo. Whoa!!
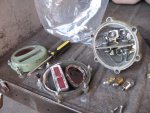
I started working on the lights. They are the original 43 year old lights so I wasn't sure what to expect. One was perfect (the reverse light), one was pretty good, and one was in bad shape. Luckily they were all salvageable...


attachment.php


The reverse light. Literally brand new. It had indications it might have been replaced at some point but also had indications of wear and plenty of use as well...
attachment.php


The pretty good lamp. One side was corroded but the other was really clean. The cover you're seeing is from the bad one...
attachment.php


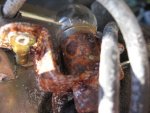
The relatively bad one. It was tough to muscle the old bulbs out, took a lot of work with a wire brush to clean them up but we got them all working...
attachment.php


Close of the rust..
attachment.php


This was a tough one. Damon's truck is 24 volt but is the only 24v in the fleet. The bulbs are hard to find/have to be ordered, and everyone else is 12 volt. You can run a 24v on 12v but it's pretty dim, you can't run 12v on 24v otherwise you blow the bulbs. We basically decided to just run it 12v after some testing and everyone is happy except Damon. I managed to somehow spend $30 in bulbs alone for the 12V bulbs but they turned out really really well. I'll have to snap pictures later showing them in action. I figured it would have been tough to use these as they are 'night' military so designed to be dull and/or seen from a certain perspective. I was really psyched that I was able to reuse them.

12v bulbs in place temporarily. Internal wiring on all was in great shape. External was corroded so I replaced those...
attachment.php


The cover. You can see the lower cover that I figure was probably a turn signal or a night/black out light... I ended up removing the black out lens all together...
attachment.php


Black out red plastic from 1966...
attachment.php


The other side.
attachment.php


This is as far as I got. I should have some more updates shortly. Again, all this was on Friday of last week...

:beer:
 

Attachments

  • SM_085.jpg
    SM_085.jpg
    87.9 KB · Views: 1,278
  • SM_086.jpg
    SM_086.jpg
    90.1 KB · Views: 1,268
  • SM_088.jpg
    SM_088.jpg
    99.1 KB · Views: 1,264
  • SM_089.jpg
    SM_089.jpg
    60.7 KB · Views: 1,263
  • SM_090.jpg
    SM_090.jpg
    74.8 KB · Views: 1,260
  • SM_095.jpg
    SM_095.jpg
    70.1 KB · Views: 1,268
  • SM_096.jpg
    SM_096.jpg
    71.3 KB · Views: 1,259
  • SM_098.jpg
    SM_098.jpg
    74.6 KB · Views: 1,260
  • SM_099.jpg
    SM_099.jpg
    68.8 KB · Views: 1,270
Last edited:

slimtwo

Adventurer
Great job on your trailer. I very much appreciated the thorough job you did in documenting your build thus far. I am planning to build a trailer from scratch, using an independent suspension set up similar to yours. I liked your idea to use a laser leveling device to true up the axles; I was wondering how to do that.

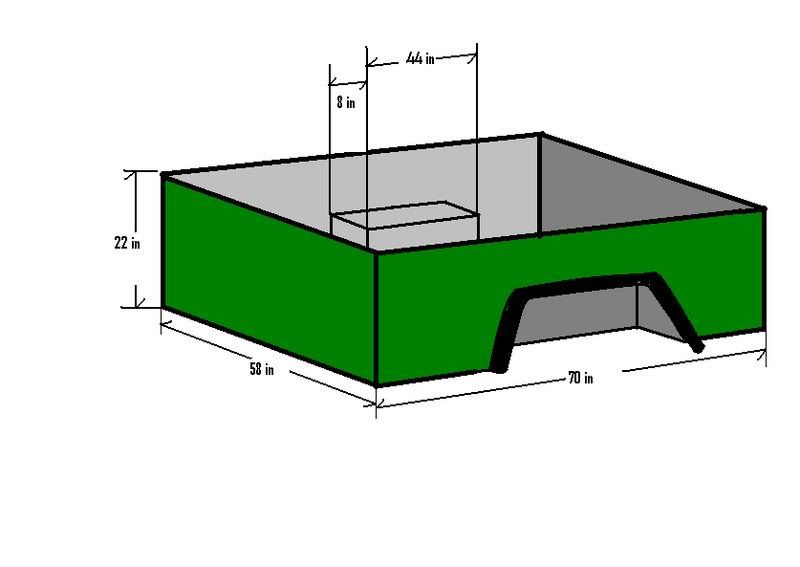
Do you mind sharing the frame dimensions? The trailer I’m planning to build will be a fleet side, but I don’t want the trailer to be wider than my TJ. I decided to go fleet so i can take advantage of the extra square footage.

Here is an example of the tub am looking to build
3DtubandMeasurements.jpg
 

Box Rocket

Well-known member
Very cool Andre. Looking really nice. I love the military lights and it's cool you were able to reuse them.
 

IH8RDS

Explorer
That's one thing I wish I did on mine with the lights. It had no lights when I bought it. I have seen them on ebay. One of these days ill have to pick some up.
Again, great work!
 

dieselcruiserhead

16 Years on ExPo. Whoa!!
Do you mind sharing the frame dimensions?

Hi Slimtwo - my apologies somehow I missed your post.. I'm about to post the latest updates after the last couple weeks. I've been marathoning on a lot of other projects so limited updates. Off the top of my head the frame is 40" wide and 72" long for the box portion (not including the sticking out wheel wells or the tongue). If I were to do it again (or were making something from scratch) really the cargo room is absolutely huge. The trailer is becoming larger and larger as I build it. They never quite look as large in photos as they do in person. It is a lot like the first time I saw an Adventure Trailer Chaser. Much larger because it mimics the lines of a M416. I know they have their smaller unit, if I could I would build the whole thing perhaps 15-20% smaller and it would be about perfect. But again my tow vehicles are also a hair larger as well than your standard Jeep with limited space...

So -- I hope this helps!
 

dieselcruiserhead

16 Years on ExPo. Whoa!!
First, I finished up the remainder of the lights. Yellow turn signal. The large bulb, close to the glass, is the stop light. And the little is a running one. Pretty neat as I'm able to re-use some of the mil spec style lighting. You can mostly see if from behind you (and it is very safe still) but does not have a lot of ambient glow. It is magnified via a bulbous spot in the military glass lens - really neat...

Last post on lighting for now - I promise...

attachment.php
 

Attachments

  • SM_004.jpg
    SM_004.jpg
    120.7 KB · Views: 1,058

dieselcruiserhead

16 Years on ExPo. Whoa!!
Now, to start working on the tailgate latch assembly. I really thought long and hard about this. At first I was going to bridge the frame similar to an AT or most other people's approaches but was never a fan...

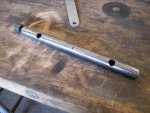
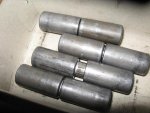
I saw a similar method on ih8mud from I forget who. The slider bar is a piece of 3/4 OD plumbing pipe. The bar is welding supply for affixing joints and it's funny because I use it all over the place. In this case it was excellent for this application... Notice the grease. I also deburred and wire wheeled the crap out of it all to make sure the bar slides well, which it does. The tailgate is "dead bolted" (to an extent), LOL... I will weld up a lock assembly using padlocks most likely for the rear...

Drill to make holes...
attachment.php


The pipe, and the welding supply bars...
attachment.php


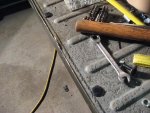
Drill (and cutoff wheel) to make the slider grooves into the tailgate...
attachment.php


Installed...
attachment.php


attachment.php
 

Attachments

  • SM_006.jpg
    SM_006.jpg
    105.8 KB · Views: 1,058
  • SM_008.jpg
    SM_008.jpg
    100.4 KB · Views: 1,053
  • SM_010.jpg
    SM_010.jpg
    106.1 KB · Views: 1,051
  • SM_012.jpg
    SM_012.jpg
    80 KB · Views: 1,051
  • SM_011.jpg
    SM_011.jpg
    85.8 KB · Views: 1,052

dieselcruiserhead

16 Years on ExPo. Whoa!!
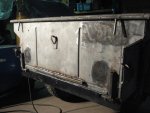
This was the end of day one. Check out the new storage mechaism for the trailer as it now takes up to close the size of a small car :( This will not last permanently as once the trailer is fully built it will be way taller and still take up too much room vertically...


attachment.php


More bounty... Echoing some of Martyn's comments in other threads about "not knowing the costs, time, and labor required to build a trailer until you do it." We are going on 6 months here. So much for short and quick and easy, and cheap... :costumed-smiley-007

14 gauge sheet metal. Each sheet is pushing about 100lbs a sheet :Wow1: I found a favorite new metal supply which is Wasatch Steel in SLC. Nice and cheap, and lots of perfect "surplus" that is 40-60% off on average...
attachment.php


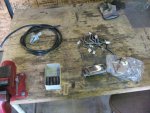
More bounty. Wiring items (these go back in favor of 7 pole), 6 wire cable for wiring, barrell hinges, weld on clamps ala Adam Tolman (thanks for the lead on this adam), and paddle latches from Henderson.
attachment.php


Barrel hinges. Very heavy duty, non greaseable. At Wasatch Steel these were $1.88 a pair or $23 a pair for the greaseable ones. There is a supplier that carries nice cheap greasable ones but I didn't have the time to find where and drive there. With grease preinstalled these should be great. Very heavy duty...
attachment.php


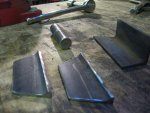
More steel mostly from the ATV / old ATV pallets that were free..
attachment.php
 

Attachments

  • SM_018.jpg
    SM_018.jpg
    102.4 KB · Views: 1,043
  • SM_020.jpg
    SM_020.jpg
    87.4 KB · Views: 1,045
  • SM_021.jpg
    SM_021.jpg
    118 KB · Views: 1,045
  • SM_026.jpg
    SM_026.jpg
    107.1 KB · Views: 1,047
  • SM_022.jpg
    SM_022.jpg
    92 KB · Views: 1,044

dieselcruiserhead

16 Years on ExPo. Whoa!!
Hinge-making. I weighed using door hinges but I liked this and how they work, and again their good reliable beef that I'm expecting...
attachment.php


attachment.php


attachment.php
 

Attachments

  • SM_027.jpg
    SM_027.jpg
    95.1 KB · Views: 1,091
  • SM_028.jpg
    SM_028.jpg
    80.5 KB · Views: 1,086
  • SM_030.jpg
    SM_030.jpg
    90.6 KB · Views: 1,086

dieselcruiserhead

16 Years on ExPo. Whoa!!
Before I installed them I had some lingering things to take care of. With the tailgate cut out the walls became a little more flexible without a center brace. Here was a technique Chendo and I came up with when he was here... This is also a killer way to add some additional attachment for the tub to the frame...

attachment.php


attachment.php
 

Attachments

  • SM_037.jpg
    SM_037.jpg
    77.2 KB · Views: 1,086
  • SM_033.jpg
    SM_033.jpg
    101.2 KB · Views: 1,089

dieselcruiserhead

16 Years on ExPo. Whoa!!
There was either some frame tweakage in the rear (our guess) or something going on. The tub wanted to rest about 1/4-1/2" above the rear frame. We figure tweaking from years hammering with the leaf springs. We had to clamp the body to the frame to get it to attach.

I then used these flat bolts to get everything mated together. Also a killer way to attach the tub to the frame. I also allowed me to get rid of the rear tabs as well...
attachment.php


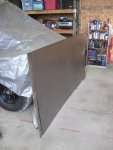
All attached. The welding on the tailgate is structural to stiffen it up...

attachment.php
 

Attachments

  • SM_038.jpg
    SM_038.jpg
    116.7 KB · Views: 1,084
  • SM_043.jpg
    SM_043.jpg
    87.7 KB · Views: 9,449
Last edited:

dieselcruiserhead

16 Years on ExPo. Whoa!!
More bounty. I killed my gallon of black Zero Rust (and as it lasts this should get me by a couple more years I figure) and the tan for the body that me and FJ40 Fax split as I'll never use a whole gallon of this..
attachment.php


Weld on hooks again aka Mr. Tolman from State Trailer Supply on Redwood and about 3500S. Mr. Tolman alsop cleaned them out of most of the cheap ones iwth the 24 he bought, so I bought some even heavier duty for $1.99 ea which is a tad expensive...
attachment.php


I realized I forgot hooks for attaching coolers, etc...
attachment.php


attachment.php
 

Attachments

  • SM_081.jpg
    SM_081.jpg
    88.5 KB · Views: 1,077
  • SM_080.jpg
    SM_080.jpg
    110 KB · Views: 1,082
  • SM_076.jpg
    SM_076.jpg
    93.2 KB · Views: 1,085
  • SM_082.jpg
    SM_082.jpg
    102.8 KB · Views: 9,433
Last edited:

dieselcruiserhead

16 Years on ExPo. Whoa!!
More bounty, about $30 for this sleeve. I cut it up into sections to use it in three places so three hitches for $10 :) Why they powder coat a weld in sleeve??
attachment.php


I only needed a little spud for the rear as anyone who would tow something with this trailer would be dumber than a box of rocks. This is mostly for recovery and to allow my hitch mounted bike rack to fit. The trailer is attracting the attention of some friends so 4 or 5 of us can pack into one car for MTB trips, rather than two but it needs bike storage...

Also note the rear tail gate, beefed up some more...

attachment.php


attachment.php


attachment.php
 

Attachments

  • SM_085.jpg
    SM_085.jpg
    119.2 KB · Views: 1,077
  • SM_087.jpg
    SM_087.jpg
    80.8 KB · Views: 1,075
  • SM_091.jpg
    SM_091.jpg
    97.4 KB · Views: 1,077
  • SM_094.jpg
    SM_094.jpg
    91.8 KB · Views: 9,400

Forum statistics

Threads
188,349
Messages
2,905,972
Members
229,958
Latest member
bdpkauai
Top