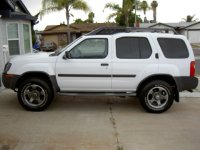
Meet Yeti - 2013 Nissan Xterra Pro-4X

ExpoMike

Well-known member
I figured I should start up a thread on our newest purchase. April this year (2023) I had a total need replacement. Once I was healed up enough to start driving again, I found with our 1999 Cherokee, the pedals are offset a little to the left and the trans tunnel has a outward slope to it. With the new knee, I was finding my knee/leg would hurt after about 20 minutes of driving. I gave it a couple months but no improvement. I didn't have this issue with any other of our vehicles. Since not being able to drive the Cherokee comfortably, it was time to sort out what I would replace it with. I narrowed it down to a very short list. A Wrangler JKU, 4Runner or Xterra. Test drove a Wrangler and found it had a similar issue as our Cherokee. Not as bad but still not comfortable. We sat in a couple 4Runners but found with the sunroof (seems to be a common option) my wife's head almost touch the headliner. Also prices are CRAZY and out of our range. We sat in an Xterra and it seemed like it could work out.

In my research, I found I only wanted a 2013-2015 Pro-4X model and something under 100K mileage. That seems to be rare in SoCal area and expanded our search to NorCal, AZ and NV. We almost had a deal on one in NV and would have flown out and driven back, if we bought it. That fell through. Then I found this one on CarMax site but it was in NoCal. Trying to plan to fly up was an option but they could ship it down to San Diego for $200. Well that's cheaper than 2 of us flying up and driving back, plus saves a lot of time. We decided to take the chance and had it shipped down.

It arrive a few days later and we took a look at it. Very clean and good shape but missing a few things like the floor mats, Xterra specific first aid kit for the rear hatch and the roof light covers. It had just over 65K miles and drove great. We checked things over and made the deal, which included them getting the missing items. I think my only real complaint was with the tires. In pics they looked great but in person, they were at 4/32's tread depth. I questioned that but their policy is they don't replace tires at 4/32's or greater. Annoying but I can put on the tires I want. Having driven it a lot in the last few weeks, it is very comfortable to drive. Way more power than our Cherokee. Bonus, the wife likes driving the X, where she didn't like driving the Cherokee. We will miss the Jeep as it's been a great rig but I think the X will be a great replacement. I did own a 2004 Xterra SE Supercharged I bought new. It was a fun rig but that one sucked for gas mileage.

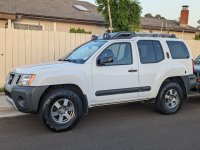
Without further ado, meet Yeti (my wife named it, since it's big, white and likes to explore in the wilderness). I'll use this thread to document my build.
PXL_20230725_023805401.jpg

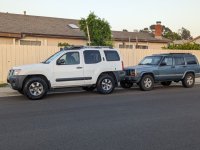
With the Cherokee (make the Jeep look small), which will be for sale

PXL_20230725_023821916.jpg

For history, this was my 2004 X
PICT0036_ppc.jpg
 

Mekcanix

Camper
I am with Pacific Northwest Yeti, I have always liked the Xterra but after working on my wifes Murano I am a bit gun shy for anything Nissan at this point. But nice clean looking rig
 

ExpoMike

Well-known member
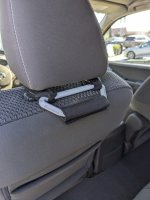
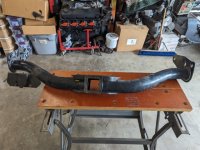
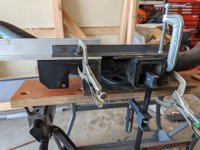
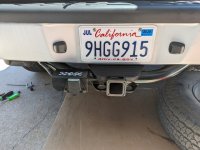
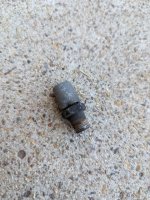
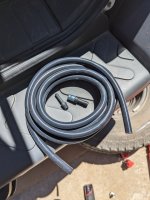
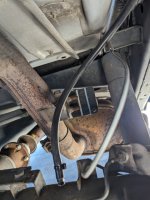
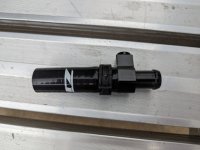
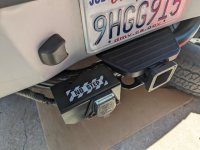
Just a few items added this weekend. I had picked up a factory Nissian trailer hitch and all the wiring from an auto recycler. One common thing I had read about is where Nissan put the bracket for the trailer plug. It was prone to getting snagged by rocks when offroading. I decided to cut the bracket off, modify it and weld it closer to the center of the hitch. Seems like a safer place but time will tell if I am right. I also found these grab handles that mount to the headrest of the front seats. Should help people getting into the back as there is no really great place to grab. It was funny to watch my S-I-L try to get in the first time. :) Also highly recommended by many, I did the rear axle breather relocation mod. I bought my own stuff instead of a kit. I used silicon hose instead of the normal rubber hose, as it should hold up longer. Seems like the quality of rubber had gone done over the years. I also installed some LED reverse lights but forgot to get pics. :(

Grab handles
PXL_20230826_000808076.jpg

Modding and install of hitch. You can see where the original plug bracket was and where I relocated it. I added a "No Step" sticker so folks won't use it for a step.

PXL_20230813_161202666.jpg


PXL_20230813_191733777.jpg

PXL_20230826_190336541.jpg


PXL_20230826_190346627.jpg

Parts for the breather relocation. The first pic is of the original breather that is on the axle. I tends to get full of crud and stops venting. This leads to blowing out the axle seals and leak.

PXL_20230826_195128646.jpg

PXL_20230826_190533789.jpg

Optical Illusion, it is not anywhere close to the exhaust nor rubbing anything

PXL_20230826_195108443.jpg

Vent up behind tail light.

PXL_20230826_195045676.jpg
 

ExpoMike

Well-known member
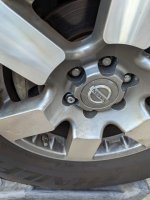
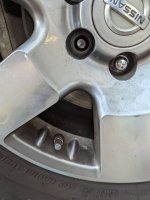
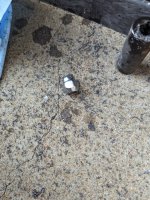
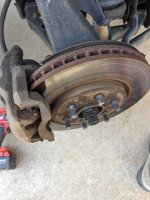
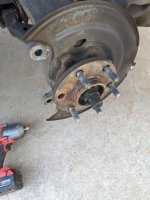
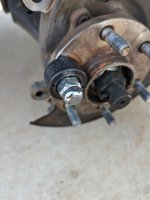
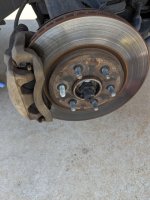
Well... Crisis adverted. Went to get new tires on the Xterra. At some point prior, someone screwed up one of the lugs on the pass front. When they tried to remove it, the whole stud just spun. Not good. Didn't get the tires installed.

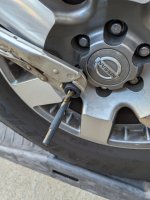
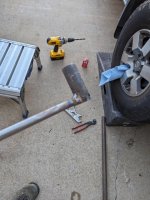
After watching a few videos and finding out there is a specialty tool to do this, I was happy... until I saw the price. $250! If I did this a lot, it would be worth it. Putting my thinking cap on, I figured I could replicate something similar. After checking a 21mm, 1/2" drive, deep socket, there is a round hole in it that a 15/32” drill bit fits. Okay time to get a sacrificial socket at Harbor Freight. Pick up a new bit at hardware store. I have $25 in parts.

Okay, tried to clamp socket in vice grips but kept rotating out. Time to weld a handle to it. Using my 36v drill on low speed and some cutting fluid, less than 15 minutes and it's out. No damage to the wheel. Now I can get the tires installed and then deal with getting a new stud in.

Very happy with the outcome.

PXL_20230830_005452129.jpg

PXL_20230830_005624901.jpg

PXL_20230830_012745310.jpg

PXL_20230830_014047840.jpg

PXL_20230830_014100476.jpg
 

ExpoMike

Well-known member
Why? What makes these models better?
These 3 years, the Pro-4X models came standard with backup camera and navigation system. Nothing wrong with the previous years but I wanted to have those without having to buy/install anything aftermarket. As for why the P4X model in general, they came with Bilstein shocks, slightly larger tire, overhead roof lights, full skid plates and the big thing, a selectable rear locking diff.
 

ExpoMike

Well-known member
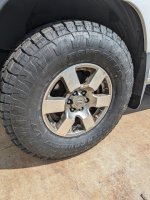
Okay, time to finish up the wheel stud issue and get tires installed. Stud came out easy but the splines on the new one weren't much bigger than the original one. Since the grooves in the hub are somewhat rounded out due to the stud spinning, I decided to add some JB Weld metal epoxy to the splines and pull it in. Used a cool little tool that is a bearing with a tapered seat, that is designed to pull the stud into the hub. Much easier to use when you cannot pull hub off to use a press. With that done, went up and got the new tires installed. Toyo Open Country A/T III. Had them on the Cherokee and liked them.

PXL_20230901_154914801.jpg

PXL_20230901_155444932.jpg

PXL_20230901_160417948.jpg

PXL_20230901_161213492.jpg

PXL_20230901_180611679.jpg
 

ExpoMike

Well-known member
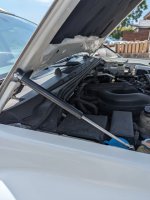
With that done, then I turned my attention to installing some bits I have bought. After hearing how so many Xterra owners said they wish they would have done this sooner, a set of hood struts to replace the prop rod. Easy 15 minute job and it is so much better. Not only is the hood opened higher, now when working on the driver side, I am not dealing with the hood prop being in the way. Well worth it.

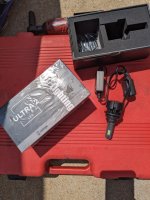
Next up was to upgrade the headlight bulbs. Having had factory LED lights in our RAV4 and putting JW Speaker LED headlights into the Cherokee, the stock Xterra lights felt like a couple of candles stuck to the front. Having researched LED bulbs for the last couple years (was looking to do our Dodge Ram) it seemed after 2 years, the best on the market were the GTR Ultra 2 bulbs. I figured I would take a chance and put a set in. Got to drive them in the dark and yes, these are SO much better than factory and give the same light pattern. No issues with blinding others. Not as good as the JW Speaker headlights but on par with our RAV4. Happy with these.

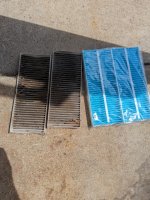
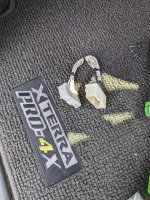
Next up with new cabin filters. OMG the old ones were dirty! Then it was on to installing the rear diff lock bypass harness. This plugs into the factory wiring and controller to allow the rear diff lock to work anytime. From the factory, it would only limit you to 4WD Lo. There are many times I would like to be able to have the locker engaged in 2WD or 4WD Hi. This was an easy 5 minute job. It can always be removed if needed. Sure this take away all of the Nissan "safety functions" but if you're not an idiot and know how and when to use it, it's going to be a great option.

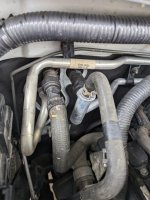
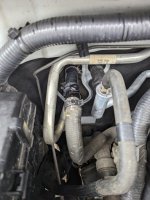
Last item for now, Nissan used a plastic adapter fitting in the heater hose assembly. These are prone to heat cycling and becoming brittle. They will break randomly and if not caught, you can run out of coolant and overheat the engine. Since I did not want this to be a failure point out on the trail, this was done as preventative measure. There is another one in a different heater hose but it looks like that was already replaced with the aftermarket all metal one. Happy to know these will not be an issue.

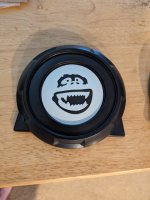
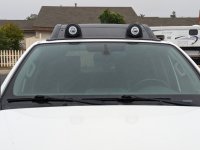
Okay, one last thing, since we named the rig Yeti, I wanted to play around with this theme. The factory roof light covers look so blah and look like there are no lights installed versus when the covers are off. I had a friend make me some Yeti stickers (Bumble from Rudolf Christmas TV show). With the white area, it looks much more like lights are installed but with a twist of a Yeti starring back at you. Something fun!

On to the pics!

PXL_20230901_184737496.jpg

PXL_20230901_185213136.jpg

PXL_20230901_193928755.jpg

PXL_20230901_200042404.jpg

PXL_20230902_161700185.jpg

PXL_20230902_161746635.jpg

PXL_20230902_162634473.jpg

PXL_20230902_151128308.jpg

PXL_20230902_162649414.jpg
 

ExpoMike

Well-known member
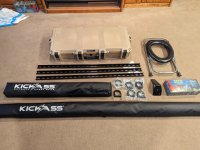
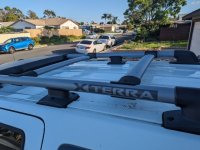
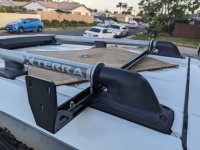
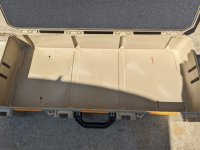
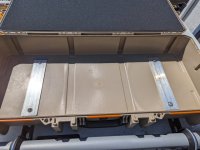
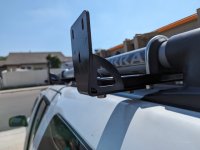
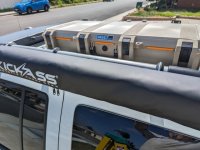
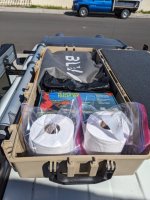
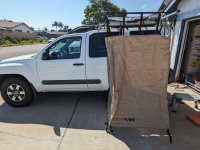
Okay, got a plan together and parts finally arrived. Going to do a uni-strut crossbars on the factory rack rails. My plan it to hold a awning on the pass. side, a privy on the driver side, a Pelican box mounted to the uni-strut, to hold the folding toilet seat, Wag bags and toilet paper. Also mounts to hold a set of MaxTraxs. I think this will work out well and solve the one issue my wife had when we would go out for extended exploring, not having a bathroom available. Started mocking up things to see what I am going to need to modify to get things to fit. Hopefully this all comes out they way I have it in my head.

Lots of parts

PXL_20230914_232524893.MP.jpg

Pulling the old crossbars off and test fitting uni-strut and awning bracket

PXL_20230915_002609898.jpg


PXL_20230915_013536517.jpg

More to come.
 

ExpoMike

Well-known member
Today has been a productive Xterra project day. Overall things went smoothly and about how I planned them.

First up was installing the cargo box on the top. Lots of measuring and drilling 4 holes in the box and piece of aluminum (to spread the load) and bam, box is mounted. Filled it up with the potty items for the one enclosure.

Next up was mounting the enclosure to be used for potty stops (or changing). I bought awning mounts, cut the mounting legs shorter and opened the holes to 3/8". Bolted that to the unistrut. Installed just as I planned and it's so easy to setup. Less then a minute to setup and a couple minutes to put away. This will be a very nice addition.

I need different hardware (bolt sizes were different) for the full awning and some mounting lugs for the MaxTrax boards, so they are waiting to be done.

Okay, pics....

PXL_20230923_174255600.jpg

PXL_20230923_175906322.jpg

PXL_20230923_180406292.jpg

PXL_20230923_182027824.jpg

PXL_20230923_215147910.jpg

PXL_20230923_182224739.jpg
 

ExpoMike

Well-known member
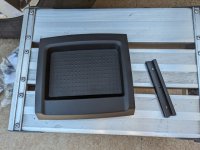
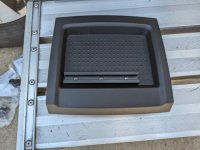
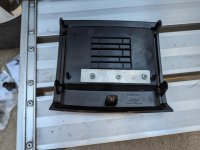
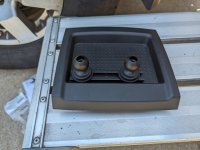
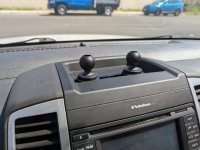
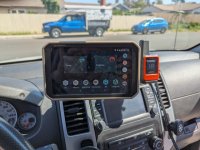
Last up was to setup my Ram ball mounts on the dash, so I can mount my Overlander GPS and InReach satellite message system. Used a piece of aluminum as a backer to the mount, so spread the load. Worked out as I hoped and when in the seat, it doesn't block the radio or view out the front. Yay! (FYI, the rail is offset to driver side, so I can get the Tee nut ball mounts in and out of the track)

PXL_20230923_192809034.jpg

PXL_20230923_200056997.jpg

PXL_20230923_200102353.jpg

PXL_20230923_200148740.jpg

PXL_20230923_200228410.jpg

PXL_20230923_201330017.jpg
 

Pacific Northwest yetti

Expedition Medic
Last up was to setup my Ram ball mounts on the dash, so I can mount my Overlander GPS and InReach satellite message system. Used a piece of aluminum as a backer to the mount, so spread the load. Worked out as I hoped and when in the seat, it doesn't block the radio or view out the front. Yay! (FYI, the rail is offset to driver side, so I can get the Tee nut ball mounts in and out of the track)

View attachment 798038

View attachment 798039

View attachment 798041

View attachment 798042

View attachment 798043

View attachment 798044
Great job with that mount! That gives me a idea for my ZR2
 

Forum statistics

Threads
188,029
Messages
2,901,362
Members
229,411
Latest member
IvaBru
Top