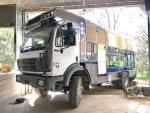
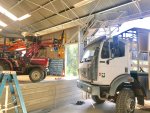
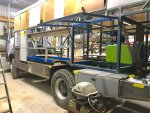
Mercedes 1222A.. The beginning!

Iain_U1250

Explorer
Looks very flash Simon, all things take time when you are doing that amount of custom work. You still have a few years yet before you are beating my record :)
 

Sitec

Adventurer
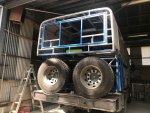
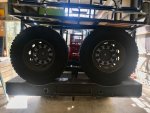
That looks amazing. Are you going to bring the lift eye higher up. It seems that with the weight of the tires you would be below the center of gravity. How does it work when you are of balance with one tire shredded?

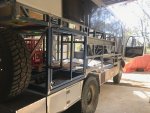
Love the panel recesses in the tire carrier .. another starwars flashback

Hi Joe.

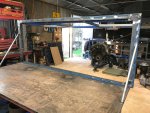
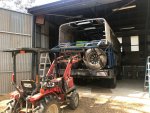
So, there are 4 forklift mast carriage rollers on the rear of the chassis, and they are far enough apart that the mast can't bind. Today is the practise to see if my wife can get a wheel off and back on the rear carrier, so I'll post a few pics later of the antics that ensue, and lifting the carrier with one wheel.
 

Iain_U1250

Explorer
One of the things to try is can she get a completely flat/shredded tyre back on the carrier. When I made my wheel tie down we tested all sorts of scenarios, we had to make sure we could tie down a flat wheel on the roof, meant I needed a bracket that could hold a deflated wheel which was 100mm thinner than an inflated wheel and tyre.
 
Last edited:

Sitec

Adventurer
One of the things to try is can she get a completely flat/shredded tyre back on the carrier. When I made my wheel tie down we tested all sorts of scenarios, we had to make sure we could tie down a flat wheel on the roof, meant I needed a bracket that could hold a deflated wheel which was 100mm thinner and an inflated wheel and tyre.

Yeah, lots of scenario's to try! She has to be able to do most things.
 

VerMonsterRV

Gotta Be Nuts
That looks amazing. Are you going to bring the lift eye higher up. It seems that with the weight of the tires you would be below the center of gravity. How does it work when you are of balance with one tire shredded?

Love the panel recesses in the tire carrier .. another starwars flashback
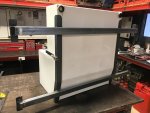
Starwars flashback... We recently added a pneumatic door strut to our entry door. Every time we open it, it reminds me of the original Star Trek TV show when doors opened. Now if only this truck had warp speed :cool:.

Now, back to Sitec. I am guessing you might end up with the turbo. Not sure how your power comes on compared to our 200hp OM366LA but if you have 220hp you might wish for more. I think you will end up a bit heavier than we are given our box is composite. I know I am wishing for a bit more power in the hills and looking into a Atego turbo upgrade.

I really like the tire lift, looks like a very clean design and your welding skills are top notch. Can't wait till you start to skin the habitat, now that will be exiting times!
 

Sitec

Adventurer
And now every time I look at the back of the truck, I too see Star Wars!! Thanks!!! ;) Anyway, back to it. I have one space left under the rear of my 'Imperial Fighter' Overlander. I have had Chris at Abber Tanks in Queensland make a tank to my dimensions. Here it is.

Chassis Mods 67.jpg

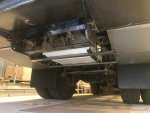
Here's the carrier I have made for it which has two roles. The first is to carry the tank, and the second is to give additional support to the two underslung lockers.

Chassis Mods 68.jpg

Here's the tank mounted in situ. There will be two drain points. Both with a tap located just behind the rear mudflaps, so they're protected and it gives us the option of which side we drain the tank too. This will only be used when we are in a mainstream camp ground.

Chassis Mods 69.jpg
 

Simon dix

Active member
And now every time I look at the back of the truck, I too see Star Wars!! Thanks!!! ;) Anyway, back to it. I have one space left under the rear of my 'Imperial Fighter' Overlander. I have had Chris at Abber Tanks in Queensland make a tank to my dimensions. Here it is.

View attachment 608644

Here's the carrier I have made for it which has two roles. The first is to carry the tank, and the second is to give additional support to the two underslung lockers.

View attachment 608645

Here's the tank mounted in situ. There will be two drain points. Both with a tap located just behind the rear mudflaps, so they're protected and it gives us the option of which side we drain the tank too. This will only be used when we are in a mainstream camp ground.

View attachment 608646
Nice work Simon. My truck would do a wheely with that tank ?
 

Sitec

Adventurer
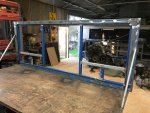
Over the last week I've been working on a rear door that will also have two double glazed opening windows. First pic is of the door frame and door closed.

Body mods 65.jpg

Next up is the view with the door open. Trying to find decent catches that can be opened from the inside only proved to be quite hard, as pretty well all decent latches have the door opened form the outside. I ended up using two spring bolts, which though agricultural have worked out well as I want some rigidity in this door when it's closed. I also have some dove tail locating blocks that will be going on to help keep it in position when closed.

Body mods 66.jpg

I also now have a large hole in the rear of the truck... Hopefully tomorrow it'll have a door in it!

Body mods 67.jpg
 

Sitec

Adventurer
The trusty little tractor is pressed into action again and gets the door and frame close enough to the hole for me to lift it into the truck.

Body mods 67.jpg

Next up was to weld it in place! The hole was even the right size!!

Body mods 68.jpg

With the frame properly welded in, I lifted an old floor board up onto the bed room platform, opened the new door, and for the first time could sit in the 'bedroom' with a coffee watching the world go by!

Body mods 69.jpg
 

Sitec

Adventurer
As I had the truck running and mobile, I had another job that needed wrapping up before the body gets removed for paint. I had to test the twist, and get the chassis as twisted as much as it can be before the side skirts contact the body, then devise and make some chassis twist stops. The front axle was still chocked at this point (a block of wood between the front axle and chassis on each side), so there is still plenty of axle travel left. I just want the chassis to twist a little to assist with bettering our axle travel off road. I'm not looking for Mog style twist! Here's the left pic.

Twist Test 3.jpg

And the view from the other side...

Twist Test 4.jpg

And lastly the view from the rear.

Twist Test 5.jpg

Sorry for the pic quality... The sun was in the wrong place!
 

Sitec

Adventurer
With the chassis twisted in an 'off road' position to the max amount I'd like it to travel before risking contacting the body, I then cut some twist stop templates, fabricated some RHS stops, and tacked them in place. There are 3 per side in line with the rear pivots.

With pretty well everything fabricated under and around the body, the time has come to strip it all back off! I had the painter visit on Friday night to assess the job of painting before stripdown. Today was spent blitzing the workshop and moving a few things, so that the body can end up back on the top level of the workshop for priming and cladding in alli.

First up was to strip all the lights and infill panels off the roof rack.

Progress 9.jpg

With the roof rack stripped, the side infill panels and all the clamps removed I was able to lift the roof rack off. O modified the lifting jib, as it didn't need to be so long as I utilised the step in the workshop.

Stripdown 1.jpg

Next up is the rear lower lockers, grey tank and side skirts.
 

Sitec

Adventurer
So, before pulling everything off, there were a few things I had to do, finish and plan... First up was the side marker lights. I have managed to get pretty well all of them equidistant on both sides except either side of the rear wheels, without having to modify anything, or have a light in an odd place.

Narva 90212 LED side markers .PNG

I'm fitting 6 of these either side (roughly marked by the yellow tape). They are an LED light that only requires a 19mm hole. 5 will be on the skirts I've built, and one on the little flat plate on the top entrance step into the cab... It's in line with the rest, and I'm hoping will act like a bit of a step light. Being almost flush with the skirt face, they shouldn't get knocked out by foliage when we are off the beaten track.

Chassis Mods 70.jpg

The second job happening here was devising a fold out platform for the Webber Baby Q and 2 gas rings that we'll use for external cooking. I have a video of the card template I have made... I'll try and upload it.
 

Iain_U1250

Explorer
Hi Simon, on mine I have the ones that are orange and red depending on what direction you look at them, those are what the QLD required. I have the Hella LEDs ( Bottom right just above the air tank.

unimog-photos-7039-jpg.613128
 

Attachments

  • Unimog Photos-7039.JPG
    Unimog Photos-7039.JPG
    832.8 KB · Views: 324

Forum statistics

Threads
188,155
Messages
2,902,901
Members
229,582
Latest member
JSKepler
Top