Mercedes 1222A.. The beginning!

Sitec

Adventurer
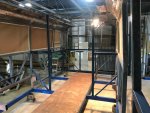
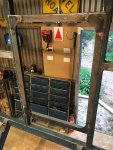
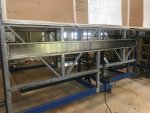
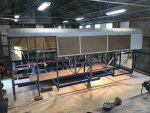
So, there's been some more work since I last posted. Pretty well all the original floor superstructure has now gone, and the new floor beams are in. The door frame has been relocated, and I can finally step in and stand up in my box!! With the new width and depth, the feeling that it was a 'long' box has completely gone! I had the comment on a Faceplant forum that 'wouldn't it have been easier to start from scratch?'... I too have had this thought a few months ago, but having continued with what I have, this box has given me a basis to work from, it's given me glass (lots of it), it's given me the door, and all associated measurements and fixtures to go with it, (and a scale plan of how to do the other doors!). I still think I'm well ahead on cost and time as I've had something to work from. I'm nearly at the point where I have to have a trial fit on the chassis and make the 4 point mounts!
519724
 

Sitec

Adventurer
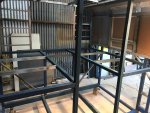
In slowly chopping the old floor out, I've had to think ahead and make the body firm enough before I cut each section of the old 'chassis rails' out. Here's a shot from inside, showing the start of the kitchen partition and the diagonal supports needed to keep it square. We really start to get a feel of how it's going to be. Wifetec is keen too!! :)

519728
 

Sitec

Adventurer
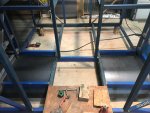
So, progress has slowed a little, due to time and forward thought!! Under the bathroom and shower floor will be access (from the rear lockers to under the kitchen units) for cables, pipes, drains etc. I'm trying to get this all factored in in my head so I don't end up doing it twice! I have the second partition in which has allowed me to start work on the bed platforms and also think about sheeting the inside of the rear lockers... which in turn means I have to think about how high the water tank will sit above the chassis rails, and then what rooms I have for the two large clothes draws that will form the steps between the beds! Talking of beds, here's the start of the platforms.

522962
 

Sitec

Adventurer
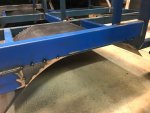
Once the simple work of partitions was done, I turned my attentions back to the area under the shower and bathroom. First thing that had to be done was the wheel arches. Using the folder at work I 'rolled' the ends to suit a card template and then tacked them in. These will be fully welded and sealed, then insulated before the floor section goes in here. I can go from the front of the rear locker through to the kitchen wall with form ply, which then gives me a floor to build a frame on to carry the shower and toilet floor, and the step in the middle of the two cubicles. This 'step' also forms part of the access tunnels for cables etc, as well as a central 300mm deep floor locker for shoes, boots etc. This will make more sense as it happens.

522964
 

Sitec

Adventurer
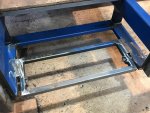
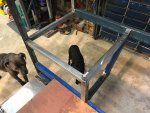
Hi all. This will be the last update for a few months, as we're going walkabout to the Northern Territory for a while. It'd be better if the truck was done... Perhaps next year. So, with the wheel arches fully welded, I then decided to look at the access door area and body to cab front face. We've been pondering step options, and have settled on a large vertical folding step that sits upright inside behind the access door. When stopped, the door is opened and the stairs hinged out and down to the lowered position. These will be assisted by gas struts so should be fairly simple to use. Originally I was going to have some simple fold out floor steps, but that's all well and good for me with long legs etc while I'm still young enough to jump about, but as Wifetec pointed out, we are not getting younger. Add to the fact that she tends to blunder in and out of things, we decided decent stairs are needed. I set up a folding stairs on the end of the work bench (using the original back locker stairs and timber blocks). The bench was only 1.0m high and with 350mm steps Wifetec looked like a spooked cat going up and down! Step spaces are now at 225mm apart so should be simple for all to use. The folding hinges form part of the footwell floor so they can be folded in or outside the body. Sounds complicated, but the card template worked so it should be fine!!! Here's the internal footwell with hinge points welded in place.

524913
 
Last edited:

Sitec

Adventurer
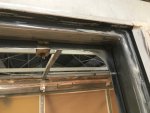
Once the footwell was in, I then replicated the original door frame trim, latch and gas strut point. The joys of having something to copy!

524914
 

Sitec

Adventurer
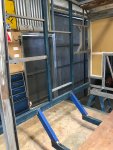
Finally, it was time to cut the last of the old floor out, finish the chassis rails and look at the cab access hatch size and position. This sits in the center of the seating area, and there'll be a door hinged on the right side that opens into the cab beside the driver, allowing the passenger to access the living area whilst mobile. The cab will have a slightly larger opening which will have a sliding door that slides to the left of the vehicle (on the back face of the cab). The slider will prob remain open most of the time (noise and heat might change this! :) ).

524915
 

Sitec

Adventurer
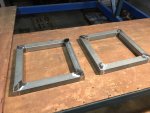
So it rained here all weekend... Not conducive to being outside doing boring stuff like chopping wood, mowing lawns etc, so I managed to have a few more hours in the workshop! Frames made for the two MaxxFan units. Just have to fit them into the roof framework now...

527474
 

Sitec

Adventurer
Hi all.

So, after an entertaining 3 day road trip from Adelaide to Darwin (3100km), we collected the outlaws at Darwin Airport and then had the last 4 weeks working our way back with them via Lichfield National Park, Kakadu, Alice Springs and the Painted Desert (5000+km). We put them on the plane home to the UK early yesterday and I then managed to get a weekend back in the shed!!

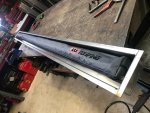
I'm now pretty well at the point where I have to remove the crane and tray, sit the body on the chassis and start to fabricate the 4 point mount and underside lockers etc... Until the crane sells I am pottering with small jobs (the boring ones that I can't be arsed to do!). Anyway, one job that did need doing and wasn't boring was the awning recesses. I say 'recesses' because Wifetec had the good idea that we should have an awning on either side so we can be out of the wind whatever direction it may be coming from. I'd already decided that I was going to use the cheep simple (and replaceable) ARB/TJM 4x4 awnings that we have available here in Australia. For some reason I had it in my head that these were approx. 50mm (2') thick. They're not! I recently bought two ARB 2.5m x 2.5m (98" x 98") awnings at the local Caravan and Offroad show for $500 AU, and when I got them out of the box I found them to be nearer 100mm (4") deep. This necessitated a quick rethink on my original awning recess as drawn. I'm going with the same sunken format as drawn, but as the awnings are 100mm/2" deep, I have lowered them slightly. This sits the 'awning box' just under the kitchen work surface.

I found a local engineering company who were able to fold me the material to form the recess. The 'box' required a join in the middle as the awnings are 2.5m long. Yesterday was spent fabricating the boxes....

Body mods 39.JPG
 

Sitec

Adventurer
Then it was time to take the cutting disk and attack the body again! I had visions of some loud 'twangs' as I cut the 150mm out of the uprights but I was lucky. Minimal movement. I wanted to take a pic before putting the box in but promptly forgot! So here's the left awning recess in and welded.

Body mods 40.JPG
 

Forum statistics

Threads
188,161
Messages
2,902,903
Members
229,582
Latest member
JSKepler
Top