You are using an out of date browser. It may not display this or other websites correctly.
You should upgrade or use an alternative browser.
You should upgrade or use an alternative browser.
Mercedes 1222A.. The beginning!
- Thread starter Sitec
- Start date
Sitec
Adventurer
Hello! No cutting machine... just the 5" grinder!very nice, do you have a cuting machine at home?? this would be nice for me even a simple plasma machine.,..I think is the next
Sitec
Adventurer
Not too many. I use the Pferd 1mm thin cutting disks, so only about 4 in total. I used a thicker standard 5" disk for cleaning out the corners. Time consuming but rewarding when done.How many cutting wheels did you go thru on that little exercise???
Iain_U1250
Explorer
I bought a cheap plasma cutter, worked great. Cuts through up 10mm steel and 2mm like butter. Looking at the pic with your shed, looks like it just fits in - not a millimeter to spare
Sitec
Adventurer
I bought a cheap plasma cutter, worked great. Cuts through up 10mm steel and 2mm like butter. Looking at the pic with your shed, looks like it just fits in - not a millimeter to spare
Hi Ian. Yeah, I've thought about buying a Plasma Cutter.. along with a folder, cropper, oxy etc, but for the little amount I'd use them I have always found another way, or borrowed the kit at work. Re the shed, it was built to suit the truck. There's about 500mm spare!
Sitec
Adventurer
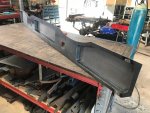
Once the backplate was done, I spent a good hour scratching my head as to how I was going to fabricate the rest. I had decided a few weeks ago that there would be some usable space in this rear bumper, and wanting to utilize all the available space outside the habitat I will be building in some 'hidden' doors, that are only accessible when the rear bumper/wheel carrier is lowered. There will be about 20mm between the back of the rear side lockers and the front face of the bumper. With some foam in the gap, the doors and rear storage will be totally hidden. Here's how far I got today.
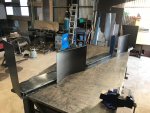

Wazak
Member
Do I see a series 2a bulkhead there near the welding equipment?Once the backplate was done, I spent a good hour scratching my head as to how I was going to fabricate the rest. I had decided a few weeks ago that there would be some usable space in this rear bumper, and wanting to utilize all the available space outside the habitat I will be building in some 'hidden' doors, that are only accessible when the rear bumper/wheel carrier is lowered. There will be about 20mm between the back of the rear side lockers and the front face of the bumper. With some foam in the gap, the doors and rear storage will be totally hidden. Here's how far I got today.
View attachment 579180
Sitec
Adventurer
Do I see a series 2a bulkhead there near the welding equipment?
You do! It's the wife's project! There's the chassis just to the left of the bulkhead too... It's an ex Australian Army SWB, that was a little hacked about when we got it. It now has a Stage 1 V8 front axle, and a disk brake conversion I'm working on, along with a 200 Tdi, LT77 gearbox and LT230 transferbox. The plan was for it to be her summer car, but it's also now planned to be towed behind the truck on an A Frame.
Sitec
Adventurer
I had a bout of energy this morning, so went into work early and managed to cut and fold up some top plates and door plates for the hidden front face. This evening was spent putting the lifting eye cross member in, and then the center plate with the hole in it (10 points for the first person to guess what the hole is for...  ). I've also managed to tack the right hand top plate in too. Here's how I left it this evening.
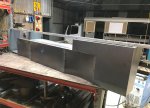

Sitec
Adventurer
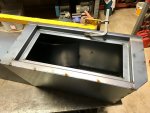
Not wanting to waste any space, the rear bumper will double as a hidden locker, with the access doors only visible when the bumper is lowered to access spare wheels etc. Here's the left hand hidden door frame. Tomorrow I'll tack the right hand framework in and then have a crack at welding the whole thing up without too much warping! Wish me luck.

Sitec
Adventurer
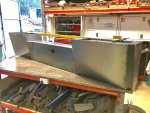
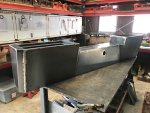
This morning was spent finishing the right hand hidden door frame, and then welding the bumper up. As there are so many corner welds, I was conscious it might warp. Most of it is 2mm as it needs to have some rigidity about it. The wheel wells are 3mm, as they have to support the weight of the spare wheels. The only thin bit is the bit that is wrapped around the mast. This is 1.6 so I expected this bit to warp, but as it's not seen I wasn't too worried. With the sink half full of water and a wet rag ready, I started with 200mm/8" weld runs. After each 8" weld, I'd apply the wet rag to the weld to take the heat out of it, and stop the expansion. It seems to have worked. Here's the result... Minimal warps so far. Now to cut the tacks holding it to the bench and weld up the rear face. I'll let you know if there's a big bang as I start to cut the tacks and the thing ends up like a banana!!
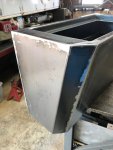
Still no guesses on what the hole is for...


Still no guesses on what the hole is for...
Similar threads
- Replies
- 0
- Views
- 159
- Replies
- 0
- Views
- 1K
- Replies
- 2
- Views
- 988
- Replies
- 26
- Views
- 4K

