Mercedes 1222A.. The beginning!

Sitec

Adventurer
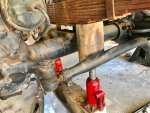
So, I'd like to say I've had an exciting weekend working on the truck, but I have to say I'd be lying! I've had the most boring soul destroying two days cleaning and sanding the chassis ready for some paint. Before I parked the truck in the workshop, I steam cleaned it at work, and thought I had it pretty clean... I was wrong! I enlisted the help of a workmate, as it all seems to happen quicker when there's two of you bouncing off each other. Saturday was the most productive, and by Sunday lunch we'd managed to get a full bucket of crud of the chassis, axles and trans. I also managed to undertake a slight suspension lift at the front by means of a 40mm spacer between the springs and the axle. The rear axle already had a 40mm spacer, and just before I started the strip down I measured the difference between the front and rear and 40mm was the difference. With the truck on stands, I lifted the spring off its position and slotted the spacer in (one side at a time!).
Chassis Mods 71.jpg

Here's the RH side with the spacer in and new U bolts torqued up. The local wrecker didn't have any that were suitable, but the local spring works made these in a few hours.

Chassis Mods 72.jpg

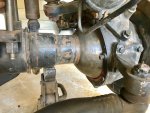
Next up was to clean the swivel housings. I hadn't realised these are grease filled and not oil... I had a horrible feeling that due to the state of the ball surface that they might be empty! Once cleaned though, they are actually very good. I'm still not convinced that the grease can get to the uni joints though, and am considering trying some EPLO liquid grease in there.
Chassis Mods 73.jpg

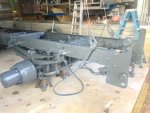
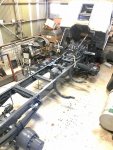
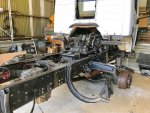
Here's how I left it on Sunday afternoon. I think another weekend of cleaning after fitting a few parts, and tidying the air lines and wiring up should have it somewhere near ready for paint. :)
Chassis Mods 74.jpg
 

Madoxen

Active member
I think with these trucks u can clean them till u think there is nothing left to clean then the next day u find hole areas that dont look like they have been touched, three cleans later and u still find more crud. I only wish i could find money in my wallet like i find crud and gunk on the truck lol
 

Sitec

Adventurer
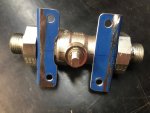
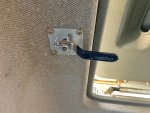
After a bit of a lull, I have started tackling the jobs that need to be done before painting the chassis. The first is the horn supply and tap... I found a decent length hydraulic hose and metric fittings which has allowed me to get a decent air supply to the top of the cab direct from the additional air tank I fitted. Finding a decent air tap that has decent flow, but has the ability to be fitted through a 'bulkhead' or in my case the cab roof proved difficult, so I'm modifying a ball valve. I've removed the handle, and made two brackets that match the thickness of the original Dowty washers, so they are sealing the unions as well as making it mountable. This will bolt to the roof and be sealed as I bolt it. I'll then refit the tap handle inside the cab. I looked at the train horn taps, but they don't lend themselves to being bolted through a roof.

Cab Mods 38.jpg

Cab Mods 39.jpg
 

Sitec

Adventurer
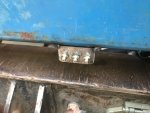
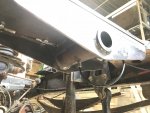
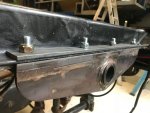
Next up is the chassis to body pivots. These had to be removed, and grease points drilled tapped and fitted. The location of the middle two is not conducive to regular greasing, so I have fitted remote grease lines. We have all this in stock for the Krone Balers we sell. I now have 3 grease nipples at the rear of the truck, accessible just above the towbar. With them here, they'll get greased!

Chassis Mods 75.jpg

Here's the grease line on one of the mid pivots.
Chassis Mods 76.jpg

While the pivots were off, I was also able to drill the top clamping strips, and then bolt the pivots up properly with 8 bolts and new Nyloc nuts.

Chassis Mods 77.jpg
 

Sitec

Adventurer
A few hours today had the horn tap fitted and a tap extension with an interior plate made and fitted too.

Cab Mods 41.jpg

The rest of the afternoon was spent removing the track rod and drag link as though not that old need new gators as they are all cracked or perished. I have also added grease nipples to each ball joint.
 

VerMonsterRV

Gotta Be Nuts
So, on my long term project list is adding an air horn. The plan is a single Mack style horn that I intended to use a 24v air solenoid wired to the current horn switch (or even a dash mounted toggle that could switch between the standard and air horn). Since this would be my first air horn why did you go with a manual valve? Does my plan sound reasonable?
 

Joe917

Explorer
So, on my long term project list is adding an air horn. The plan is a single Mack style horn that I intended to use a 24v air solenoid wired to the current horn switch (or even a dash mounted toggle that could switch between the standard and air horn). Since this would be my first air horn why did you go with a manual valve? Does my plan sound reasonable?
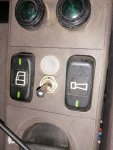
Very reasonable, You just described our setup. 24v solenoid controlled from the horn button on the end of the signal stalk. Dash switch(factory) to go between air horns and electric incognito horn.IMG_20200610_142914.jpgIMG_20200610_204714.jpg
 

Sitec

Adventurer
Why did you go with a manual valve? Does my plan sound reasonable?

There's a story as to why... About 20 years ago when I was still living in the UK, I had a Land Rover 101 and large diesel engine in it which had the compressor so it seemed logical to fit an air tank and make use of it... This Land Rover also had a large triple air horn that I'd bought when I was in Thailand. One early cold frosty morning, I drove over to a mates place in the local town and just lightly tapped the horn button to give a little chirp of the air horns to let him know I was outside. Well, I can only put it down to moisture in that electrically controlled valve, but the 'little chirp' became a very long loud blast. No mater what I did it wouldn't stop! We ended up turning the engine off and draining the large air tank to shut the thing up! So, I considered the electric valve for all of 5 seconds, because the thought of the K5LA (pictured) blowing continuously was not good! ;)

K5LA.jpg

Re your plan, yes as Joe917 said, it sounds fine. The only thing I'd change is I would have a fail safe mechanical tap in the line... but that's purely because of my incident! I have another tap on our horn supply line where it comes out of the tank just in case!!! Once bitten, twice shy!


Sitec

Adventurer
Hi all. So, after a long 'flat' few weeks of ignoring the truck, I finally found the gusto to finish cleaning the chassis. The amount of rubbish that we have scraped off this thing is unbelievable. Even though it looked clean, we still ended up with a decent bucket full of soil, grease, oil, broken cable ties and unnecessary wiring! Little jobs like re sealing the leaking front diff cover plate, replacing perished air brake lines and gators, running new fuel lines etc to incorporate new accessible fuel filters, a one way valve and hand primer all seemed to take time too. Last night I got the paint gun out and made a start! Just a slight difference!

Chassis Mods 78.jpg
 

Sitec

Adventurer
Hi fella. So, I'm using Solver Ag Enamel. which mix to the colour you want. It coats very well, sticks to anything, and dries within half an hour. I'm going with one coat as it's gone on well, and realistically, very little of the chassis will be seen when the job is finished. :)
 

Sitec

Adventurer
Sunday and last night was spent doing some final masking (masking the axle swivel balls was fun!), and then painting. It's not a job I want to do again, but I'm happy with the results. Once the wheels are painted, I can then focus on finishing, priming and painting all the side skirts and lockers I've made. With these fitted the truck can go and have the cab painted.

Chassis Mods 79.jpg
 

joeblack5

Active member
That looks fantastic. You already have a spare engine painted as well,.... you could put that in the back and drive the front wheels with it. I think DAF had a truck like that for Paris Dakkar. DeRooy I believe was the driver.
 

Geo.Lander

Well-known member
Sunday and last night was spent doing some final masking (masking the axle swivel balls was fun!), and then painting. It's not a job I want to do again, but I'm happy with the results. Once the wheels are painted, I can then focus on finishing, priming and painting all the side skirts and lockers I've made. With these fitted the truck can go and have the cab painted.

View attachment 629771

Amazing work, makes me want to paint my chassis!
 

Forum statistics

Threads
188,201
Messages
2,903,720
Members
229,665
Latest member
SANelson

Members online

Top