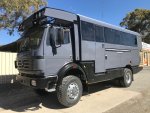
The last few days have been busy. The temp is warming which always makes the amount of energy and motivation seem to dwindle. It's also not condusive to painting, but we have managed to get on and shot blast the roof rack and its associated parts, etch prime and paint it and manage to get it atop the cab without disaster! There are no pics of the rigging to get it there as some dodgy lifting was occuring, but here it is mounted for hopefully the last time!
View attachment 697404
The blue badge came with the later grille so will change. It'd be nice to have 340hp, but it will read 1222A Overland Class and be backed by red not blue as I think it'll work in better with the grey, black and silver.
View attachment 697405
Now to wire all those lights in!
View attachment 697406

