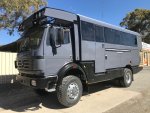
Mercedes 1222A.. The beginning!

Geo.Lander

Well-known member
The last few days have been busy. The temp is warming which always makes the amount of energy and motivation seem to dwindle. It's also not condusive to painting, but we have managed to get on and shot blast the roof rack and its associated parts, etch prime and paint it and manage to get it atop the cab without disaster! There are no pics of the rigging to get it there as some dodgy lifting was occuring, but here it is mounted for hopefully the last time!

View attachment 697404

The blue badge came with the later grille so will change. It'd be nice to have 340hp, but it will read 1222A Overland Class and be backed by red not blue as I think it'll work in better with the grey, black and silver.

View attachment 697405

Now to wire all those lights in!

View attachment 697406

Looks amazing Sitec, love how much thought has been put into those lighting configs and the rack in general, spot, side flood, front flood. You gonna see those Roos for sure ?
 

Sitec

Adventurer
Armed with the trade plate we decided it was time to see what the truck drove like on the road. It needed fuel anyway! I'm pleased to say that it drove very well. I was surprised how well it went. Very different to when it had the crane and tray on. Much lighter which was a huge relief! There'll be another tonne or two to go on in water, fuel and interior fittings but it is at least lighter than I'd thought it was going to be!

Progress 14.jpg
 

Madoxen

Active member
Makes you feel like a very big metal gauntlet has just slapped you in the face. Challenge accepted. Although not sure how close to your standards i will get sitec
 

mog

Kodiak Buckaroo
Armed with the trade plate we decided it was time to see what the truck drove like on the road. It needed fuel anyway! I
It looks awesome ++++ :love:
Man, that was a lot of hard work (for you, I just had to click to follow along), but it sure has paid off tenfold.
But were your plans upside down, because the cabin door and steering wheel are on the 'wrong' side ?
 

Sitec

Adventurer
An update on the antics here... With the bulk of the insulation in place, it was time to contemplate lining the Hab Box. Thermal bridging has been on my mind since the start. Much as I'd like to think there will be none, in reality a hab box that has any form of steel or aluminium in it as framework or in the form of door and window frames is going to have thermal bridges. However, I can at least lessen it where I can. The bulk of our hab box frame is made from 50 x 50 RHS with an alli skin on the outside, and a 3mm ply skin on the inside. I have decided to thicken the wall thickness by 10mm with ply battens...

Final leg 36.jpg

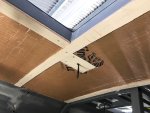
These ply battons give me 10mm of space for another layer of insulation. They also give me space to run the wires for the downlights without having to drill holes in the original framework. The ceiling, and walls will all have this extra layer on them. With all the battens in place, I could then run the lighting wires in and down light mount plates, and then cut and glue the extra layer in...

Final leg 37.jpg

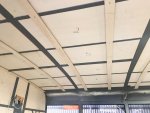
With the bulk of the ceiling insulation and battens in it was time to start cutting and fitting the interior ceiling sheets. At over $60 a sheet, I don't want to get these wrong!

Final leg 38.jpg

I'd already made some cross support bars with the shape of the roof, so set too with the first sheet. With all the stands and clamps removed this morning, the sheet stayed in place! Happy days! Today we start at the front and work back!
 

luthj

Engineer In Residence
I recently discovered the expanding foam used to plug gaps around windows, is a fantastic adhesive (in the states we actually have a version that's specifically an adhesive). Sets up in an hour, and won't sag when hot like contact adhesives.

1640645330920.png
 

Sitec

Adventurer
What glue /bonding agent are you using ?

Glues.jpg

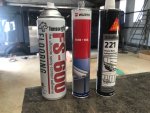
I have used Wurth Bond and Seal (in Grey) for all the exterior panels and cappings, and also for the interior 3mm panels to the timber battens. It's sandable and overpaintable. For sticking the 50mm Kingspan insulation to the inside of the Alli skin, I used Tensorgrip FS-600 (a neighbor owns a flooring company and said it was good gear!). I've also used this to bond the inner insulation to the Kingspan insulation and RHS where they cross. Lastly I am using Sikaflex 221 to seal the joins where the 3mm laminated ply sheets meet, and where the laminated ply sheets meet the floor etc.
 

Sitec

Adventurer
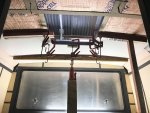
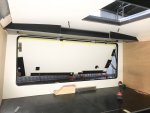
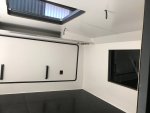
Happy New Year all! With a few days at home, it's surprising what can be acheved! We now have all but one of the ceiling sheets glued in place. I still have speaker wires and the TV antenna wire to run before the last sheet goes in. However, we were able to make a start on the sleping area. Having watched Unimog Adventures video on their truck and it's layout, they pointed out that side mounted overhead storage makes the area feel crowded and too enclosed. Not only that, it'd eat into the space above when sat in bed reading. With this in mind, we have gone for a slim rear storage area, which will also house speakers, and provide mounts for the ceiling fans.

Final leg 39.jpg

This shelf had to go in prior to the wall sheets, as I'm using the walls to support the shelf. I was able to line and fit the internal parts of the shelf while it was on the bench before fitting it and carrying on with lining the rest of the sleeping area.

Final leg 41.jpg

Next job is the toilet area! I'm prioritising the areas needed as I go!!
 

Paddler Ed

Adventurer
Looking at the formply (at a guess) bed base, and remembering a conversation with a work mate who had this issue, how are you ensuring there's ventilation to avoid condensation forming and therefore mould on the mattress? He ended up having to buy a whole new ($1000) mattress, and then drilling a load of holes in the bed base to increase airflow.
 

Sitec

Adventurer
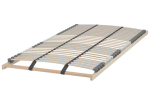
Hi Paddler Ed. I plan to use either a product called Froli, or a couple of Ikea bed bases with slimline slats. We used to have the same issue with our roof top tent, and don't want a repeat of it in the truck! :)

Ikea base.png
 

Paddler Ed

Adventurer
Hi Paddler Ed. I plan to use either a product called Froli, or a couple of Ikea bed bases with slimline slats. We used to have the same issue with our roof top tent, and don't want a repeat of it in the truck! :)

View attachment 699965
I had a feeling it would be under control, but worth checking - it also adds content for people to find and learn from!

That looks a good solution, I might hunt something similar for our trailer.
 

Forum statistics

Threads
188,151
Messages
2,902,797
Members
229,582
Latest member
JSKepler
Top