mgmetalworks
Explorer
Hello everyone!
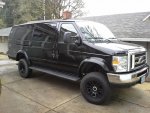
I've seen a lot of really great builds here so I thought I'd also share the progression of our family adventure van.
We picked up the van about a month ago and so far I've completed two of the projects on the long list...
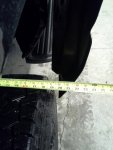
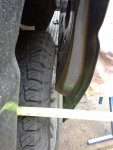
First up was modifying the slider hinge so the door would clear the tire. In the process I learned that extending out an inch or two is moderately simple but beyond that gets kinda ugly, both in the complexity of rebuilding the hinge and the reality of what needs to be cut out of the door to make it work. I've started a 3D model in Solidworks for a new design and an every-evolving prototype hinge for 3+" of extension. I've had to set that aside for a couple weeks due to a new job and new baby but stay tuned...
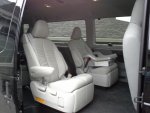
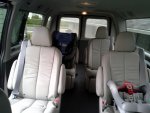
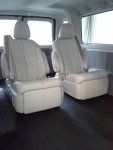
Second project was to install reclining seats from a 2011 Toyota Sienna. When we bought the van, my wife sat in the bench seats and laughed. I think she was trying to tell me that there was no way we'd go from a nice Tahoe to a 4x4 van if the seats in the van were "that" uncomfortable. I did some searching for custom seats but most of what comes up looks like it belongs in an RV. Then on Ebay I came across an auction for the Sienna seats and I started doing some research. I called the seller which happens to be a wrecking yard who buys factory take-outs and blemished seats from the Toyota factory. Prices range from $750/pair for seats that don't pass quality inspection up to close to $1300/pair for new take-outs. I chose not to roll the dice with blemished seats but I talked the guy down a bit and bought 4 of the new take-out seats. They are very comfortable. Probably the most comfortable automotive seat I've been in. The color matches the light grey trim in the van pretty well.
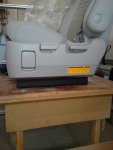
I didn't want the sliding tracks that the seats normally mount into so I removed the four latches at the bottom of the seat and designed my own mounts. I originally had the mounts designed to be taller but the material utilization on the laser was pretty bad. I'm glad I reduced the height because as they are, they sit just a little lower than the front seats so if I wanted to reconfigure the interior and put them on swivel or quick release mounts, they wouldn't be too tall.


Even though the extended van is pretty big inside, you put 4 of these seats in it and room goes away very quickly. Placement is kind of a compromise of space in the back, getting in and out and reclining. I think I did pretty well for all of the factors involved. Since the two rear seats sit between the wheel wells and the recliner lever is inaccessible, I had to relocate the recliner lever cable to the now not-in-use track slide lever. I had to fabricate a bracket to hold the cable but overall pretty straight forward swap.
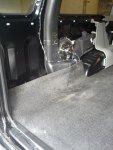
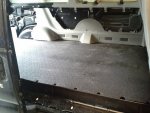
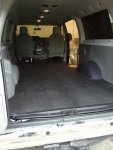
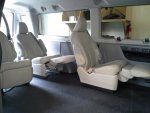
A few pics of the seats installed....
Quite a few projects left on the list, I better get back to it.
Michael G.
MG Metalworks
Newberg, OR
I've seen a lot of really great builds here so I thought I'd also share the progression of our family adventure van.
We picked up the van about a month ago and so far I've completed two of the projects on the long list...
First up was modifying the slider hinge so the door would clear the tire. In the process I learned that extending out an inch or two is moderately simple but beyond that gets kinda ugly, both in the complexity of rebuilding the hinge and the reality of what needs to be cut out of the door to make it work. I've started a 3D model in Solidworks for a new design and an every-evolving prototype hinge for 3+" of extension. I've had to set that aside for a couple weeks due to a new job and new baby but stay tuned...


Second project was to install reclining seats from a 2011 Toyota Sienna. When we bought the van, my wife sat in the bench seats and laughed. I think she was trying to tell me that there was no way we'd go from a nice Tahoe to a 4x4 van if the seats in the van were "that" uncomfortable. I did some searching for custom seats but most of what comes up looks like it belongs in an RV. Then on Ebay I came across an auction for the Sienna seats and I started doing some research. I called the seller which happens to be a wrecking yard who buys factory take-outs and blemished seats from the Toyota factory. Prices range from $750/pair for seats that don't pass quality inspection up to close to $1300/pair for new take-outs. I chose not to roll the dice with blemished seats but I talked the guy down a bit and bought 4 of the new take-out seats. They are very comfortable. Probably the most comfortable automotive seat I've been in. The color matches the light grey trim in the van pretty well.
I didn't want the sliding tracks that the seats normally mount into so I removed the four latches at the bottom of the seat and designed my own mounts. I originally had the mounts designed to be taller but the material utilization on the laser was pretty bad. I'm glad I reduced the height because as they are, they sit just a little lower than the front seats so if I wanted to reconfigure the interior and put them on swivel or quick release mounts, they wouldn't be too tall.


Even though the extended van is pretty big inside, you put 4 of these seats in it and room goes away very quickly. Placement is kind of a compromise of space in the back, getting in and out and reclining. I think I did pretty well for all of the factors involved. Since the two rear seats sit between the wheel wells and the recliner lever is inaccessible, I had to relocate the recliner lever cable to the now not-in-use track slide lever. I had to fabricate a bracket to hold the cable but overall pretty straight forward swap.
A few pics of the seats installed....


Quite a few projects left on the list, I better get back to it.
Michael G.
MG Metalworks
Newberg, OR
Last edited:

