Mobile base camp build

ntsqd

Heretic Car Camper
When was the last time on a trip that you got two flats, of which at least one of them was not field repairable (due to any reason) ?

How long does a full bottle of propane last you between refills?


My answers to those questions are:

Never. A spare for each seems more than reasonable enough for U.S. trips. Heck, if the furthest that you can get away from a McDonald's is 145 miles by road, there's bound to be a tire shop within that range as well.
If you are thinking OZ Outback, Africa, or South America, then maybe a third is appropriate. I would make sure to have a good tire 'boot' for sidewall patches (purely limp out mode), and a tube of the right size vacuum sealed in a foiled mylar computer parts bag goes a long ways towards not needing another spare. That buggy in my avatar had a tube in a tubeless left rear tire when that picture was taken.

Don't know for sure, on the plus side of 6 days somewhere. 6 days of cooking breakfasts and dinners for 6-10 guys is the most that I've used a 5 gallon propane tank, & I've always come home with fuel in the tank. Based on this I plan to eliminate one of the two tanks on the TrailBlazer trailer.
 

Arya Ebrahimi

Adventurer
Very valid points. I've never gotten a flat....ever. But I've never hauled as$ in the desert either :D Kind of an unknown for me, but I see desert rigs with flats all the time.

I think I will wait and see how the Cruiser build goes. I may elect to move the Cruiser's spare to the trailer(for weight distribution), where having a double carrier would come in handy.

I agree on the propane thing. I will just run one tank.

Thanks!
 

Arya Ebrahimi

Adventurer
Time for an update.

Well I've been working out of town which gives me plenty of time to think about this build, but not a whole lot of time to work on it. Since I had a 3 day weekend thanks to Martin Luther, I decided to devote the whole weekend to the build.

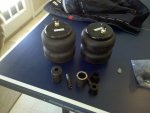
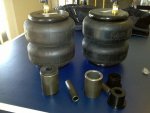
I got home Friday afternoon and found a box full of goodies

(Pics just show the highlights, not all the parts )
 

Attachments

  • 2010-01-18 13.47.25.jpg
    2010-01-18 13.47.25.jpg
    161.5 KB · Views: 107
  • 2010-01-18 13.47.41.jpg
    2010-01-18 13.47.41.jpg
    164.9 KB · Views: 110

Arya Ebrahimi

Adventurer
So you're probably wondering what I'm doing with airbags if I'm running leaf springs. Well.....the leaf springs are going bye bye

I realized that I was making too many design compromises because of the leafs, and switching to independent trailing arms with air bags literally solved every single complaint I had about the current design.

The wheel wells are fairly narrow and I was concerned about the articulated travel of a leaf spring setup causing tire rub.

The trailer was also sitting too high to make the kitchen compartment very useful, and too low for proper offroad ground clearance in my opinion.

With the air bags in combination with a compressed air source and 2 paddle valves, I now have the ability to raise and lower the trailer at will, as well as level side to side, and so on. I anticipate dumping the bags while at camp to let the rear jack legs hit the ground, as well as bring the kitchen down to a reasonable working level. Additionally it will make the loading/unloading of ATVs and other items much more manageable.

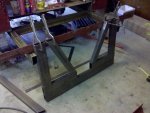
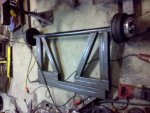
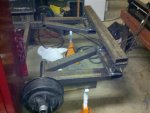
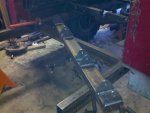
So with the necessary parts in hand, I set about to build a trailing arm suspension. I started by reading extensively on here about different design concerns and also problems other people have had with their homebuilt suspensions. I also read about fabrication issues that Martyn, the owner of adventure trailers, has experienced in producing the suspension parts for his trailers. With all of that in mind I set out to build a simple and strong design while accomodating as much tolerance as possible. I'm happy to report that I was succesful in building a pair of trailing arms with no noticeable warp/misalignment!

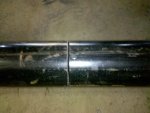
The last picture shows where I cut the axle tube after I was finished with fabrication. The tubes stayed perfectly aligned and spread by about 1/32 of an inch. Ironically, the trailing arms were about 1/32 of an inch out before, so now everything lines up perfectly
 

Attachments

  • 2010-01-17 14.57.50.jpg
    2010-01-17 14.57.50.jpg
    181.4 KB · Views: 297
  • 2010-01-17 23.32.41.jpg
    2010-01-17 23.32.41.jpg
    190.1 KB · Views: 338
  • 2010-01-18 13.12.25.jpg
    2010-01-18 13.12.25.jpg
    156.2 KB · Views: 259

Arya Ebrahimi

Adventurer
I've just about caught up to where I am presently. I'm waiting for my brother to come back with the bolts for the bushing assemblies so I can finish the frame crossmember and bushing mounts on the arms to tie everything together.
 

Attachments

  • 2010-01-18 13.22.20.jpg
    2010-01-18 13.22.20.jpg
    254.4 KB · Views: 214
  • 2010-01-18 13.22.33.jpg
    2010-01-18 13.22.33.jpg
    239.3 KB · Views: 235

elmo_4_vt

Explorer
Looks like it's going to come out nice... I'll be interested to see how you regulate the air lines too. Keep the updates coming.

-
 

Arya Ebrahimi

Adventurer
anything new on this? I am considering this route for a future build

Haven't really done anything on the trailer. Been working out of town for almost a year now.

I have been setting up and riding my "new" dual sport though, a 2004 DRZ400S :bike_rider:

We did 475 miles of FS roads and trails 2 weeks ago in WV, it was awesome :D

IMG_1930.jpg
 

Arya Ebrahimi

Adventurer
Been tinkering with this a little bit the past couple of weeks. After some comments about making the toe adjustable on the trailing arms, I decided to say screw it and make the arms adjustable for both toe and camber :sombrero:

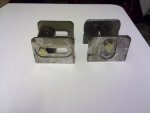
The toe and camber brackets are just about finished. Here are a couple of teaser pics to see what I've been up to.

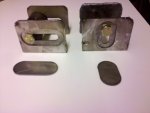
What you see is one trailing arm's worth of brackets. The horizontal slotted bracket will adjust toe, and the vertically slotted bracket will adjust camber. I'm thinking the camber bracket will go to the outside of the vehicle and the toe bracket will go to the inside, but that's not 100% at this point.

The blank cutouts you see will eventually get drilled with the final location of the bolts in the slotted holes and they will be inserted into the larger slots you see. This will in essence lock the bolt in place. These cutouts will get welded in, but not so permanently that they can't be removed and the arms adjusted in the future.

Alright, lemme have it, is it going to work? or fail miserably? :lurk:
 

Attachments

  • adjustable brackets 1.jpg
    adjustable brackets 1.jpg
    104.5 KB · Views: 132
  • adjustable brackets 2.jpg
    adjustable brackets 2.jpg
    97.5 KB · Views: 127

deepmud

Adventurer
So the oval washers look like they will lock into the brackets (looks like the brackets are machined to fit) but you'll need them to shift to let you adjust?

Regardless, I think it will work if you have thick enough/sturdy enough brackets :D
Look to off-road rigs for the size they use on their link suspensions -should be overkill enough.

http://www.ballisticfabrication.com/Multi-Purpose-Tabs_p_1476.html

They come as thin as 3/16 but I'd recommend at least 1/4 so the bolt has more area to take the load. On thinner links they often tig-weld on some washers.
 

Arya Ebrahimi

Adventurer
Once I determine the final location of the bolt within the slot, I will drill out the oval washers with that location, and weld it in.

I'm quite familiar with offroad rigs, I've got several :)

The brackets are two laminated layers of 1/8", so they total 1/4" when all is said and done. Should be plenty.
 

deepmud

Adventurer
I'm quite familiar with offroad rigs, I've got several :)

The brackets are two laminated layers of 1/8", so they total 1/4" when all is said and done. Should be plenty.

doh! thought I recognized you from POR :sombrero:

1/8 eh? Seems under-kill.......:coffeedrink:
 

Arya Ebrahimi

Adventurer
Every adjustability method has it's trade-offs. If all that is seen is the total of this approach then I expect that transferring the holes to the oval pieces in nearly exactly the right location is going to be a little wonky.

On tire impact with a road obstacle the outer mount will see rearward thrust and the inner mount will see forward thrust. The inner mount has more leverage against the tire and will see lower loadings. I would arrange the orientation of the slots to maximize bolt bearing area in the mount holes at the outer mount. Might even consider the heavy washer trick in addition after the location is set.

Yes, my plan is to put the vertical(camber) slot at the outer position so that adjustments won't affect the "wheelbase", the unfortunate side effect of that is that if I put the toe adjustment at the inner mount, adjustments will affect the track-width. How significantly I don't know yet.

doh! thought I recognized you from POR :sombrero:

1/8 eh? Seems under-kill.......:coffeedrink:

I think once you see the final product, you won't be too worried about the mounts :)
 

Arya Ebrahimi

Adventurer
Finally getting back to this project lately. Been working on it a couple hours for the past several nights and finally have some progress worth sharing!

I had been going round and round in my head about the trailing arm connections to the frame. After 3 revisions I finally settled on a working design. Unfortunately the adjustable mounts went by the wayside. I think the concept is sound, and if I have problems in the future I may redeploy the idea, but for now it was not going to work.

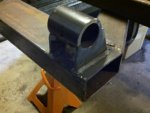
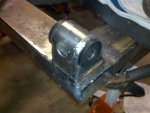
I built the bushings mounts onto the trailing arms, my thinking being that if I have to R&R the bushings it will be easier to do by pulling the arm from under the trailer than trying to do them under the trailer attached to the frame.

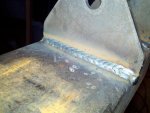
I started with two pieces of 3/16" cut to cradle the bushing sleeve. These got welded inside and out and then ground flush on the outside. I then took some 1/8" plate and wrapped the joints to provide lateral stability and really lock them down. I think they should be fine. You'll notice a circular cut out in the 1/8" wrap. That is for the grease fitting for the bushings.

For the frame end I decided to go with some simple 1/4" tabs. I will brace these a bit when I pull the frame out from under the box to finish weld/paint everything, but for now they're fine. I conceptualized, drafted, and had these 8 tabs cut on the Torchmate in less than 20 mins total :D
 

Attachments

  • 2011-02-27_16-49-20_781 (Medium).jpg
    2011-02-27_16-49-20_781 (Medium).jpg
    74.2 KB · Views: 172
  • 2011-02-27_17-43-45_540 (Medium).jpg
    2011-02-27_17-43-45_540 (Medium).jpg
    66.6 KB · Views: 184
  • 2011-02-27_20-41-14_207 (Medium).jpg
    2011-02-27_20-41-14_207 (Medium).jpg
    82.1 KB · Views: 234
  • 2011-03-02_17-58-09_709 (Medium).jpg
    2011-03-02_17-58-09_709 (Medium).jpg
    102.6 KB · Views: 170
  • 2011-03-02_17-58-36_475 (Medium).jpg
    2011-03-02_17-58-36_475 (Medium).jpg
    76.6 KB · Views: 166

Forum statistics

Threads
187,897
Messages
2,899,698
Members
229,072
Latest member
fireofficer001
Top