You are using an out of date browser. It may not display this or other websites correctly.
You should upgrade or use an alternative browser.
You should upgrade or use an alternative browser.
Mobile base camp build
- Thread starter Arya Ebrahimi
- Start date

Arya Ebrahimi
Adventurer
Looks good... Though I think you need a bigger tent now... That utility box is huge. :ylsmoke:
-
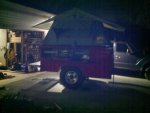
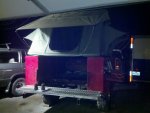
The tent is already bigger than my normal bed lol, its the 6' x 8' version.
onelow1ton
Adventurer
looking good! the tent looks perfect up on there
Arya Ebrahimi
Adventurer
Oooh.
Noticed in the video the fillers on the side of the utility bed for dual tanks. You got some ingenious plan to use those?
That tent looks perfect on that bed.
Nice! I like.
Don't recall if you've mentioned brakes?
Thanks
")
Of course I have an ingenious plan for the dual fillers :ylsmoke:
One will be replaced with a water filler assembly for filling the onboard water tank. The other will remain a fuel filler for filling the onboard fuel tank that will serve the toy(bikes/quads) filling station as well as the onboard generator.
There are electric brakes that will be hooked up to the Prodigy P3 in the tow-rig.
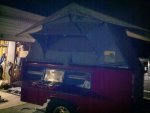
As for the tent, I'm debating leaving it setup as is, or moving it forward so that it opens over the tongue and gives us a 4'x4' deck/patio outside the door of the tent.
The current task at hand is to finish the shocks/limit straps which I hope to have in hand by Wednesday or so. Then it will be time to lift the body off and paint the frame. Then on to fabricating a much lighter floor for the body. I estimate the current floor made of 1/8" steel diamond plate weighs in excess of 250#. I plan to replace it with a much lighter structure of light gauge square tube and aluminum sheeting.
Arya Ebrahimi
Adventurer
Back on this lately and will be until we depart for Colorado in August(with this in tow).
Spent a good chunk of Saturday staring at the "mechanical closet" which is the rearmost driver's side cabinet. Inside will be the 5-gallon air tank, dual Viair compressors, Shurflo water pump, and an Eccotemp L5 water heater. It's not a huge cabinet, so it took some careful planning to get it all to fit.
Found 5 minutes to throw the new water filler door on.


Then I set to work on finally removing the rest of the old floor, clearing way for a much lighter version that will also afford me a couple of precious inches underneath to fit the water tank.

I also spent some time whipping up a series of brackets for the limit straps, bumpstops and shocks. Not sure if I've mentioned it, but I LOVE my torchmate. I built a pair of the shock brackets below in about 2 hours. Would have taken me a day with traditional methods.


I hope to be posting much more frequent and substantial updates in the coming days/weeks, so keep an eye out
Spent a good chunk of Saturday staring at the "mechanical closet" which is the rearmost driver's side cabinet. Inside will be the 5-gallon air tank, dual Viair compressors, Shurflo water pump, and an Eccotemp L5 water heater. It's not a huge cabinet, so it took some careful planning to get it all to fit.
Found 5 minutes to throw the new water filler door on.
Then I set to work on finally removing the rest of the old floor, clearing way for a much lighter version that will also afford me a couple of precious inches underneath to fit the water tank.
I also spent some time whipping up a series of brackets for the limit straps, bumpstops and shocks. Not sure if I've mentioned it, but I LOVE my torchmate. I built a pair of the shock brackets below in about 2 hours. Would have taken me a day with traditional methods.
I hope to be posting much more frequent and substantial updates in the coming days/weeks, so keep an eye out
Mark Harley
Expedition Leader
A very nice build, You are a talented individual!
It is cool to see what ideas and solutions are rolling around in other builders heads.
The metal fab is awesome!
Keep the pictures coming.
Mark Harley
It is cool to see what ideas and solutions are rolling around in other builders heads.
The metal fab is awesome!
Keep the pictures coming.
Mark Harley
Arya Ebrahimi
Adventurer
A very nice build, You are a talented individual!
It is cool to see what ideas and solutions are rolling around in other builders heads.
The metal fab is awesome!
Keep the pictures coming.
Mark Harley
Thank you very much Mark, kind words indeed.
Arya Ebrahimi
Adventurer
Hit the trailer hard this weekend and got a fair number of things done.
First off was to finish the suspension. The shock mounts were done, but hadn't been welded on. The limit straps were on hand, but none of the mounts were done.

After getting the shock mounts welded on, I moved on to the limit straps. I had originally wanted to sleeve through the frame crossmember so that I could through-bolt the limit strap that way. Well I looked all over town and couldn't find an appropriate sized piece of tubing(or pipe, or conduit, or....) so I moved on to coming up with a new plan. I had visions of going over a big unforseen bump and this thing getting airborne in a hurry. With that in mind I wanted to make sure the limit strap mounts were stout, aka double shear.
I made an inner tab that the nut sits behind and an outer tab that should reinforce things nicely.


Then I welded on a pair of simple tabs for the bottom and bolted up the strap.

After all of that was done I wanted to get the rear stabilizer legs done. I started with some 2x2x.188 tubing that's welded to the frame and passes through the floor of the rearmost boxes. To this I welded a spring-loaded pin with T-handle. Insert some legs with CNC cut holes and voila, stabilizer legs! I still need to weld on some "feet" but they're otherwise complete. The idea for these is that I can drop the legs down prior to dropping the trailer and they will carry the weight of the trailer in camp, removing the sway that the tires/suspension would give otherwise. They're also handy for keeping the trailer from tipping over backwards when it's not hooked up to the tow vehicle and someone wants to climb up onto the rear platform.

Last project of the weekend was to finish the rear bumper and get it welded on. I wasn't sure what I would want for a hitch, d-rings, etc so I decided to just put the lights on and plan on adding the rest at a later date once I have a better idea of what I want to do. (You can see the stabilizer legs in this picture as well)

First off was to finish the suspension. The shock mounts were done, but hadn't been welded on. The limit straps were on hand, but none of the mounts were done.
After getting the shock mounts welded on, I moved on to the limit straps. I had originally wanted to sleeve through the frame crossmember so that I could through-bolt the limit strap that way. Well I looked all over town and couldn't find an appropriate sized piece of tubing(or pipe, or conduit, or....) so I moved on to coming up with a new plan. I had visions of going over a big unforseen bump and this thing getting airborne in a hurry. With that in mind I wanted to make sure the limit strap mounts were stout, aka double shear.
I made an inner tab that the nut sits behind and an outer tab that should reinforce things nicely.
Then I welded on a pair of simple tabs for the bottom and bolted up the strap.
After all of that was done I wanted to get the rear stabilizer legs done. I started with some 2x2x.188 tubing that's welded to the frame and passes through the floor of the rearmost boxes. To this I welded a spring-loaded pin with T-handle. Insert some legs with CNC cut holes and voila, stabilizer legs! I still need to weld on some "feet" but they're otherwise complete. The idea for these is that I can drop the legs down prior to dropping the trailer and they will carry the weight of the trailer in camp, removing the sway that the tires/suspension would give otherwise. They're also handy for keeping the trailer from tipping over backwards when it's not hooked up to the tow vehicle and someone wants to climb up onto the rear platform.
Last project of the weekend was to finish the rear bumper and get it welded on. I wasn't sure what I would want for a hitch, d-rings, etc so I decided to just put the lights on and plan on adding the rest at a later date once I have a better idea of what I want to do. (You can see the stabilizer legs in this picture as well)
loren85022
Explorer
On the same path.....
I really like your build. I've been building similar using a fiberglass mini-truck utility bed. I decided to build out the compartments (kitchen, elec box, etc) before I decide how elaborate of suspension is needed. Taking notes from your suspension design. I have a 16 gallon tank underneath with a Sureflow pump. I plan to put the Eccotemp propane heater in the front compartment, with the propane tank up on the tongue. Currently working on the fold-out sink.
Getting mine painted really motivated me to keep the build going. Trying to find matching 8-lug KMC rims has become a real pain.
Last edited:
Arya Ebrahimi
Adventurer
I really like your build. I've been building similar using a fiberglass mini-truck utility bed. I decided to build out the compartments (kitchen, elec box, etc) before I decide how elaborate of suspension is needed. Taking notes from your suspension design. I have a 16 gallon tank underneath with a Sureflow pump. I plan to put the Eccotemp propane heater in the front compartment, with the propane tank up on the tongue. Currently working on the fold-out sink.
Getting mine painted really motivated me to keep the build going. Trying to find matching 8-lug KMC rims has become a real pain.
View attachment 66173
I'm almost embarrassed to say that I like the look of your trailer better than mine
Have you had much experience using the water tank and more specifically how long 16 gallons lasts you?
loren85022
Explorer
My crew usually consists of 2 adults, plus 2+ kids, plus 2 dogs. So 16 gallons aint enough if I get the shower (w/hot water) working as planned. But size wise, it was a good fit, and I can stow additional 5-gal tanks in the back. We're 2-5 day campers so I'm not trying to keep enough supplies on board for extended trips. I will add that I think 5 gallons of propane should last far more than one trip's requirements.
Regarding my water tank, I arranged it right over the axle. I have a feeling that it's location will create a problem if I get the inclination to use anything but a solid axle.. Mario at AT Trailers looked at it and thought he could make his trailing arms work, but it was dark and rainy at the time. Your's has a wider wheelbase so that may not be an issue.
As for your wheel wells, cant you hack them out a bit? I plan to add some rubber fender guards to match the van. In your case it would hide the rough cuts. Even if you have to sacrifice your two intake locations, I bet it would look more consistent with the truck.
Arya Ebrahimi
Adventurer
My water tank sits just forward of the axle centerline. With the airbags behind the axle centerline there's just enough room for it to be well protected by the trailing arms. I'm using a 21 gallon tank, but am questioning whether that will be enough with a shower and sink. We're 2 adults and 2 dogs.
As for the fenders, I'll probably dress them up a bit, but the one I opened up is plenty big now.
As for the fenders, I'll probably dress them up a bit, but the one I opened up is plenty big now.