MOIRAI 1995 4x4 Fire Rescue BUILD Thread

Jdubucsd

Addicted to Espresso
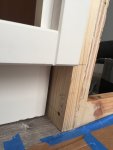
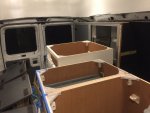
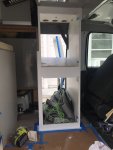
Moved all 3 carriage bolts out about 5” so the fridges wouldnt bump into them and cleared the sides for 1/2” polyiso sheets. But kept them for structural integrity. ?

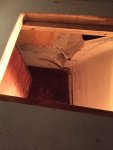
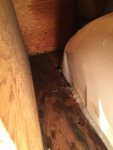
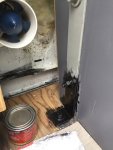
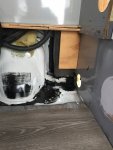
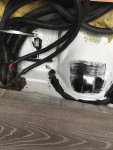
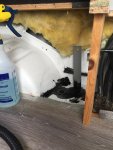
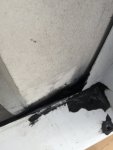
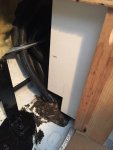
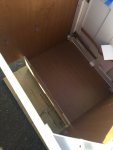
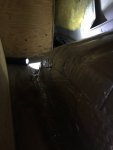
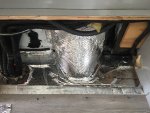
Lots of cleaning and prep behind the drivers side wheel well. Rather dirty. Took about two hours with the steam cleaner and light degreaser. Prepped also for three coats of POR15 and around the 1 1/2” drain hole under the cabinet where the sink will go. And along some back seams etc. next will be some thinsulate. Wiring. Plumbing. Cabinets. In that order

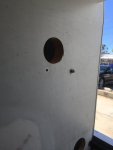
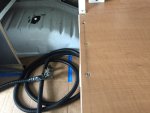
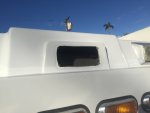
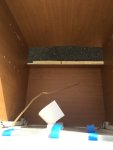
In the back has the 3” Atwood 12volt inline vent. I wired the MaxxAir roof vent to the exhaust fan switch. So this one currently gets no power. It moves a ton of air though!! I think it would be best on a rheostat to control the rpms. Not sure if Ill keep it there maybe with a reverse switch to move air in or out with a speed control. Also thought about re purposing it above the two fridges to help move air above the condensors when its hot. Anywho ....?
 

Attachments

  • 7C39F57F-00C1-413F-8DA1-21B841BD1C08.jpeg
    7C39F57F-00C1-413F-8DA1-21B841BD1C08.jpeg
    759.9 KB · Views: 29
  • DEB26FB7-293C-4AE2-A60E-F3B52E570CF4.jpeg
    DEB26FB7-293C-4AE2-A60E-F3B52E570CF4.jpeg
    1.1 MB · Views: 29
  • 459EB102-E439-497F-8C55-2E3CF5DB397B.jpeg
    459EB102-E439-497F-8C55-2E3CF5DB397B.jpeg
    687.4 KB · Views: 28
  • 21BDB615-F452-4965-9BC1-7E26CC4595DC.jpeg
    21BDB615-F452-4965-9BC1-7E26CC4595DC.jpeg
    929.7 KB · Views: 30
  • 56652432-B3CF-4D58-841A-E26E59A7553C.jpeg
    56652432-B3CF-4D58-841A-E26E59A7553C.jpeg
    1.1 MB · Views: 30
  • 328A769C-F91E-4AE2-908A-B5D469610A43.jpeg
    328A769C-F91E-4AE2-908A-B5D469610A43.jpeg
    1.3 MB · Views: 29
  • 245CE671-E0BC-4A62-8FF0-2C335FDE9156.jpeg
    245CE671-E0BC-4A62-8FF0-2C335FDE9156.jpeg
    1 MB · Views: 27
  • D4A2E1F6-F049-483A-BEEE-80E0EE9A974C.jpeg
    D4A2E1F6-F049-483A-BEEE-80E0EE9A974C.jpeg
    2.2 MB · Views: 27
  • 41165642-EB7E-4BF6-9DB9-884000FF3771.jpeg
    41165642-EB7E-4BF6-9DB9-884000FF3771.jpeg
    767.1 KB · Views: 27
  • A62AB779-D4D6-4908-A1BA-E0C76B3E3EC7.jpeg
    A62AB779-D4D6-4908-A1BA-E0C76B3E3EC7.jpeg
    870.6 KB · Views: 26

Jdubucsd

Addicted to Espresso
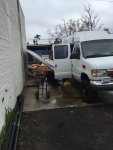
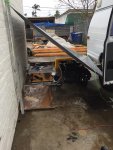
Its raining here in San Diego. I work six days a week and saturday I must work on the rig. Nice tent lol ?
 

Attachments

  • 55858F9A-C07C-437E-936F-7842CE0C0DE7.jpeg
    55858F9A-C07C-437E-936F-7842CE0C0DE7.jpeg
    1.2 MB · Views: 21
  • B6594AFB-6969-4ADC-95C1-0DB86F321947.jpeg
    B6594AFB-6969-4ADC-95C1-0DB86F321947.jpeg
    1.3 MB · Views: 21

Jdubucsd

Addicted to Espresso
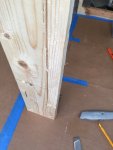
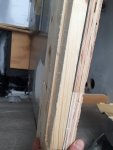
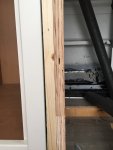
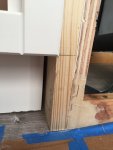
My scribe work came out great. I used a circular saw actually. Set thw depth. Followed the line. Went back on the side 5/16” deep and there is my scribe in a 1”x4” board. Finished the corner with a chisel.
 

Attachments

  • 5263B8DC-D43C-4769-B86B-EE3F88743C87.jpeg
    5263B8DC-D43C-4769-B86B-EE3F88743C87.jpeg
    987.5 KB · Views: 24
  • 5A961161-177A-434B-B401-4FEFF3F01756.jpeg
    5A961161-177A-434B-B401-4FEFF3F01756.jpeg
    1,005.1 KB · Views: 25
  • A73B2A9F-7861-4196-A7B8-EC8FE2054019.jpeg
    A73B2A9F-7861-4196-A7B8-EC8FE2054019.jpeg
    794.9 KB · Views: 23
  • 2981EE70-C27B-42BA-8051-144B9F4232D8.jpeg
    2981EE70-C27B-42BA-8051-144B9F4232D8.jpeg
    683 KB · Views: 22
  • 243F0AAC-7BCE-46DC-97C4-E8FFBA9FF772.jpeg
    243F0AAC-7BCE-46DC-97C4-E8FFBA9FF772.jpeg
    847.4 KB · Views: 22
  • F669A948-A3DD-4A99-AC28-5CA4F0018875.jpeg
    F669A948-A3DD-4A99-AC28-5CA4F0018875.jpeg
    742.8 KB · Views: 21
  • 652307DC-DC91-4B7A-A23E-839D8EB5211E.jpeg
    652307DC-DC91-4B7A-A23E-839D8EB5211E.jpeg
    770.5 KB · Views: 21
  • 1A8091CC-28C5-463A-976E-BDD3B0DE9E23.jpeg
    1A8091CC-28C5-463A-976E-BDD3B0DE9E23.jpeg
    664.3 KB · Views: 20
  • D2580A28-6467-4713-9F74-21A5FA3418B7.jpeg
    D2580A28-6467-4713-9F74-21A5FA3418B7.jpeg
    722 KB · Views: 20
  • 50DCC802-7990-411B-9867-DA4FB140E853.jpeg
    50DCC802-7990-411B-9867-DA4FB140E853.jpeg
    1,019 KB · Views: 19

Jdubucsd

Addicted to Espresso
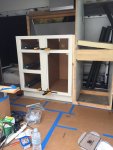
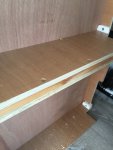
Drafted up some table saw action. Made some 5/8” and 9”16 filler strips and recessed some 1 1/4” wood screws. Some 2” wood screws went into the face frames.

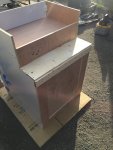
Joining the two 15” cabinets to make a 30”. Top and bottom gaps were filled with the custom cut pieces and many recessed screws evenly spaced. Its rock solid! Yay. Progress!

The odd square notches I used a multitool. Followed by chisels. And finished with files. The stainless steel flush mount frame for the two Dometic CRX50 fridges have a tab that sticks out about 1/16” of an inch. Its enough to keep the fridge from sliding into its spot. Very awkward to find this out as Im trying to rough mount the fridges. Its Not as clean as I would like. But my wood frames were already screwed down with 7 screws each. Basicaly had to remove the melamine and first to two layers or so of the ply to allow enough space. And guess what, they slide right in with no extra effort.
 

Attachments

  • 0B29119C-5839-42EE-AFCC-CD1BB69CBDE7.jpeg
    0B29119C-5839-42EE-AFCC-CD1BB69CBDE7.jpeg
    854 KB · Views: 14
  • C3D3C008-A5E5-49FB-81A0-A433EEB41BF3.jpeg
    C3D3C008-A5E5-49FB-81A0-A433EEB41BF3.jpeg
    1.1 MB · Views: 13
  • 70C121F1-E3DB-42BB-99B0-9014E4336ACD.jpeg
    70C121F1-E3DB-42BB-99B0-9014E4336ACD.jpeg
    1.2 MB · Views: 14
  • B845E83A-EFB3-45AE-982B-BDD1619292B9.jpeg
    B845E83A-EFB3-45AE-982B-BDD1619292B9.jpeg
    1,011.2 KB · Views: 14
  • 3538C951-BBD6-4D34-A031-B2F39383EBA3.jpeg
    3538C951-BBD6-4D34-A031-B2F39383EBA3.jpeg
    808.5 KB · Views: 13
Last edited:

Jdubucsd

Addicted to Espresso
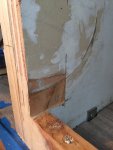
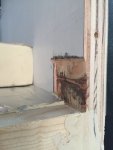
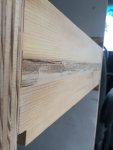
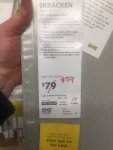
Sanded in many steps. 60 grit, 80, 100,120, 220. Just because I had sheets around. And well I was curious. Local ikea had a great laminate counter for sale. 59$ plus tax. And it not as heavy as say butcher block. And I wont have to worry about warping cracking from solid wood. Anyways. Ill give it a shot.

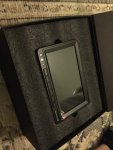
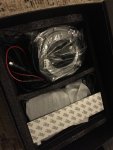
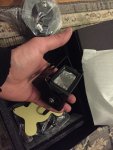
Rear view cam system was $149 from Amazon. Nicely packages. Bagged. Etc. looks like a very easy install. Seems well made.
 

Attachments

  • 0D9C9AC5-D3C1-4CEF-BEBE-2463D9096E59.jpeg
    0D9C9AC5-D3C1-4CEF-BEBE-2463D9096E59.jpeg
    620.2 KB · Views: 18
  • E4110FF6-313E-4F79-9EC4-84B08FBAB2FC.jpeg
    E4110FF6-313E-4F79-9EC4-84B08FBAB2FC.jpeg
    781.4 KB · Views: 17
  • B7244BEE-B1DB-49BE-908D-42453C773BFC.jpeg
    B7244BEE-B1DB-49BE-908D-42453C773BFC.jpeg
    909.9 KB · Views: 17
  • F9E91109-1530-48D2-88F4-07A22F33E2D1.jpeg
    F9E91109-1530-48D2-88F4-07A22F33E2D1.jpeg
    988.7 KB · Views: 18
  • 2AFCA71D-36A0-4B86-9F81-97CA55ADC443.jpeg
    2AFCA71D-36A0-4B86-9F81-97CA55ADC443.jpeg
    1.3 MB · Views: 17
  • EB345B94-F2F6-4D62-BFE8-92AC8EB7874A.jpeg
    EB345B94-F2F6-4D62-BFE8-92AC8EB7874A.jpeg
    1 MB · Views: 18
  • 8291722D-A7ED-453D-85E0-30DC3308631A.jpeg
    8291722D-A7ED-453D-85E0-30DC3308631A.jpeg
    1.1 MB · Views: 16

Jdubucsd

Addicted to Espresso
I have 4 coats of Kilz2 primer down. Sanded with 220 a bit. Still can see through to some shading from the ply. Been so long since Ive painted. Rather throw on primer. Then risk putting the final finish paint and see shadows.

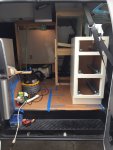
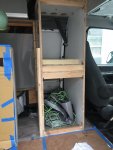
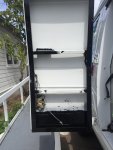
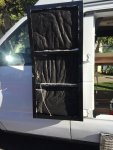
Basically spent 4 hours reshaping. And securing to the nth degree the 24” base cabinet. Had to be cut out to clear the drivers side wheel well. And it will leave enough clearance for the Thinsulate going in. And above that. Wires too. Third coat of POR15 on the drivers side access door. It opens to the back of the two fridges. And Ill probably cut a side access hole to allow you to reach in behind the sink cabinet. Lots of work today.
 

Attachments

  • E66742A1-2662-406C-A685-8B16DDBFB2B8.jpeg
    E66742A1-2662-406C-A685-8B16DDBFB2B8.jpeg
    950.6 KB · Views: 19
  • 92F53FC2-7C60-4FDB-8F61-2D07A9B55546.jpeg
    92F53FC2-7C60-4FDB-8F61-2D07A9B55546.jpeg
    985.4 KB · Views: 19
  • 251C99D7-652B-45B9-8B09-5E4310E0C08D.jpeg
    251C99D7-652B-45B9-8B09-5E4310E0C08D.jpeg
    703.7 KB · Views: 17
  • 42A538A7-7678-480B-A796-82E3977517E2.jpeg
    42A538A7-7678-480B-A796-82E3977517E2.jpeg
    972.2 KB · Views: 17
  • EA720FC4-3572-423D-8396-59F3E59F4B72.jpeg
    EA720FC4-3572-423D-8396-59F3E59F4B72.jpeg
    1.1 MB · Views: 16
  • 98CFEE77-DC0F-46E2-A979-8BA4D872B87E.jpeg
    98CFEE77-DC0F-46E2-A979-8BA4D872B87E.jpeg
    1.2 MB · Views: 16
  • F8AE8E12-6382-41E5-927E-135253FB0D89.jpeg
    F8AE8E12-6382-41E5-927E-135253FB0D89.jpeg
    782.5 KB · Views: 15
  • 9772AA50-97D7-4FC0-BCBA-58771D13C77C.jpeg
    9772AA50-97D7-4FC0-BCBA-58771D13C77C.jpeg
    758.7 KB · Views: 15
  • 10BD5E46-3241-4137-A5AC-121B7392B15B.jpeg
    10BD5E46-3241-4137-A5AC-121B7392B15B.jpeg
    1.1 MB · Views: 15

Jdubucsd

Addicted to Espresso
Cleaned. Layed down some Noico liner. And siliconed around the base. Steamed cleaned all in where the light is too. This will be blocked by the 24” base cabinet. And there is already a small access hatch in the existing cabinetry where I set the light. About 4x4” hole with a cover.
 

Attachments

  • B1E35C34-DFC3-4B7C-A1DD-040551FF763C.jpeg
    B1E35C34-DFC3-4B7C-A1DD-040551FF763C.jpeg
    858.1 KB · Views: 12
  • 6888C630-B610-4EA6-B2F7-042083EC6F7F.jpeg
    6888C630-B610-4EA6-B2F7-042083EC6F7F.jpeg
    1.5 MB · Views: 13

Jdubucsd

Addicted to Espresso
Resealed third brake light. Black butyl tape. Scraped off what remained of the old cracked gasket material. Cut some black butyl. Fun to work with. Reseated it. Dicor black non self leveling sealant over that. And clear on the screw heads
 

Attachments

  • 53DC501D-25D2-4722-9AA0-16E78B0CD80E.jpeg
    53DC501D-25D2-4722-9AA0-16E78B0CD80E.jpeg
    1,014.4 KB · Views: 16
  • 2D96B971-F2FA-4BC9-B522-6282F8642FC5.jpeg
    2D96B971-F2FA-4BC9-B522-6282F8642FC5.jpeg
    1.3 MB · Views: 14

Jdubucsd

Addicted to Espresso
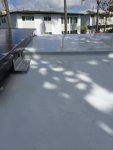
Well. The solar panels wont fit with these stock z shaped mounts. Due to the middle ridge of the van.
Ordered height adjustable curved mounts from Renogy. Seemed like the best most secure option for the price. Actually from Home Depot online, cheaper and free shipping. Thought of making shims out of various material. But I figured it was best to buy real mounts rather than shim out 1/4 to 3/4” depending on the panel location. I dont ever plan to add a pricey roof rack either. ?

Side door behind driver. All butyl sound deadening in. After three plus coats of gloss POR15. Love that stuff.

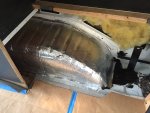
Behind the kitchen cabinets. All steam cleaned, rubbing alcohol for extra cleanliness. And more sound deadening. To note I covered the 2” hole I made for plumbing grey water. Wanted to secure it from dust and dirt and air now. And I can open it up down the road.

This brings me to the next hurdle grey water. I always thought it would be best to have a portable detachable tank. Under 5 gallons then. And I always thought it would be cool. If it was mounted and could be dismounted easily. . And had a solenoid that you could also use to empty it to the ground while driving or when you chose to!?
 

Attachments

  • BA1F5584-A22A-492F-A4F2-EC9186FDA381.jpeg
    BA1F5584-A22A-492F-A4F2-EC9186FDA381.jpeg
    784.4 KB · Views: 18
  • 8ECF6C86-CC54-4C82-9C04-41162F0D979E.jpeg
    8ECF6C86-CC54-4C82-9C04-41162F0D979E.jpeg
    609.6 KB · Views: 20
  • 158F36FA-E1DF-4F28-92B1-1CD48C82E989.jpeg
    158F36FA-E1DF-4F28-92B1-1CD48C82E989.jpeg
    1.7 MB · Views: 20
  • 502FA060-3526-4502-A5D1-CD2C77AA3CB5.jpeg
    502FA060-3526-4502-A5D1-CD2C77AA3CB5.jpeg
    2.6 MB · Views: 19
  • 9684BB04-D678-4B2A-8295-9E60E1D01473.jpeg
    9684BB04-D678-4B2A-8295-9E60E1D01473.jpeg
    769.1 KB · Views: 19

wanderer-rrorc

Explorer
Looking GREAT!!

I feel like I'm watching Norm Abrams from This Old House (Ambulance) do a custom rebuild!!!!

What fan is that your using?? Looks like it can MOVE SOME AIR!!!

Keep going!! It's all worth it!

8801ba0b2087c381d891dcd7bad5ae71.jpg


Sent from my VS987 using Tapatalk
 

Jdubucsd

Addicted to Espresso
Looking GREAT!!

I feel like I'm watching Norm Abrams from This Old House (Ambulance) do a custom rebuild!!!!

What fan is that your using?? Looks like it can MOVE SOME AIR!!!

Keep going!! It's all worth it!

8801ba0b2087c381d891dcd7bad5ae71.jpg


Sent from my VS987 using Tapatalk
Haha. Funny! Sometimes I have thoughts of putting it in nuetral and rolling it off a cliff ??

Its a Maxxair Fan Deluxe. Black lid and a remote. I thought the remote would be handy if your driving and want to alter the rear air flow. Thanks for the nice compliment. I originally was just going to have a super basic setup. Therma rest. Sleeping bag. Small solar. Small house battery. One large fridge anyplace. But the more I got into it. I just envisioned it being a certain way. Its been a major pain in the ass. But its starting to turn the corner. On a nice fit and finish usable product?
 

Jdubucsd

Addicted to Espresso
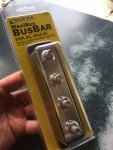
Running wiring for the back up cam. And here is the busbar capable of handling the 220 amp alternator output minus losses, to the battery tray where this will reside. Connects to a new 2/00 wire that will charge the house batteries Ill be placing inside. Small gains!
 

Attachments

  • A2D2183E-C6A3-4980-AC5A-8A72757C4432.jpeg
    A2D2183E-C6A3-4980-AC5A-8A72757C4432.jpeg
    214.4 KB · Views: 16
  • B9FEA330-9036-4D7E-99CA-A319D5ADAFAE.jpeg
    B9FEA330-9036-4D7E-99CA-A319D5ADAFAE.jpeg
    894.6 KB · Views: 15

Jdubucsd

Addicted to Espresso
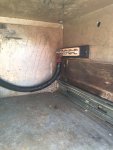
Bus bar final resting place? Hard to say. This is the wire from the alternator to inside the two battery area. It might be better to just run a new wire inside. And not have this exposed to the elements so to say. The aluminum box is not entirely weatherproof. As in moisture will be present in rainy conditions and I just think long term. Inside where the house batteries will be. Will be better.

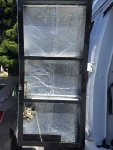
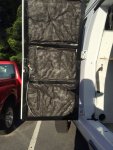
Some two layers of 1-3/4” Thinsulate in the side compartment door. For 3.5” total. On top of Noico butyl and Por15. Used some 3M spray adhesive. Was a fun project. Relatively easy to cut the Thinsulate with scissors.

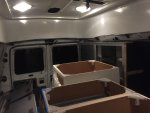
Interior HI/Low bulbs all got LED warm lights installed in each of the four domes. Two bulbs for each dome. Cost about $18 to do them all. And draws waaaaay less amps.
 

Attachments

  • 14C49BD1-5720-493A-A9BA-7E3D52ED7806.jpeg
    14C49BD1-5720-493A-A9BA-7E3D52ED7806.jpeg
    996.8 KB · Views: 23
  • DF131C72-03D4-49BE-9D85-07FE49CE98B1.jpeg
    DF131C72-03D4-49BE-9D85-07FE49CE98B1.jpeg
    1 MB · Views: 24
  • 24B4C7FD-00B3-4F32-946B-CB6E6064E76F.jpeg
    24B4C7FD-00B3-4F32-946B-CB6E6064E76F.jpeg
    1.1 MB · Views: 26
  • A2013702-9D85-4A9F-A0DF-A7F7FF6C01EB.jpeg
    A2013702-9D85-4A9F-A0DF-A7F7FF6C01EB.jpeg
    1 MB · Views: 25
  • 0DCB4452-2130-424F-AFF6-0890DF605087.jpeg
    0DCB4452-2130-424F-AFF6-0890DF605087.jpeg
    1.4 MB · Views: 25

Forum statistics

Threads
188,161
Messages
2,902,903
Members
229,582
Latest member
JSKepler
Top