You are using an out of date browser. It may not display this or other websites correctly.
You should upgrade or use an alternative browser.
You should upgrade or use an alternative browser.
My 2001 Pathfinder (R50 ) mild/budget build
- Thread starter stioc
- Start date
HI Recently i did a full throttel body clean and fuel system flush and Platinum plugs ( Mistake i guess) i was getting about 6 km/ltr now its much lesser i feel..have not really got a chance to check it... do you think the plugs has something to do with it or should i be looking at something els. ( Tiers were also changed inbetween)
...and just for fun. My collection of spare lug nuts for the Pathy, yeah 3 pairs of spacers will do that
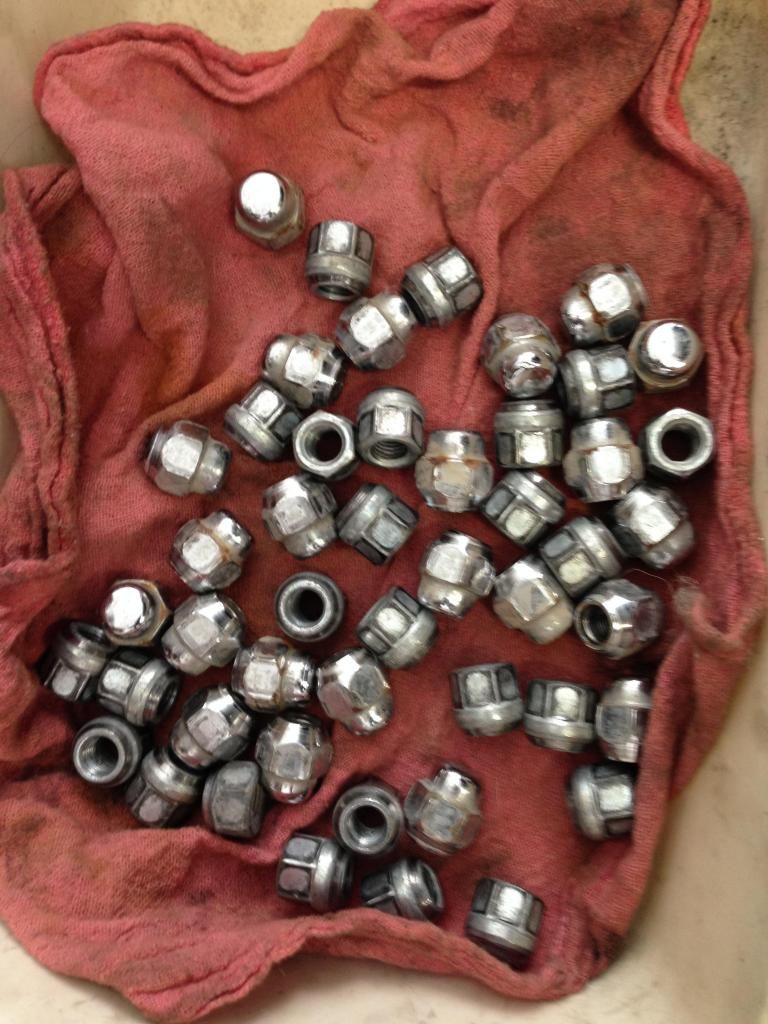
that a good collection...:sombrero:
stioc
Expedition Leader
HI Recently i did a full throttel body clean and fuel system flush and Platinum plugs ( Mistake i guess) i was getting about 6 km/ltr now its much lesser i feel..have not really got a chance to check it... do you think the plugs has something to do with it or should i be looking at something els. ( Tiers were also changed inbetween)
Did you replace the plugs with the NGK Platinums? Unless you switched to cheap Platinums (Bosch) new plugs shouldn't affect the mpgs. I'd expect it to be even better actually. How's your air filter? What psi are you running in your larger tires? That's where I'd start.
Did you replace the plugs with the NGK Platinums? Unless you switched to cheap Platinums (Bosch) new plugs shouldn't affect the mpgs. I'd expect it to be even better actually. How's your air filter? What psi are you running in your larger tires? That's where I'd start.
The plugs are ngk from the dealership and air filter is only 3months old I clean it every 2 weeks. Iam running on 35 psi
stioc
Expedition Leader
I just ordered some new parts to freshen up the front end: New inner tie-rods, OEM balljoints, poly bushings for the front control arms and a 27" rear brake line.
I noticed the other day when I brake my steering wheel tilts to the driver's side so I'm wondering if the passenger caliper is sticking. It never ends!
I noticed the other day when I brake my steering wheel tilts to the driver's side so I'm wondering if the passenger caliper is sticking. It never ends!
Last edited:
Rebelord
Semper Fi
The caliper is a easy fix though. Pull the pins, if dry. Clean up with emery cloth or sandpaper. Grease up with some high temp grease, re assemble.
I have done the rear poly bushings so far, have yet had the time to pull the LCA and press out the front bushings and put in the poly ones. Ball joints, look good even with 200k on em. However, probably getting to be that time, I think I'll go with Moog though.
Have fun with them inner tie rods though!! Heh.
stioc
Expedition Leader
Yeah my biggest challenge is finding the time to work on it 
The balljoints on mine look OK too but the rubber boot is looking a bit dingy and dry plus with all the offroad action I figure it's only a matter of time when they throw up all over themselves. I've seen catastrophic failures of balljoints so I'd rather replace them before they fail and also the reason why I spent the extra bucks to just buy OEM and go another 150k miles without worrying about them. As I type this I just realized I should've also bought new nuts to go with them.
My inner tie rods don't have any play in them when the front wheels are off the ground but the truck tends to wander left to right back and forth so there must be some play at a certain angle. They're cheap enough that it makes sense to just replace them since most things at this mileage are at their replacement age anyway.
stioc
Expedition Leader
Well it was another back breaking weekend in the garage. Here's what was done and a few tips in case anyone else is looking to do this too:
- Pulled the struts out again for the millionth time...this time to machine the 1" spacers down to .75". While I liked the height but with weight in the back the front would sit higher worsening the positive camber and the CV angles. It's all about dialing it in...
- Replaced the inner tie-rods, one Moog and one AC Delco (since I'd purchased it as a spare a while back). This was probably the easiest compared to the rest of the tasks that got done this weekend. Just count the threads or measure the length to get the alignment close to the original; then I used a large vise-grip to loosen it at the steering rack end. Pipe wrench didn't fit.
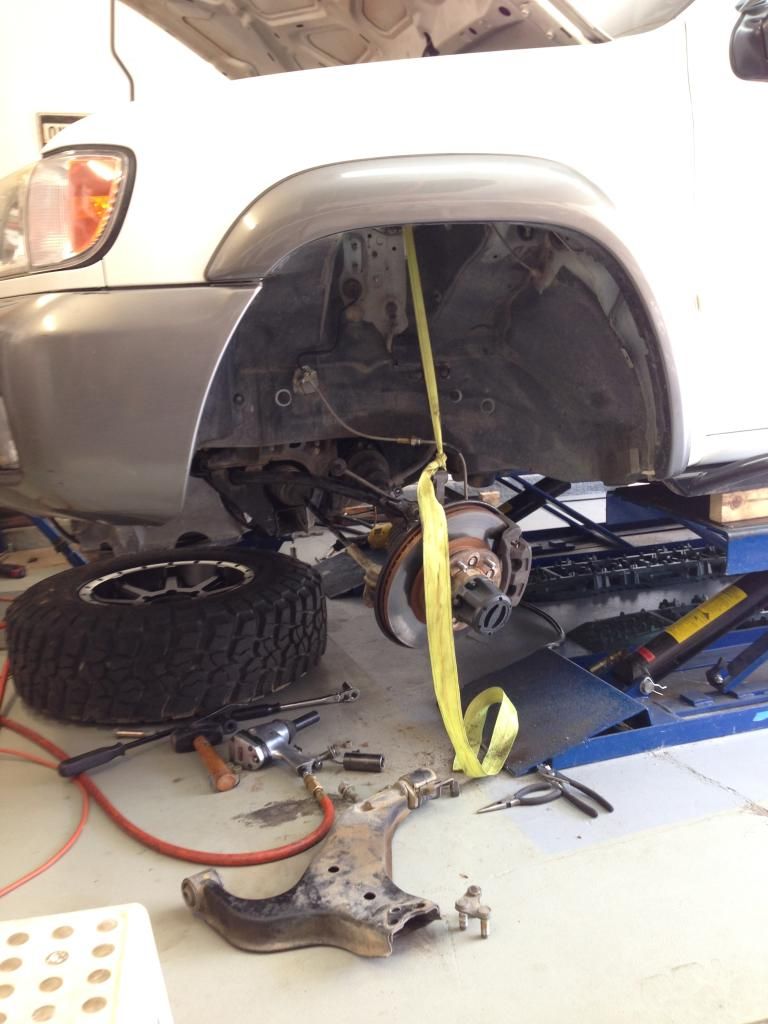
- Replaced both lower ball joints in the front. Once the nut was off I had to use a two jaw puller to pop it loose (banging the knuckle with a 5lbs sledgehammer did nothing but left gouges in the knuckle). You also have to pull the CV shafts out to get the ball joint completely free- not enough clearance otherwise. However, since I had the strut out I only removed the C-clip at the wheel end of the CV shaft which allowed me to swing the whole hub up to free the ball joint. You'll need a lovely assistant or another pair of hands to do this.
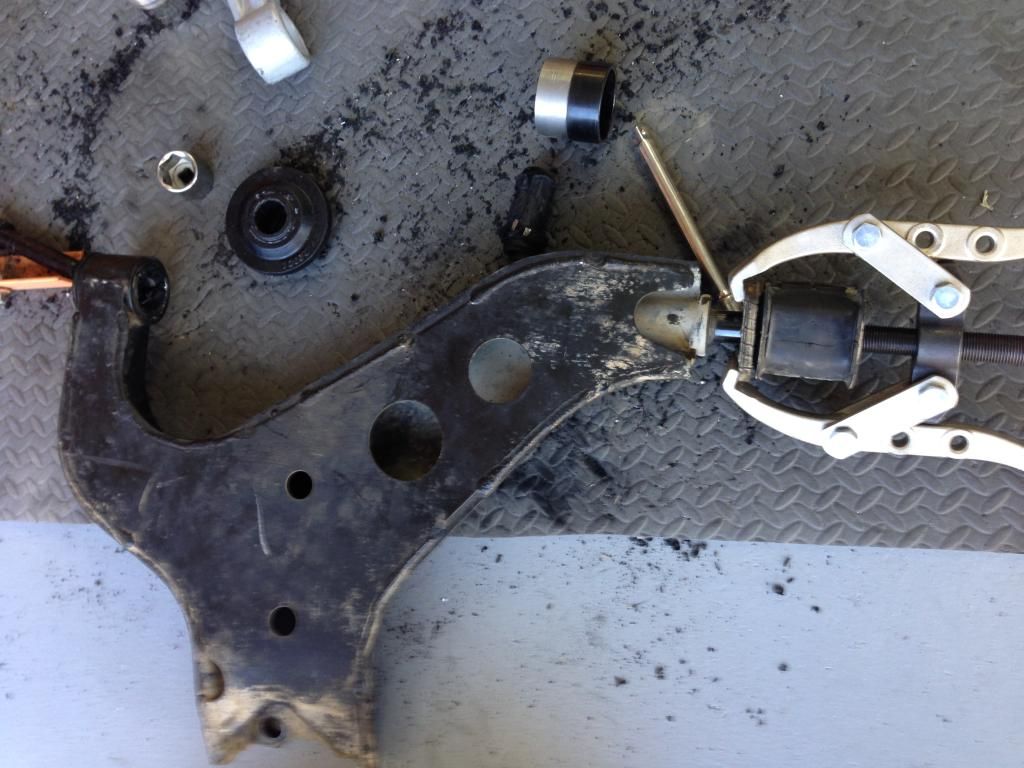
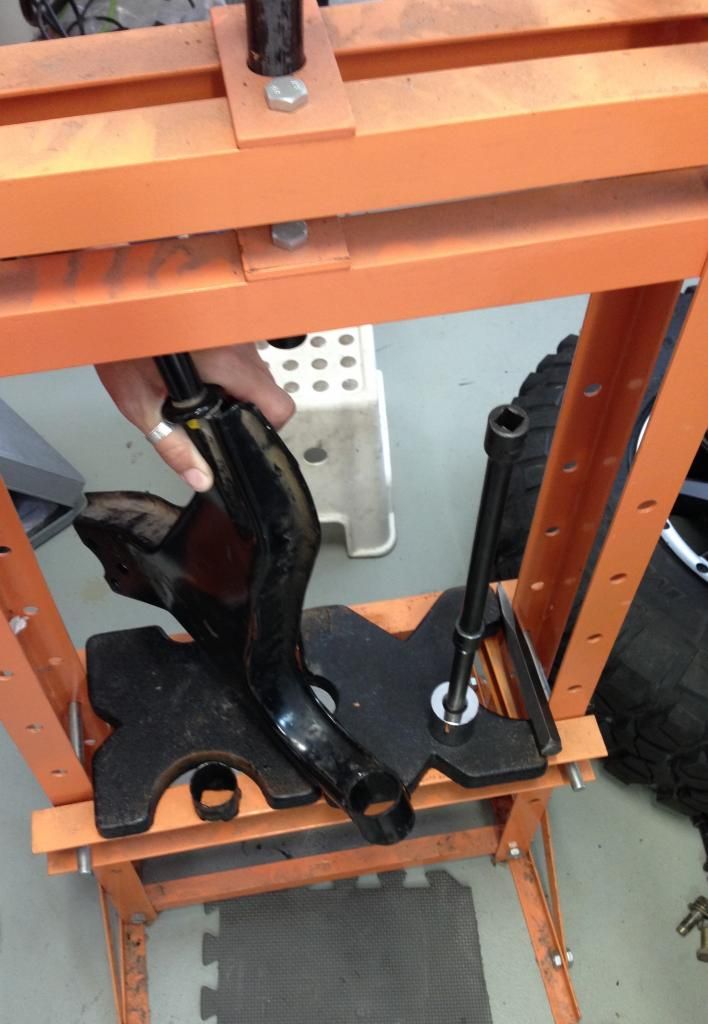
- Lastly pulled the control arms out, which was easy enough but getting the bushings out was another story. The rear bushings are easy if you use a 2 jaw puller, see the pics. For the front bushings I tried the DIY method first since most folks don't have a shop press at home. The DIY method involves drilling the rubber part in a few areas, burning it out, slicing the outer metal sleeve very carefully so you don't cut the housing, then prying it or knocking it out. This was a long slow process (about an hour and a half) but ultimately worked on the first control arm. However, the second one just won't budge even with all the center rubber part completely hollowed out. At this point I had had enough and out came the shop press. It took a little figuring as far as the placement, the size of the die and other bits to use but 5mins and it was done! I used a 1-1/4" Craftsman socket as the press die which fit perfectly on the outer sleeve of the bushing and a couple of 1/2" extension. It took a LOT of force, the popping noise sounded like a gun shot, it was music to my ears at that point lol. Unfortunately I don't have the new bushings yet so the install will have to wait till next weekend or so. This whole project was quite involved or it certainly felt like it in 100deg weather and just about every trick tool out on the garage floor. Enjoy the pics
Look ma, no suspension:
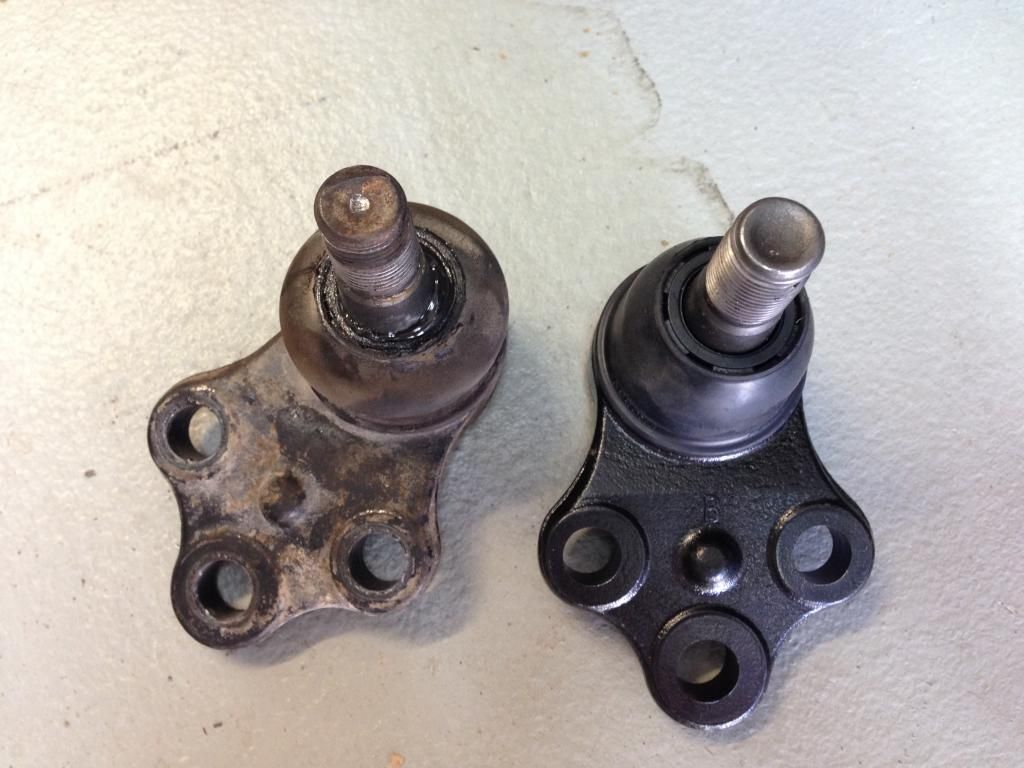
Old vs. new
Easy peasy
DIY method...grab a drink or two it's going to be a while
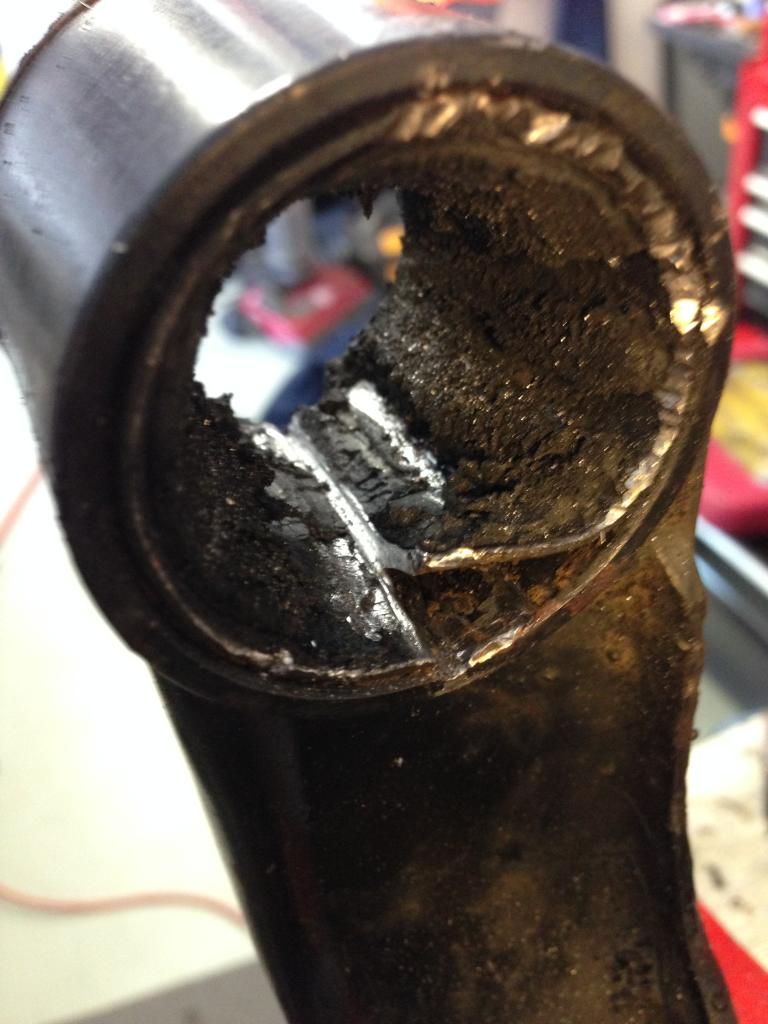
Knock it out using the outside lip and it should come out like this...
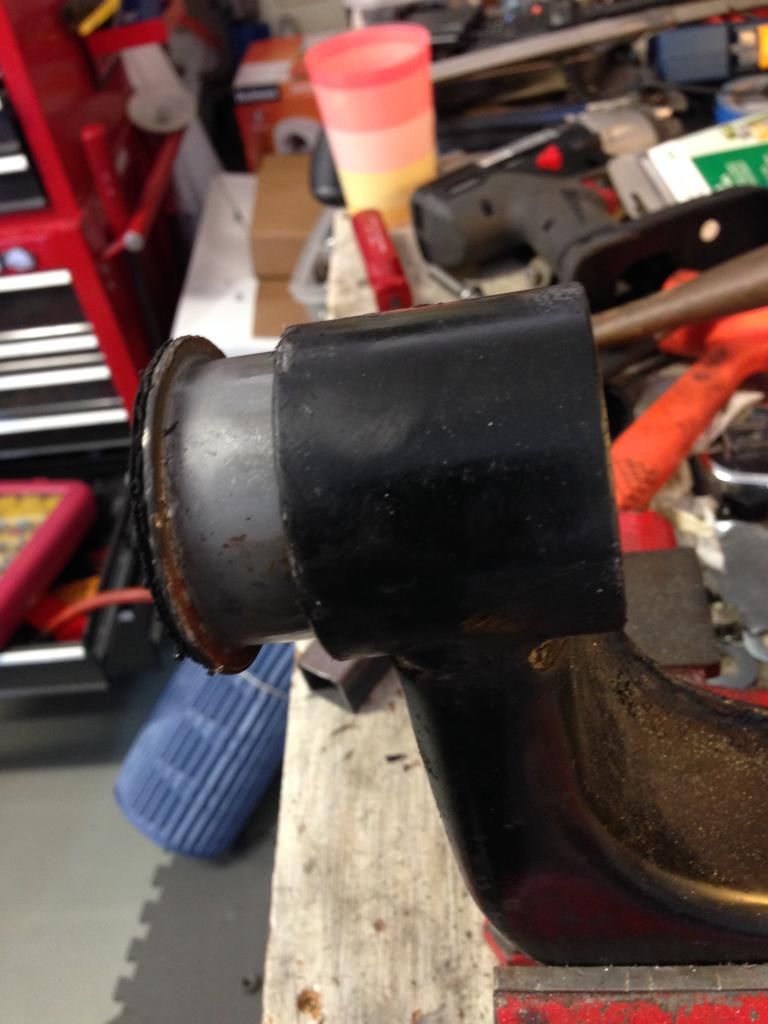
If not, break out the big boys tools or bring it to a shop and have them press them out for $20
- Pulled the struts out again for the millionth time...this time to machine the 1" spacers down to .75". While I liked the height but with weight in the back the front would sit higher worsening the positive camber and the CV angles. It's all about dialing it in...
- Replaced the inner tie-rods, one Moog and one AC Delco (since I'd purchased it as a spare a while back). This was probably the easiest compared to the rest of the tasks that got done this weekend. Just count the threads or measure the length to get the alignment close to the original; then I used a large vise-grip to loosen it at the steering rack end. Pipe wrench didn't fit.
- Replaced both lower ball joints in the front. Once the nut was off I had to use a two jaw puller to pop it loose (banging the knuckle with a 5lbs sledgehammer did nothing but left gouges in the knuckle). You also have to pull the CV shafts out to get the ball joint completely free- not enough clearance otherwise. However, since I had the strut out I only removed the C-clip at the wheel end of the CV shaft which allowed me to swing the whole hub up to free the ball joint. You'll need a lovely assistant or another pair of hands to do this.
- Lastly pulled the control arms out, which was easy enough but getting the bushings out was another story. The rear bushings are easy if you use a 2 jaw puller, see the pics. For the front bushings I tried the DIY method first since most folks don't have a shop press at home. The DIY method involves drilling the rubber part in a few areas, burning it out, slicing the outer metal sleeve very carefully so you don't cut the housing, then prying it or knocking it out. This was a long slow process (about an hour and a half) but ultimately worked on the first control arm. However, the second one just won't budge even with all the center rubber part completely hollowed out. At this point I had had enough and out came the shop press. It took a little figuring as far as the placement, the size of the die and other bits to use but 5mins and it was done! I used a 1-1/4" Craftsman socket as the press die which fit perfectly on the outer sleeve of the bushing and a couple of 1/2" extension. It took a LOT of force, the popping noise sounded like a gun shot, it was music to my ears at that point lol. Unfortunately I don't have the new bushings yet so the install will have to wait till next weekend or so. This whole project was quite involved or it certainly felt like it in 100deg weather and just about every trick tool out on the garage floor. Enjoy the pics
Look ma, no suspension:

Old vs. new

Easy peasy

DIY method...grab a drink or two it's going to be a while

Knock it out using the outside lip and it should come out like this...

If not, break out the big boys tools or bring it to a shop and have them press them out for $20

richard310
pew pew
Nice overhaul. It's a great feeling when it's all said and done, and having said that, I hope the rest of the install goes well.
Rebelord
Semper Fi
Nice work. One trick for the front bushings that I have heard is to hack saw the outer sleeve, then use a air chisel to "pry" it away from the control arm, essentially folding the sleeve in half then pounding it out. But a press works much better IMO. Having a shop press mine out when I pull my arms. As for the rear bushings, when I did mine. I left the arms on the truck. Pulled the bracket off that holds them in place. Used a long 1" heavy wall DOM tube, like a long chisel. Held that on them and had a friend hit it on the front side to get them off. Mine, I kept sprayed up with PB Blaster, so once about 1/2 way off you can pull them by hand. I would suggest anyone going to do this, start spraying them up with lube every day for a week leading up to it to get it worked in there good.
Another thing I've noticed. Once you pull the struts on these trucks enough. I think I can have both removed in about 30mins once in the air. Gets pretty easy.
Question: Which bushings did you go with? I picked mine up from 4x4Parts/AC. Fronts, I got the split ones. But the rears are very nice IMO. Even for the price. (Literally picked them up from AC, their "shop" is 5mins from my work!)
Also you said you got a 27" rear brake line? From who? AC? I am doing brakes soon, and want to do the SS lines, was again just thinking of picking those up from AC. Using PowerStop Z36 Truck Tow n Heavy duty pads.
stioc
Expedition Leader
Thanks, I'm glad I got most of it out of the way.
I used the hack saw method as described and it worked, just slow and more manual work.
I got the AC bushings too, haven't gotten them yet though. Same for the brake line, got it from AC. Lucky you're close to them because I have to pay their crazy shipping charges.
I used the hack saw method as described and it worked, just slow and more manual work.
I got the AC bushings too, haven't gotten them yet though. Same for the brake line, got it from AC. Lucky you're close to them because I have to pay their crazy shipping charges.
Similar threads
- Replies
- 2
- Views
- 992
- Replies
- 1
- Views
- 1K
- Replies
- 5
- Views
- 1K
- Replies
- 6
- Views
- 2K
