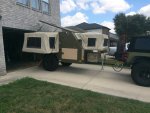
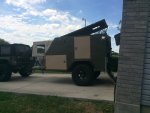
My DIY solution to the UEV 440

Rutdigger

Watch This!
Great build, I want to see how you wrap this up. The devil is in the details Mike

I hear ya, but I won't have near as many details in mine as the real deal does, only so much I can do with the equipment I have. Finishing work will be an ongoing process for probably years after it gets camping worthy, as most projects go. The family and I are getting excited about using it b/c fall weather is coming up and is the perfect time for camping. Gotta get it mostly done soon..:victory:
 

whatevah

Observer
Wow, wow and wow! Amazing work, I know it's taken a lot of work, but it's about to start to pay out! Go with some graphics even if just a small one per side, gives it that finished look.
 

Titanpat57

Expedition Leader
Thanks, lots of thought has gone into it. I have watched your builds from the beginning, love your projects!

Thank you as well!

Love the Rockies theme...after all, you are from CO..

I have to ask..what was the choice of heater, and why, if you don't mind sharing...Thanks and keep up the work.

As far as the floor in the center, maybe a good quality indoor, outdoor with bound edges. Easy enough to pick up and shake out, but supple enough to give a bit of comfort and warmth under foot.
 

Rutdigger

Watch This!
Wow, wow and wow! Amazing work, I know it's taken a lot of work, but it's about to start to pay out! Go with some graphics even if just a small one per side, gives it that finished look.

I agree....I think this is the graphics we are going to go with...

Adventure is a choice.jpg
 

Rutdigger

Watch This!
....I have to ask..what was the choice of heater, and why, if you don't mind sharing...

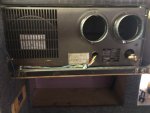
What motivated my choice of heater in this build was price. I found a guy up in Fort Collins selling a Suburban brand forced air heater from an RV. I verified it worked and bought it for $100 bucks. Took it home and had it cleaned etc. It has all the components like the thermostat and the propane sensor and puts out good heat. If I find this draws to much power or it just doesn't work like I want it to then I will take it out and probably use that space for a heater buddy or something until I can buy an Atwood or one of those other doo-hickies...lol.

Here is a pic of the outside cabinet:

276.jpg

As for the flooring goes...I will prolly go with some type of vinyl flooring that contrasts good with the carpet. I have a few ideas that I saw over at lumber liquidators...we will see..playing with photoshop to see if I like it..
 

Rutdigger

Watch This!
DIY UEV 440

So I got a little more work done to the trailer tonight by finishing up the carpet on the inside. I think tomorrow I will pull it out and start on the upper canvass and rain flys:sombrero:

This is the most important switch on the trailer....it turns on my FAN!...lol. Gotta have my fan.
001.jpg

A pic of how the tents attach to the trailer. Clean look and weather resistant.
002.jpg

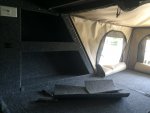
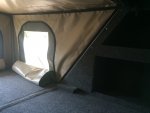
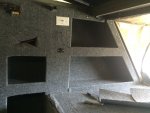
Second bed for our 7 year old. If an adult wants to sleep there then I have to put in the platform for there feet. Kinda like the stoy-a-way table idea in RVs.
003.jpg

004.jpg

005.jpg

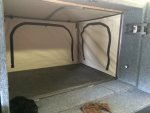
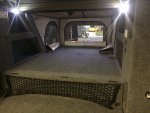
The front bed for Momma, Me, and our little dog..lol
016.jpg

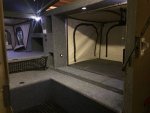
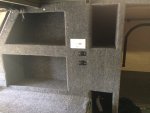
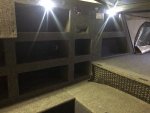
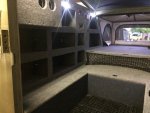
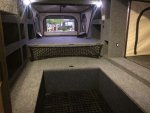
The three large storage areas below the light in the middle is actually the pantry. It will hold food and kitchen stuff. On this side I will have a zip up canvass that we can unzip to access the food from the inside, as opposed to going outside to get something. The canvass will also hold the food from fall into the trailer.
017.jpg

The water tank is directly below that storage net. Also where the water pump is located. I still need to install a vent tube in there..dang it..forgot all about that!
019.jpg

020.jpg

021.jpg

Well, the inside is pretty much done for the time being. Need to pick-out our type of bedding (prolly 3 or 4" memory foam") and sew a mattress bag/cover, install the DVD player and the 13" 12volt tv to mount on the wall mount. Might stick a CB in there, not sure on that yet. Add the AMP, and Volt Gauges. Install the solar charge controller for the 60 Watts solar panel Might install the cell signal booster while I'm at it. But these are things that I can do as I get time and need a project. You guys know how it goes! Now to finish up the top, add battery vents, make rain-flys...maybe even make one of those bat-wing canopy things, etc...oh and graphics..
 

Rutdigger

Watch This!
DIY UEV 440

Here is cool project that I might incorporate into the trailer for the cell signal booster antenna I mentioned earlier. My son and I made this telescopic pole a few months back because we were curious of how they worked....so we made a small version of one . I engineered the pole system and he programmed the motors to raise and lower the pole. I think this would work very well on a larger scale model for raising and lowering an antenna. A person could use a hand crank or a ATV winch to raise and lower. Thoughts??

 
Last edited:

Rutdigger

Watch This!
DIY UEV 440

Here is a video of the bed rail actuating. By actuating this way I am able to use the arms to lock the bed in place and it provides a clean look from the outside. Plus it just looks cool..:victory:


ripperj

Explorer
Dude that interior looks awesome!
Re the graphics, love the front, not digging the letters on the side, just my two cents

Sent from my Passport using Tapatalk 2
 

MountainD

Adventurer
Cool bed mechanism-- I love it. Great build! In regards to graphics, less is more. Plastering it with images really takes away from it. Graphics are great for making crap look better, but if it already looks great, why f-it up? Personally, it looks great on its own---I'd keep graphics to a minimum and place it well...
 

Rutdigger

Watch This!
DIY UEV 440

Got a few more pics tonight. I began making the patterns for the upper canvass and the rear door this afternoon. I also got the ceiling fan installed but forgot to take pics of that tonight.

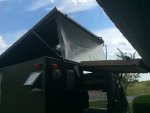
View of the tents before the rain flys get made and attached:

008.jpg

012.jpg

Making that patterns for the upper canvass:

013.jpg

Making a frame out of double sided tape:

014.jpg

Sticking the tape to the areas I want to attach canvass to:

018.jpg

Laying the duraskim to the tape and cutting out the pattern:

020.jpg

023.jpg

024.jpg

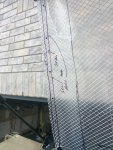
Making notes as I draw my lines. Add a 1/2 seam allowance and MATCH YOUR DOTS ON THE CANVASS! Very important.:

025.jpg

026.jpg

More to follow....
 

Rutdigger

Watch This!
I'd keep graphics to a minimum and place it well...

I hear ya....I am still playing around with colors and stuff in Photoshop. My problem is if I put something on the large bed on the side, I can't match it on the other side because I only have the middle door that is tan. So I may just end up putting something small on both sides instead of something large and then put the mountains on the front bed lid....don't know yet, still playin with images. Takes a little time to change colors, add photos, distort, blah, blah ,blah yack!..lol.
 

Rutdigger

Watch This!
Great build. Coming along nicely. What is the tongue weight on it?

Officially im not sure yet but will get an actual weight when i do the offical weighin. However, i can still lift it myself with a little effort. So if i had to guess i would put it at about 100-150lbs?? As a matter of fact i think i will go get a scale today and see. Now im curious.
 

Forum statistics

Threads
188,486
Messages
2,905,526
Members
230,494
Latest member
Sophia Lopez
Top