You are using an out of date browser. It may not display this or other websites correctly.
You should upgrade or use an alternative browser.
You should upgrade or use an alternative browser.
My FZJ80 Overland Build
- Thread starter NM-Frontier
- Start date
Bahnstoermer
New member
Sweet truck brother, love it!
ssssnake529
Explorer
Nice! Sweet 80 Series.
NM-Frontier
Explorer
Great job so far! Looking forward to you thought's on the 863's on the back with your weight. I have the 860's and with the addition of the rear bumper/ tire swing and 3 jerry cans I can already feel they are not up to it. Have not even fitted the drawers or RTT yet.
Wheelingnoob,
From just the small driving I'v done with the 863's I think you will love them. The ride has been much better, the stance has a bit of stink bug to it right now but I think after settling a bit and a swing out bumper it will be perfect.
NM-Frontier
Explorer
I have almost finished up up my rear drawers project, just need to finish the inside drawer dividers and ad some carpet to help with any rattling inside the drawers.
Quick specs:
3 36"X18"X8" drawers two stacked on top of each other, with open spot for cooler/fridge.
3/4" and 1/2 birch plywood construction.
250lb Slides.
Aluminum trim to protect corners and add a finished look.
I hope to have some pictures up to night!:sombrero:
Quick specs:
3 36"X18"X8" drawers two stacked on top of each other, with open spot for cooler/fridge.
3/4" and 1/2 birch plywood construction.
250lb Slides.
Aluminum trim to protect corners and add a finished look.
I hope to have some pictures up to night!:sombrero:
NM-Frontier
Explorer
Rear Cargo Storage
Rear Drawers:

This was my first time building storage drawers with slides, I'v build two platforms with drawers for the back of my Tacoma so I felt confident going in that I could build a nice set up. Working with slides was a bit trickier then I thought it would be, getting the space for the slides is critical for smooth operation. But after some adjustments they all came out fine and I'm proud to have done them my self. Not quite master craftsman quality but given my tooling and abilities they came pretty good.
Built with 3/4" birch ply for the outside case and 1/2" birch for the inside drawers.
Full length 36" slides rated to 250lbs. These are not locking slides so paddle latches and strikes were used to keep them closed. Aluminum angle iron was used on all the trip to help keep the corners protected, and to hide my lack of carpentry skills! Cheap carpet from Home Depot was used in the bottoms, the tan color matches well and will help with ware and noise inside the drawers. Still need to finish the insides of the drawers with. One will hold stove and propane and kitchen kit. The other two have not been designated yet so those may not get dividers till I dial out what will be in there. I also have some more anchor points that I will add as needed to secure cargo to the top of the drawers if needed.

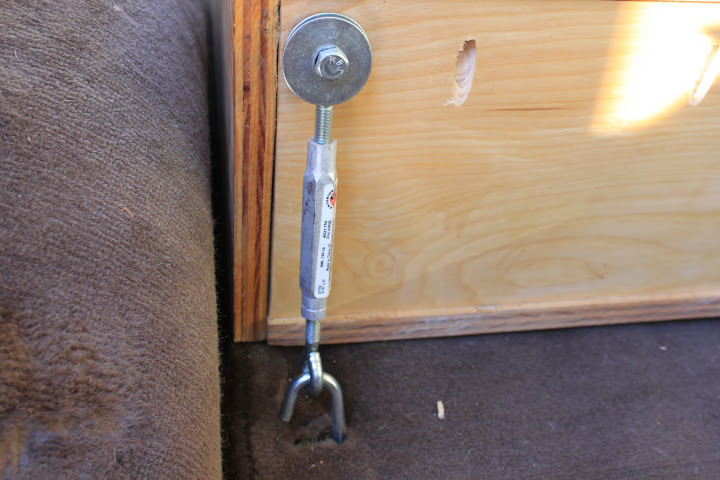
Turnbuckles anchor the draws behind the second row seats. The front of the draws bolt to the factory tie down holes.
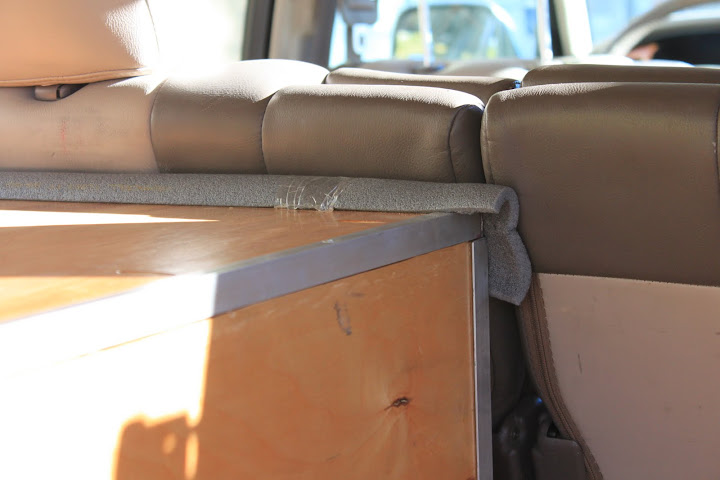
The back side just nearly rubs the seat, pipe insulation protects the leather for now but need to come up with a cleaner solution.
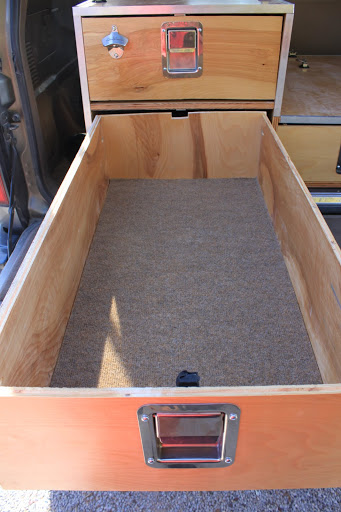
Carpeted insides to help with rattles and ware.
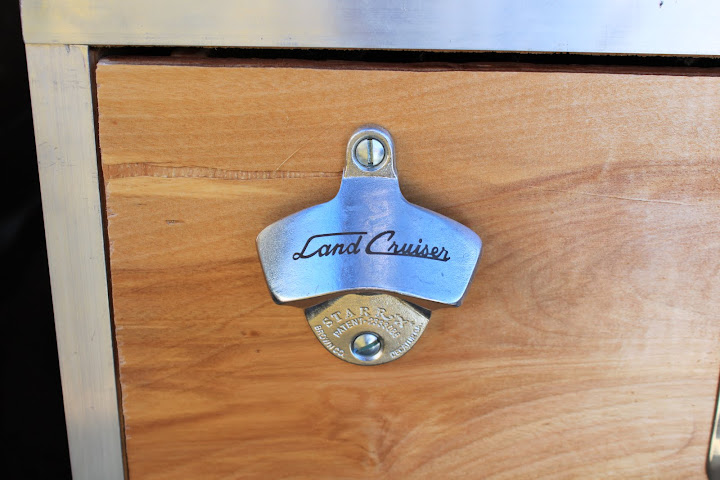
This may be my favorite part!:sombrero:
This is my standard trip set up in the cargo area:
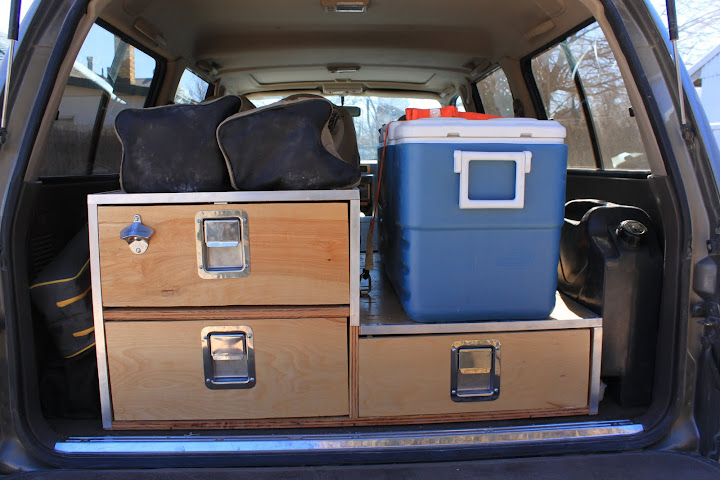
Air compressor and table on left. Two ARB chairs tied down on top. Cooler tied down. Frontrunner Jery can w/spout on right. Everything else is in the drawers!

Second water jery tied down behind cooler. Non MWC Scepter, not as nice as a MWC, small spout and still has a funny tast, but it was the best I could source locally.
This set up has been working well. It will be nice to get a cargo barrier at some point just to help keep thing were they are in case of an accident. It is also pretty quiet on even the roughest roads. Thing to do next would be a Wagongear Tailgate lid for spares and recovery, this will free up a drawer and a Scepter MWC to replace the some times funny tasting blue one.
Rear Drawers:
This was my first time building storage drawers with slides, I'v build two platforms with drawers for the back of my Tacoma so I felt confident going in that I could build a nice set up. Working with slides was a bit trickier then I thought it would be, getting the space for the slides is critical for smooth operation. But after some adjustments they all came out fine and I'm proud to have done them my self. Not quite master craftsman quality but given my tooling and abilities they came pretty good.
Built with 3/4" birch ply for the outside case and 1/2" birch for the inside drawers.
Full length 36" slides rated to 250lbs. These are not locking slides so paddle latches and strikes were used to keep them closed. Aluminum angle iron was used on all the trip to help keep the corners protected, and to hide my lack of carpentry skills! Cheap carpet from Home Depot was used in the bottoms, the tan color matches well and will help with ware and noise inside the drawers. Still need to finish the insides of the drawers with. One will hold stove and propane and kitchen kit. The other two have not been designated yet so those may not get dividers till I dial out what will be in there. I also have some more anchor points that I will add as needed to secure cargo to the top of the drawers if needed.
Turnbuckles anchor the draws behind the second row seats. The front of the draws bolt to the factory tie down holes.
The back side just nearly rubs the seat, pipe insulation protects the leather for now but need to come up with a cleaner solution.
Carpeted insides to help with rattles and ware.
This may be my favorite part!:sombrero:
This is my standard trip set up in the cargo area:
Air compressor and table on left. Two ARB chairs tied down on top. Cooler tied down. Frontrunner Jery can w/spout on right. Everything else is in the drawers!
Second water jery tied down behind cooler. Non MWC Scepter, not as nice as a MWC, small spout and still has a funny tast, but it was the best I could source locally.
This set up has been working well. It will be nice to get a cargo barrier at some point just to help keep thing were they are in case of an accident. It is also pretty quiet on even the roughest roads. Thing to do next would be a Wagongear Tailgate lid for spares and recovery, this will free up a drawer and a Scepter MWC to replace the some times funny tasting blue one.
Last edited:
Every Miles A Memory
Expedition Leader
These look really nice!!
NM-Frontier
Explorer
Nice work...I am not a drawer person but I like the natural stain look...
Thanks! It took a wile to decide what finish to use but I'm glad I went with the natural look. I think the trim helps give it a nice clean look also, kinda goes with the interior. I just need to cover up that small section in the center with some trim, but clearance is tight may take some work to get that one.
NM-Frontier
Explorer
I started on a bunch of small jobs today. First up was the exhaust mount just after the cats. It has been broken since I got it, and makes the exhaust rattle against one of the cross members after the muffler on start up. Hopefully the new one will eliminate the knock/rattle when I fire it up. Next was removing the transmission pan and resealing it. It has been weeping fluid all around it, but have noticed a bit more recently so I got a fresh tube of FIPG last week and finally got to it. I didn't finish today as the sun when't down faster then I could clean the old stuff off the pan. Boy that was a pain! Once I finish clean up in the morning Ill get it mounted back up and refilled.
Next on the list will be the oil pump cover and crank seal, I'v been collecting all the parts and tools for a bit and hope to do it after Christmas.
Sorry no pics of the boring stuff to night, I'll gab some in the morning.:sombrero:
Next on the list will be the oil pump cover and crank seal, I'v been collecting all the parts and tools for a bit and hope to do it after Christmas.
Sorry no pics of the boring stuff to night, I'll gab some in the morning.:sombrero:
NM-Frontier
Explorer
Just a short update: I got the trans pan all sealed up and after some driving, no leaks! Then I got the castor correction bushings in. I used OME 3* with Landtank template, the end result is great, the truck steers and tracks as it should. I haven't got it to the alignment shop yet so I don't have any caster numbers yet but it seems to drive and handle the way it did before I installed the taller 850 springs.
:box: I also ordered up one of these:
Mojave Off Road “Phoenix MCU-1”

http://www.mojaveoffroad.com/Products.html
After lots of hunting and research for the best way to mount my Scepter fuel cans, these guys made the best one I could find. It looks like a top notch product built here in the states by a small company. And it will go great with my Gamiviti rack, also built in the USA by a small company. I can't wait to get this mounted up!:sombrero:
Still need to get the oil pump cover gasket done along with the crank seal. Hopfuly I will get this knocked out between bike rides this weekend.
:box: I also ordered up one of these:
Mojave Off Road “Phoenix MCU-1”

http://www.mojaveoffroad.com/Products.html
After lots of hunting and research for the best way to mount my Scepter fuel cans, these guys made the best one I could find. It looks like a top notch product built here in the states by a small company. And it will go great with my Gamiviti rack, also built in the USA by a small company. I can't wait to get this mounted up!:sombrero:
Still need to get the oil pump cover gasket done along with the crank seal. Hopfuly I will get this knocked out between bike rides this weekend.
NM-Frontier
Explorer
Today I got the oil pump cover o-ring and front crank seal done. Both seemed to be leaking a bit when the motor was running. The old o-ring/gasket was dried and cracked but not broken yet. It did come out in pieces though. The seven screws came out with out much of a fight so that was a relief. The whole process whet pretty smooth. So far no leaks after a quick drive!:sombrero:
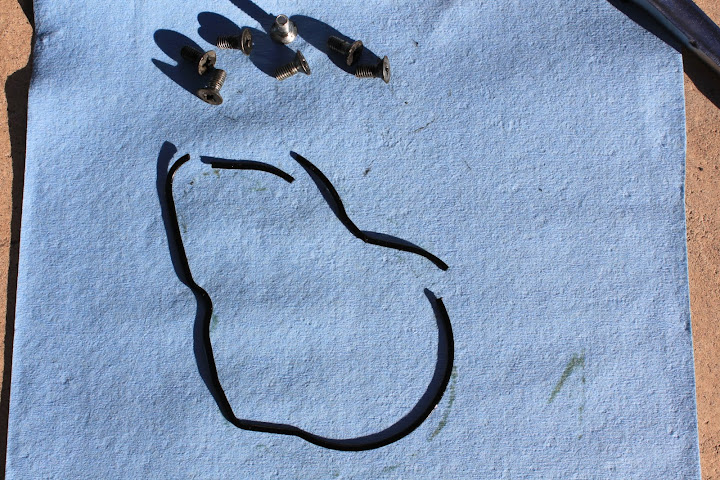
The old gasket in pieces.

The cover out and getting cleaned.

Every thing out.

Replaced the phillips head screws with Torx head.
The old gasket in pieces.
The cover out and getting cleaned.
Every thing out.
Replaced the phillips head screws with Torx head.
concretejungle
Adventurer
nice swap on the oil pump cover bolts!! I replaced mine with allen heads when i did mine because that was the best thing the local fastenal had in stock. Glad i did it! You will be happy too!
Similar threads
- Replies
- 5
- Views
- 921
- Replies
- 0
- Views
- 803
- Replies
- 0
- Views
- 773
- Replies
- 5
- Views
- 673
Forum statistics
Members online
- driller
- Robert104
- Farfrumwork
- TommyG
- Sabey
- kerouac
- Mr.Ragnar
- 94LandCruiserDude
- DVD
- LexusAllTerrain
- leunam
- Jblanchrd
- cmd42
- Dosamigos
- RPhil
- Delsh
- volvota
- mistermustard
- dudeandadog
- 97heavyweight
- MotoDave
- mclimber
- ramblinChet
- glennm01
- bigsam
- Expedit
- isu
- Spencer for Hire
- mark5280
- Sergio828
- Geared4adventure
- Gila Man
- tougu
- grpeterson
- NikonRon
- swanton24
- nmorrill25
Total: 3,232 (members: 42, guests: 3,190)
