My FZJ80 Overland Build

NM-Frontier

Explorer
I finally got my Mjove Off Road fuel can holder installed. Very strait forward install with the supplied hardware, bolts through the base of the holder to plates that clamp around the cross bars of the roof rack. The top hinges can be undone and the top removed leaving just the base mounted, so you don't have to have the cans up there all the time. Foam pads protect the cans/holder and a lock is used to "lock" the top to the base. I use a small Masterlock that rests on the base when locked so Ill need to wrap it in tape or find one that won't rub or rattle on the base. I really like all of the holes provided in the base for mounting, it gives you lots of options, forward, or sideways, any way really.

With my two Scepter MFCs the lid is TIGHT witch is good for rattles but it was a bit of a fight to get the latch in. I ended up trimming the foam down a bit and that seemed to help. One can at a time, no sweat but both was harder then I think is should have been, and that was with empty cans! I'v got one ex US and one ex CAN can but they seem to bee fine as far as of them shape goes. I'd rather it be secure then rattling and loose. Any one else experience this with the Mojave? Overall the construction and quality seem top notch.

IMG_4036.JPG

All mounted up!

IMG_4032.JPG

The base mounted to the rack. You can see all the mounting holes and the flat top bolts.

IMG_4029.JPG

Mounted to the rack.

IMG_4027.JPG

Mounting hardware.

Also updated the roof rack post with this.:sombrero:
 

NM-Frontier

Explorer
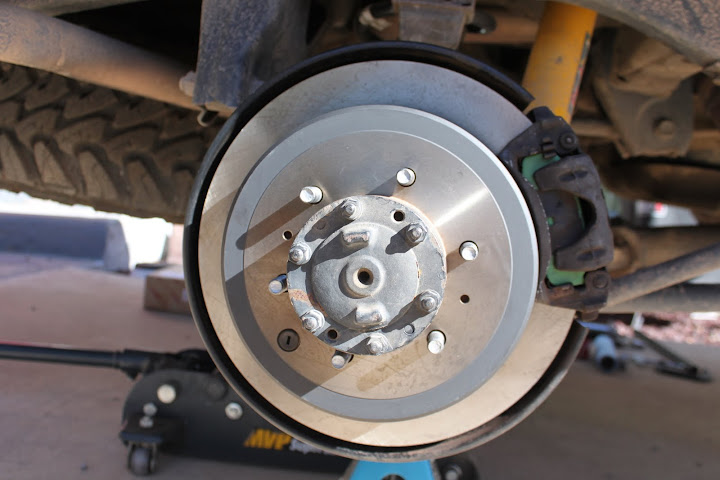
Today I got some new stoppers put on! New OEM rotors and pads. Brakes seem to be overlooked some times but once you start adding a bunch of extra weight to a truck it is a bit more noticeable when your brakes get warn or damaged and when it comes to parts no short cuts can be made here, cause its your brakes and you got to be able to stop! :sombrero:
IMG_4048.JPG

No more noise and smooth stopping is always a good thing.

Also got out on a shake down run on some local trails, sunny and 60* it was nice!
IMG_4049.JPG


IMG_4056.JPG
 

Sempertoy

Explorer
Today I got some new stoppers put on! New OEM rotors and pads. Brakes seem to be overlooked some times but once you start adding a bunch of extra weight to a truck it is a bit more noticeable when your brakes get warn or damaged and when it comes to parts no short cuts can be made here, cause its your brakes and you got to be able to stop! :sombrero:

IMG_4048.JPG

No more noise and smooth stopping is always a good thing.

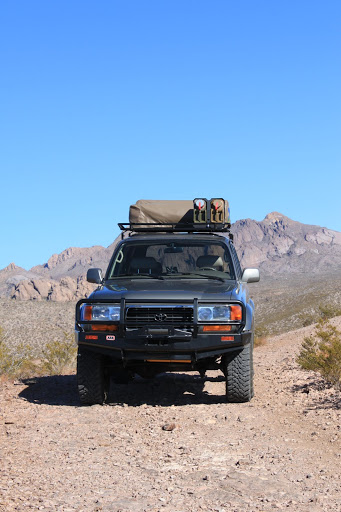
Also got out on a shake down run on some local trails, sunny and 60* it was nice!
IMG_4049.JPG


IMG_4056.JPG

Great point! I just had my brake booster go out today :/ so I had to get a new one and figured it was time for front rotors and pads.... And since I'd be in there, time for a front axle rebuild!


Sent from my iPad using Tapatalk HD
 

alia176

Explorer
Hey Gordon,

Nice looking rig you got there; just about an exact replica of my 97 40th, right down to the color! Looking forward to having you join us on trips in 2013.

Ali
 

NM-Frontier

Explorer
Thanks Ali, just got home from Death Valley and boy what an awesome place! Unfortunately my season for travel is winding down as fire season is right around the corner, just got time for a few weekenders before work takes over everything!
 

NM-Frontier

Explorer
More Updates!
Updated post #22 Cargo drawers, with pics of the back all loaded up for a trip. Sorry for the late up date on that on, trying to keep everything organized by updating the original post. Thanks for following and all the comments!:sombrero:
 

LexusAllTerrain

Expedition Leader
How difficult was to replace your oil pump gasket and seal, I think the leak I have is from the same place is a small leak but traveling season for me is almost here and would like to repair soon!


Your vehicle is looking very nice!
 

NM-Frontier

Explorer
Lexus,

It wasn't that hard at all. I did a ton of research on mud and found a few good step by step threads. My screws came out with no problem. The biggest thing was sourcing all the tools a 3/4" socket, breaker bar and torque wrench are not as easy to come by as you may think, in Cruces at least. I ended up buying a 300ft-lb torque wrench at Harbor Freight, not my first choice but I couldn't even find one for rent or sale any were else, but it seemed to do the trick. Took 3.5hrs total including lunch and drain and refill with 5w30.
 

NM-Frontier

Explorer
John E,

I will have to give that a try, seems silly to get a new can if I can get mine to taste normal. Thanks!:sombrero:
 

LexusAllTerrain

Expedition Leader
Lexus,

It wasn't that hard at all. I did a ton of research on mud and found a few good step by step threads. My screws came out with no problem. The biggest thing was sourcing all the tools a 3/4" socket, breaker bar and torque wrench are not as easy to come by as you may think, in Cruces at least. I ended up buying a 300ft-lb torque wrench at Harbor Freight, not my first choice but I couldn't even find one for rent or sale any were else, but it seemed to do the trick. Took 3.5hrs total including lunch and drain and refill with 5w30.


Thank you on the scoop, I did spend smetime last night at MUD and I think I found my issue, PM coming soon!
 

NM-Frontier

Explorer
Pfran LEDs, Interior and Back Up Kit

Being able to see well at night a great thing and can really help make life more enjoyably at certain times. The original 80 lighting is't terrible but it wasn't the best, with the two domes and the map light you could see around pretty good, but with the drawers in the back it was hard to see in them with out a second light. After a quick search and reading lots of good reviews on Pfrans LEDs, I ordered the two dome lights and map light kit. I did not go for the door lights because they just don't help with the lighting at a set up camp. I also got the 7w reverse bulbs, because you can never have to much help backing up at night.

IMG_4469.JPG


The lights were easy to install, just pop out the old bulb and put in the adapter and plug in the LEDs easy as pie! Reverse lights were even easier as they are a direct replacement. Maybe 30min total to get it all in, and that't with cleaning all the lenses.

IMG_4509.JPG


IMG_4510.JPG


I couldn't be happier with the results, defiantly a worthy upgrade that I would recommend to any one. I do not have any pics of the reverse lights (taking a pic of yourself in reverse is kinda tricky) but they are impressive! You can really see back there now. One of the most useful mods to date just due to the fact it improves overall drivability not just trail or overland specific.
 

NM-Frontier

Explorer
I got kinda behind over the last few weeks, today I got caught up on mods but still need to do my Death Valley trip report. New LEDs in the post above and a better write up and pics of the Howling Moon Stargazer RTT on page 2. Also finally got carpet in the drawers! (pics on page 3 post #22)
 
Last edited:

Forum statistics

Threads
188,343
Messages
2,903,830
Members
230,176
Latest member
Arcadia1415
Top