My OVRLND build

skyfree

Active member
I finally "finished" (is it ever?) my OVRLND camper build so I thought I would do a multi-part build post for others to get ideas from.

My wishes were:
- Insulated
- Once piece of furniture that could be easily removed
- As lightweight as possible
- Pressurized water system
- 50 amp-hours of lithium battery
- 1 drawer that contains the entire kitchen setup
- Fridge slider
- Adequate interior lighting

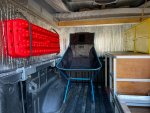
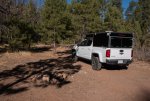
This is the camper on my Chevy ZR2. I actually haven't done anything to the truck itself, other than 589Fab shock skids (which get used regularly). My camper is sized to the truck with a little extra room in the cabover so I could accommodate 3" foam cushions. I got HD36-HQ foam from the Foam Factory (AKA Foam by Mail), and it's super comfy and just thick enough not to hit bottom with that particular foam.
DSC_2190.jpg

Part 1: Insulation and ceiling lights

I spent a cold night in the camper in November 2020 when it was down into the upper 20's. Sitting in an uninsulated aluminum box is actually worse than just sitting outside. The cold seems to be radiated from the metal and you feel it. So after consulting with my friends who lived in a van year-round for 2 years, I came up with a plan.

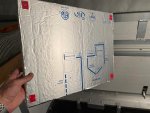
1" foil-backed (on both sides) Polyiso foam was the first layer. I attached it with VHB tape because I didn't want to mess with glue in my cold garage in December:
IMG_0072.jpg

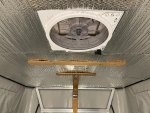
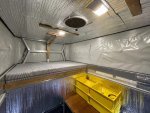
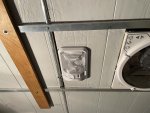
After doing the walls, I did the ceiling and added 2 RV style LED lights at the same time so I could conceal the wires:
IMG_0073.jpg

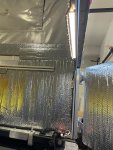
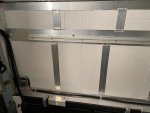
Notice the large sections of bare metal in the next photo. This is a good start, but I knew that metal would conduct a lot of cold into the space:
IMG_0074.jpg

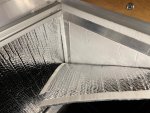
To break the thermal bridge, I added a layer of Reflectix over this. My friends suggested attaching it with Velcro so any moisture trapped between the layers could be aired out and any mold cleaned up. We will see how this plays out, but for practical purposes handling Velcro is easier and cheaper than more VHB so this worked out well:
IMG_0289.jpg
The ceiling:
IMG_0286.jpg

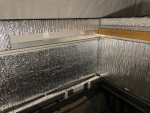
Notice that there is a section with no Reflectix where the bed slide slides out. The tolerances are too tight to allow it there. Not perfect, but this gets completely covered when the slide is out.
IMG_0287.jpg

This insulation makes a huge difference when sitting inside when it's hot or cold outside. The tent part is not insulated of course, but the thick tent material seems adequate and I don't think I'll be adding any insulation up there. The truck bed has a spray coating on it that seems to provide some barrier to thermal transfer, but that could be covered with Reflectix later if I decide I need more.
 

skyfree

Active member
Part 2: The drawer/storage unit

The insulation and electrical work was completed in late March and then I started work on the furniture. I wanted one piece that I could bolt down to the truck bed (no attachments to camper) and remove easily by myself. Lightweight was important so I chose 8020 style 1" extrusion from TNutz which is a little cheaper than 8020. The wood is 3/8" and 1/4" Baltic Birch ply. I used about 12 sq ft of 3/8" and 20 sq ft of 1/4" ply which is about 30 lbs. From the shipping I know that the aluminum weighed 40 lbs. The 36" drawer slides are 10 lbs. There is probably another 10 lbs of stuff on there between the storage bins, water pump, and propane tank mount, so I figure about 90 lbs. Someday I will get around to weighing it.

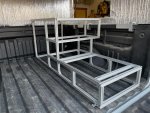
The design took a couple of weeks. Tolerances are very tight to fit everything I need into the very limited space. I have pages of drawings for this thing, so it was exciting to finally get the frame put together and test fit into the truck:
IMG_0311.jpg
The mount points ended up changing since that obviously didn't work. I ended up with 6 mount points including 2 on the vertical bed surface on the cab side. I also got some wrong screws for the t-slot which I had to re-order. I put it together initially with some screws from the hardware store and then replaced them all later with strong hex button head screws after they got shipped (ug!).

I found the aluminum easy to work with, but my cabinet building/carpentry skills are poor and that part was frustrating with some do-overs. It works, but it's not up to the high standards others have set for furniture on this site! It's particularly hard to get the drawer sized right to fit with the slides, but it worked out in the end.

One pro tip is don't use stain/poly all-in-one paint. That is really hard to get an even coat. Next time I would just take the time and stain / seal separately.

Here is the finished product:
IMG_0522.jpg
The drawer slide releases are 1/8" from the closed tailgate. The drawer handles were 1/4" too deep so I had to cut them which was a real PIA.

The tailgate on the Colorado does not sit flat. It has a pronounced slope to it, which wasn't going to work. The bottom of that drawer is 1" above the truck bed, so I had to lower it to clear that. I couldn't find longer tailgate cables so I just modified the hardware and drilled out the holes larger which gave me what I needed. There is 1/8" between the drawer and tailgate when the drawer is extended.

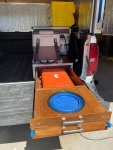
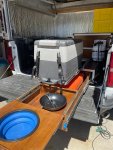
Drawer extended:
IMG_0524.jpg

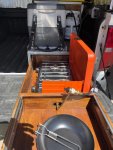
The drawer is sized in height to fit the GSI Selkirk 540 stove. I didn't want it too high because I needed to be able to see into and reach into the fridge easily. After building it I was happy with the access to the fridge.

IMG_0526.jpg

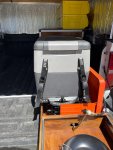
It's a DFG fridge slide built for the Indel-B TB31a that I've had for years. I don't need a lot of fridge space so this works well for me.

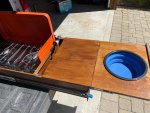
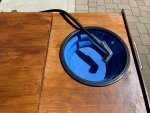
The "sink" is a large collapsible dog bowl. It can be lifted out and tossed when full. I went with that rather than a real sink for weight and ability to have a sink without plumbing. Any plumbing that hung down would take away from the storage space under the sink when the slide is pushed in. I can store my minimal kitchen gear, plates, cups, and utensils in there.

Here it is with the stove deployed:
IMG_0527.jpg

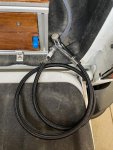
I had to carefully bend the regulator pipe to work. It's attached to a 5-lb propane bottle with an extension hose. It looks awkward to use the stove since it's inboard on the tailgate but it's not a problem at all in practice.

Notice how the fridge slide is offset to the left. This is so I can slide out the fridge with the stove open:
IMG_0528.jpg

When the sink is deployed, there is an extra board I can insert above the storage area to have a work surface. The board stores on top of the stove when not used:
IMG_0529.jpg

This kitchen setup solves a lot of convenience issues for me when cooking. The only hassle is attaching the propane regulator to the stove, but that's only really needed twice a day so I can live with that. This is ripe for future enhancement but I haven't figured out the hardware for that yet.
 

skyfree

Active member
Part 3: Electrical and Water

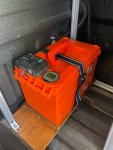
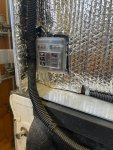
I built a small/light battery box with a 50ah lithium battery. So far I haven't used more than 40% of the capacity running the fridge, powering lights, and charging a phone. The battery is 13 lbs for 45ah (at 90% capacity), vs about 55 lbs for a 90ah AGM battery (50% capacity) so a huge weight savings there. It has a Renogy 20-amp DC-DC charger, Coulomb-meter / voltage meter, master switch and solar controller. It charges when the vehicle is running, connected with Anderson connectors. The whole thing is in a small box that I can easily remove and store.
IMG_0533.jpg

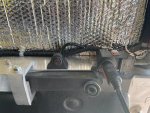
This runs to a fuse block via one wire run that is fused inside the box.
IMG_0541.jpg

I have a 50-watt solar panel I could use if I ever spend a couple of days in one spot, but that's not really my style so I haven't needed it yet.

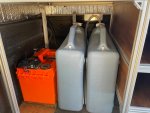
Water storage is 2 6-gallon jugs. I installed a 1.2gpm SeaFlow pump with a kitchen sprayer that extends to the sink. When one jug runs out I swap them. They tie down to the truck bed (not shown). The design was to precisely fit the 2 jugs and battery box in that area, and then accommodate the 36" drawer. I was JUST able to do this in the ZR2's very short 5'2" bed with nothing to spare.
IMG_0534.jpg

Sprayer at the sink. Just squeeze the trigger. Luxury!
IMG_0530.jpg

Sprayer detail. It's a cheap plastic one from Home Depot.
IMG_0514.jpg

Pump is mounted to the aluminum drawer/storage unit
IMG_0511.jpg

Pump is switched with a small light to show me it's on. The pump is pressure activated of course, but the switch is nice to avoid any accidental water leaks in case the sprayer gets triggered.
IMG_0537.jpg
 

skyfree

Active member
Part 4, storage and lighting: (the last part of this long post!)

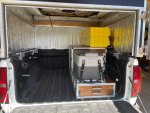
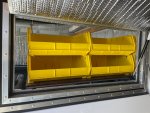
I ordered the OVRLND with a single flip-up side hatch with the idea that it would be convenient to be able to access some storage instead of just throwing my food and clothes in the back of the truck which is what I've been doing for years. The problem was finding storage bins that would work for this and were very light. I found some Acro-Mils storage bins that were exactly the right size and shape:
IMG_0521.jpg
You can see the effect of the pronounced forward slope of the Colorado bed here. The drawer/storage unit is level on the bed. This was made worse by a slight bow in the bed rail I will go into below.

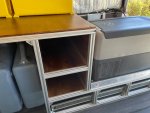
The other built-in storage is the two storage bins in the drawer/slide unit on the inside:
IMG_0535.jpg

There is also some space above the battery box where I can stuff a sleeping bag and pillow.

Notice that you can see the drawer slides here. I decided not to box everything in which is just cosmetic since I'm going for light weight.

I decided to mount these new X-bull recovery boards inside which is just easier and doesn't really interfere with anything. This was the only thing I mounted directly to the camper other than lights and electrical. In this photo you can see the 589Fab Hi-Lift jack mount with quick-fist mounts for a shovel. I can actually have both a hi-lift and shovel mounted, but the hi-lift is really heavy so I don't always carry it depending on where I'm going and if I'm alone:
IMG_0545.jpg

Notice in the above photo that the storage bins are sized to allow plenty of table-top space on the chair side.

I mentioned the 2 overhead RV-style LED lights before:
IMG_0539.jpg

Obviously 2 is overkill for such a small area, but I can use 1 or the other depending on if the bed is deployed.

Jay gives people this really cool LED dimmable / color selectable USB powered strip light with the camper, so I mounted it above the right-hand barn door so it lights the kitchen / tailgate area. This is the most used light by far:
IMG_0542.jpg
I just plugged it directly into the USB/Cigarette outlet that Jay included. One thing about that outlet is it doesn't seem to be able to handle a high load, like the fridge/light/and charging a phone at the same time. It shuts down when I plug the phone in. I have a couple more USB outputs on the battery box so not a big deal but it could be improved.

I bought one of those magnetic / velcro screens made for sliding-glass doors on Amazon for $29. I'm going to velcro it on the inside wall of the camper barn doors to prevent bugs from getting in. When it's dark, that light attracts every bug within a mile and I have to spend 15 minutes killing bugs at bed time.

I will mention some strange flaw in some ZR2 beds you can see in this photo. The bed rails are curved on both sides, so a flat camper does not fit perfectly unless it flexes, which the OVRLND does not. We had to use a couple of aluminum spacers and some rubber gaskets to get it to fit. This makes the gap between the cab and the camper small, which isn't a bad thing for wind resistance, but it makes the forward slope to the camper even worse than the pronounced forward slope built-in to the bed already. It also means that to get the bed level I need to park on a slight uphill or use rocks. Jay has seen this on 2 different ZR2's. Not a big deal, but if someone else runs into it don't be surprised.

You really have to watch those C-clamps by the way. Bring a wrench to tighten them because they will loosen over time.

That's it for my build! I hope someone benefits from it and gets some ideas for their own build. The OVRLND camper is great but it is VERY basic so everyone builds something it seems!
 

skyfree

Active member
I wish I had the skills to do something like it.

I didn't know anything about building with 8020 aluminum before this project, but you need to have lots of spare time on your hands. I just retired so this gave me something to do for the last 6 months. Now I understand why I see so many years-long build threads on here and at the end the builder usually sells it and starts over. It's an addictive hobby!
 

jreddy

Member
I love this. Other than the fact that everything fits the space and your preferences so perfectly, it also really matches the ethos of the OVRLND. It's lightweight, easy to remove, and you splurged only in the places where it really matters.
 

Andrew_S

Observer
Awesome. The OVRLND units are so nice. I was just contemplating using relectix to finish out the inside of our camper and was trying to figure out an effective way to accomplish this. How do you like the velcro?
 

dstefan

Well-known member
I was just contemplating using relectix to finish out the inside of our camper and was trying to figure out an effective way to accomplish this.
Checkout this stuff: https://www.usenergyproducts.com/collections/reflective-sealer-foam-core-1
Its like Reflectix, but 5mm closed cell foam core with actual insulation capability, which Reflectix really doesn’t have. Not sure I fully believe their R8 rating, though.

I just finished insulating our camper shell with it. I’ve also used Rflectix for other things in the past. This stuff is as easy to work with and as light, but seems more durable and certainly is more insulating. I put it up with VHB, and it’s held up really well so far. The nice thing is you can VHB it to the frame members and leave an air gap to the skin and avoid the thermal bridging problems. I covered it up with white chloroplast, except for the ceiling and we really like it. You can find this on Amazon, which is where I first ran into it, but it’s mostly 3 mm foam core, which to my mind is not thick enough. I just ordered it straight from US Energy Products, and they have a lot more options in sizes and lengths.
 

skyfree

Active member
Awesome. The OVRLND units are so nice. I was just contemplating using relectix to finish out the inside of our camper and was trying to figure out an effective way to accomplish this. How do you like the velcro?

Velcro is really easy to work with. I got the real 3M version 50' X 3/4". I needed about 75 ft of it but you could get by with 50' if you don't go too crazy with it. It sticks and hasn't loosened in even the extreme 113F heat I was in last week.


Reflectix as wallpaper isn't for everyone. It's very shiny obviously so most people will prefer something a bit more domestic. On the plus side it doesn't stain and you can wipe off dust with a damp cloth.
 

jreddy

Member
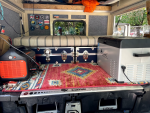
Here's my current setup in a Ranger with a 5 foot bed. It's all pretty budget, and I wouldn't even really call it a "build," as the only thing that's really permanent are the drawers.
  • I carpeted the walls using some cheap, adhesive, berber squares. Probably adds a tiny bit of insulation, but mostly I like the look, and it's easy to attach velcro patches.
  • Decked drawers. This was a big question mark for me. I was concerned about losing head room, and I didn't like that they don't use all the available space they take up, but I'm really glad I went this direction. They're just so convenient, and they still hold pretty much all of my kitchen stuff and a lot of miscellaneous camping gear, folding chairs, and tools. Also, it makes it really easy to clear out a big flat space if I want to use my truck to haul stuff. The plywood storage contraption I had before was a pain to remove, and now I can keep most of my gear even while helping friends move furniture. Also, with the top up, I've still got 5'9 between the cross beams, so I can change pretty comfortably.
  • Molle panels on the wall. Can't really see them in this pic, but there are some plywood panels that I've attached a punch of pouches to. Stuff I need pretty regularly goes in there (towels, sanitizer, flashlights, water bottle.
  • My power system is just a Renogy 160 watt panel on the roof and a Jackery 1000. I run USB string lights and a USB fan on the ceiling directly into the Jackery, and it powers a cheap Alpicool fridge with ease (3-4 days without recharging, but solar usually keeps the battery at 100%). I wanted a Maxfan, but I didn't have the clearance in my garage. The little USB desk fan was only 6 bucks at a hardware store, and it's enough to keep the air moving at night.
  • The "sofa" in the back is a pair of custom Rhino Trunks with a cushion on top. Rhino only charges a $100 design fee for custom sizes, and they're really heavy duty (9 inches high, and about 29 square). These hold clothes and personal effects, recovery gear, and consumables for longer trips (for a short trip, everything I need fits in the Decked drawers). There's enough storage that really the only thing that looks different from this photo when I'm fully packed is that there's a plastic folding table sitting on top of the sofa.

1626117330771.png
 

Forum statistics

Threads
188,337
Messages
2,905,751
Members
229,959
Latest member
bdpkauai
Top