NAS LR3 build with an overseas twist

Ray_G

Explorer
Roof rack flooring; farmtek polymax again on a Rover

Updates will be intermittent it would seem based off now balancing two Rovers and the rest of stateside life. It's a bit like having multiple wives, or at least a wife and a mistress or several. Perhaps that line of logic is best left undeveloped.

As it relates to Rovers, here's what I mean:
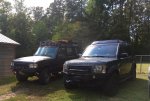
2016-09-04 15.54.36.jpg
The 96 and the 06 together...I think Coyote is a bit miffed at the return of her younger sibling but she'll still get plenty of use, albeit at a more relaxed pace.
2016-09-04 15.56.06.jpg
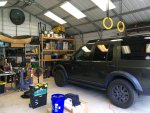
The D3's inaugural trip into the technology center for fitting/fabrication of the flooring.
2016-09-04 16.36.06.jpg
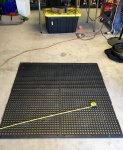
For the prospeed two pieces of polymax will cover the area I wanted; leaving the front open for my continued messing with Maxtrax and such and also leaving the far aft portion open where I may end up putting rotopax or otherwise using for implements. The rack's area is somewhat narrow, about 43" if my memory serves and with two pieces of interlocking flooring I opted to offset the centerline/interlocking area so that I could more easily use hardware to affix the flooring. Not pictured but pertinent was that I also choose to use 3 pieces of aluminum flat stock running length wise under the flooring to give a little more bracing since the flooring itself isn't all that ridged and the very slim build of the rack doesn't offer much bracing either-with a glass roof under it all I figured the 3 runners (one was a about 5" wide and fairly thick that I'd acquired in the UAE) were prudent.
2016-09-04 17.49.39.jpg
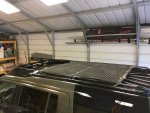
Up on the roof with hardware bolting it down, using Dii tie downs on the front and back to give a place to easily grab onto for straps if necessary. Since she technically isn't even registered yet (I brave the DMV tomorrow) I haven't tried it at speed to see what noise it has created but I'm honestly not expecting much.
2016-09-04 17.49.27.jpg
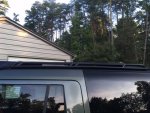
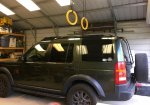
A side shot, illustrative of how well it tucks into the rack.
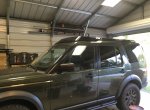
2016-09-04 17.49.47.jpg
Same/same from the front, nearly invisible from ground level and in keeping with my desire to keep the D3 a sleeker DD platform compared to the festooned nature of her older sibling.
2016-09-03 22.11.06.jpg
This has nothing to do with the truck but does have minor overlanding applicability; if anyone is exploring the reasons why to buy a volcano stove (Volcano Grill) not only is it a damn good little grill with 3 fuel capability, the wife and I have found it to be a nice fire pit for just the two of us (or a small group) that does really well with small amounts of fuel.

Up next...Snomaster is en route thanks to one of our esteemed colleagues here and thus a fridge will be back in this truck soon since Coyote isn't giving hers up. Eventually VHF, probably CB, the Kenwood L702, KO2's...and the fuel tank at some point!

r-
R
 

Ellis B

New member
Ray, Thank you very much for sharing your build,I am new here, i actually joined E.P. because I found your thread. I am Just getting started on a 06 LR3 HSE, that we (the Wife and I ) have owned for the last 8 years, I was waiting to buy her another vehicle before I start changing anything, but the wife loves the LR and wants to keep driving her, so I was given the thumbs up to get started. My list of MODS and Maintenance has grown considerably since joining E.P. and reading your post. I am pulling the airbag suspension off the LR and replacing it with the same coil spring kit you used, did you finally get the bugs worked out of it? I would like to hear about any issues you are having or have had, I do all my own work, so any heads up will be a big help.
 

Ray_G

Explorer
Ray, Thank you very much for sharing your build,I am new here, i actually joined E.P. because I found your thread. I am Just getting started on a 06 LR3 HSE, that we (the Wife and I ) have owned for the last 8 years, I was waiting to buy her another vehicle before I start changing anything, but the wife loves the LR and wants to keep driving her, so I was given the thumbs up to get started. My list of MODS and Maintenance has grown considerably since joining E.P. and reading your post. I am pulling the airbag suspension off the LR and replacing it with the same coil spring kit you used, did you finally get the bugs worked out of it? I would like to hear about any issues you are having or have had, I do all my own work, so any heads up will be a big help.
Ellis-
Thank you for the kind words and I'm glad that in some way my ramblings helped (or hindered depending on perspective!).

As far as the coil springs go I have had zero real issues with it since the initial install; confession to make or re-highlight is that I dropped the truck off with the local indy LR mech in the UAE and they did the wrenching, I just did the post install troubleshooting with the programming. That said my understanding is the install for the springs and such is rather straightforward but at present I can't speak to that personally. Assumption is that someone on here has pulled an air strut and can chime in on the relative difficulty of that, and from there just reverse the process with your traditional non-EAS coils.

I didn't, however, get the hardwired version of the software/hardware to work properly and the tech at AB couldn't figure out why. That said the flashing of the ECU did work, and has worked ever since. It does leave the suspension light on, red, in the lower left of the instrument cluster but I pay that no mind. All other features have been retained per the advertisement-i.e. all the terrain response features and such.

I would advocate that you order the RNG500060 13.5mm spacers that may help level off the back end depending on how your truck's stance shakes out. (i.e. from a place like here: http://landroverparts.checkeredflag.com/p/Land-Rover_2005_LR3/SPACER/51361457/RNG500060.html) and as illustrated here: http://lrcat.com/34/4/46341, part 5708 (you will see there are actually various sizes of that spacer, 13.5mm is the largest, i.e. ~1/2"-pardon the russian on LRcat).

Hope that helps, hit me up here, via pm or at ray.gerber(at)gmail.com if you have any other questions.

r-
Ray
 

Timbo FJ45

Observer
When you replaced the steering wheel logo. Is it just a matter of peeling off the old one and sticking the new one down? Or is there a trick to it?
 

Ray_G

Explorer
When you replaced the steering wheel logo. Is it just a matter of peeling off the old one and sticking the new one down? Or is there a trick to it?

Pretty much, no trick-I took inordinate care to be out of the way of the airbag but in reality it was a non-issue.


Sent from my iPhone using Tapatalk
 

harbinger808

Adventurer
Aloha Ray,
How are you liking the Polymax flooring and was it easy to do?... My Prospeed roof panels are starting to warp after a year of being installed here in Phoenix AZ. I like that I can rearrange them as needed but I this AZ sun destroys everything.
Mahalo,
Markq
 

Ray_G

Explorer
Aloha Ray,
How are you liking the Polymax flooring and was it easy to do?... My Prospeed roof panels are starting to warp after a year of being installed here in Phoenix AZ. I like that I can rearrange them as needed but I this AZ sun destroys everything.
Mahalo,
Markq

Markq-
Fascinating...everyone told me to get the roof panels when I ordered the rack and I opted not to b/c I'm biased toward the chicken coop flooring (this was a major controversy in the Discovery world about a decade ago).

I can't speak to how it would handle the AZ sun, but I will say that my Discovery 1 has had the same flooring (on two different SD racks, high and low) since 2007 and the flooring on that truck is fine, no issues, no warping, no wear, nothing. It just works.

As far as with the prospeed, you'll want two pieces if you cover it the way I did and as I discussed I opted to run aluminum supports under it running lengthwise on the truck to give it some more support. If you didn't want to deal with drilling holes in the polymax you could easily just HD zip tie the flooring down and it will be 100%.

At about $60 for the two pieces, it is economical and utlilitarian flooring that I'm quite happy with in the limited time its been on the D3...and the very long time it's been on my D1.
r-
Ray
 

Ray_G

Explorer
Thanks Ray
I will PM you with some questions and thoughts from time to time, if you dont mind

Don't mind at all, and MontyMog doing his in the near term we should see good feedback on his thread too so everyone can learn.
r-
Ray
 

harbinger808

Adventurer
Markq-
Fascinating...everyone told me to get the roof panels when I ordered the rack and I opted not to b/c I'm biased toward the chicken coop flooring (this was a major controversy in the Discovery world about a decade ago).

I can't speak to how it would handle the AZ sun, but I will say that my Discovery 1 has had the same flooring (on two different SD racks, high and low) since 2007 and the flooring on that truck is fine, no issues, no warping, no wear, nothing. It just works.

As far as with the prospeed, you'll want two pieces if you cover it the way I did and as I discussed I opted to run aluminum supports under it running lengthwise on the truck to give it some more support. If you didn't want to deal with drilling holes in the polymax you could easily just HD zip tie the flooring down and it will be 100%.

At about $60 for the two pieces, it is economical and utlilitarian flooring that I'm quite happy with in the limited time its been on the D3...and the very long time it's been on my D1.

r-
Ray

Thanks for the info! I'll be looking into the polymax flooring soon. Do you have a close up off the flooring on the rack from a side view perspective?... just wondering how much the flooring sticks up from the rack itself.
 

Ray_G

Explorer
Thanks for the info! I'll be looking into the polymax flooring soon. Do you have a close up off the flooring on the rack from a side view perspective?... just wondering how much the flooring sticks up from the rack itself.

Well the initial install shots from the front and the side are fairly illustrative-it barely does (and I personally think the little amount it does actually complement's the rack b/c it offsets the slight rise from the wind fairing). Here's a closer shot to show the slight elevation (which could be mitigated further by not putting in the cross braces running fore/aft but they are only a few mm thick).
IMG_1371.JPG
 

Ray_G

Explorer
Trucker's Friend multipurpose tool install

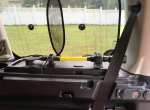
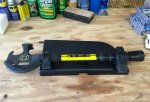
One thing my truck has lacked compared to my D1 is any type of multipurpose tool larger than a Gerber/Leatherman. Somewhere the algorithms of Amazon Prime infiltrated my brain or I'd read somewhere on a plane about a company called Innovation Factory (Innovation Factory /URL] who makes some handy multipurpose tools for both long haul truckers and fire/rescue. US made and not too expensive, as well not as big as a Hooligan (Halligan) tool I decided to give one a try, specifically the IF-232 Fire/Rescue version.

I decided to mount it via quick fists on one of the rear storage bins, test fitting illustrates size:
2016-09-07 12.07.21.jpg
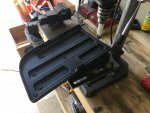
One of the reasons I decided to mount here, aside from it being out of the way in the far back, was that this part would easily be replaceable should I ever decide to clean the truck up or something. Quick shot of the underside, I drilled into the pre-existing holes that likely were left over from injection or something. Decided to use my ubiquitous collection of 1/4" grade 8 hardware bought in bulk from TSC.
2016-09-07 12.11.19.jpg
Mounted on the bench. I ended up fabricating a small spacer since the top end of the tool uses a smaller quickfist than the bottom and as the test fitting showed it was significantly canted. No impact on function, I just didn't like the way it looked so I offset it slightly.
2016-09-07 12.34.55.jpg
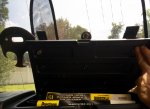
Illustrating that I can still open the bin if needed. This side is the aux fuse box, relays, and spares like brake switch, bulbs, and as you can see belts. Worst case scenario if I need to get in there the lid is actually not hard to remove at all.
2016-09-07 12.35.53.jpg
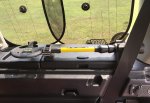
As it sits installed. It certainly isn't the fastest for access but that's ok in my book, almost all the stuff for utility is compromised like that by moving it to the rear cargo area to retain the primary passenger area's comfort. Everything is a balancing act and compared to the very utilitarian nature of my D1 the continued desired endstate for this truck is to have a comfortable, but capable, DD.
2016-09-07 12.35.25.jpg
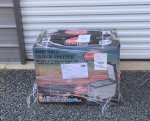
Foreshadowing the next major update, this was dropped off on Friday afternoon...Snomaster fridge install and review to follow
FullSizeRender-1.jpg
 

Forum statistics

Threads
188,362
Messages
2,906,024
Members
230,117
Latest member
greatwhite24
Top