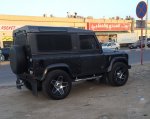
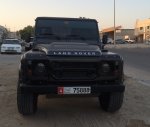
NAS LR3 build with an overseas twist

Ray_G

Explorer
I keep watching you guys on the Prospeed and when you crack the nut on the very few utility shorfalls that thing has I'll be ordering mine up! hahaha :victory: Then I might move my FR to short rails and install it on my M416 project and a Prospeed on the truck.

I can't fault your logic in the slightest; an application based decision is def the way to go with things (at least in my OCD mind) and yours makes sense in context. For me I think if I sort a way to nest the maxtrax up front (which is where I wanted them all along and was a major excuse, I mean reason for shifting off the FR half rack) & then put flooring on it will accomplish what I need from the rack. Either with the prospeed panels in conjunction with M8 eyebolts or if I go with the poly flooring & eyebolts/tie downs, I'll have the utility aspects needed. Not to mention the aft area is ripe for installing flat brackets to hold rotopax on the very back of the rack.

I've found with my D1 that the SD rack is necessary given the frequent hauling of two kids + wife with the way the back is built out all the time-ala how I had to use it last summer going from VA to WI and back; the beauty of the LR3 is that the same cubic footprint of luggage and gear would get swallowed up by the back-and thus the low profile of the prospeed keeps noise minimal but is still functional for throwing canoes/kayaks up there, the occasional large object, etc.

In truth its all a balance of function, form, and cost. Since I was having a pity party with the wife off to China for a bit the cost factor was removed, function is something that will get resolved, and well...form speaks for itself. I def feel that that prospeed is the LR3/LR4 heir to the Safety Devices low profile rack from the D1-i.e. the one that simply meshes the best with the shape and such, and since my D1 has the SD low, having her newer also green companion have the prospeed only made sense. At least in my mind.

Sadly that functionality mods will likely wait till late summer when she lands in the US again. I still have a few more updates cooking though.
r-
Ray

Shoots man, like you say "it's all about needs" and you definetely weighed it all out. Like I said, for sure that rack is the bees knees for LR3/4 and should be a factory add on. Although LR would make it $5k and completely unaffordable. Lol

I love it and cringe everytime I see one cuz I'm envious. But, I am super happy with my FR on the utility side and my needs.
 

Ray_G

Explorer
A little flora and fauna shot from the other day in AD.
4c7788e71f58154ad3fe74543b642974.jpg


GWagons are about as common as 4Runners in the US it seems. I rather preferred this work beast that our Belleau Wood tour guide was driving.
dbd5265496f6290d937045e6e7234765.jpg


Sent from my iPhone using Tapatalk
 

Ray_G

Explorer
Rear Swing Away Saga, Part 1

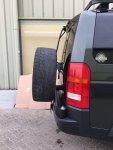
While I've posted a couple of shots with the swing away tire carrier of late I hadn't really documented it all that much since it was still 'in progress.' I think we've now reached a point where it is both good, and good enough, in terms of its final state and with enough data to post up here what all went on. In many ways it is illustrative of the challenges of building anywhere, particularly when you can't do the welding/fabrication yourself, so perhaps some will find points to keep in mind for projects that are outsourced of this magnitude. I don't regret the commissioning of the carrier and don't fault Icon for the trials and tribulations we went through to get to here-but that might just be a facet of growing more used to inshallah culture after 2 years in Abu Dhabi.

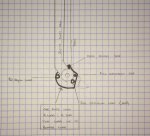
Background: tire carrier was necessary because I'd decided to buy the Frontrunner aux fuel tank that will take that space under the aft end of the truck. I didn't want to put the tire on the roof for a variety of reasons (MPG, COG, and the sheer joy of lifting the relatively heavy weight up and down from the roof being a royal PITA-I've played that game before, not going to do it this time). I also didn't want to sacrifice the cargo area, so it had to go on the back. Keep in mind the wife is not happy about this as she thinks the extra fuel is unnecessary (it probably is) and the loss of ease of use of one of the best facets of the D3/D4 compared to the D1/D2 (i.e. the tailgate and hatch) is unfortunate (it definitely is). However she's in China and realized that I have one toy here so was forgiving with my advocation for the project, basically saying she didn't care b/c I wasn't allowed to touch her Tacoma back in the US. Right. So I had a sketch in hand, and as alluded to earlier in the thread when the fuel tank showed up started executing violently and then realized it would be nice to slow down on the tank since I wanted a gauge for it that FR doesn't provide. So that can wait till the US, but the tire carrier was already in motion and at a good price-why not, right? The sketch, along with the truck, went in just before I went back to the US for a week to do spring break with my kids. (*I also pilfered a lot of shots of the FR swing away and several of the other fabrications others have done here and gave them about six pages of print outs showing what I wanted; i.e. just a single support arm, locks at 90 and full swing, etc)
Tire carrier sketch.jpg
The office manager at Icon kept me in the loop via what's app and a lot of videos/pics that week, as I'd posted some of them before these are illustrative.
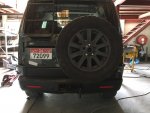
2016-03-21 11.00.45.jpg2016-03-21 11.00.23.jpg
2016-03-21 09.08.40.jpg2016-03-21 08.51.42.jpg
Some of them resulted in some back and forth with specific concerns regarding:
-the latching mechanism, I don't like it hanging down on the bumper
-the absence of lock outs at full swing
-the rubber stopper touching the tailgate, making for wear of the paint at vibration.

The shop manager related these concerns but was essentially put off by the fabricator who doggedly stuck with the latch since that was what they were used to from a recent large contract build for the Int'l Red Cross, further claiming that the second lock out was not possible. They did cut down the rubber stopper, but basically otherwise the truck waited for me to get back to the UAE.

Upon return in country I drove up to Dubai and amidst relating the concerns face to face with the fabricator things unraveled, esp when I asked for the 5 pages of pictures I'd annotated and printed out to illustrate what I wanted and he said "Oh, I don't know where those are" While I acknowledge that I have incredibly high standards for people that are rarely met, this was too much. Compounded when the fabrication 'supervisor' intervened and I asked him about the issues and his awareness of the dialogue while I was in the US and he said he wasn't aware of any problems, nor had he seen any of the pictures as the fabricator put all this together. I informed him that I didn't think supervisor was an accurate title for his position. Off to see the shop manager who was already extremely frustrated by the fab folks, she promised they'd fix it-and deliver it to me in Abu Dhabi.

So the truck was dropped off:
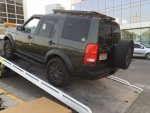
2016-03-29 17.34.55.jpg
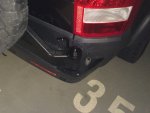
Here's the butchery of my bumper after it was 'fixed', note-no second lock out (still), and the bumper cover is basically trashed and looks like my 9yr old was given allowed to cut it.
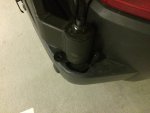
2016-03-29 18.24.23.jpg
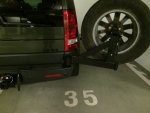
I was apoplectic. In contacting the manager the concerns coupled with the soft copy of the initial files provided and the pictures of the current state went to the ownership. To their credit they offered two COAs immediately: they would come get the truck, fix the quality issues with the build or alternatively come get it, replace the stock bumper with a new LR stock bumper and refund me my money. I will give them credit for standing by their name and providing option to salvage reputation. Given my optempo and it being the sole vehicle here I mulled over the options for a bit, also using the time to explore some the good facets of the carrier-i.e. that I think I can stow rotopax between it and the vehicle (the cardboard is the same size as a 2gal rotopax, absent the width of 3", there is also a like mockup on the right side tucked well in behind the tire). That, plus the way they build the pivot so that it is easily removable (i.e. for day to day driving in the US it may well come off and only come on for events and trips.
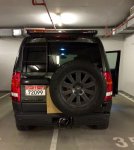
2016-04-01 09.51.36.jpg
In the end I decided to let them try again, and with another work trip of about a week coming up they came and grabbed the truck again. (you can also see the chronology of the build b/c the mockup of the rotopax was done with the FR half rack still on, but the pickup for attempting again is with the prospeed).
2016-04-16 13.26.05.jpg
 

Ray_G

Explorer
Rear Swing Away Saga, Part 2

So the truck went back to Dubai, and went with a sketch documenting exactly what I wanted that the acting shop manager (the normal one went on a well deserved vacation where I hope she had a lot to drink) and the fabrication supervisor (who was now the guy detailed to pick up/drop off the truck and actually supervise) both said they fully comprehended what needed to be done.
2016-04-02 04.21.48.jpg
Thus for the past week while I've been in Germany with all my people (and exploring Belleau Wood and such), I was getting A LOT of photos as they sorted out how to make the sketch into reality
2016-04-19 11.12.34.jpg2016-04-19 11.12.35.jpg
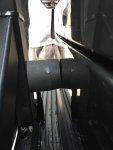
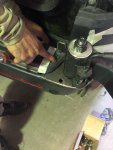
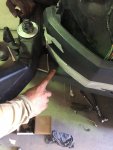
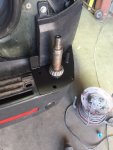
Ultimately a little more cutting and the creation of a full covering plate was necessary, more/less reflected here. Also a good shot of the spindle. Personally I am not sure about its longevity and know that I'll be putting a grease fitting on there when I get to the US but its removability and such makes me think it will work out well enough.
2016-04-19 16.58.46.jpg
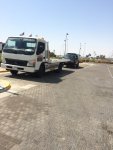
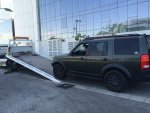
So upon return, the truck came back via her favorite flatbed again this am. The guy is so familiar with my neighborhood and such that he had it off the truck and ready to go before I could even get downstairs.
2016-04-23 10.19.09.jpg
Some final shots, technically there is the ability to lock at rest, at 90, and at full swing.
2016-04-23 10.25.31.jpg
2016-04-23 10.26.57.jpg
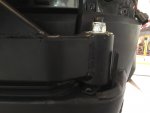
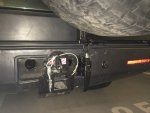
A close up of the latch; I may still explore horizontal mounting solutions back in the US but when coupled with the Rhino hitch I am not too worried about it hanging down and catching something on departure.
2016-04-23 10.25.42.jpg

At this point I'm happy enough with the fabrication that I'm leaving it be, with some tweaks to come when I'm back in the US and have my welder and shop back.
Given that's removable, that I can likely add a rotopax (probably just one tucked in on the right side vice the two) and potentially use it where I can create a small mast for a CB antenna I think I got what I paid for. I will note it locks up very tight at rest and even when fully swung out, it doesn't move at all other than intended motion.

Looking ahead somehow time has flown and the truck has ~7weeks of road time left in the UAE. Realistically the only big thing left to do out here is the 100k service where I'll put some 13mm spacers in the back to slightly alter the stance, do the metal pan conversion on the transmission, etc. Well...I won't do that, but it will get done). I also have a couple of minor 'happiness' tweaks to the interior I am working but those aren't substantive. After that the truck gets put on a ship to link up with me as I move back to the US. Then a whole new chapter can open involving KO2's, VHF, ICE Ver 3.0, and the fitting of that aux fuel tank-oh, and a lot of time using it on the roads & trails back home!
 

Ray_G

Explorer
Very important mod(s): interior badging

On the heels of the swing away tire carrier I figured I needed to tone it down a notch for posts, and thus I'm finally able to document my saga to spruce up the interior badging as yesterday the silver/black RRS (MY10-12) badges showed up.

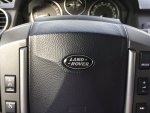
Why would I do this? No real reason other than boredom and this really being my only toy out here-and because I wanted to continue the theme of all the LR ovals being black and silver ala the front/rear and wheel badges. On the interior of my truck that gave me three locations; the steering wheel as well as driver and passenger side door cards.

Steering wheel was pretty straightforward, remove the gold/green, replace with silver/black sourced from here: ebay UK steering wheel badge
and install:
2016-02-04 09.07.22.jpg
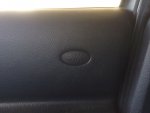
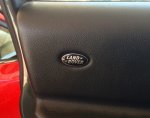
The door cards are a little trickier. I'd initially sourced a set of RRS black/silver emblems from the early RRS, those are way too small. I then went off the picture on eBay and the discreet info that the MY10-12 emblems were different and likely akin to the LR3's arrow style clip ins that are flat and plain. The eBay store I was working with actually was good enough to communicate mid-stride and say they held the two up side to side and that the RRS badges were slightly smaller, but that they were willing to send me the pair to see if they'd fit and look ok (with no questions asked refund/return if they didn't), to my DPO overseas at that. Customer service! So I ordered these: RRS door card badges (MY10-12) which replaced these:
IMG_3321.jpg
with two of these:
IMG_3320.jpg

Dumb little mods that make me happy, and if anyone else is thinking about it the key element is the model year RRS needs to be the kind that has the arrow clips.
r-
Ray
 
On the heels of the swing away tire carrier I figured I needed to tone it down a notch for posts, and thus I'm finally able to document my saga to spruce up the interior badging as yesterday the silver/black RRS (MY10-12) badges showed up.

Why would I do this? No real reason other than boredom and this really being my only toy out here-and because I wanted to continue the theme of all the LR ovals being black and silver ala the front/rear and wheel badges. On the interior of my truck that gave me three locations; the steering wheel as well as driver and passenger side door cards.

Steering wheel was pretty straightforward, remove the gold/green, replace with silver/black sourced from here: ebay UK steering wheel badge
and install:
View attachment 341928
The door cards are a little trickier. I'd initially sourced a set of RRS black/silver emblems from the early RRS, those are way too small. I then went off the picture on eBay and the discreet info that the MY10-12 emblems were different and likely akin to the LR3's arrow style clip ins that are flat and plain. The eBay store I was working with actually was good enough to communicate mid-stride and say they held the two up side to side and that the RRS badges were slightly smaller, but that they were willing to send me the pair to see if they'd fit and look ok (with no questions asked refund/return if they didn't), to my DPO overseas at that. Customer service! So I ordered these: RRS door card badges (MY10-12) which replaced these:
View attachment 341931
with two of these:
View attachment 341933

Dumb little mods that make me happy, and if anyone else is thinking about it the key element is the model year RRS needs to be the kind that has the arrow clips.
r-
Ray

Looks great in my opinion. And if my opinion matters, it's only dumb if you did it for someone else's liking and not your own! Go with your own style and desires brother, Rover on! :smiley_drive:
 

Ray_G

Explorer
~100k service

As the truck rounded 97,000 miles and her time here waned I decided that while I was on my last work trip I'd drop her off for a 100k mile service of sorts. I say of sorts because I've found that my mechanic is really, really good but will do what he is asked, and what he finds is necessary to do, but not necessarily everything. If that makes any sense. What I mean was I dropped the truck off with a list of things to be done, i.e. the 100k service; and within that I was explicit about the transmission service b/c I wanted them to put my Alto pan/filter kit on. Specifically said belts, plugs, and change the oil. Didn't specifically say do the difs or transfer case. So what was done? The transmission pan was sorted, though they put an OE pan on since the Alto kit apparently didn't have a gasket...belts, plugs, oil, along with finding the l/h front hub bearing was a little loose as was the tie rod so those got swapped out.
2016-05-08 16.58.56.jpg
As you can see I also threw new brake pads/sensors on, the LR parts pictured are 13mm spacers for the rear of the coil sprung trucks-should help the stance even out slightly now that she's settled. Given that all of this was done for ~$1200 I really can't complain since I don't want to think what I'd pay if I dropped it off at the dealership here or back in the US. Mind you I probably wouldn't as I'd do the wrenching myself but out here time and ability to wrench are both in short supply.

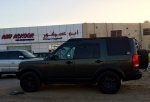
As she sits now:
2016-05-18 18.36.29 HDR-2.jpg

You never know what you'll see when you go by his place, not my cup of tea but to each their own.
2016-05-18 18.36.59-1.jpg2016-05-18 18.37.13.jpg

Moving forward the focus is on prepping for retrograde to the US! Like any good LR owner, I'm moving all kinds of random parts back b/c that's what we do.
2016-05-06 11.33.06.jpg
 

Ray_G

Explorer
Yeah, I doubt I'll be taking her to the dealership for much-am def looking forward to having my tools back and an ability to really work on her.

Weekend update; I pulled the little LED bar off after some reflection, I prefer the cleaner look of no lights and between the HIDs and the LED fogs in the bumper lightning is more than adequate.
91fdf2d9c529ffdcec6f4833aeffed34.jpg

406c70cddb3dce6b04476b10cd0d66be.jpg


Sent from my iPhone using Tapatalk
 

Ray_G

Explorer
A few more items, as you can see the prospeed wind fairing is slighting warped, that seems to be conditional. Meaning these kind of conditions at 10 am the other day:
image2.jpg
Though I think the sensor may be slightly off, as it didn't feel a bit above 110. Or as someone posted to my FB, this is so true:
13240602_1059864250746852_7088957455189254332_n.jpg
Pulled the fridge out and reinstalled the center section as she gets prepped for shipment in a few weeks. Trying to decide if the Indel/Ironman is going back in or if I'll get an Engel or ARB and use the original in my D1.
image1-2.jpg
r-
Ray
 

Forum statistics

Threads
188,034
Messages
2,901,402
Members
229,411
Latest member
IvaBru
Top