You are using an out of date browser. It may not display this or other websites correctly.
You should upgrade or use an alternative browser.
You should upgrade or use an alternative browser.
NAS LR3 build with an overseas twist
- Thread starter Ray_G
- Start date
harbinger808
Adventurer
harbinger808
Adventurer
Question for you... have you driven with your nakatenga vents installed?... we are looking at window visors to let some air in while driving and help to vent hot air during the AZ summers. Was wondering if I should just purchase these and kill 2 birds with one stone.
Victory_Overland
Explorer
Question for you... have you driven with your nakatenga vents installed?... we are looking at window visors to let some air in while driving and help to vent hot air during the AZ summers. Was wondering if I should just purchase these and kill 2 birds with one stone.
I drive with my Nakatenga vents all the time. If I know I am going to be on the freeway, then I remove them as they can be a bit noisy. Lower speeds around 45 mph or so are just fine. You obviously hear road noise outside the vehicle and some wind noise but not bad. Ventilation is nice but if you have AC on at the same time, well then it defeats the purpose as it blows out the windows.
Like I said, mine are in just about all of the time as my commute and daily activities usually keep me 45-50mph and lower and I like them in to regulate Hawaii hot temps.
Hope this helps.
Ray_G
Explorer
I'd yield to Victory's experience since ironically I installed the vents to see how they'd look (and of course take a pic) and then re-wrapped them since they are a gift for Clifford the Twin Mountain LR3 (since that truck carries two dogs around on a constant basis).
I do very much like the quality, on my end I'm just as likely to get the set of window shades but with SDO local the temptation is high, if I had the change laying around and was looking for a quick, relatively cheap, high quality mod I'd be all over them-as it is that is exactly why it might happen at some point.
r-
Ray
Ray_G
Explorer
Updating after a lag; sunshades
Been a bit since I updated this thread. On the verge of being able to wrap up some major radio/communications changes but wanted to start the series with a few other minor changes. Truck continues to be superb, in Dec it proved its worth as a very comfortable long haul traveler when we went to/from Parris Island SC over 2 days. Lot of driving to be sure but the truck just eats up miles and things like the snomaster and the seat covers prove their worth over and over again.
I continue to find that not only are my major upgrades fewer on the list, but those competing priorities known as life constantly gets in the way. Not just Coyote mind you, as now there is another Rover in the mix being specifically built for up on the mountain in WV:
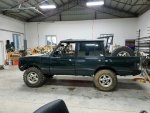
Bernard will be the subject of other posts though, in due time since that was coming off the glow of transplanting a new engine (the 4.2 had blown a HG, and then a hole in the block-hence why it was rather cheap to acquire), and then we installed the suspension, swampers, and such-the cut off back portion was a reflection of wanting to build a more utilitarian trail building truck and the fact that the D pillars, upper tailgate, etc were all rusted to hell.
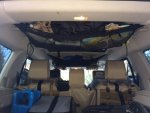
So with the D3 one recent minor upgrade was the acquisition of custom made sunshades, which had either been discussed in this thread earlier or in other threads on this forum. I'd considered getting from ebay.uk but the shipping would have made the $100 USD shades come in at about $150 total, so the US based version that was $125 shipped got the nod (LR3 sunshades on fleabay. I'm nearly certain they are the exact same as the UK offered ones. Mostly b/c you start with these indicators:
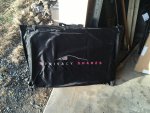
Of course a lot of other stuff has Discovery labeling on it (like replacement windshields, for example). The shades came in the described bag, which I guess is handy if you plan on taking them in/out often.
Well made and fairly sturdy for what they are. Fit is quite good into each of the rear seats, the rear cargo area, and the back glass.
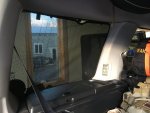
As advertised, you can roll down the passenger area windows with them in. Not sure how they'd stand up at speed, but still a decent feature.
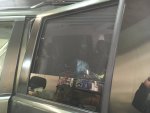
Overall I prob didn't need them but after the UAE I'm very sensitive to how hot a green truck with black interior can get so small offsets like this are worth exploring, or at least that's my rationalization.
More to follow as I get my pics organized from the big Kenwood KOS install (i.e. new nav, ipod integration, backup camera & a snazzy new lower console piece from the UK), along with VHF), etc.
r-
R
Been a bit since I updated this thread. On the verge of being able to wrap up some major radio/communications changes but wanted to start the series with a few other minor changes. Truck continues to be superb, in Dec it proved its worth as a very comfortable long haul traveler when we went to/from Parris Island SC over 2 days. Lot of driving to be sure but the truck just eats up miles and things like the snomaster and the seat covers prove their worth over and over again.
I continue to find that not only are my major upgrades fewer on the list, but those competing priorities known as life constantly gets in the way. Not just Coyote mind you, as now there is another Rover in the mix being specifically built for up on the mountain in WV:

Bernard will be the subject of other posts though, in due time since that was coming off the glow of transplanting a new engine (the 4.2 had blown a HG, and then a hole in the block-hence why it was rather cheap to acquire), and then we installed the suspension, swampers, and such-the cut off back portion was a reflection of wanting to build a more utilitarian trail building truck and the fact that the D pillars, upper tailgate, etc were all rusted to hell.
So with the D3 one recent minor upgrade was the acquisition of custom made sunshades, which had either been discussed in this thread earlier or in other threads on this forum. I'd considered getting from ebay.uk but the shipping would have made the $100 USD shades come in at about $150 total, so the US based version that was $125 shipped got the nod (LR3 sunshades on fleabay. I'm nearly certain they are the exact same as the UK offered ones. Mostly b/c you start with these indicators:

Of course a lot of other stuff has Discovery labeling on it (like replacement windshields, for example). The shades came in the described bag, which I guess is handy if you plan on taking them in/out often.

Well made and fairly sturdy for what they are. Fit is quite good into each of the rear seats, the rear cargo area, and the back glass.

As advertised, you can roll down the passenger area windows with them in. Not sure how they'd stand up at speed, but still a decent feature.

Overall I prob didn't need them but after the UAE I'm very sensitive to how hot a green truck with black interior can get so small offsets like this are worth exploring, or at least that's my rationalization.
More to follow as I get my pics organized from the big Kenwood KOS install (i.e. new nav, ipod integration, backup camera & a snazzy new lower console piece from the UK), along with VHF), etc.
r-
R
Ray_G
Explorer
I like them! Let us know if you try them at speed.
Just for you, I did it on the way in this am.
Don't reccomend it! At least not if you put the window all the way down. Mine shot out the side (this was at 60mph mind you)...
Ray_G
Explorer
Good to know! More of a parked option. Good for sleeping in back and keeping pests out?
Parked, or if you are going to use them I'd suggest only rolling the window down ~1/3 of the way (aka about what you would for the Nakatenga vents).
Ray_G
Explorer
NOCO Genius dual battery 2 bank waterproof on board battery charger
One of the other things I've managed to accomplish in the past few weeks is the installation of a NOCO genius charger. The specific model has 2 banks which allows for simultaneous charging of both the starting and auxillary batteries.
NOCO Genius
A very robust unit.
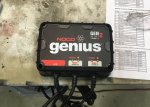
Starting to run out of room under the hood! That said, with a little bracket I fabricated it fit in pretty well over top of the air compressor in front of the aux battery.
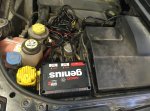
Ran the wires, aux going in immediately, starter battery running atop the traxide wires along the back firewall, and the power goes into the front bumper.
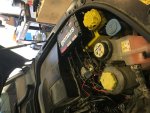
Hooked up; extension cord illustrates where it goes in.
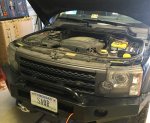
All told a very nice unit, not terribly expensive, and nice to have to plug the truck into if it was going to sit for a period of time given all the electrical requirements.
One of the other things I've managed to accomplish in the past few weeks is the installation of a NOCO genius charger. The specific model has 2 banks which allows for simultaneous charging of both the starting and auxillary batteries.
NOCO Genius
A very robust unit.

Starting to run out of room under the hood! That said, with a little bracket I fabricated it fit in pretty well over top of the air compressor in front of the aux battery.

Ran the wires, aux going in immediately, starter battery running atop the traxide wires along the back firewall, and the power goes into the front bumper.

Hooked up; extension cord illustrates where it goes in.

All told a very nice unit, not terribly expensive, and nice to have to plug the truck into if it was going to sit for a period of time given all the electrical requirements.
Ray_G
Explorer
Kenwood KOS V1000, Yaesu F7900R install; Part 1
My long awaited revamp of the in car electronics, version 4.0 (at least) got underway shortly after the New Year when the wife bounced back to the PRC and the weather took a turn for the warm, briefly.
The overall intent was to augment the basic high line HK stereo in my SE with some 'modern' amenities in a package that would tidy up the interior a little since the D1 is doing most of the heavy offroad lifting (when the RRC build isn't in motioin). Or, using pictures to go from this, to this.
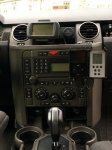

The touchscreen nav wasn't on in the previous pic so this illustrates the primary interface and what the standard Garmin input looks like:
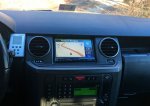
The Kenwood unit isn't new technology, in fact it is obsolete, but as a controller it does allow for plug & play functionality. Moreover since our head units are tied directly into many other things through the MOST ring it allows a sidestep of the problems of taking the head unit/stock amp out of the equation while still facilitating nav, ipod integration, backup camera, XM/Sirius, bluetooth and even other things like touchscreen switching of accessories.
Details here: Kenwood KOS-V1000
I'm certainly not treading new water, as several folks with LR3's did this years ago including some forum members who were an excellent reference for me. Some good detailed install threads exist:
Dweb KOS thread
D3.uk KOS thread
Those point to the same truck but Dan & Tami's thread is prob one of the best and the pics on D3.uk help a lot.
At the same time I was going to be tearing up the center console along with running wires I figured it was time to do the VHF install too. My Yaesu FT7900R had been harvested from Coyote since the detachable face would be important for my endstate here and far less so in the D1. Most of the parts I collected off ebay, which took some time-in fact most of them moved back to the US from Abu Dhabi with me as I'd found a V1000, the L702 monitor (got that seperate), the KNA-G510 sat nav, the XM, and some backup camera options all over time. With the V1000 being used, I inheirited a chopped up wiring harness and such which wasn't too big a deal but a little frustrating. Then I managed to snag a V500-new in box-off a Sun am ending ebay auction for a song. That was a score as it gave me redunancy in systems as well as nearly identical wiring if something were flawed. It also illustrated a potential problem-the unit itself is large and since I have a 7 seater it couldn't go into the back. My intent was for under the driver's seat and it would be a tight fit for a V500, much less the V1000. So I almost used this:

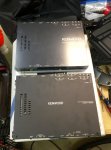
Since I had as much time as I wanted I opted to lay everything out to get myself organized and think through the install deliberately. This pic shows the table I setup beside the truck and how I'd linked all the systems together. It also illustrates the size difference between the 1000 (silver casing) and the 500 (black).

A little tinkering revealed that the casing and plastic bits on the sides of the 1000 were just cosmetic, essentially the control unit underneath is nearly identical to the 500 except for additional input/outputs. Once realized I decided to progress with the 1000 as the primary and keep the 500 in reserve.
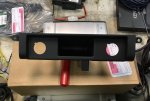
One of my favorite parts of the install was discovered when deliberating over how to mount the VHF faceplate. Searching the interweb revealed that D3's can have two different lower panel moldings. Most of us probably have the 'smoker's pack' which has the useless always breaking ashtray and the spring hinged 12v outlet(s). I decided to order the non smoker's pack which is LR part #FBO500630WBQ, I used LR direct given the exchange rate-once you add in a few other bits you need for various rovers the shipping totally makes it worth it. FBO500630WBQ
Intent on my end, and visible in the before/after shot (& more later) was to use the 12v outlets for a USB/Aux line to the Kenwood on one side and a dual USB charger on the other. The cubby in the middle facilitated a very tight nesting of the Yaesu face plate as the after shot illustrates. It's the little things.
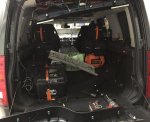
A lot of pre-work was done running the wires, in particular the wires from the GPS, XM, and VHF antennas off the roof as well as the backup camera from the tailgate. Wiring...joy.
The roof setup has a Diamond motorized antenna mount up front for the VHF and then used prospeed antenna mounts for the XM & GPS pucsk in the back.

While doing all the wiring in the back I took the time to install 4 more LED cat eyes into the hatch for more cargo lighting. These augment the existing lights already in the hatch and in the trim panel to give a bit more light cast directly down.

Ultimately it was a large project, best done deliberately in bite sized chunks. A few more updates to follow to illustrate where/how I mounted the unit itself as well as the ancillaries and some of the lessons I learned along the way.
My long awaited revamp of the in car electronics, version 4.0 (at least) got underway shortly after the New Year when the wife bounced back to the PRC and the weather took a turn for the warm, briefly.
The overall intent was to augment the basic high line HK stereo in my SE with some 'modern' amenities in a package that would tidy up the interior a little since the D1 is doing most of the heavy offroad lifting (when the RRC build isn't in motioin). Or, using pictures to go from this, to this.


The touchscreen nav wasn't on in the previous pic so this illustrates the primary interface and what the standard Garmin input looks like:

The Kenwood unit isn't new technology, in fact it is obsolete, but as a controller it does allow for plug & play functionality. Moreover since our head units are tied directly into many other things through the MOST ring it allows a sidestep of the problems of taking the head unit/stock amp out of the equation while still facilitating nav, ipod integration, backup camera, XM/Sirius, bluetooth and even other things like touchscreen switching of accessories.
Details here: Kenwood KOS-V1000
I'm certainly not treading new water, as several folks with LR3's did this years ago including some forum members who were an excellent reference for me. Some good detailed install threads exist:
Dweb KOS thread
D3.uk KOS thread
Those point to the same truck but Dan & Tami's thread is prob one of the best and the pics on D3.uk help a lot.
At the same time I was going to be tearing up the center console along with running wires I figured it was time to do the VHF install too. My Yaesu FT7900R had been harvested from Coyote since the detachable face would be important for my endstate here and far less so in the D1. Most of the parts I collected off ebay, which took some time-in fact most of them moved back to the US from Abu Dhabi with me as I'd found a V1000, the L702 monitor (got that seperate), the KNA-G510 sat nav, the XM, and some backup camera options all over time. With the V1000 being used, I inheirited a chopped up wiring harness and such which wasn't too big a deal but a little frustrating. Then I managed to snag a V500-new in box-off a Sun am ending ebay auction for a song. That was a score as it gave me redunancy in systems as well as nearly identical wiring if something were flawed. It also illustrated a potential problem-the unit itself is large and since I have a 7 seater it couldn't go into the back. My intent was for under the driver's seat and it would be a tight fit for a V500, much less the V1000. So I almost used this:

Since I had as much time as I wanted I opted to lay everything out to get myself organized and think through the install deliberately. This pic shows the table I setup beside the truck and how I'd linked all the systems together. It also illustrates the size difference between the 1000 (silver casing) and the 500 (black).

A little tinkering revealed that the casing and plastic bits on the sides of the 1000 were just cosmetic, essentially the control unit underneath is nearly identical to the 500 except for additional input/outputs. Once realized I decided to progress with the 1000 as the primary and keep the 500 in reserve.

One of my favorite parts of the install was discovered when deliberating over how to mount the VHF faceplate. Searching the interweb revealed that D3's can have two different lower panel moldings. Most of us probably have the 'smoker's pack' which has the useless always breaking ashtray and the spring hinged 12v outlet(s). I decided to order the non smoker's pack which is LR part #FBO500630WBQ, I used LR direct given the exchange rate-once you add in a few other bits you need for various rovers the shipping totally makes it worth it. FBO500630WBQ
Intent on my end, and visible in the before/after shot (& more later) was to use the 12v outlets for a USB/Aux line to the Kenwood on one side and a dual USB charger on the other. The cubby in the middle facilitated a very tight nesting of the Yaesu face plate as the after shot illustrates. It's the little things.

A lot of pre-work was done running the wires, in particular the wires from the GPS, XM, and VHF antennas off the roof as well as the backup camera from the tailgate. Wiring...joy.

The roof setup has a Diamond motorized antenna mount up front for the VHF and then used prospeed antenna mounts for the XM & GPS pucsk in the back.

While doing all the wiring in the back I took the time to install 4 more LED cat eyes into the hatch for more cargo lighting. These augment the existing lights already in the hatch and in the trim panel to give a bit more light cast directly down.

Ultimately it was a large project, best done deliberately in bite sized chunks. A few more updates to follow to illustrate where/how I mounted the unit itself as well as the ancillaries and some of the lessons I learned along the way.
Similar threads
- Replies
- 2
- Views
- 1K
- Replies
- 0
- Views
- 1K
- Replies
- 7
- Views
- 1K
- Replies
- 9
- Views
- 2K

