Ray_G
Explorer
KOS Controller install & backup camera fitting
I did, will use your reply as the springboard for that odyssey.
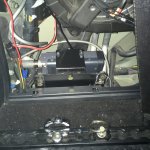
To form the basis of the rest of the accessories I knew I needed to find the final location for the controller and get that settled. I'd decided that the only good place was under the driver's seat and even that proved somewhat challenging. I ended up fabricating a bracket of sorts that tied it into the seat frame (vice putting it on the floor over top the vent that is there. In retrospect it may have been easier/better to put it on the floor and raise it up enough to be level and off the braket. Oh well, I was committed.
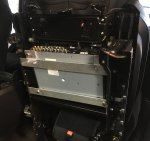
The mass of wiring coming from all over the vehicle. The nice thing about the KOS setup is that most of the accessories have control wires that take power off the flow coming to the main unit. While it's messy, it could be worse and with the 3's relatively easy trim panel removal and such it was time consuming but not too difficult to get everything coming in from either the side of the center console or the carpet under the seat.
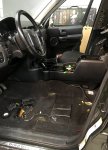

Fitting the L702 touchscreen requires some dremel work on the center console. Nerve wracking since you are taking out plastic/foam that isn't going to go back in if you need to reverse the process-that said I can't see a significant reason I'd remove this setup from the truck so I view it as near perm install anyway. I didn't take any good pics of the hole I cut but those exist elsewhere online if someone is going down this path. Like many things, measure several times and cut once-removing only what is necessary (incrementally) and test fit the monitor often.
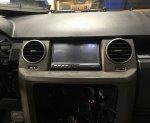
Testing to ensure function after getting power wires hooked up and such, always critical before trim goes back on.

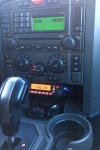
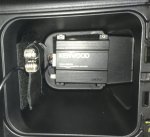
GPS unit found a home in the bottom of the center console (Ipod wires are also visible, I ran that harness up to the same RAM mount I'd had mounted externally which now lives on the center console lid akin to how stock ipod integration can be setup). The KNA-510 is dated technology of course but the Garmin interface is easy to use. With a $20 SD card with 'new' (2015-16) maps the unit has up to date data that is easy to get in/out. I would note that when first installed the 2006 firmware was taking FOREVER to get position lock, almost certainly because it was looking for satellites that are no longer in the constellation. New firmware and it finds position in about 10-15 sec.
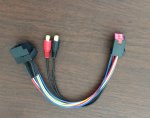
At present I haven't used the hack into the amp's speaker connections to push sound out; that may come in phase two later in the Spring. After I messed up my XM unit's control wires the only audio out is really the ipod (I don't use Nav audio) so that goes out via RCA cables to the same aux sidestep that I have residual behind the radio.
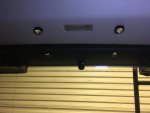
My initial backup camera unit was one that was advertised as fitting into the lic plate light setup on the rear hatch. Of course the clear plastic wasn't the same so I ended up hacking into my stock setup and used silicone to make it work. Not elegant, but also not actually visible to anything but the most detailed inspection.
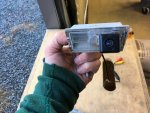
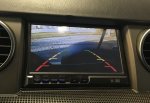
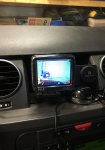
Testing the camera after getting the wire run all the way from the back hatch. A pyle unit I had purchased had a little standalone monitor that has proven invaluable to testing/troubleshooting.
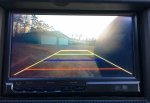
So my ************** tested it...but the swing away was open at the time. When I got it all buttoned up...well, the swing away makes for a blindspot. That resulted in a decision to move the camera. That's for the next update.
Awesome update! Did you do the backup camera too?
I did, will use your reply as the springboard for that odyssey.
To form the basis of the rest of the accessories I knew I needed to find the final location for the controller and get that settled. I'd decided that the only good place was under the driver's seat and even that proved somewhat challenging. I ended up fabricating a bracket of sorts that tied it into the seat frame (vice putting it on the floor over top the vent that is there. In retrospect it may have been easier/better to put it on the floor and raise it up enough to be level and off the braket. Oh well, I was committed.

The mass of wiring coming from all over the vehicle. The nice thing about the KOS setup is that most of the accessories have control wires that take power off the flow coming to the main unit. While it's messy, it could be worse and with the 3's relatively easy trim panel removal and such it was time consuming but not too difficult to get everything coming in from either the side of the center console or the carpet under the seat.


Fitting the L702 touchscreen requires some dremel work on the center console. Nerve wracking since you are taking out plastic/foam that isn't going to go back in if you need to reverse the process-that said I can't see a significant reason I'd remove this setup from the truck so I view it as near perm install anyway. I didn't take any good pics of the hole I cut but those exist elsewhere online if someone is going down this path. Like many things, measure several times and cut once-removing only what is necessary (incrementally) and test fit the monitor often.

Testing to ensure function after getting power wires hooked up and such, always critical before trim goes back on.

GPS unit found a home in the bottom of the center console (Ipod wires are also visible, I ran that harness up to the same RAM mount I'd had mounted externally which now lives on the center console lid akin to how stock ipod integration can be setup). The KNA-510 is dated technology of course but the Garmin interface is easy to use. With a $20 SD card with 'new' (2015-16) maps the unit has up to date data that is easy to get in/out. I would note that when first installed the 2006 firmware was taking FOREVER to get position lock, almost certainly because it was looking for satellites that are no longer in the constellation. New firmware and it finds position in about 10-15 sec.

At present I haven't used the hack into the amp's speaker connections to push sound out; that may come in phase two later in the Spring. After I messed up my XM unit's control wires the only audio out is really the ipod (I don't use Nav audio) so that goes out via RCA cables to the same aux sidestep that I have residual behind the radio.

My initial backup camera unit was one that was advertised as fitting into the lic plate light setup on the rear hatch. Of course the clear plastic wasn't the same so I ended up hacking into my stock setup and used silicone to make it work. Not elegant, but also not actually visible to anything but the most detailed inspection.

Testing the camera after getting the wire run all the way from the back hatch. A pyle unit I had purchased had a little standalone monitor that has proven invaluable to testing/troubleshooting.

So my ************** tested it...but the swing away was open at the time. When I got it all buttoned up...well, the swing away makes for a blindspot. That resulted in a decision to move the camera. That's for the next update.


