You are using an out of date browser. It may not display this or other websites correctly.
You should upgrade or use an alternative browser.
You should upgrade or use an alternative browser.
Norwegian Unimog U1700L camper build
- Thread starter Vegard_S
- Start date
diesel_jim
New member
Looks great!
thebigblue
Adventurer
Hurry up for ********************** - spring is around the corner 
Vegard_S
Adventurer
So; we managed to bolt up the rear storage boxes and connect the rear lights. They will be removed again later on to be painted in the same colour as the supportframe. But it was nice to see that they fitted as planned.
Yesterday I took the beast out for a short spinn, just loosen up everything after months with the truck just standing still. -Everything worked fine
Again; sorry for the poor pictures, I really need tho get a better cameratoreplace my beaten up cellphone...
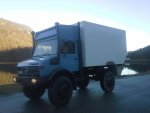
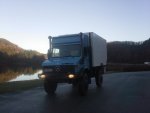
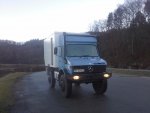
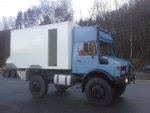
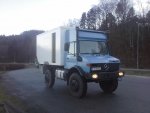
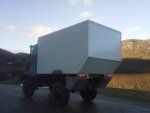
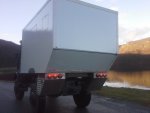
Yesterday I took the beast out for a short spinn, just loosen up everything after months with the truck just standing still. -Everything worked fine
Again; sorry for the poor pictures, I really need tho get a better cameratoreplace my beaten up cellphone...


tooFATtoDRIVE
New member
What's the latest on this project?
Vegard_S
Adventurer
Ok, so it’s been a while since the last update..
In April we bought a small old farm (buildings dating from aprox. 1850). So unfortunately, for the camper project, most of our time and money have gone into the restauration project of the house and the barn.
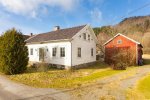
But we have nevertheless managed to do some work to the Unimog in between all the house work
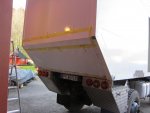
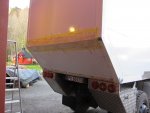
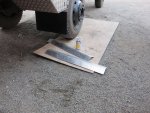
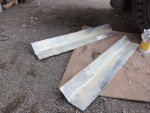
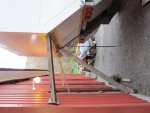
At the rear end of the camper box we installed a alu-plate to cover the sharp edge in the rear wall. Same type of plates will later on be installed to cover the outer seam between the floor plate and the lower plate of the rear wall. But this will have to wait until the rear storage boxes are disassembled again to have their final coat of painting.
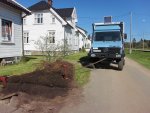
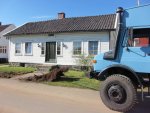
BTW, it can also be very handy to have a Unimog available when you have to do the garden work:
In April we bought a small old farm (buildings dating from aprox. 1850). So unfortunately, for the camper project, most of our time and money have gone into the restauration project of the house and the barn.

But we have nevertheless managed to do some work to the Unimog in between all the house work
At the rear end of the camper box we installed a alu-plate to cover the sharp edge in the rear wall. Same type of plates will later on be installed to cover the outer seam between the floor plate and the lower plate of the rear wall. But this will have to wait until the rear storage boxes are disassembled again to have their final coat of painting.


BTW, it can also be very handy to have a Unimog available when you have to do the garden work:


Vegard_S
Adventurer
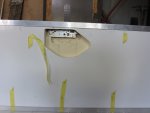
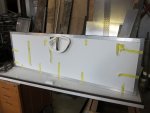
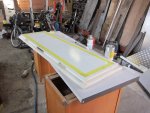
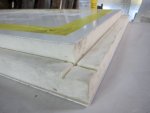
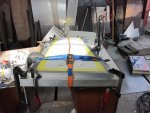
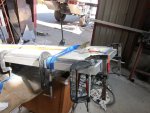
In may I started on making the entrance door for the camper unit. This is made of the cut out from the sandwichplate and the edges on bot the cut out and the hole in the camper wall are then covered with 3mm aluminum profiles.
We still need to finish of the door frame with the sealing to make it watertight, and then paint the aluminum profiles so that they match the white color of the walls.
The door lock mechanism is from the German company KCT, way too expensive... But we really liked the 3-pin lock system, build quality and “slim fit look” when installed in the door, so we went “all in” on this one.
More to follow tomorrow..
We still need to finish of the door frame with the sealing to make it watertight, and then paint the aluminum profiles so that they match the white color of the walls.
The door lock mechanism is from the German company KCT, way too expensive... But we really liked the 3-pin lock system, build quality and “slim fit look” when installed in the door, so we went “all in” on this one.


More to follow tomorrow..
Last edited:
Iain_U1250
Explorer
Looks great, it is worth getting the right components for your build, then you won't have to build it again in the future.
Vegard_S
Adventurer
Next on the list was installation of the three side windows from Pabst Airtec, the installation progress was very straightforward, especially since the manufacturer of the sandwichplates already had prepared the cut-outs for where the windows should be installed. All windows where delivered with curtains and mosquito nets, but we will not install this until the rest of the interior in the cabin is assembled. The build quality and the finish of the windows seems to be of very high standard, and although not exactly cheap to buy, they are still a lot cheaper than windows from Outbound and KCT, which both have similar design.
![DSC_8040JPG[1].jpg DSC_8040JPG[1].jpg](https://forum.expeditionportal.com/data/attachments/326/326310-44997b21b055eb6ff645feeb9a0594f6.jpg?hash=RJl7IbBV62)
![DSC_8041JPG[1].jpg DSC_8041JPG[1].jpg](https://forum.expeditionportal.com/data/attachments/326/326311-d2c40de558239cc0760e065570ae5060.jpg?hash=0sQN5VgjnM)
![DSC_8045JPG[1].jpg DSC_8045JPG[1].jpg](https://forum.expeditionportal.com/data/attachments/326/326312-7b3e9d18d1bbd503511ffb59c0246b5b.jpg?hash=ez6dGNG71Q)
![DSC_8050JPG[1].jpg DSC_8050JPG[1].jpg](https://forum.expeditionportal.com/data/attachments/326/326313-ff49d0f0d5325a837f7d2a3d73c4da4e.jpg?hash=_0nQ8NUyWo)
![DSC_8053JPG[1].jpg DSC_8053JPG[1].jpg](https://forum.expeditionportal.com/data/attachments/326/326314-3c1fdca4be5b6aeeb67fc0d08838afef.jpg?hash=PB_cpL5bau)
![DSC_8112JPG[1].jpg DSC_8112JPG[1].jpg](https://forum.expeditionportal.com/data/attachments/326/326315-cd04ba1f202186fa589ed5d55e9f48f2.jpg?hash=zQS6HyAhhv)
![DSC_8114JPG[1].jpg DSC_8114JPG[1].jpg](https://forum.expeditionportal.com/data/attachments/326/326316-cd8cb947a84423ad0f8b8dc09bcf0d33.jpg?hash=zYy5R6hEI6)
![DSC_8118JPG[1].jpg DSC_8118JPG[1].jpg](https://forum.expeditionportal.com/data/attachments/326/326318-08905775f5d8c4463d6ae32e2237b99c.jpg?hash=CJBXdfXYxE)
![DSC_8120JPG[1].jpg DSC_8120JPG[1].jpg](https://forum.expeditionportal.com/data/attachments/326/326319-7df4c4e4c3a75f69a6509e35092acc62.jpg?hash=ffTE5MOnX2)
![DSC_8128JPG[1].jpg DSC_8128JPG[1].jpg](https://forum.expeditionportal.com/data/attachments/326/326320-8821ff8c1fe390290d1577da559dbca5.jpg?hash=iCH_jB_jkC)
Vegard_S
Adventurer
Then it was time to install the angle bar profiles for the inner edges where the different plates are glued together.
This was made from 40x40x3 angel bars made from fiberglass by the German company Paneel Tec, which also supplied the sandwich plates for the camper box. Here the profiles for the joint between the roof and wall plates are getting covered.
![DSC_8600JPG[1].jpg DSC_8600JPG[1].jpg](https://forum.expeditionportal.com/data/attachments/326/326326-08ce82e5c12ff44b08dd7f3b7a9634f6.jpg?hash=CM6C5cEv9E)
![DSC_8608JPG[1].jpg DSC_8608JPG[1].jpg](https://forum.expeditionportal.com/data/attachments/326/326327-8dc2adeaf4c6062952f725a509e9e75a.jpg?hash=jcKt6vTGBi)
![DSC_8613JPG[1].jpg DSC_8613JPG[1].jpg](https://forum.expeditionportal.com/data/attachments/326/326328-5df2d7813fc321d562622b076e82e15c.jpg?hash=XfLXgT_DId)
![DSC_8616JPG[1].jpg DSC_8616JPG[1].jpg](https://forum.expeditionportal.com/data/attachments/326/326329-b08c41d9cd3148be4c8086ceb0b83a56.jpg?hash=sIxB2c0xSL)
Similar threads
- Replies
- 3
- Views
- 1K
- Replies
- 3
- Views
- 226
- Replies
- 2
- Views
- 542


![DSC_8129JPG[1].jpg DSC_8129JPG[1].jpg](https://forum.expeditionportal.com/data/attachments/326/326322-335db276f32ac353d10c5b8d7257a00e.jpg?hash=M12ydvMqw1)
![DSC_8130JPG[1].jpg DSC_8130JPG[1].jpg](https://forum.expeditionportal.com/data/attachments/326/326321-60803c9b0903e88d45efed21b502794c.jpg?hash=YIA8mwkD6I)
![DSC_8135JPG[1].jpg DSC_8135JPG[1].jpg](https://forum.expeditionportal.com/data/attachments/326/326323-39734f812b60bc7976c47bbbc4f7dc52.jpg?hash=OXNPgStgvH)
![DSC_8193JPG[1].jpg DSC_8193JPG[1].jpg](https://forum.expeditionportal.com/data/attachments/326/326324-ea096327cff9b32bfe800d4370c7c0e0.jpg?hash=6gljJ8_5sy)
![DSC_8200JPG[1].jpg DSC_8200JPG[1].jpg](https://forum.expeditionportal.com/data/attachments/326/326325-8421681cbbe0b0129efd0283e8cf694f.jpg?hash=hCFoHLvgsB)