OK, it's done. I made the conversion to lithium this weekend. I now have a 400 Ah battery bank which fits in the existing battery location, and I rigged it for all-season charging, which may not have been necessary, but it's done now.
Products I used:
- LiTime 12V 400Ah Lithium Battery 3200W Max. Load Power LiFePO4 Battery, Built-in 250A BMS, 5120Wh Usable Energy, 4000-15000 Cycles & 10-Year Lifetime
- This used to be (until the new year) AmpereTime. Now it's LiTime, I guess, but it's the same stuff. Will Prowse did a video on this battery that convinced me to get it over some similar sized Sokergy models that he said were garbage.
- I picked this one specifically because it fit in the space of the three 100Ah batteries, within 0.5" in any direction. I didn't have to move anything around in the trailer besides the batteries, and it's the most battery I could find to fit in there.
- I got it for $1500 on Black Friday. Not a huge savings, but not nothing. Worth it so far.
- It does have a battery management system (BMS), but it does NOT have a low-temp cutoff. Again, Will Prowse did a video on how to work around that, and I installed my own cut-off.
- Victron Energy SmartSolar MPPT 100V 30 amp 12/24-Volt Solar Charge Controller (Bluetooth)
- This is what Will recommended in this video (same link) in order to add the low-temp cutoff.
- Yes, it comes in a 50A version, but I'm lying if I think I'm ever going to expand my solar array on the roof, so this is plenty. You do you.
- This replaced my Renogy Adventurer 30A solar controller. See pics below.
- Renogy's controller does have a temperature sensor adapter, but it's only for optimization and not for a cutoff; their BMS on their batteries has a low-temp cutoff, so if you use Renogy batteries you don't need this, but you can't fit 400 Ah of Renogy in the same space. You see the problem...
- Victron Energy Smart Battery Sense Long Range (up to 10m)
- Again, recommended from the same video.
- This just links to the Victron controller and tells it when to cut the charging (default setting is 5 degrees Celsius). I kept that, but it's adjustable. Again, you do you.
Tools needed:
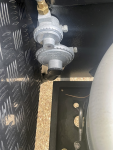
- The only weird tool that you might not have readily available is a T20 torx screwdriver; you'll need that to disconnect the heating duct from the Truma because it's installed over the battery in the D13 (I'm not sure about the D15 or D19).
- Socket set
- Various screwdrivers, including a very short Phillips to get in hard to reach spaces
- Electrical tape
Basic steps involved:
- Ensure you've disconnected the battery disconnect.
- Open up the belly of the beast under the bed.
- Remove the duct from the Truma. You'll need a socket for the outer sleeve and a Torx T20 for the inner duct. Set aside.
- Remove the battery holder crossbar. Two nylock nuts on either end is all.
- Disconnect all 3 batteries. Take them out of the trailer. Sell them on craigslist.
- Drop in the new Lithium battery in the same location and admire how smart you are for buying something that fits in the exact same space and gets you 2.66x as much power. Be sure to both ooooooh and ahhhhhh.
- Remove the wiring from the OEM Renogy solar controller. Remove the solar controller. Sell it on craigslist with your batteries. Bundle discount.
- Reinstall wiring for PV and battery into the new Victron controller.
- Attach (positive first) battery with the temp sensor installed on the terminals using the [EDIT] two shortest preexisting battery wires on both positive and negative (to allow for greater current from battery, per Willy's idea). More ooooooohs and ahhhhhhs because lights turn on and stuff.
- Use electrical tape to cover the other terminals from the wiring no longer needed for a multiple battery bank. You can totally just remove these wires, but I didn't because there was a thing nagging at the back of my mind saying "what if I want to do another multiple battery bank someday?" and I just left them. They aren't hurting anything and it was easier to just cover them.
- Adjust settings in the Renogy 2000W inverter to be lithium according to manual. For my model it was program 06 set to LI, but be sure to check that and not trust this post in case it's different.
- Connect the Victron controller and temp sensors using the Victron app following Will's instructions from that video. Super easy. Takes about 10 minutes if everything goes well, including firmware updates.
- Once you're convinced it's working, install the Victron controller on the inside of where the Renogy solar controller was. That's the only logical place I could figure to put it. If you find something better, let me know.
- Reinstall the battery holder crossbar.
- Reinstall the duct to the Truma.
- Close it up and admire your work with a final set of oooooohs and ahhhhhhs. Check your new bluetooth app 30 times the rest of the day to assure yourself it's doing fine. It is.
This took me about an hour and around $2000 all in with tax.
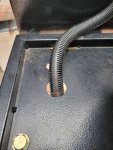
I have NOT done a trip with it. I'll keep you posted on performance once I have some data. I also haven't closed up the hole from the Renogy controller; I'm going to cover it with something classy like a license plate that says "My Other Ride is Your Mom" or something, but that's not that important for now.
Pics to help:
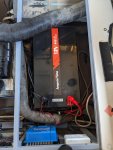
Battery in its place:
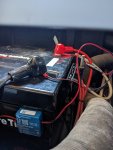
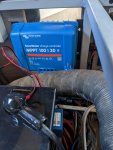
The temp sensor installed:
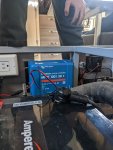
Here's a look at the controller where the hole from the Renogy is. I still need to cover it with something.
A couple pics of the controller installed. I used the Renogy screws to mount it on the inside. I only used 3 screws instead of 4. I'll let you know if it ever fails.
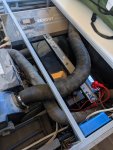
Reinstalled ductwork and crossbar:
"Dude, where have you been? We're ready for dinner and no one cares about your stupid trailer." They didn't help. Not even a little bit.
Feel free to add details if you've done something similar.