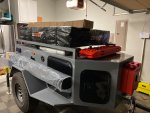
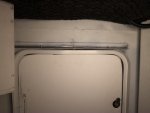
So I decided that I don't really like the big square RV door. Returning it and getting a rounded baggage door with the slam latch instead. Should make it a smaller "foot print" also on the side of the trailer. Then using 2 16x16 rounded baggage doors on the trapezoidal part for pass-through to access the electrical compartment (going to be separated from the rest of the trailer by a "firewall". I am also putting the water tank on the inside of the trailer not hanging down as I have plenty of room on the inside.
You are using an out of date browser. It may not display this or other websites correctly.
You should upgrade or use an alternative browser.
You should upgrade or use an alternative browser.
Off Road Camp Trailer Build
- Thread starter tte30m3
- Start date
Here are some pictures. I have more build pictures and video on Instagram at marztank. The latch on the tailgate is off amazon “Buyers products L8855 T handle-latch”. The latch engages the 1/8 inch by 3/4 inch steel flat strip that also has the “D” shaped weather strip adhered to it. For the battery, it is basically a dual battery setup only differing that the 2nd battery is 20 feet away from the engine bay and detachable. I used a Keyline Dc to Dc battery isolator/charger found on amazon. The wire gage used in the tow vehicles 7 pin trailer harness is to small to effectively charge the trailer battery. I ran a 4 gage wire with 50 amp circuit breaker from car battery positive terminal all the way to rear bumper adjacent to 7pin connector with an Anderson connector. I used the chassis as the negative circuit so as not run two wires. The trailer has its own 4 gage harness with other half of Anderson connector running to the Keyline isolator and to trailer ground/chassis. I am able to watch voltage at Dometic fridge in real time while I tow on the Dometic app on my phone. Usually the volts are from 13.1 to 14.0 while towing. When I turn off engine it drops to 12 volts.
Did you spray the, what looks like, Raptor liner yourself? If so, what prep work did you do to the sheet metal?
Astarwrench
New member
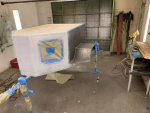
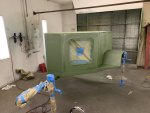
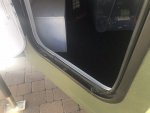
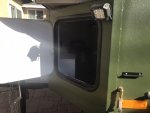
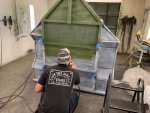
I welded 3/4 x 3/4 angles at top and bottom edges of opening in sheet metal then ran some self tapping screws trough the door frame into the angles. Then I ran a bead of sealant around the frame. I did the Raptor coat myself in the paint booth at my work (also my son helped spray too). After degreasing the metal I gave it a light scuff with 100 grit paper and an orbital sander. I used the Raptor etching primer on the bare steel then used the Raptor coat tintable 4 quart kit with spray gun and activator. You have to order the color pouches separately from Raptor. It is pretty easy but a little messy and I am very happy with how it turned out since I’m not a painter. It also seemed to deaden most of the boom from the structure like if you wrap it with the heal of your closed fist.
Attachments
-
 20D10E87-F870-4CE7-9CAF-3F4AE2F9F52A.jpeg271.5 KB · Views: 98
 -
 58939C73-B832-4476-9F85-F5767E915B37.jpeg268.6 KB · Views: 105
 -
 5E5F2DC9-EF79-4CF1-97FF-62FFA674ED09.jpeg300.1 KB · Views: 95
 -
 9A26CC1E-4468-4FF6-A13D-8A4BCC456087.jpeg269.4 KB · Views: 92
 -
 4AE5E9B1-725F-44DE-A6F2-42BABCDE4899.jpeg205 KB · Views: 94
 -
 8590D0D2-B85C-4E60-AB8B-B8A2DE7E3366.jpeg284.6 KB · Views: 98
 -
 A44D2DE8-0BBC-4BD1-8FC0-25EE191A6630.jpeg295.9 KB · Views: 95
I welded 3/4 x 3/4 angles at top and bottom edges of opening in sheet metal then ran some self tapping screws trough the door frame into the angles. Then I ran a bead of sealant around the frame. I did the Raptor coat myself in the paint booth at my work (also my son helped spray too). After degreasing the metal I gave it a light scuff with 100 grit paper and an orbital sander. I used the Raptor etching primer on the bare steel then used the Raptor coat tintable 4 quart kit with spray gun and activator. You have to order the color pouches separately from Raptor. It is pretty easy but a little messy and I am very happy with how it turned out since I’m not a painter. It also seemed to deaden most of the boom from the structure like if you wrap it with the heal of your closed fist.
Thanks for the details! Greatly appreciate it. Also noticed you put glue down carpeting in the trailer as well. Is it moister rated carpet?
Astarwrench
New member
It is a 4 ‘ x 6’ entry carpet from Home Depot trimmed to fit the shape of the trailer. It has a rubber backing and lays flat with no glue. It should be pretty durable since it’s meant to walked on in a heavily trafficked area.
Astarwrench
New member
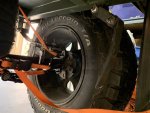
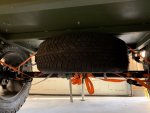
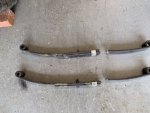
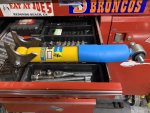
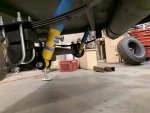
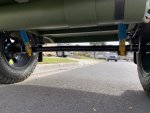
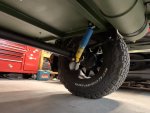
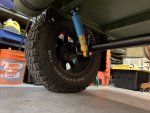
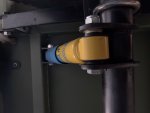
Took the trailer out a couple of weeks ago to test it on a rough trail. Went to the Cleghorn trail in the Cajon pass on Interstate 15. About 10 miles into the trail both leaf springs snapped just aft of the U-bolts and the trailer fell down onto it’s wheel wells. Had to stuff the 4 runners spare tire in between the axle and the trailer chassis and hold it in place with ratchet straps to limp off the trail and the 90 highway miles home. Had some custom made leaf springs made by Atlas spring in city of industry that are way more flexible than the Dexter axle springs which I’m sure were never intended for off road use. To be fair to Dexter axle I probably compromised the springs by removing a leaf in an attempt to soften the ride. Also I added a pair of Bilstein 4600 shocks and now it has calmed down quite a bit when I’ve towed it on the freeway at 70 mph ! They just happen to be for a Nissan path finder’s rear axle. I picked them for their extended and compressed dimension. Had to make custom mounting brackets and weld them to the axle. Still need to test them on the trail.
Attachments
-
 2B64AF5D-E747-42C8-BC7D-B23771957ACB.jpeg307.7 KB · Views: 80
 -
 99B26CAA-A9FF-4B6C-8CAF-696B79942C40.jpeg286.1 KB · Views: 82
 -
 78393DA8-5563-4DDA-BB77-342E19C71207.jpeg381.8 KB · Views: 75
 -
 507DF0A3-70F7-4626-9139-C8487DFCD95E.jpeg323.6 KB · Views: 75
 -
 AFEB8B98-77A8-462E-A0FE-570DBDF36399.jpeg267.9 KB · Views: 72
 -
 0DDE693F-5BEE-4116-BC49-3513FB1B4537.jpeg384.4 KB · Views: 74
 -
 BA8A76E3-1501-4D22-8882-0EBE6715A7E0.jpeg291 KB · Views: 72
 -
 7BF7F428-C899-4D9B-B986-DD29B70369AE.jpeg301 KB · Views: 69
 -
 A4AA68FA-B9E8-49CD-86CE-5A0F04743D6D.jpeg191.4 KB · Views: 68
Last edited:
high-and-dry
Active member
You need a bump stop, if you dont have one you will be using the shocks as a bump stop and will break/bend them, and or break/bend the shock mounts
Almost ready.....
Looks awesome! Do you mind sharing what you used for the switch panel and housing box? Sorry if I missed it from earlier
Looks awesome! Do you mind sharing what you used for the switch panel and housing box? Sorry if I missed it from earlier
I used this switch panel (Amazon product ASIN B07Q192TRF) but had to shave off just a tad to fit into the housing. And this is the housing Amazon product ASIN B0017TXE38
All powered by 2 100ah marine batteries at the front with 1500watt inverter ready.
Similar threads
- Replies
- 1
- Views
- 891
- Replies
- 2
- Views
- 1K
- Replies
- 2
- Views
- 939
- Replies
- 36
- Views
- 5K
Forum statistics
Members online
- CoExplorer
- BrookTrout304
- roaming.nomads
- FAW3
- Mickey Bitsko
- fmwizard
- osukj04
- Pskhaat
- 4runnerteq
- Atl-atl
- Mack M
- spacecowboy7777
- LMell84
- furbucket
- MtnToys
- windtraveler
- ebickford
- SmoothLC
- cman1120
- tofitian
- Kess
- mountainsports2002
- tacollie
- BajaSurfRig
- stageracer
- mark5280
- Dan Grec
- freedomproject
- Jonathan Olcott
- llamalander
- Dlafreni
- stoneglasshaus
- Mwder
- OrvsR4me
Total: 4,139 (members: 36, guests: 4,103)


