You are using an out of date browser. It may not display this or other websites correctly.
You should upgrade or use an alternative browser.
You should upgrade or use an alternative browser.
Off-road teardrop scratch-build
- Thread starter rob cote
- Start date
Are you using CPES for the epoxy on the wood or something else?
The epoxy is West Systems 105.
Progress is slow, but steady. Still working on reassembling things. It seems each piece needs minor tweaks to be 100% complete. Last night I got the drawer for the grill to 98%. It needs epoxy on the front face of the inner drawer for utensils, and maybe a handle added to the top of the outer drawer, not sure yet. It's just a little weird trying to open only the inner drawer, because it tends to pull the outer drawer with it, so a handle would help to hold it back. But the grill is secured to the top, so that works just as well as a handle.


I've been plugging away and getting a lot of little detail things tidied up that I've been pushing off or overlooking for quite a while. I extended the propane line a little bit farther towards the tank to facilitate actually removing the tank. My original plan was to try and somehow shut off the valve and disconnect the flexible line before lowering the tank. I figured that would probably prove to be a pain in the butt. The flex line that I have is long enough to lower the tank all the way to the ground now that the hard line comes all the way up to the tank's space. I got it all soldered and leak-checked on the ground away from my hard work.
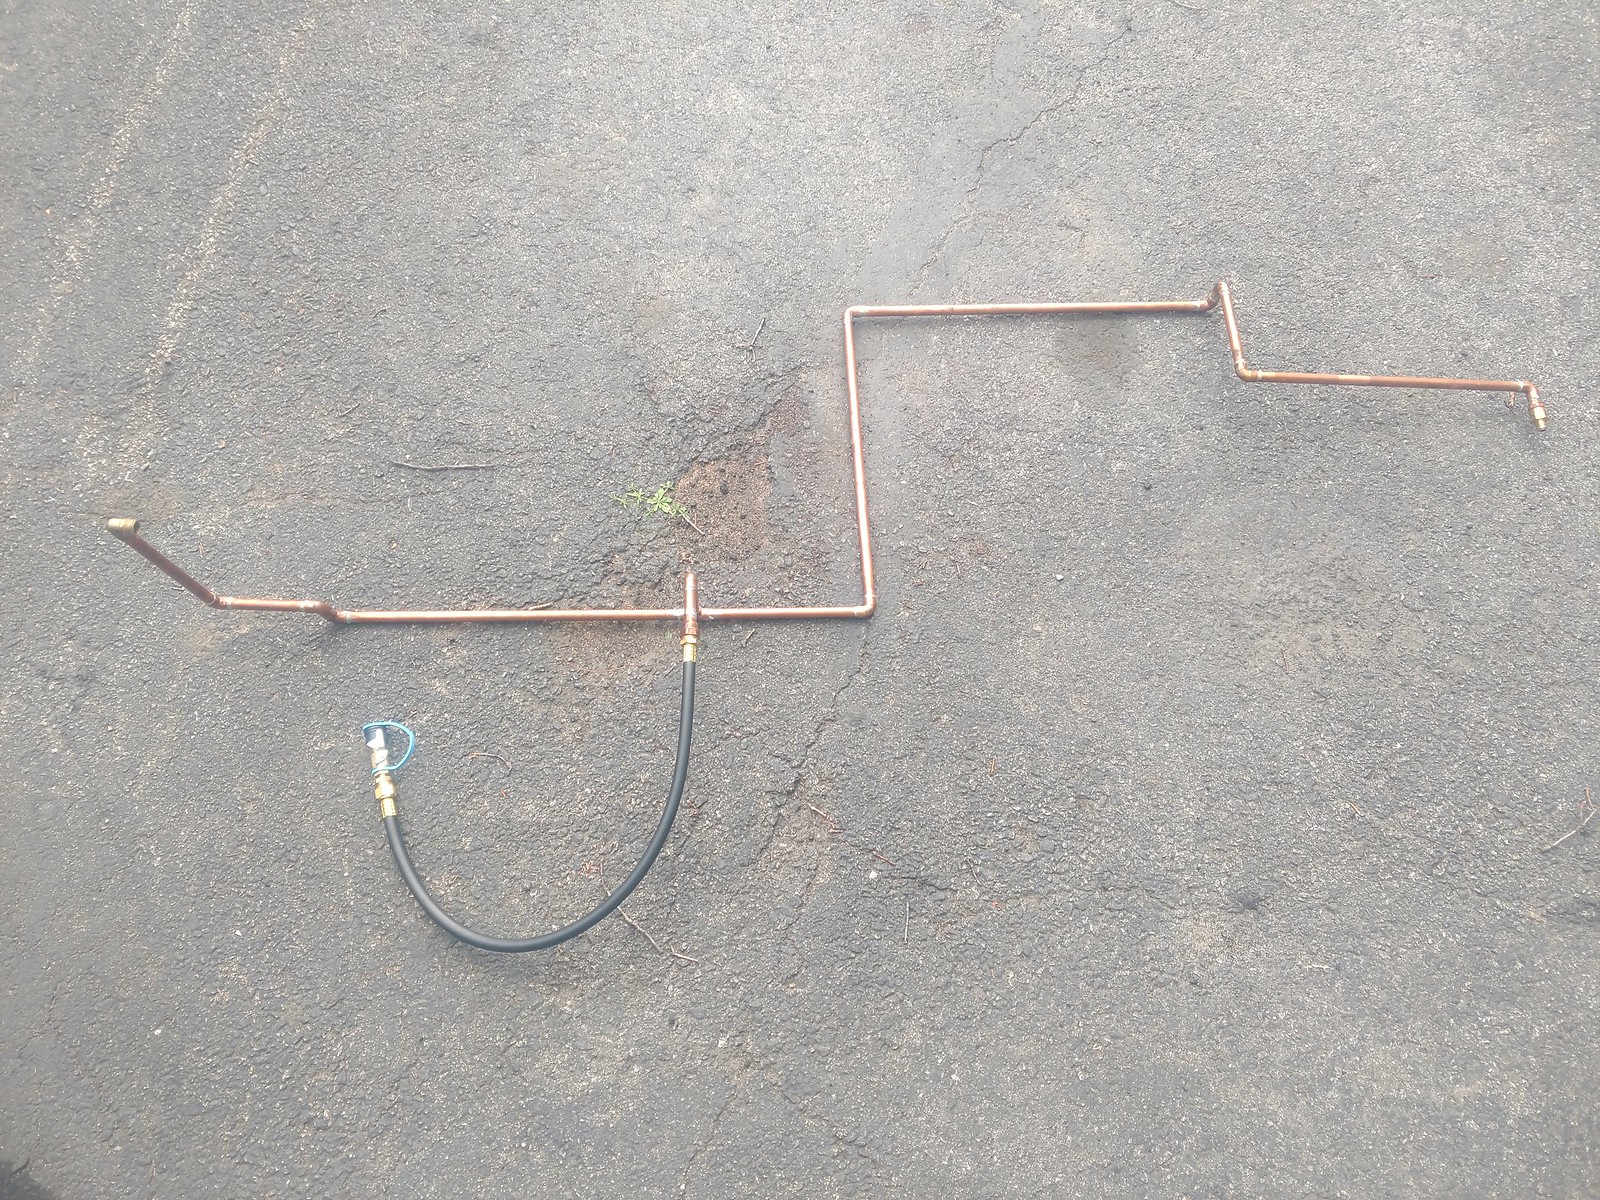
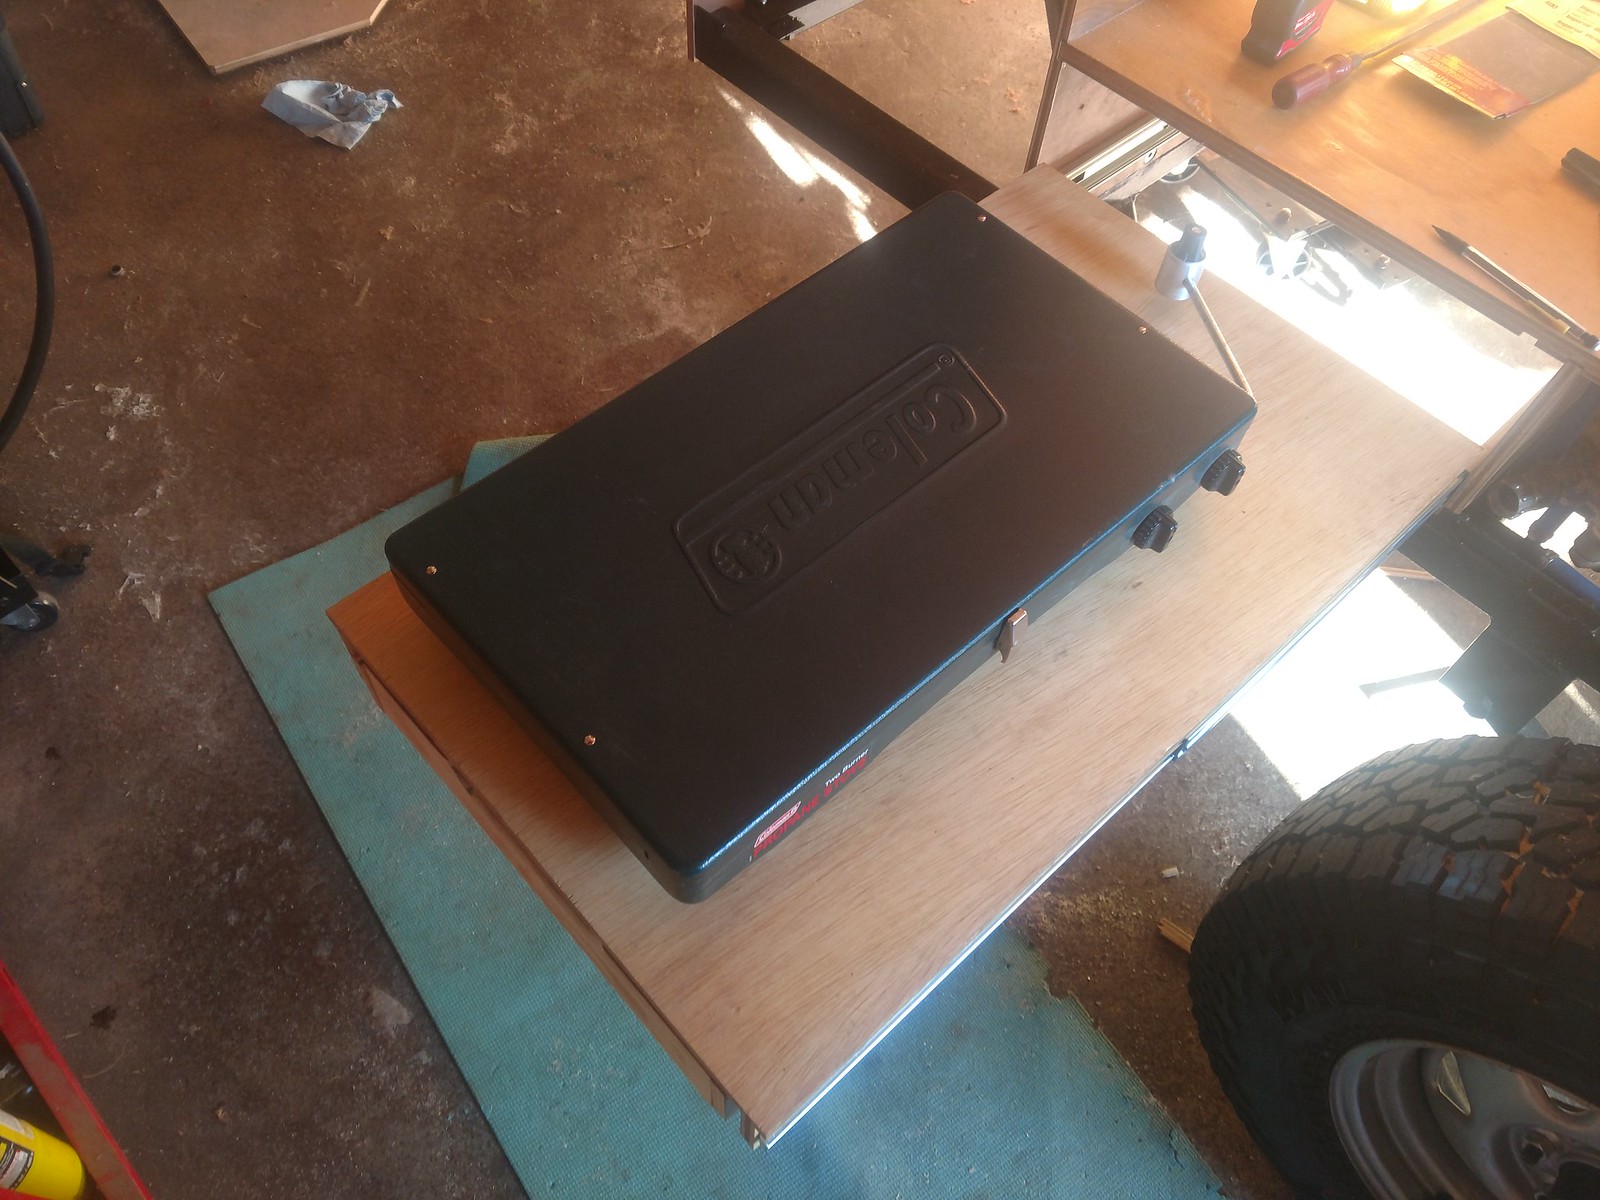
I'm short one pipe fitting, but the system is otherwise complete. I believe what I need is a 1/16 close nipple. None of the local stores carry pipe that small, but McMaster has it. I need to order it. I sorted the drawer for the grill and confirmed everything will work as intended. Shown here is the closed/stowed orientation:
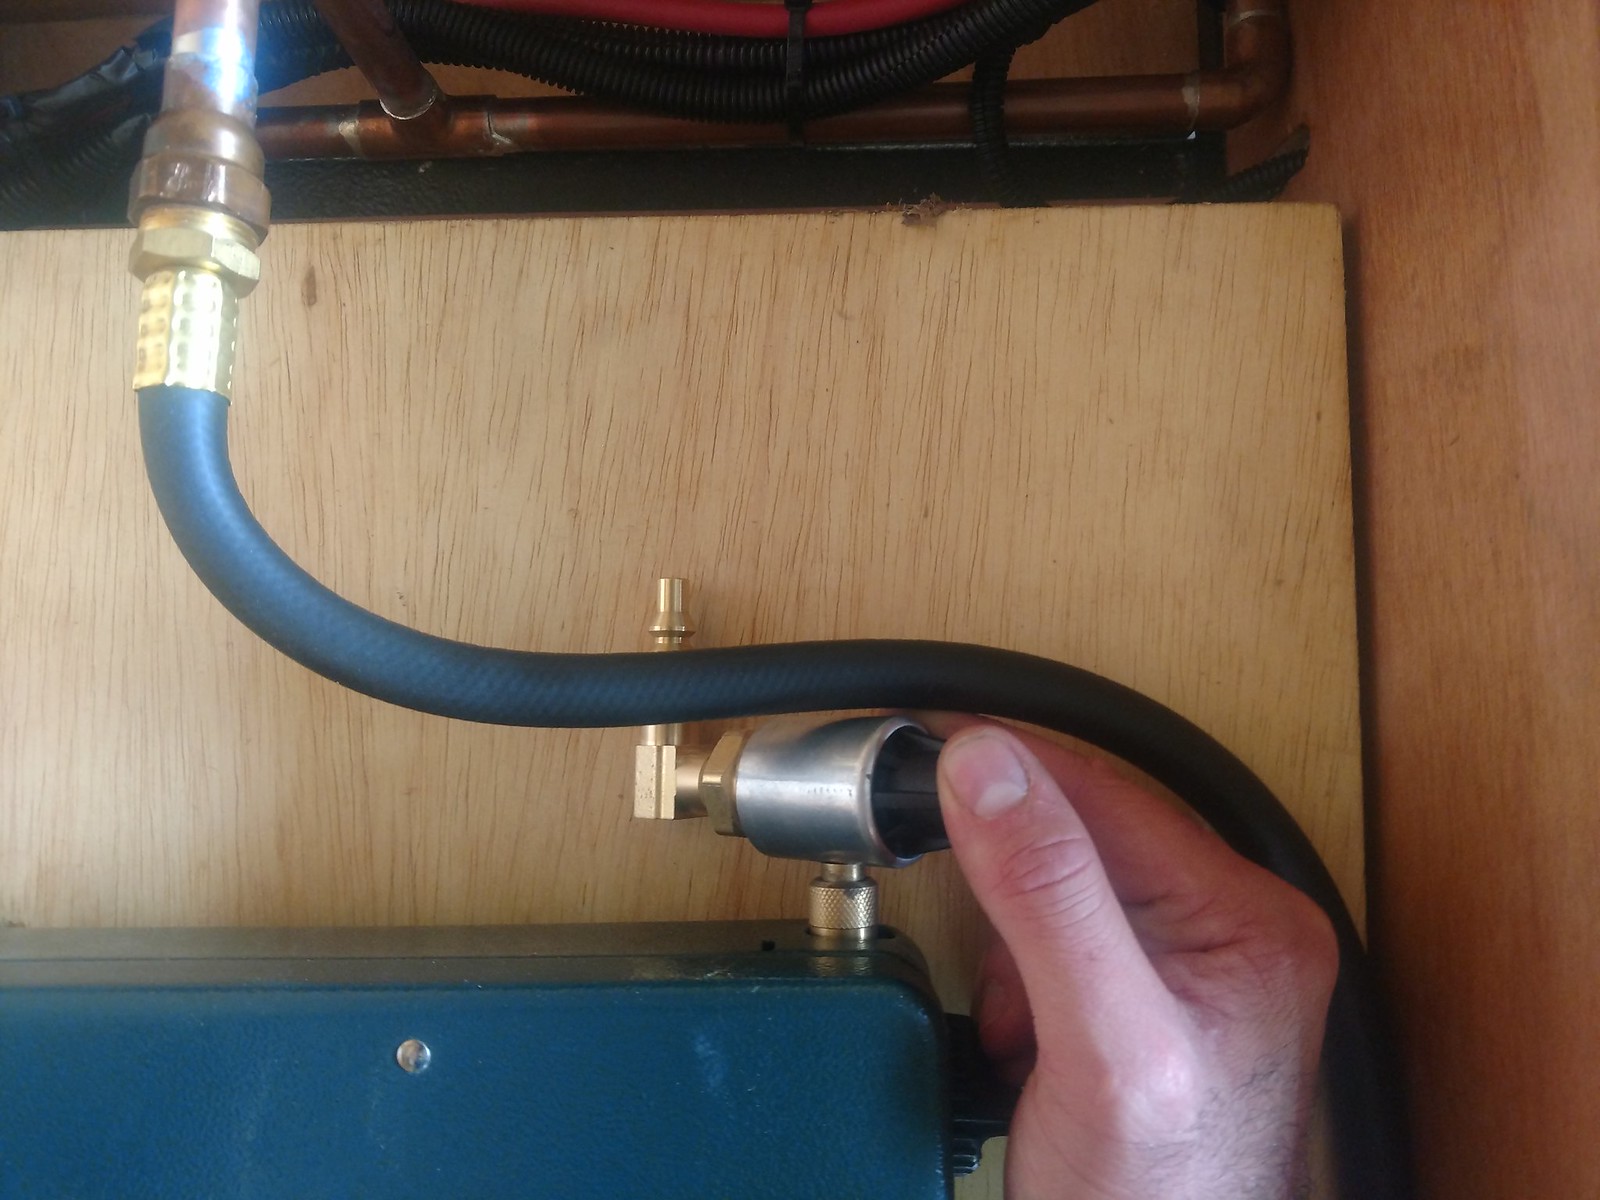
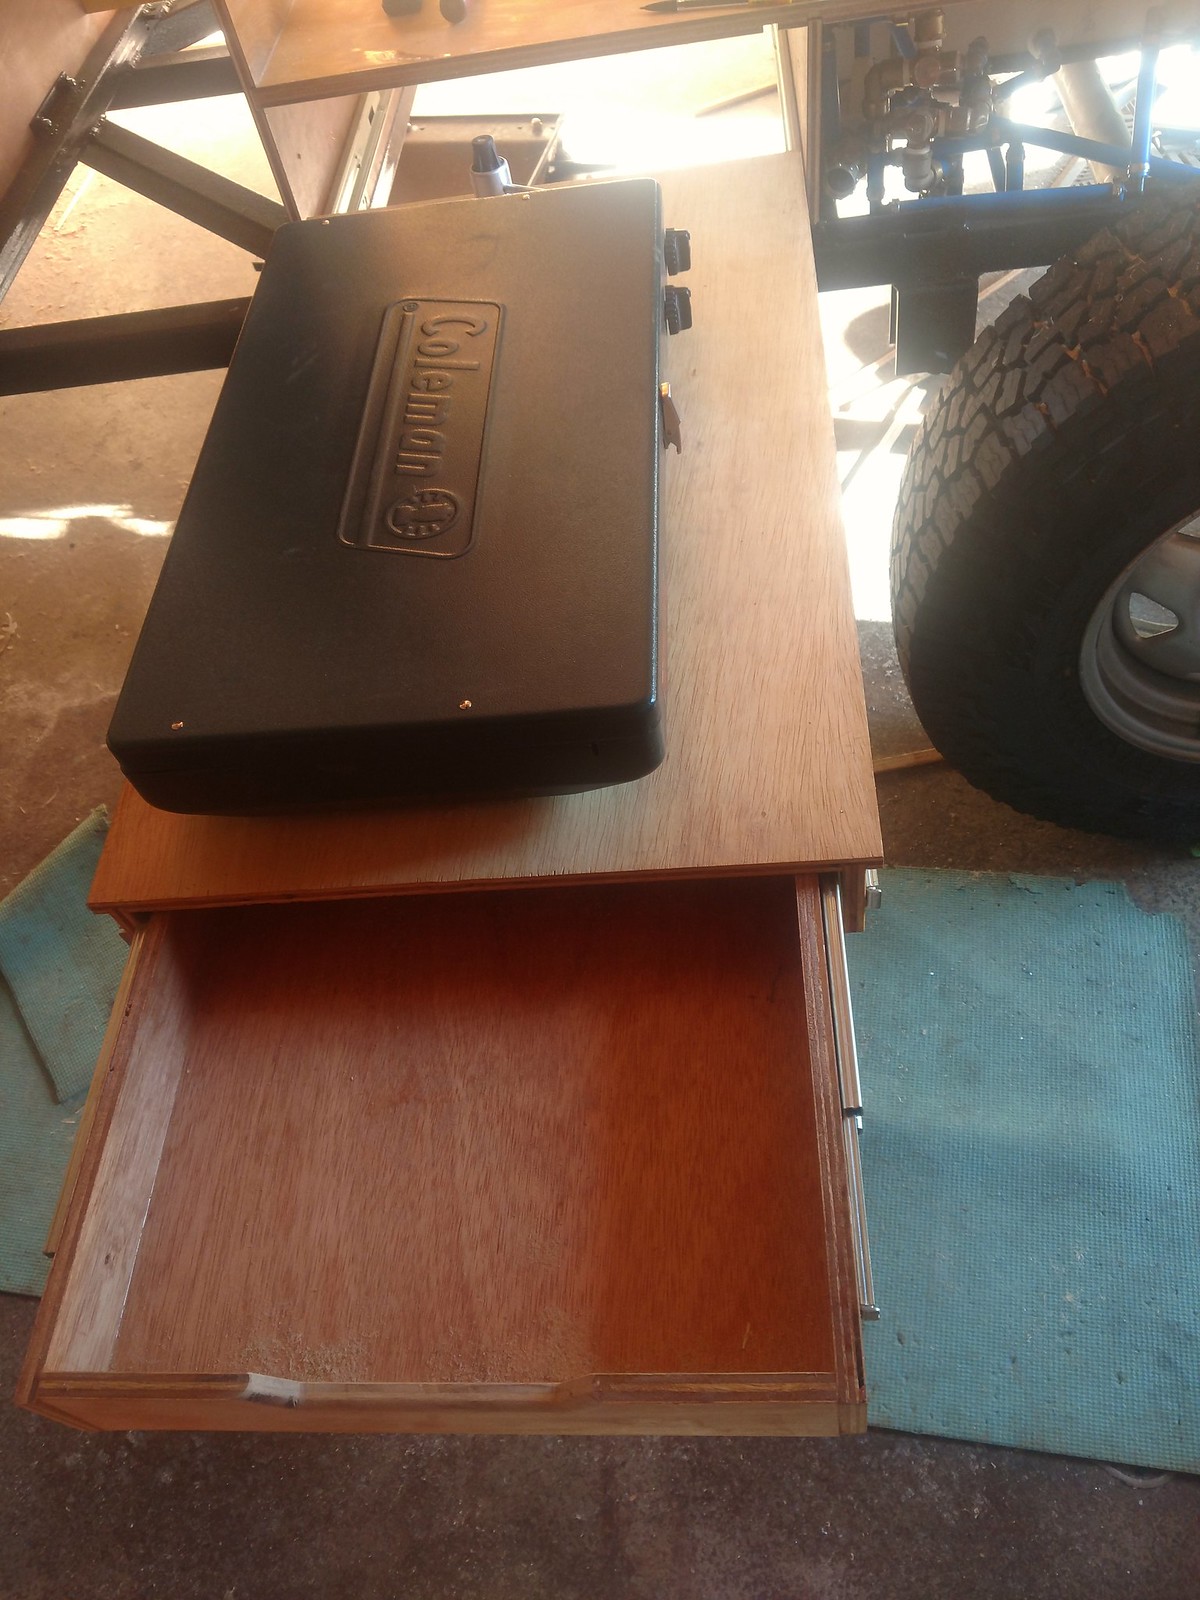
Ignore my hand as it's doing what the missing pipe fitting will do once I receive it. With the drawer all the way out, we can simply attach the quick connect to the grill with no tools, like so:
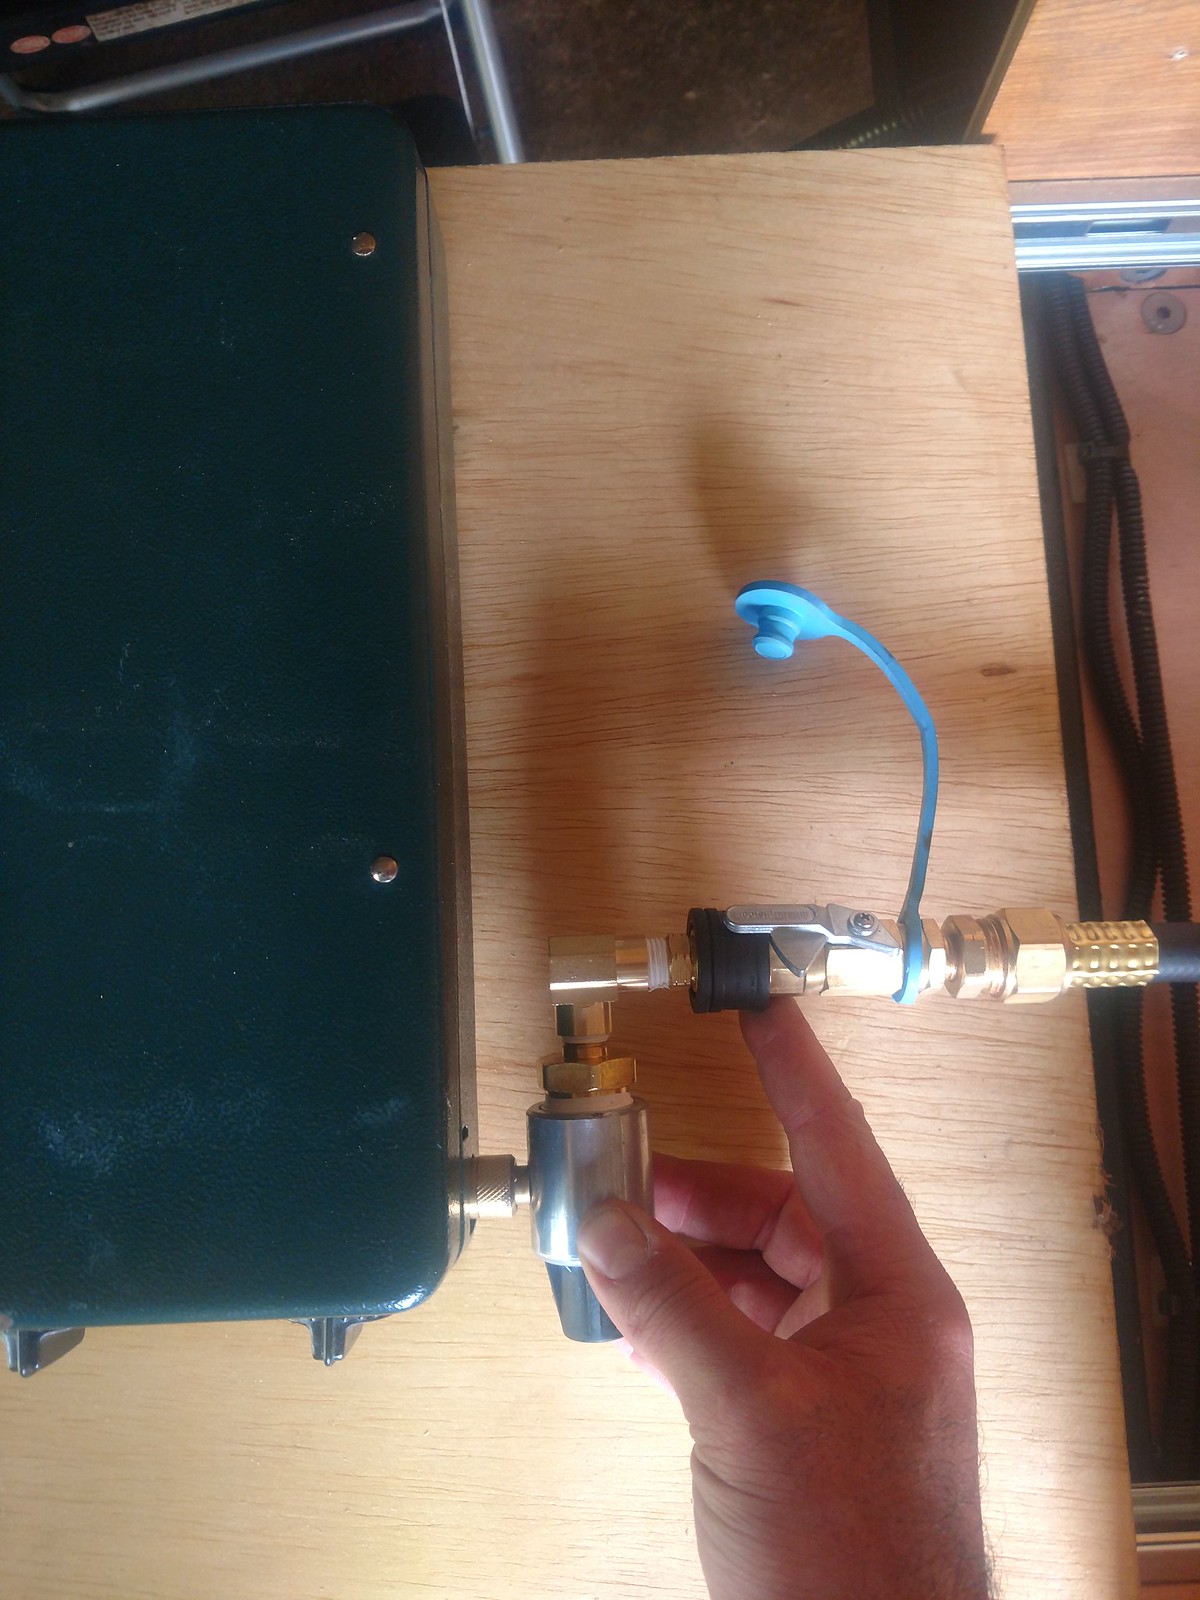
Note: I eliminated Coleman's ~6" pipe between the grill connection and their regulator, but I retained the regulator. I felt their "extension" was unnecessary now that we're not using disposable tanks, but I'm sure the regulator is necessary. The disposable tank thread size is 1"-20 in case anyone wants to try this at home. There is an adapter available to convert it to common pipe thread sizes. You shouldn't have to look too hard.
You'll recall a while back I made up a panel/box/hold down sort of contraption for the battery. I made it fit and made sure the battery was held down securely. What I didn't do until just recently was make provisions in the panel for securing it to the frame. So I match-marked and drilled out the bolt holes and I painted the laminated steel panel to prevent rusting. I also painted the hold down brackets, same reason. I've used 3/8" hardware pretty much everywhere, so 3/8" washers on the hold down as well. But they were slightly too big to fit in the hold down channel, so I put some flats on them to fit:
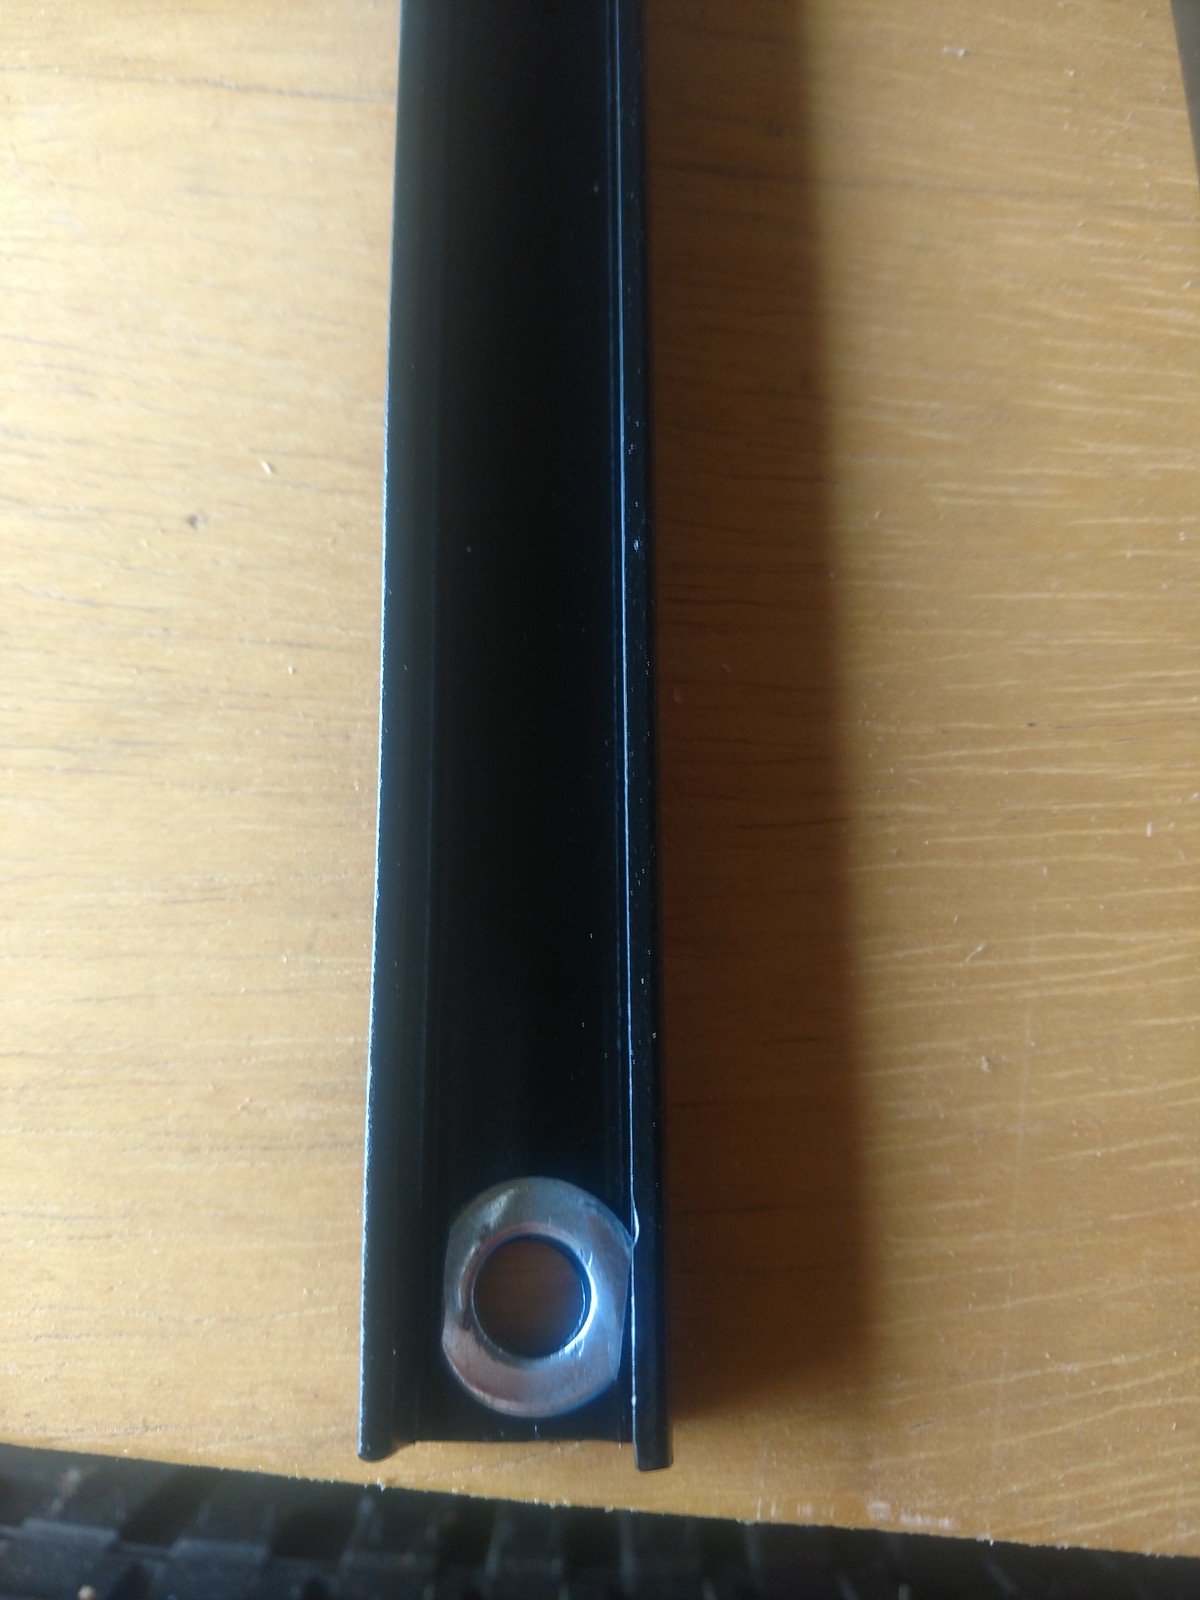
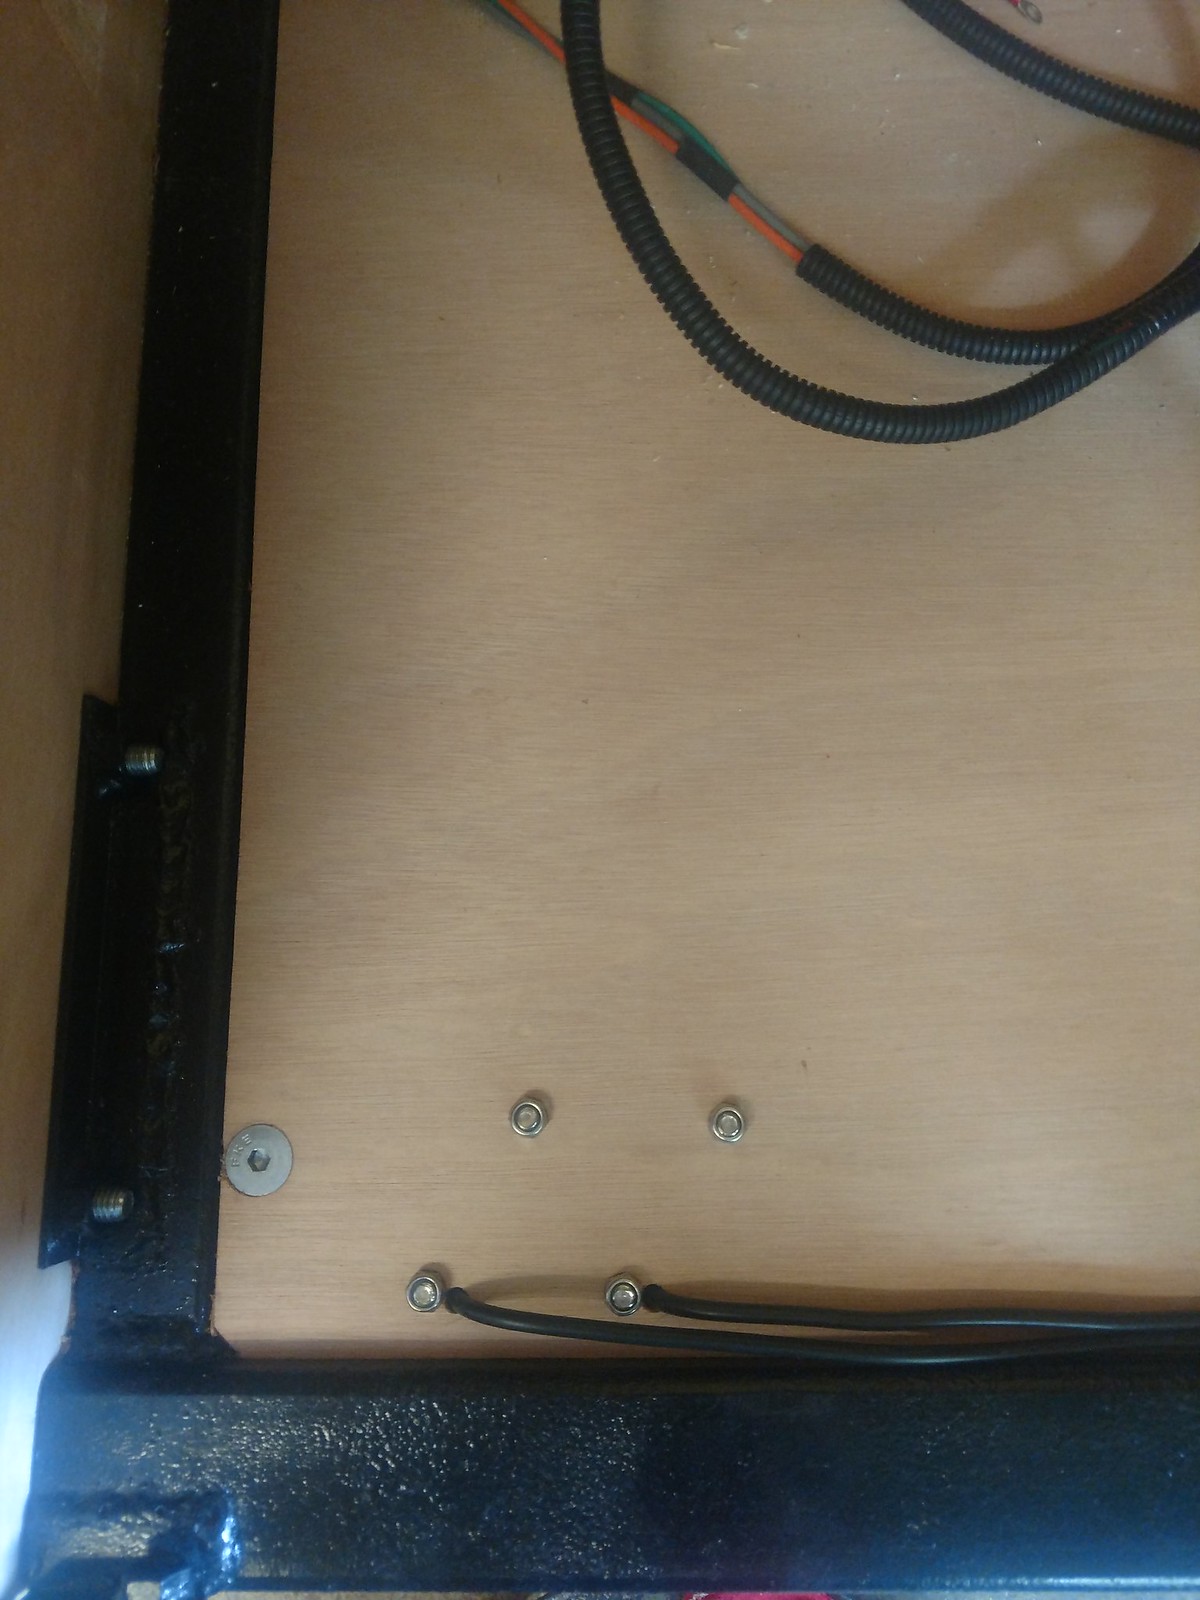
Not at all exciting. But this gives you the idea of the sorts of things I've been working. Details that give nothing to show for all the time spent. You'll also recall that we put two sets of rock lights (one red and one white) under the trailer for a night light. They've been ready to go in for a while, but without an actual final home. I put this off because in a couple spots there wasn't actually a panel to secure them to, but also because it meant un-pinning and re-pinning all the connectors which kind of sucks. But in the end it was worth it I think. This is the view from the top:
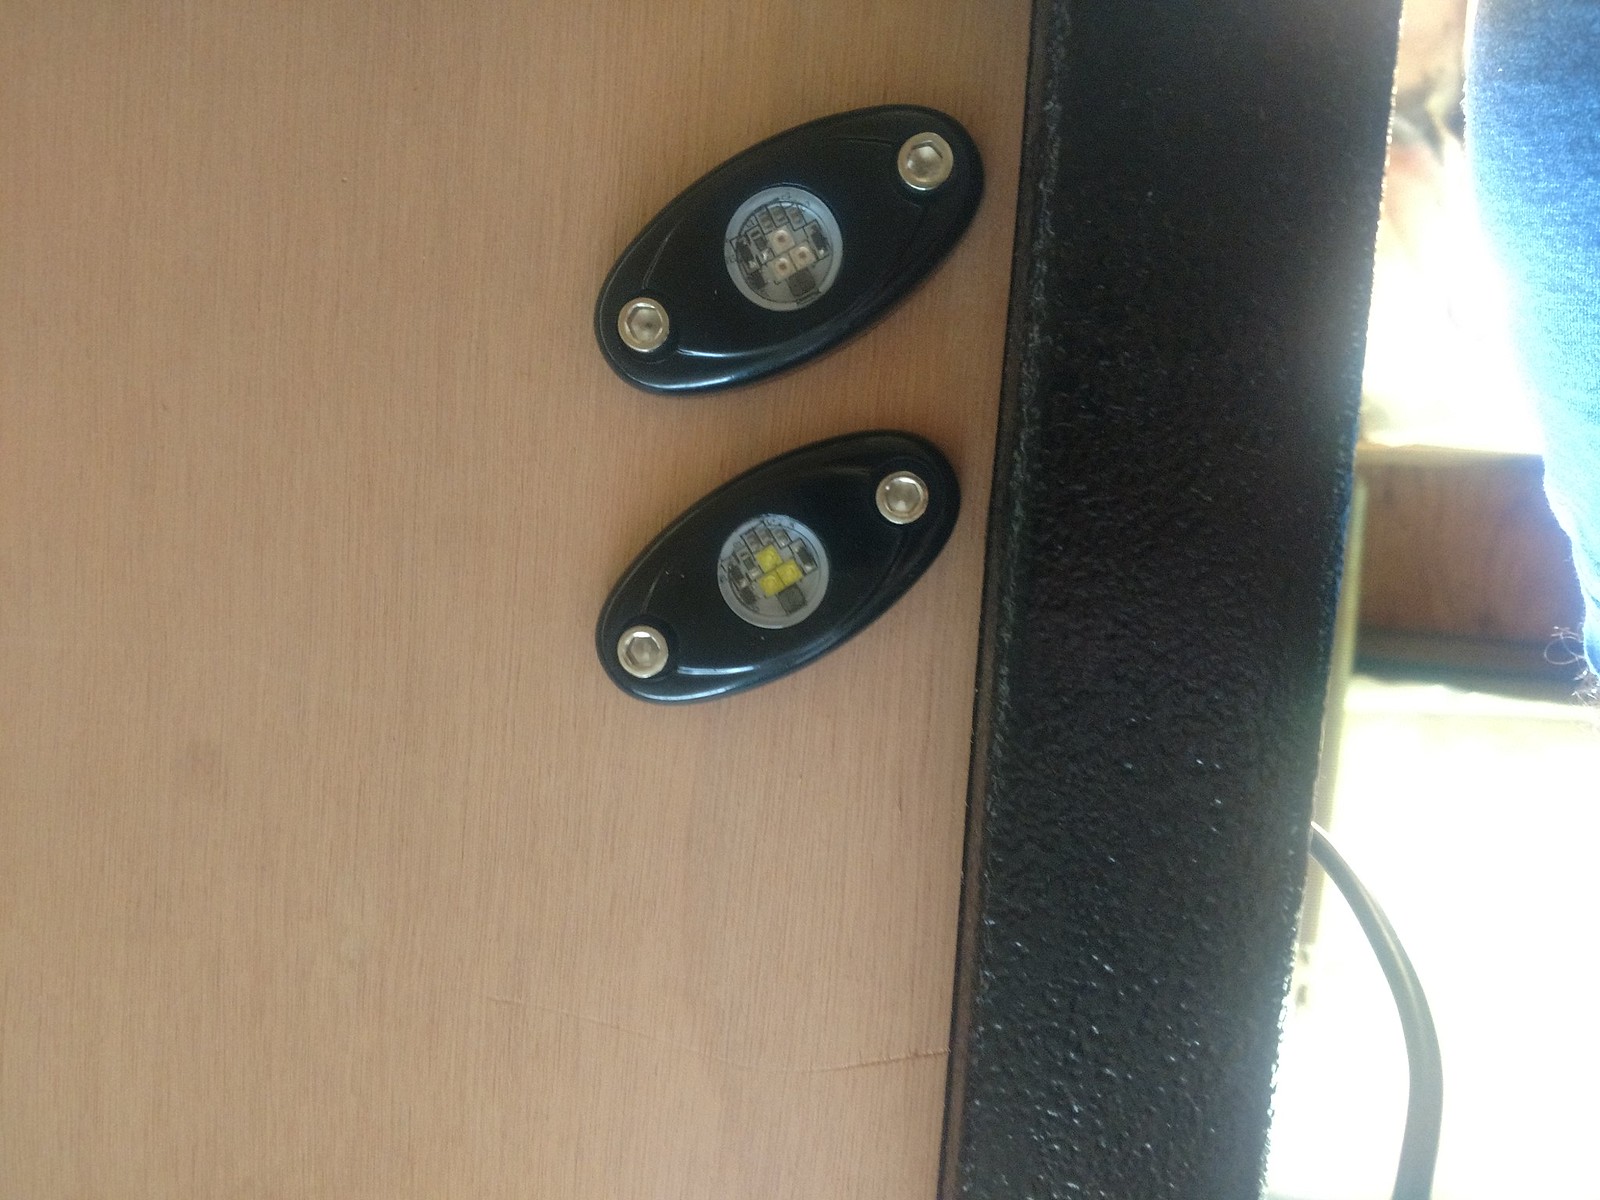
And from the bottom:
I also used some of the "scrap" marine plywood to make up a couple of floor pieces where they were lacking (under the fridge, sink and grill). I laid all of the wiring harness back into place and spent a good deal of time making sure it was routed in such a way that there won't be any interference with any moving parts and all that. I secured it all in place with zip ties, which required putting a screw into all of the zip tie bases so when the sticky-back fails, it won't all fall down. I also spliced in an override switch for the reverse lights, so if we want light around camp at night we can use those, rather than having to install more lights. Once all of the wiring was back in place and secured, I hooked up one of the solar panels and set it out in the driveway to catch some sun. The battery charged to 100% full, everything tested out fully functional. In short, it's all good.
Next up, I need to shorten a few wires at the fuse block that are too long, and re-terminate them. Then I can put the bed support piece back in place and secure the wiring to its underside. I need to extend one side marker light by about a foot. Then I can put up a wall and start cutting it to the right size and shape and all that. I'm super excited for it to have a real profile, but also nervous as hell. I hope it goes quickly, but I want to take my time so I don't screw it up. I feel like we're finally actually coming down the home stretch now that all those little kinks are sorted. I'm probably the only one that feels this way but I feel like it was a TON of progress. There's just very little to show for it. Oh well, no one's reading this anyways.

I'm short one pipe fitting, but the system is otherwise complete. I believe what I need is a 1/16 close nipple. None of the local stores carry pipe that small, but McMaster has it. I need to order it. I sorted the drawer for the grill and confirmed everything will work as intended. Shown here is the closed/stowed orientation:

Ignore my hand as it's doing what the missing pipe fitting will do once I receive it. With the drawer all the way out, we can simply attach the quick connect to the grill with no tools, like so:

Note: I eliminated Coleman's ~6" pipe between the grill connection and their regulator, but I retained the regulator. I felt their "extension" was unnecessary now that we're not using disposable tanks, but I'm sure the regulator is necessary. The disposable tank thread size is 1"-20 in case anyone wants to try this at home. There is an adapter available to convert it to common pipe thread sizes. You shouldn't have to look too hard.
You'll recall a while back I made up a panel/box/hold down sort of contraption for the battery. I made it fit and made sure the battery was held down securely. What I didn't do until just recently was make provisions in the panel for securing it to the frame. So I match-marked and drilled out the bolt holes and I painted the laminated steel panel to prevent rusting. I also painted the hold down brackets, same reason. I've used 3/8" hardware pretty much everywhere, so 3/8" washers on the hold down as well. But they were slightly too big to fit in the hold down channel, so I put some flats on them to fit:

Not at all exciting. But this gives you the idea of the sorts of things I've been working. Details that give nothing to show for all the time spent. You'll also recall that we put two sets of rock lights (one red and one white) under the trailer for a night light. They've been ready to go in for a while, but without an actual final home. I put this off because in a couple spots there wasn't actually a panel to secure them to, but also because it meant un-pinning and re-pinning all the connectors which kind of sucks. But in the end it was worth it I think. This is the view from the top:

And from the bottom:

I also used some of the "scrap" marine plywood to make up a couple of floor pieces where they were lacking (under the fridge, sink and grill). I laid all of the wiring harness back into place and spent a good deal of time making sure it was routed in such a way that there won't be any interference with any moving parts and all that. I secured it all in place with zip ties, which required putting a screw into all of the zip tie bases so when the sticky-back fails, it won't all fall down. I also spliced in an override switch for the reverse lights, so if we want light around camp at night we can use those, rather than having to install more lights. Once all of the wiring was back in place and secured, I hooked up one of the solar panels and set it out in the driveway to catch some sun. The battery charged to 100% full, everything tested out fully functional. In short, it's all good.
Next up, I need to shorten a few wires at the fuse block that are too long, and re-terminate them. Then I can put the bed support piece back in place and secure the wiring to its underside. I need to extend one side marker light by about a foot. Then I can put up a wall and start cutting it to the right size and shape and all that. I'm super excited for it to have a real profile, but also nervous as hell. I hope it goes quickly, but I want to take my time so I don't screw it up. I feel like we're finally actually coming down the home stretch now that all those little kinks are sorted. I'm probably the only one that feels this way but I feel like it was a TON of progress. There's just very little to show for it. Oh well, no one's reading this anyways.
The copper line will be inside the trailer so it's protected from the elements, but outside of the sleeping area so we're protected from it.
The regulator says it's preset non-adjustable, but doesn't specify what it's set to. I figured at best, I need it so I'm covered. At worst, it's redundant and doesn't affect anything.
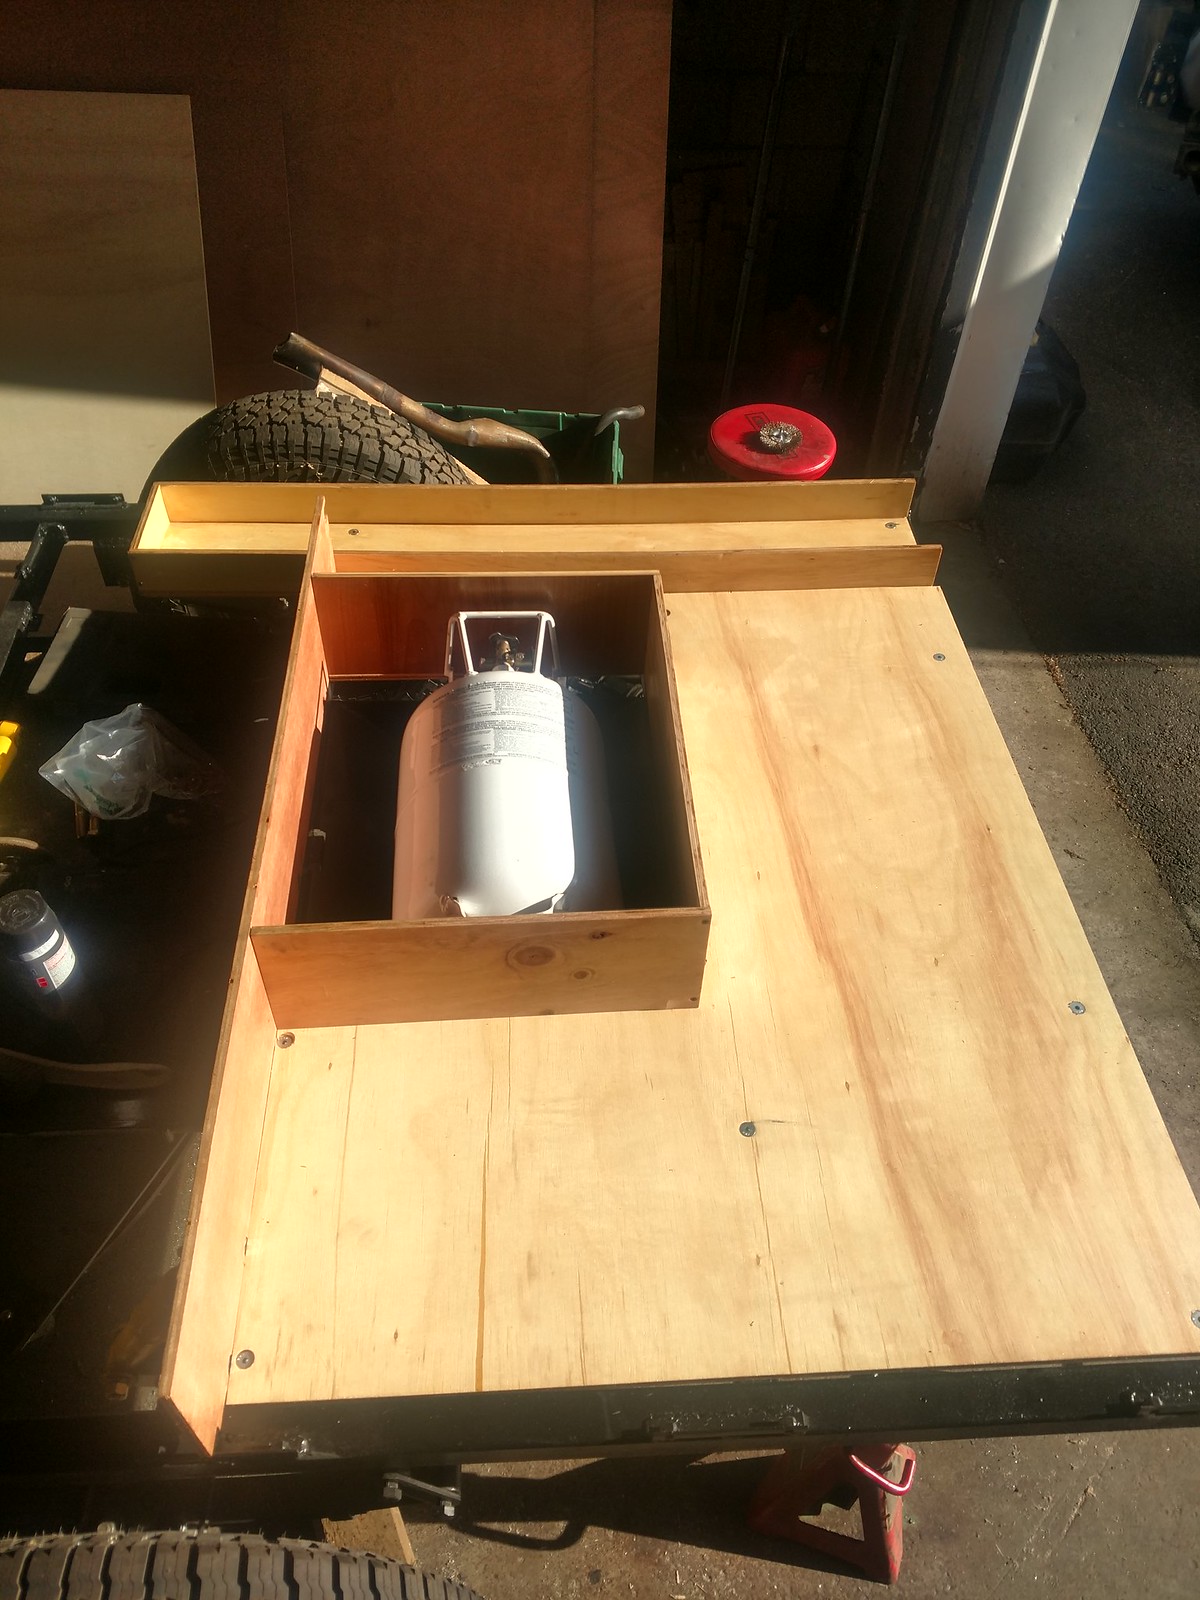
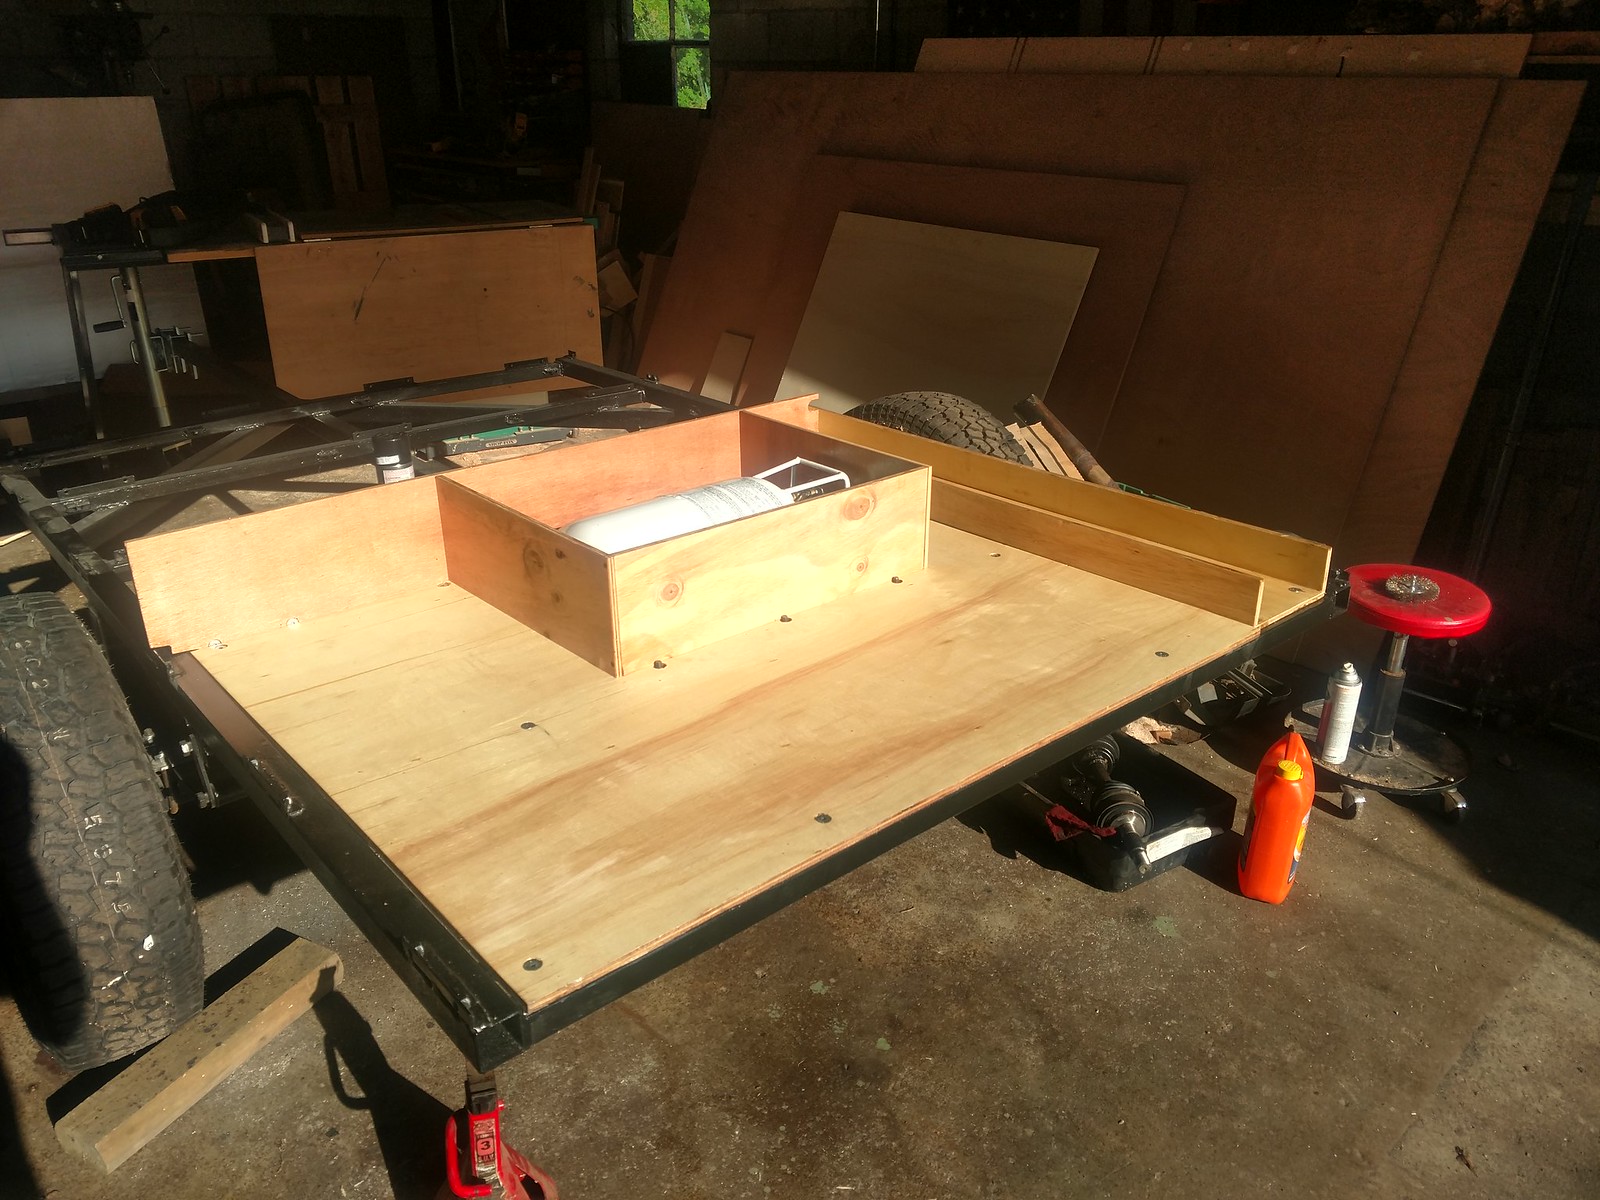
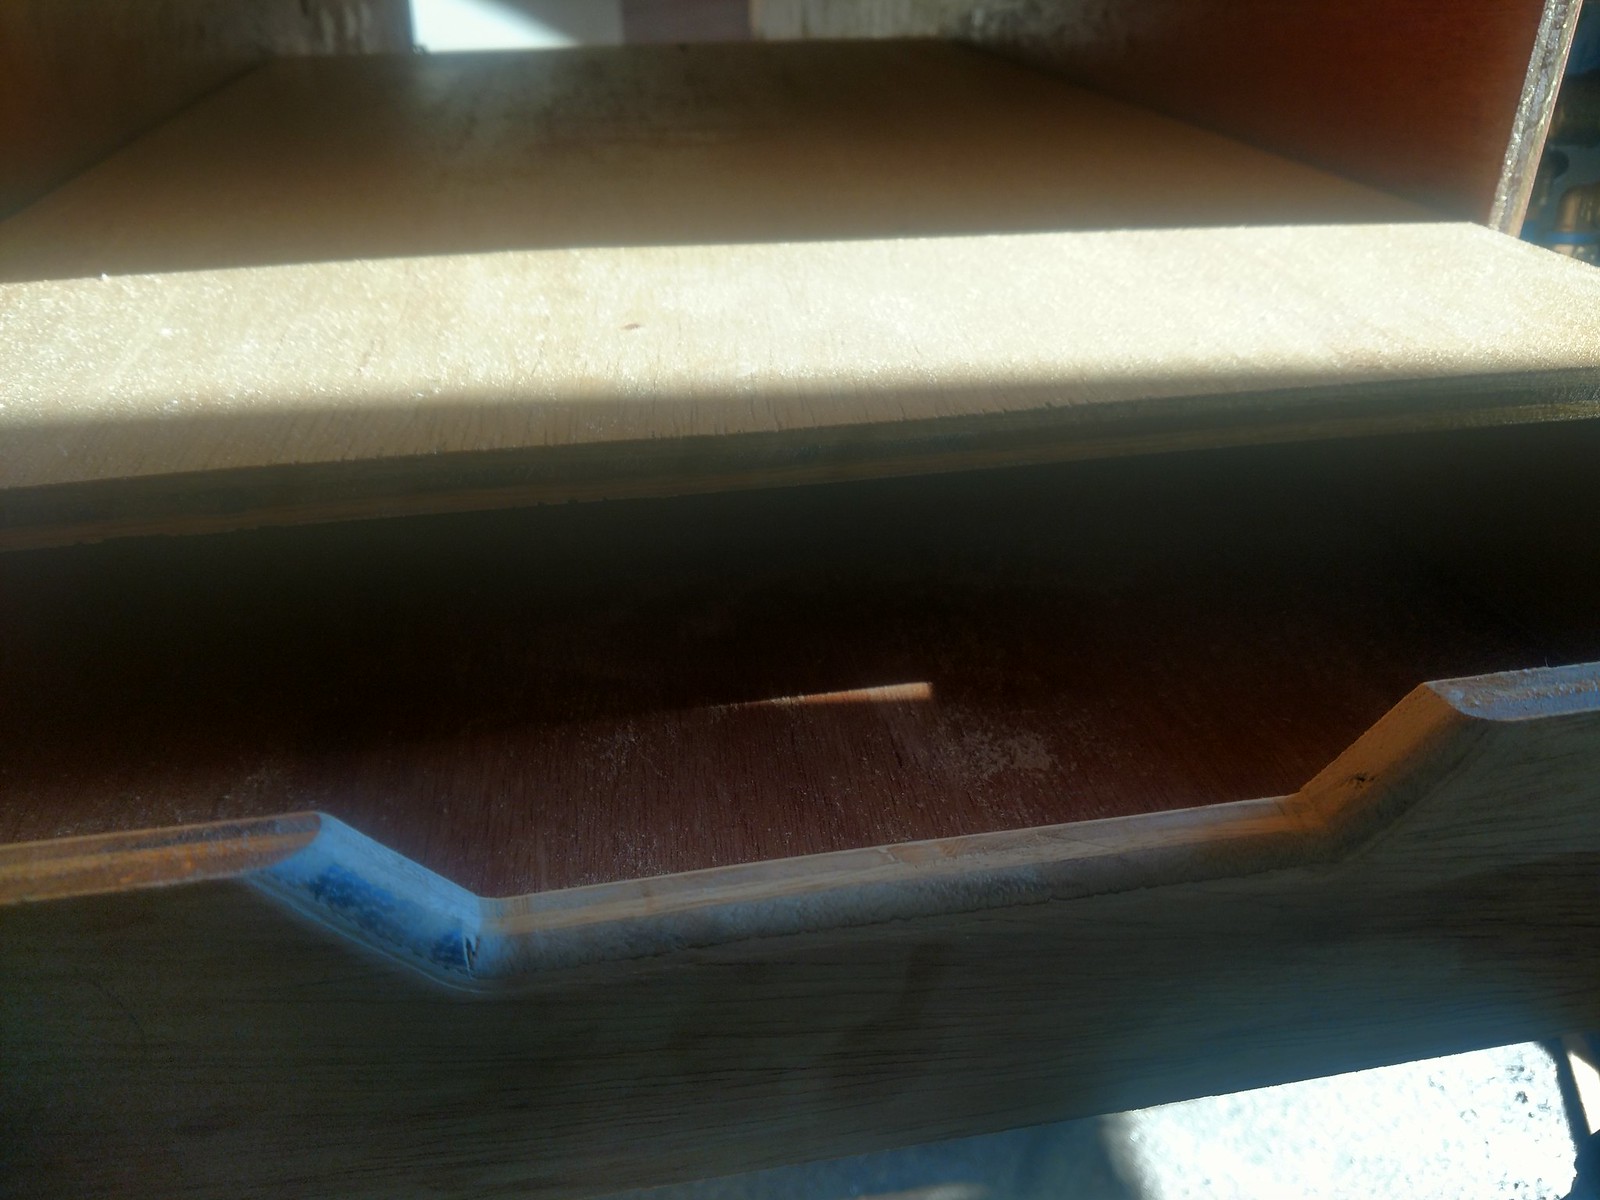
Here's a few more and better pictures, just cuz. First one of the cavity where the grill goes:
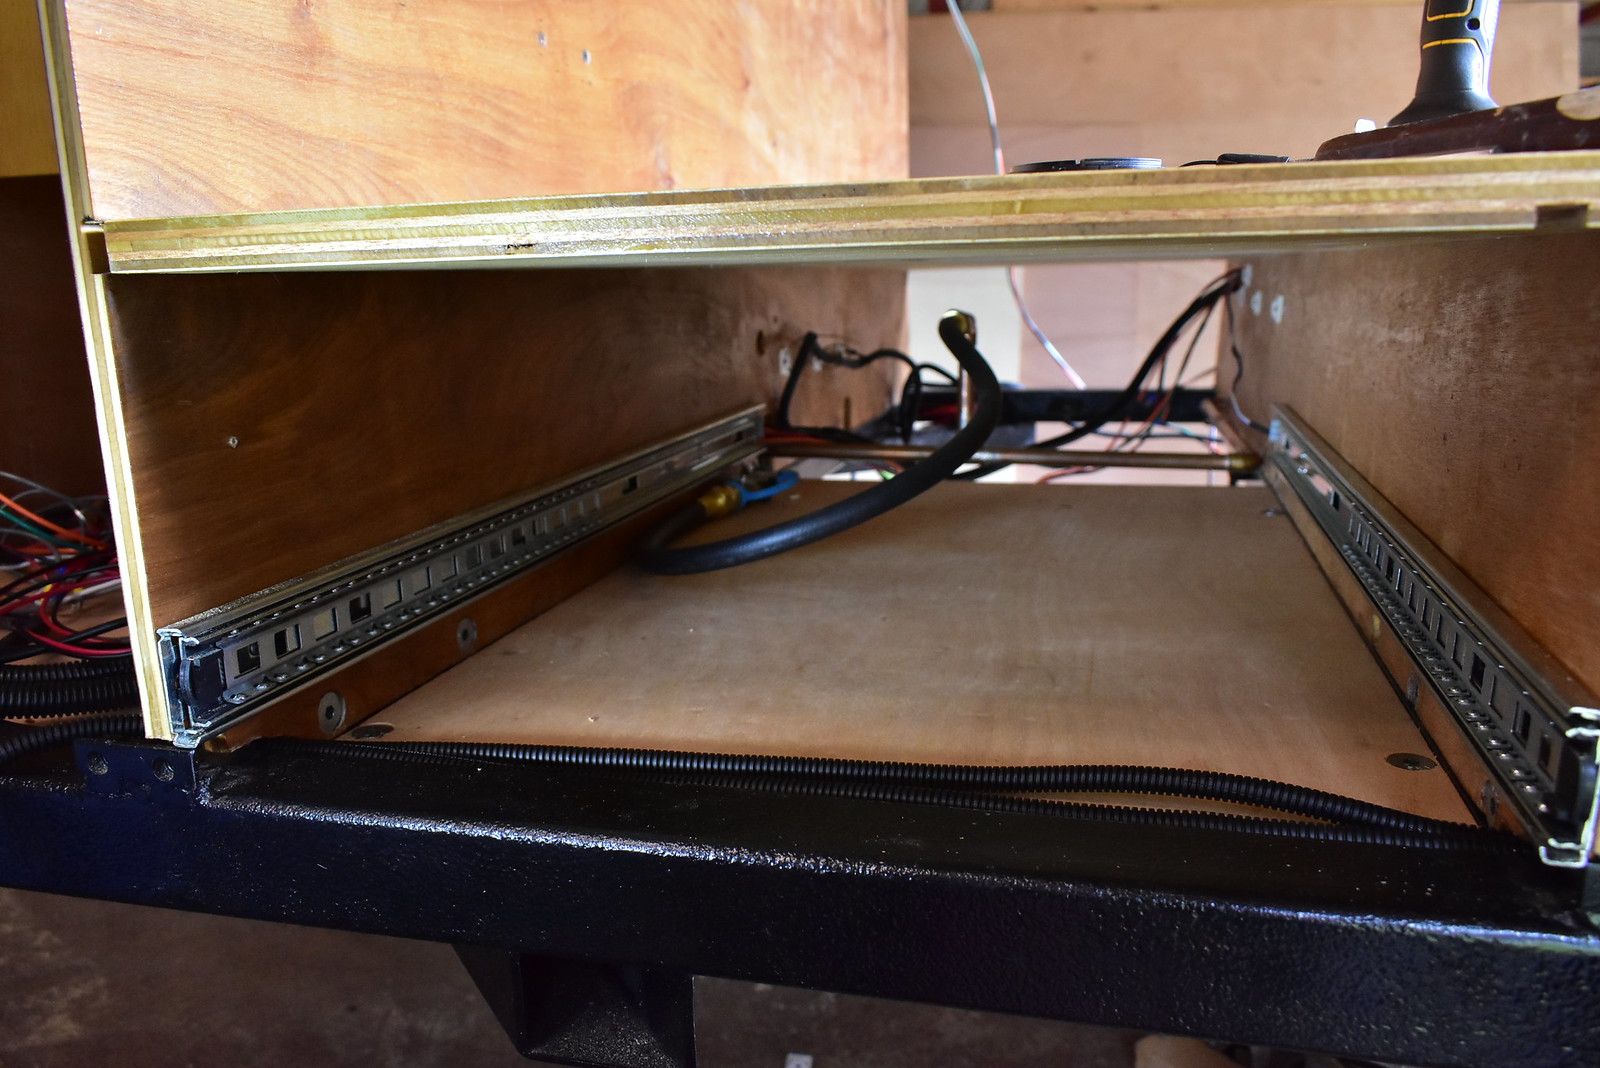
You can see the floor underneath that I recently installed. The hope is this will minimize dirt and water kicking up at the bottom of the actual drawer.
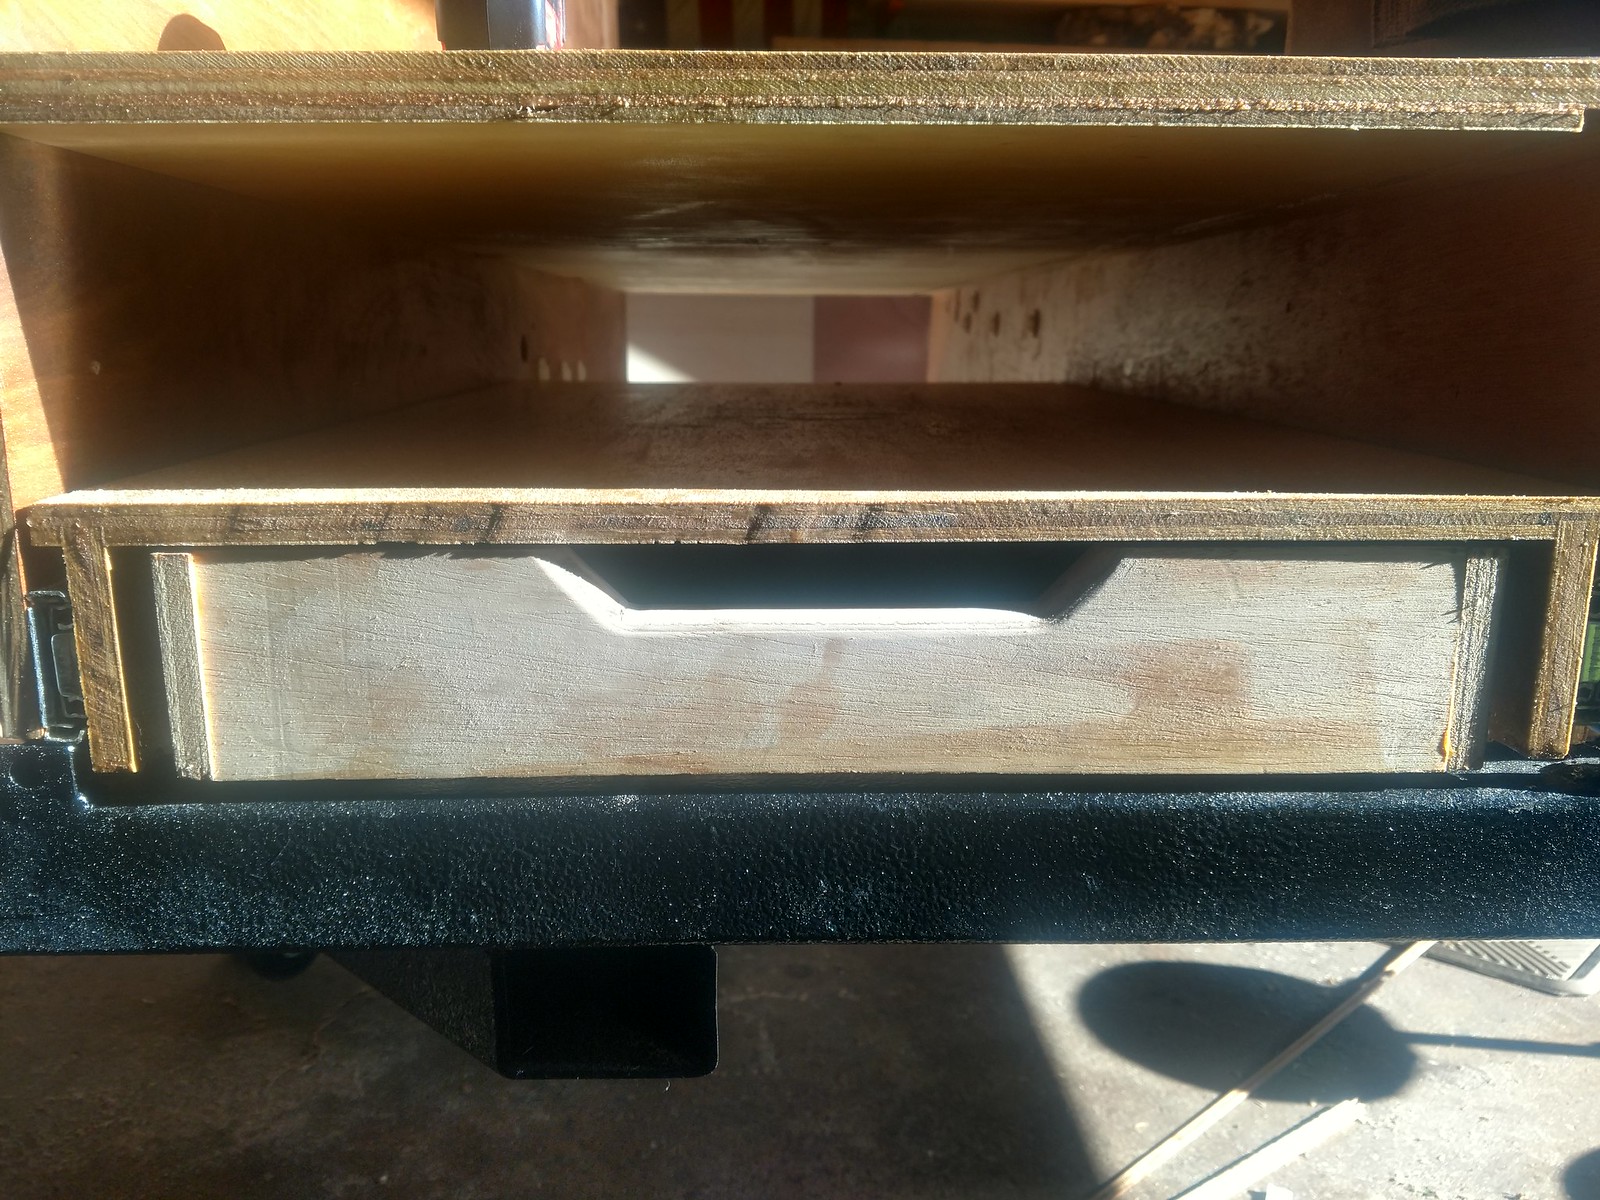
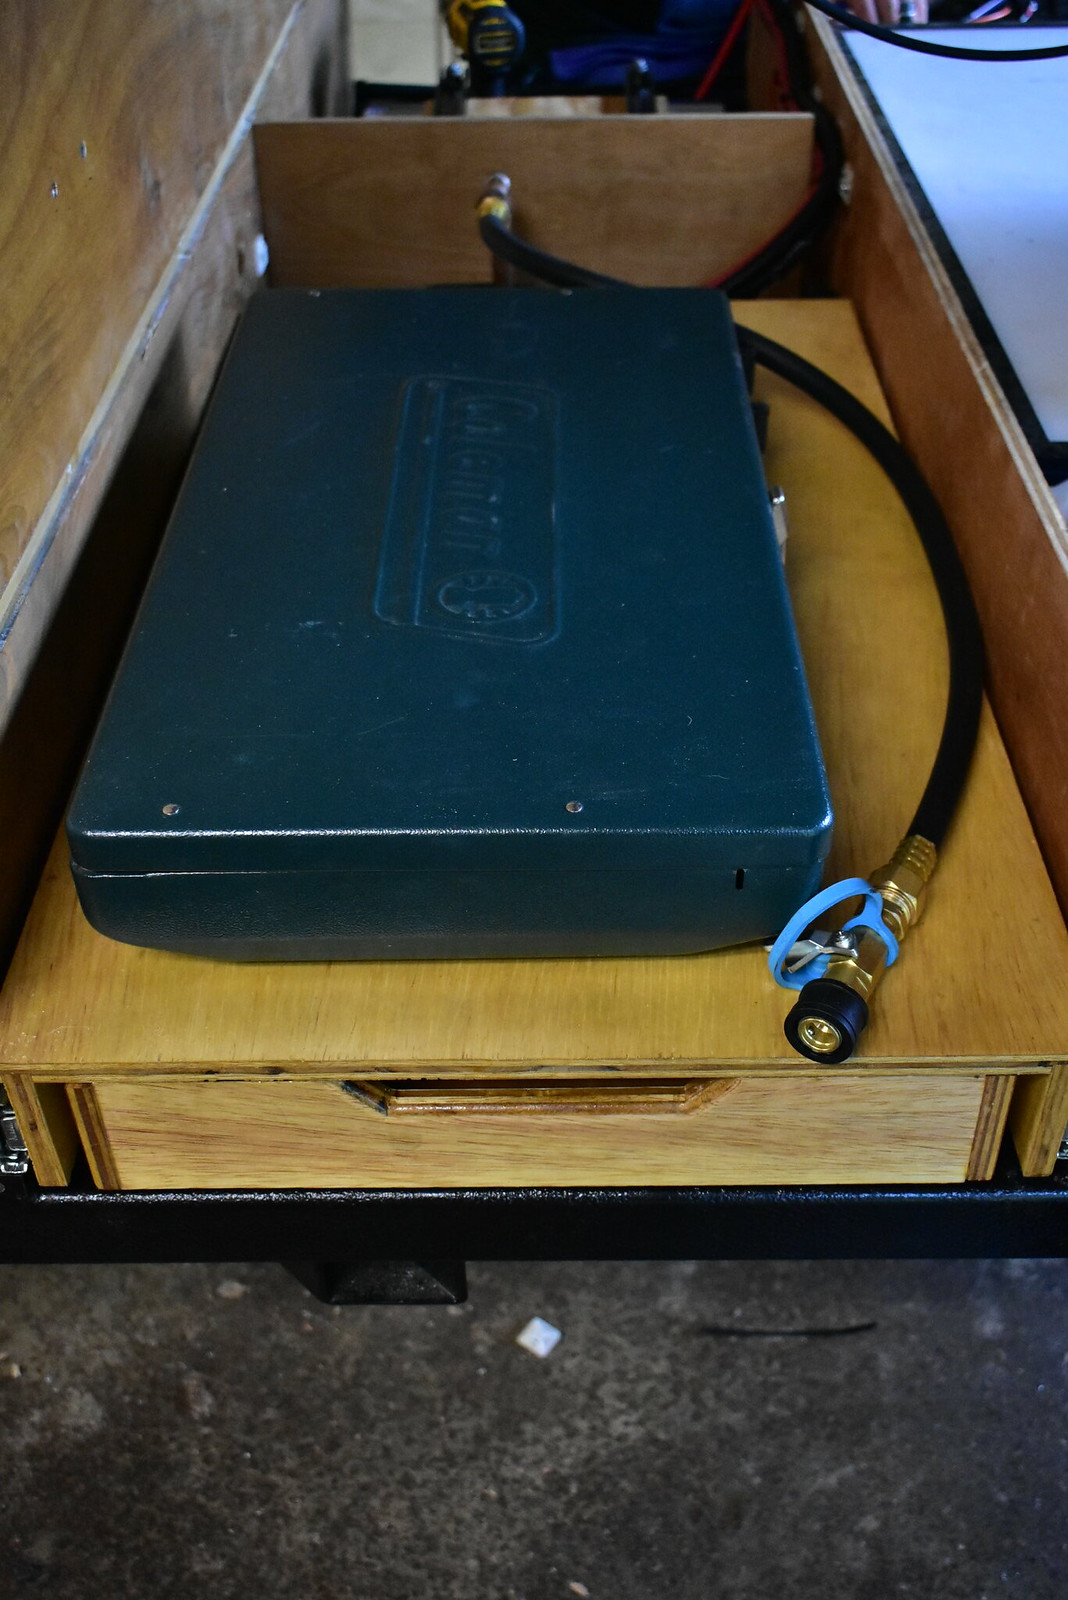
A better overall view of the grill drawer installed to get a clearer idea of what it actually looks like stowed:
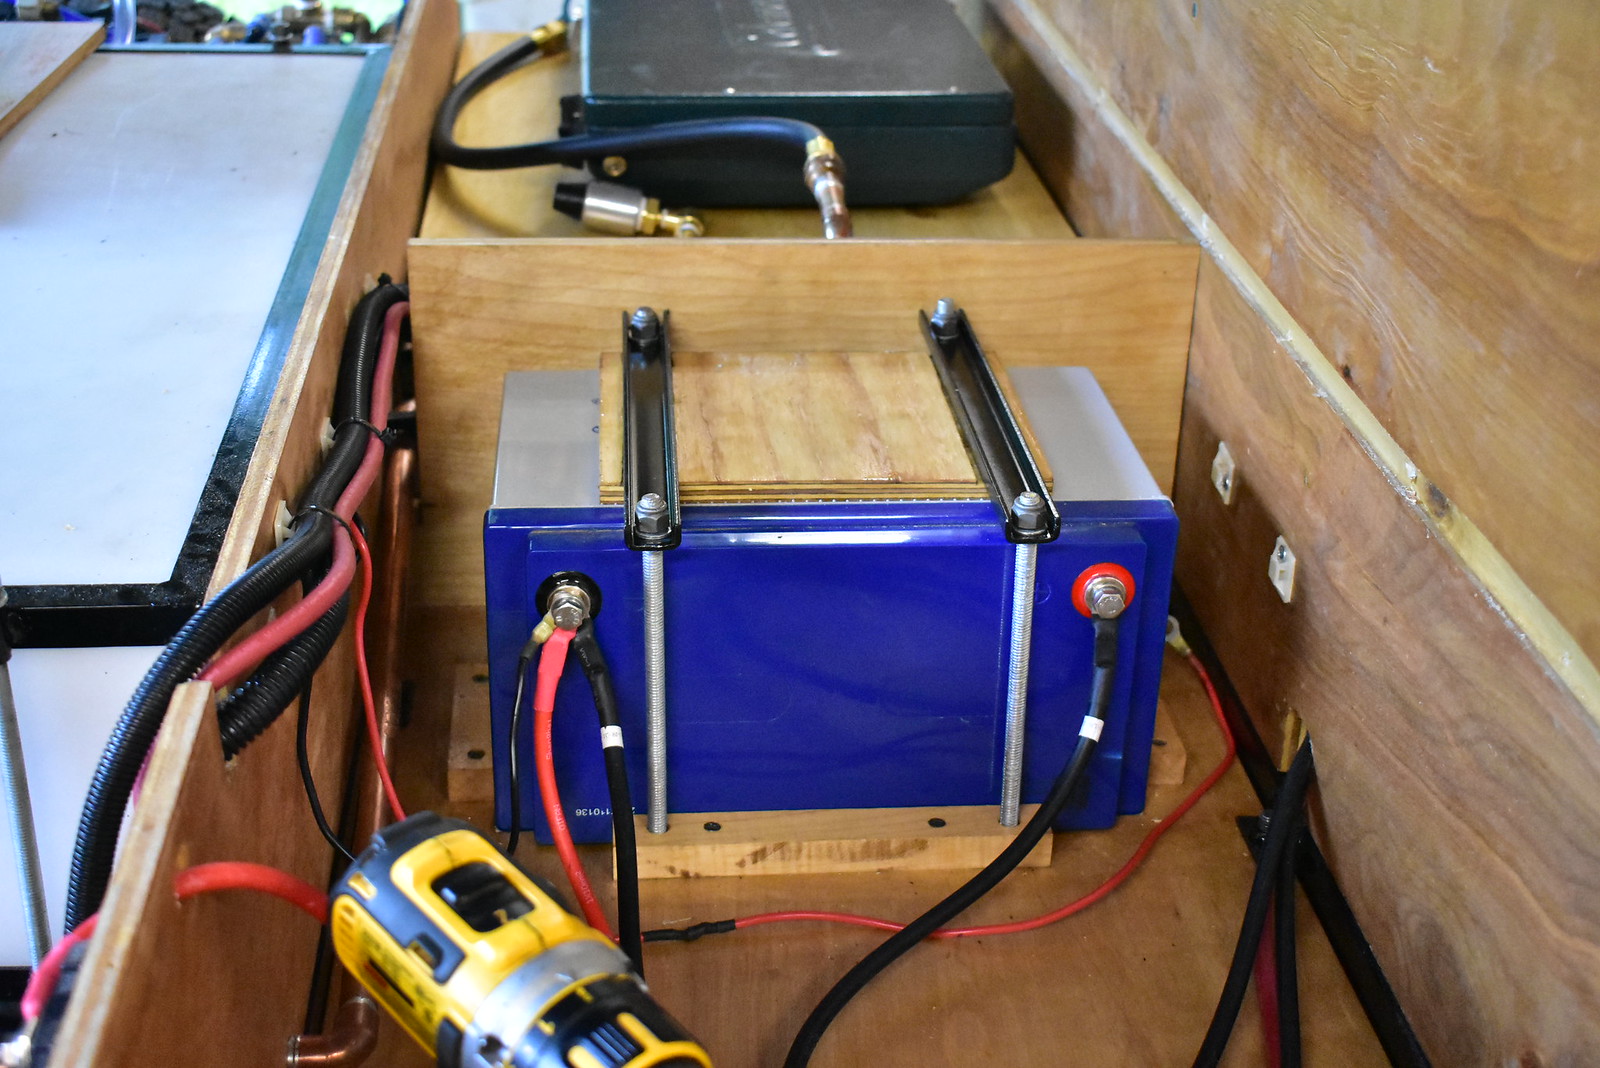
And one of the battery compartment at about 95% complete:
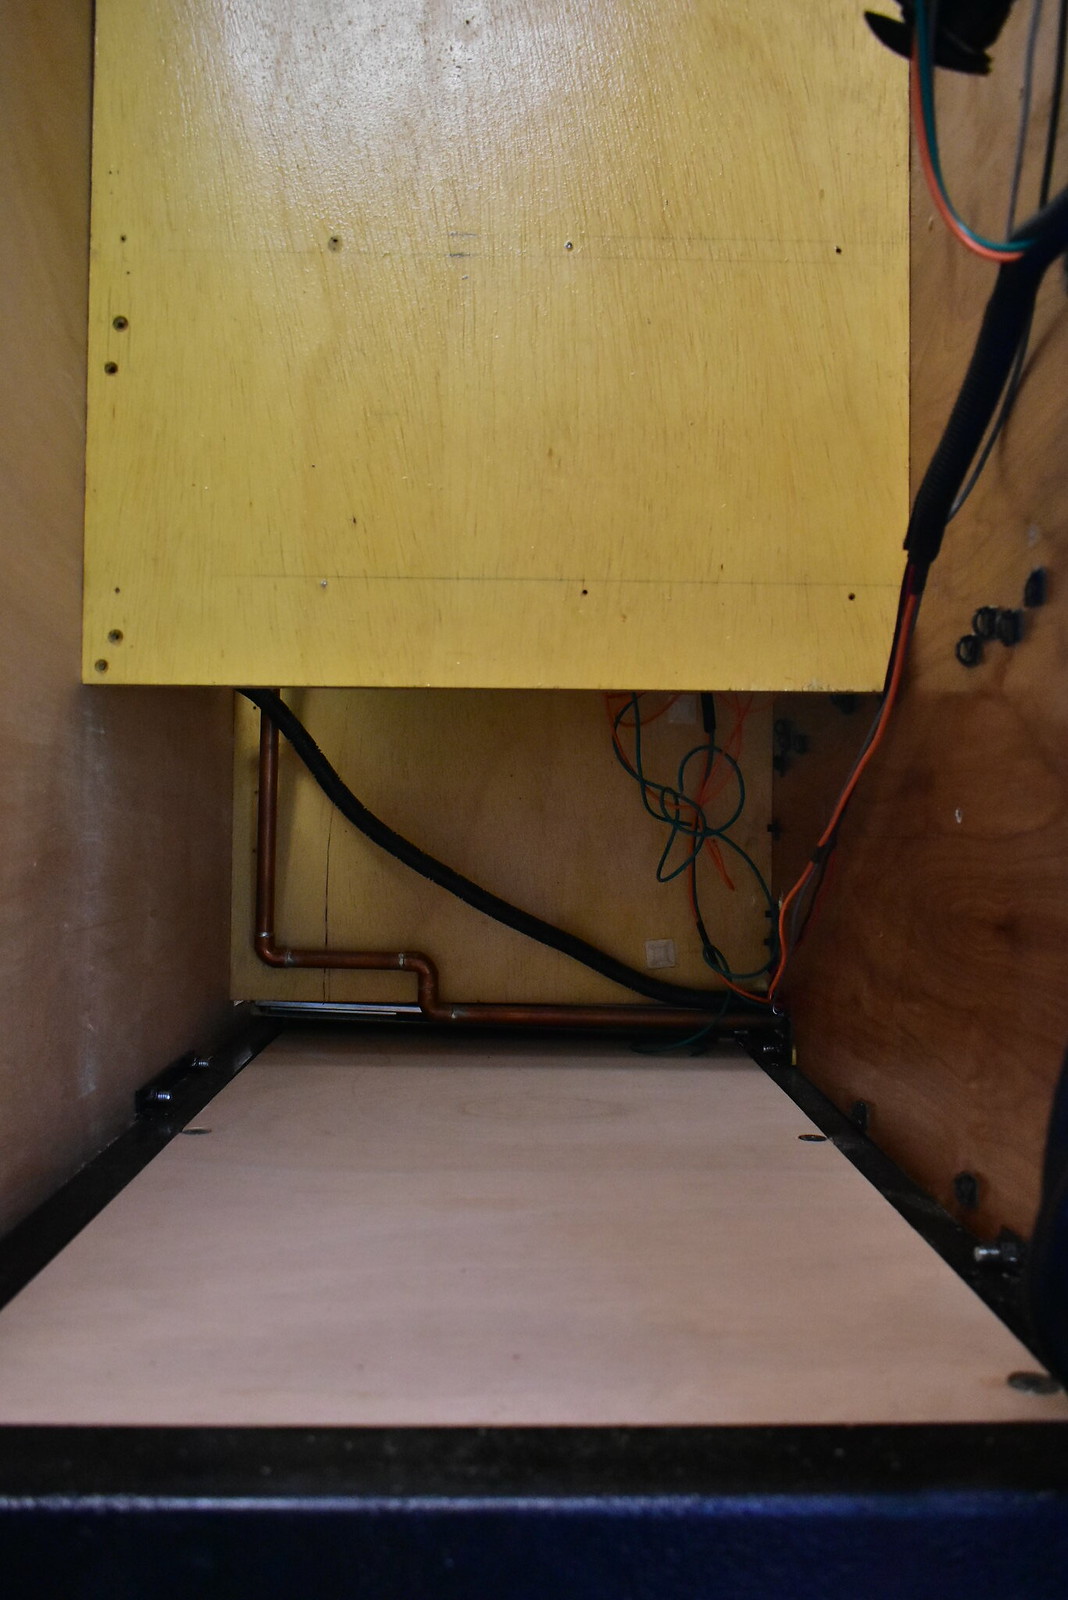
And here's the floor under the sink:
The regulator says it's preset non-adjustable, but doesn't specify what it's set to. I figured at best, I need it so I'm covered. At worst, it's redundant and doesn't affect anything.
Here's a few more and better pictures, just cuz. First one of the cavity where the grill goes:

You can see the floor underneath that I recently installed. The hope is this will minimize dirt and water kicking up at the bottom of the actual drawer.
A better overall view of the grill drawer installed to get a clearer idea of what it actually looks like stowed:

And one of the battery compartment at about 95% complete:

And here's the floor under the sink:

Thanks for enjoying the show! I'm pretty happy with how it's coming together. I wish it would go faster because I'm getting anxious to just get out there and use it, but I think in the end it will be time well spent. I'm trying to prioritize longevity and ease of maintenance, so there's extra effort and time involved in putting things together in a way that I hope will help them to last longer. It means making sure things are good and secure to minimize fatigue stress, designing things so they can come apart easily, even chasing threads and applying anti-seize everywhere. It all adds time and cost, but it makes it suck less when something's gotta come back apart for whatever reason.
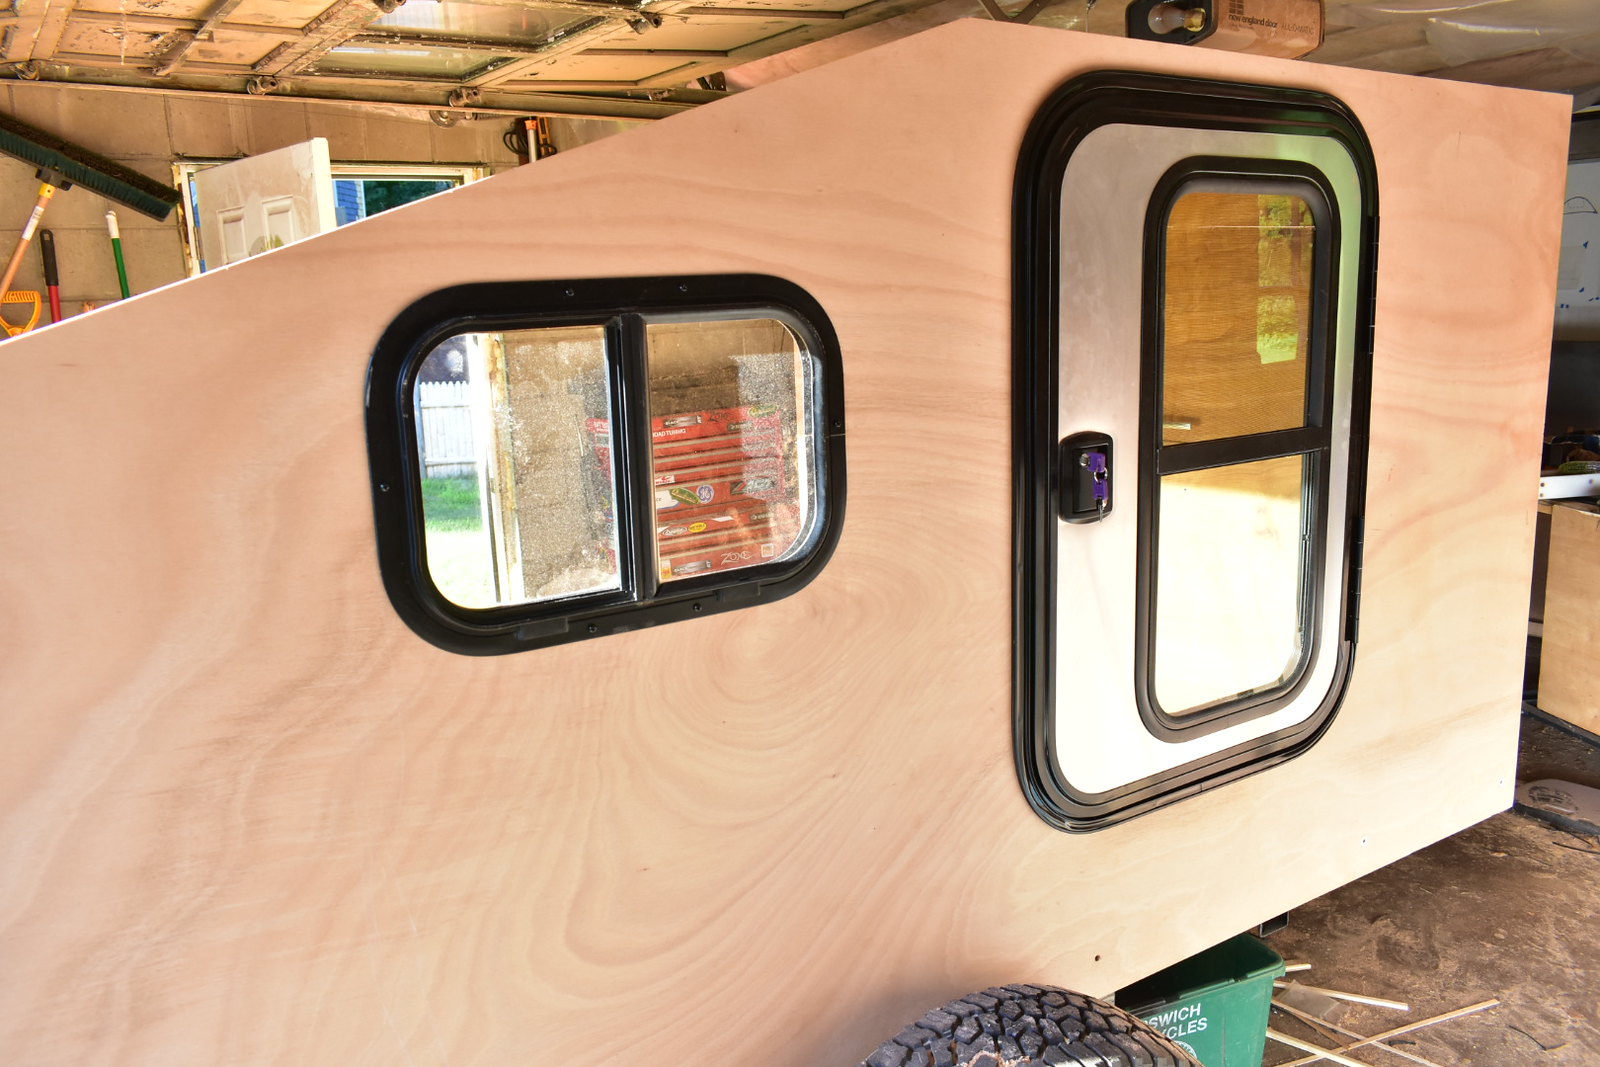
You guys have been patient. I'm super excited. You can finally see the rough profile of this thing. It actually wasn't a ton of work, but this looks like a big step.
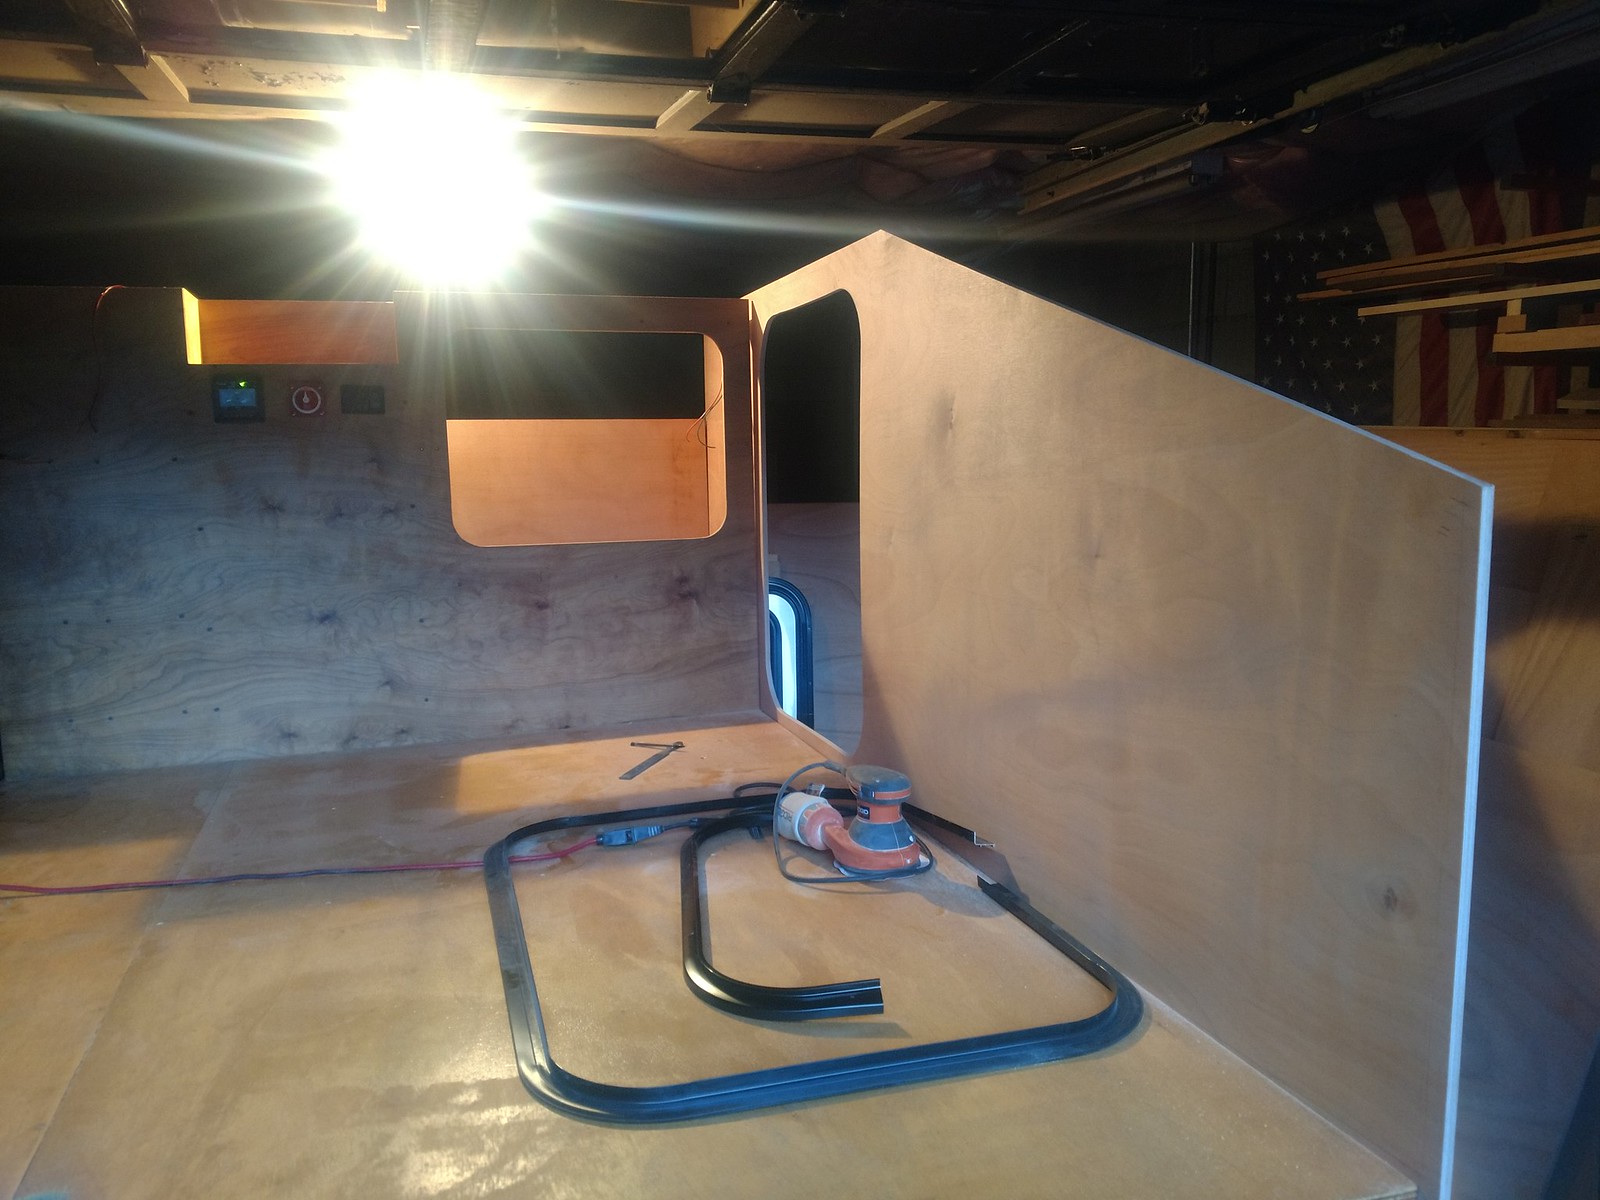
The top front corner will get rounded off, but this gives a much clearer picture of the finished size. I'm hoping to get the wall studded and insulated and finished off this week. Then I can start thinking about the driver's side and the roof.


The top front corner will get rounded off, but this gives a much clearer picture of the finished size. I'm hoping to get the wall studded and insulated and finished off this week. Then I can start thinking about the driver's side and the roof.
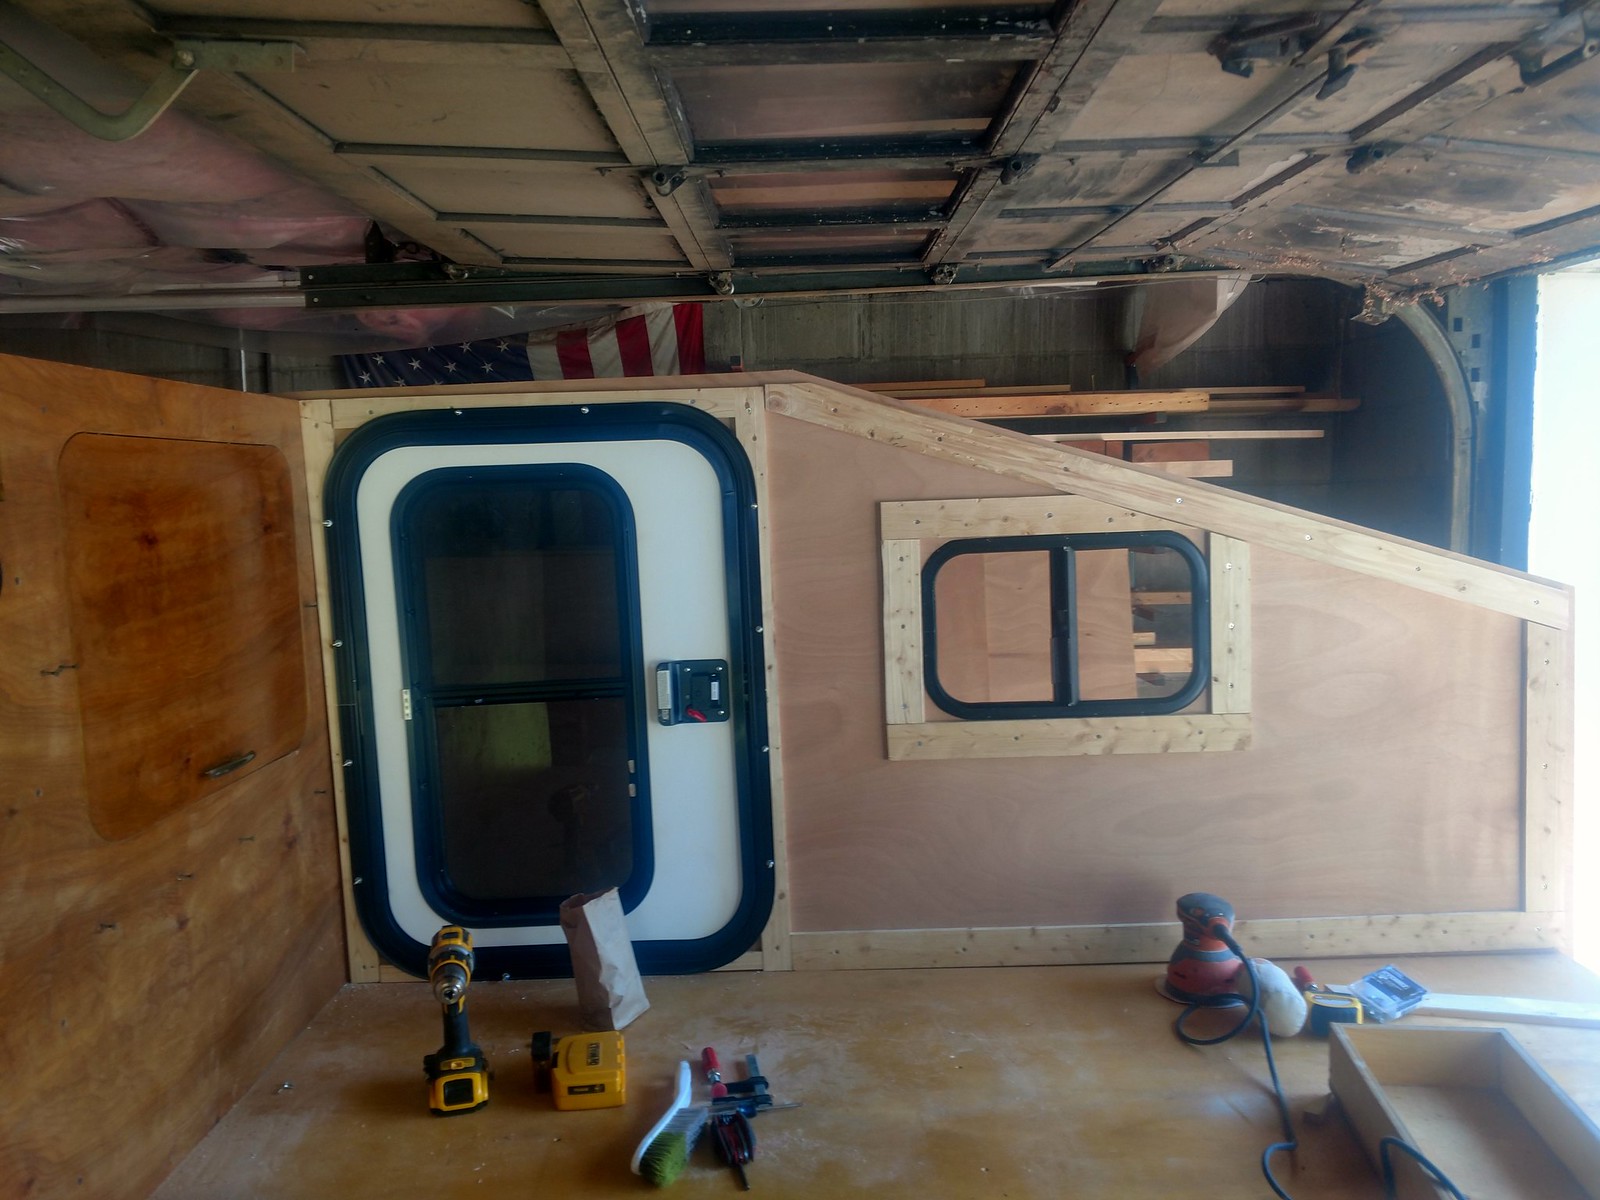
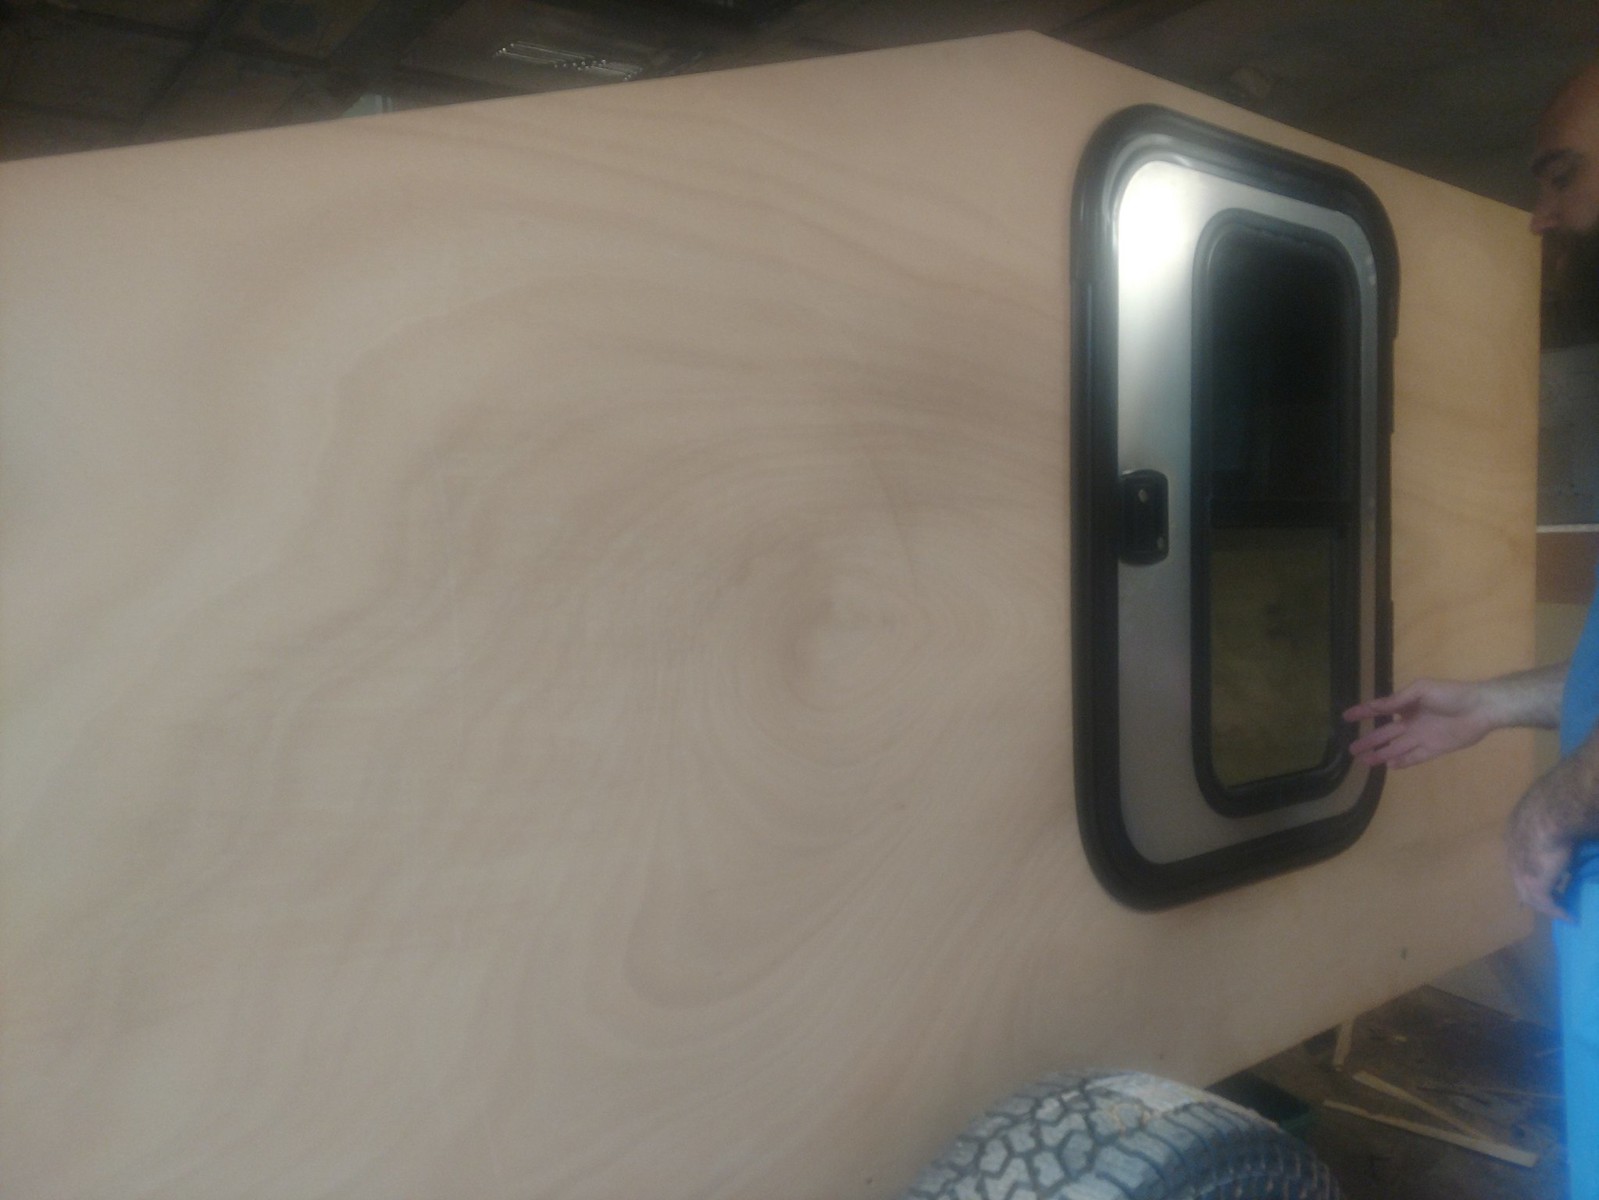
I got the window actually mounted in there securely.
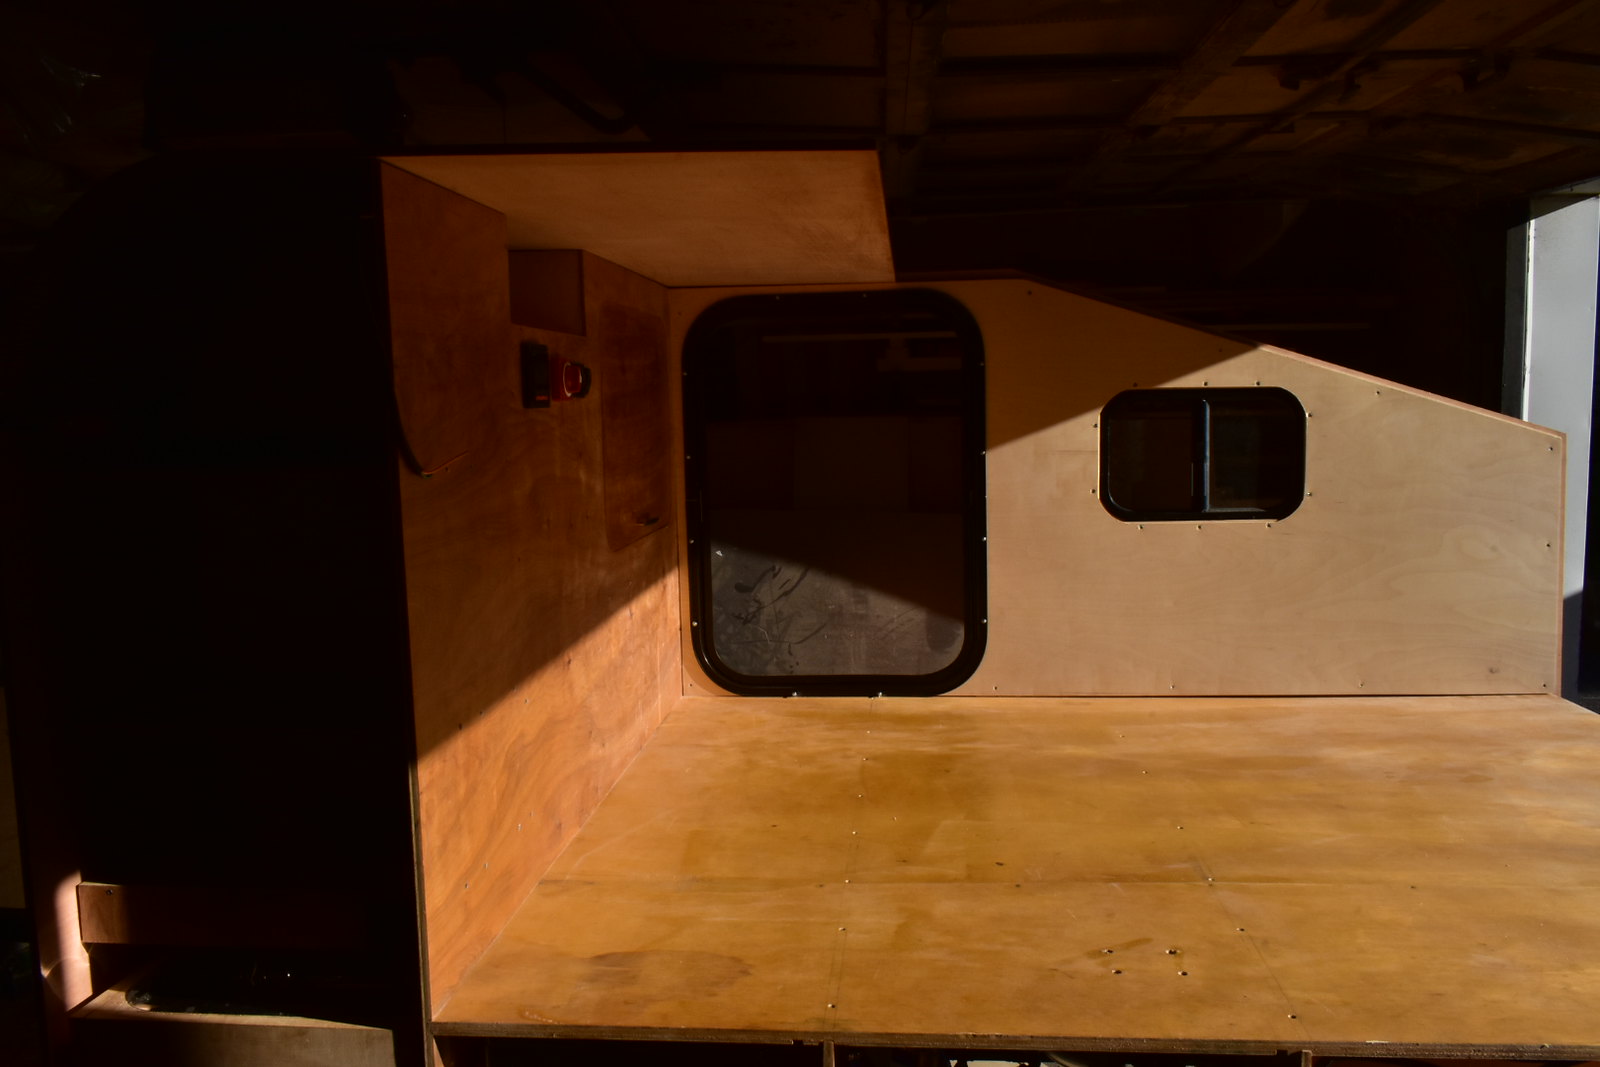
I got the wall insulated and interior skinned.
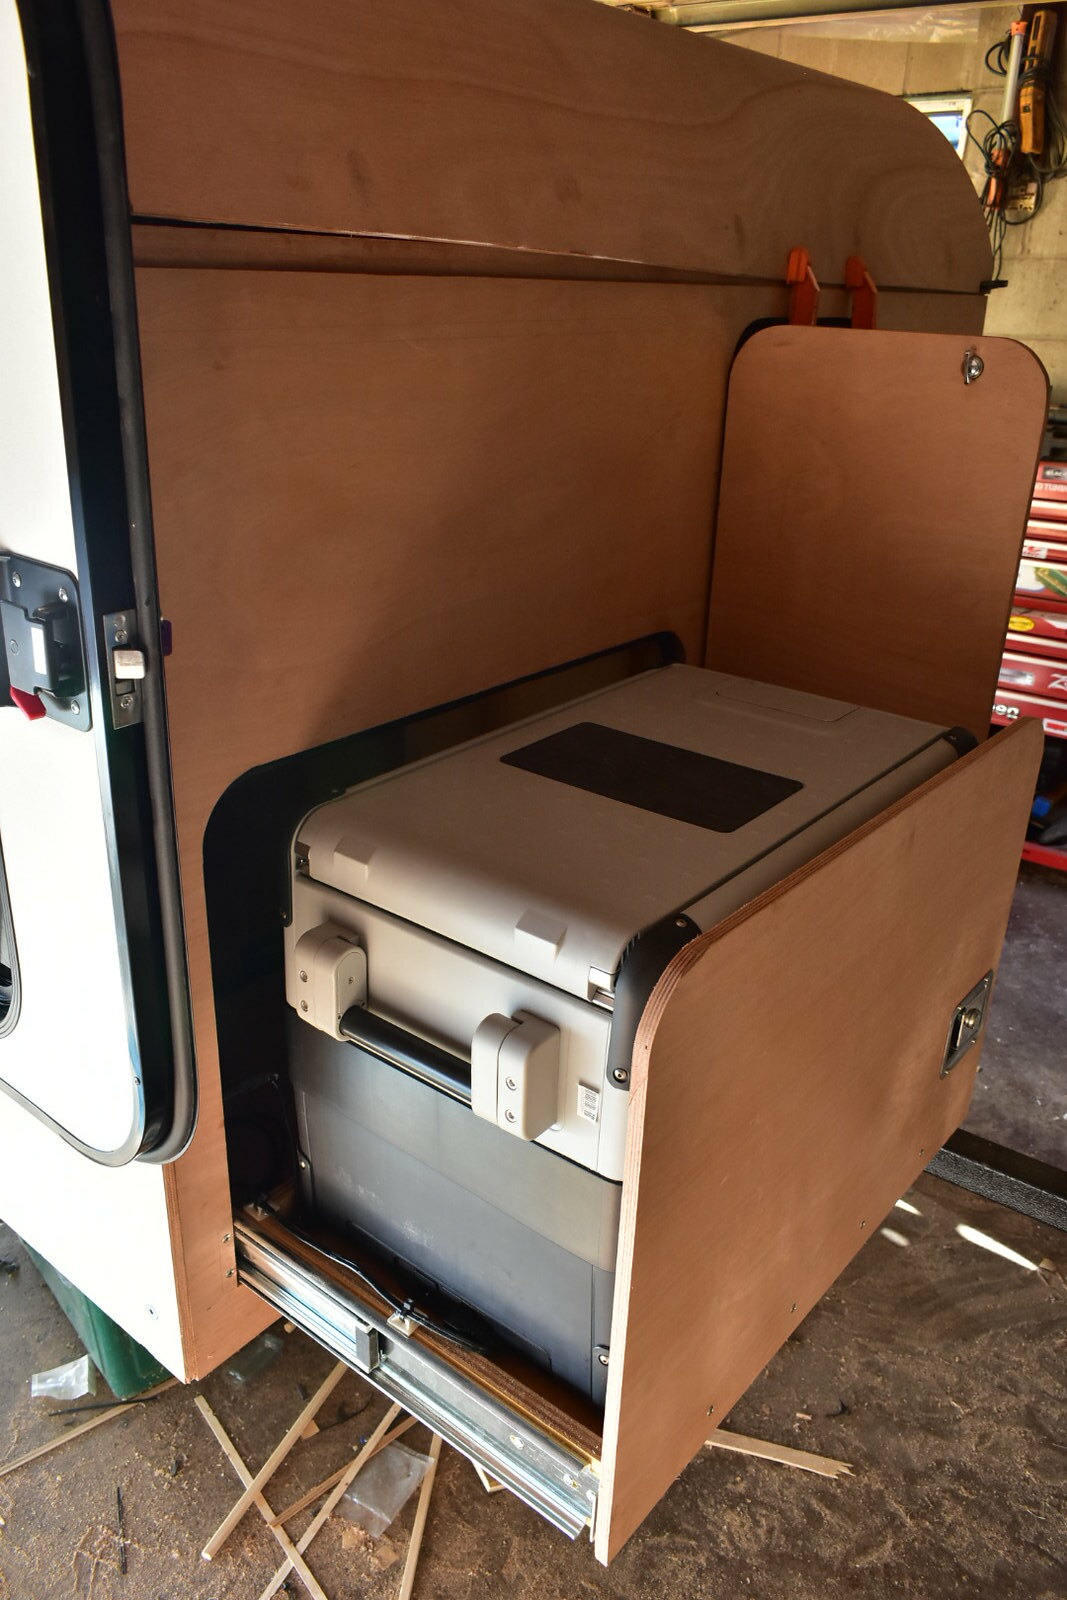
I got the fridge installed 100%, electrically and mechanically. I let it run for a few hours with no issues.
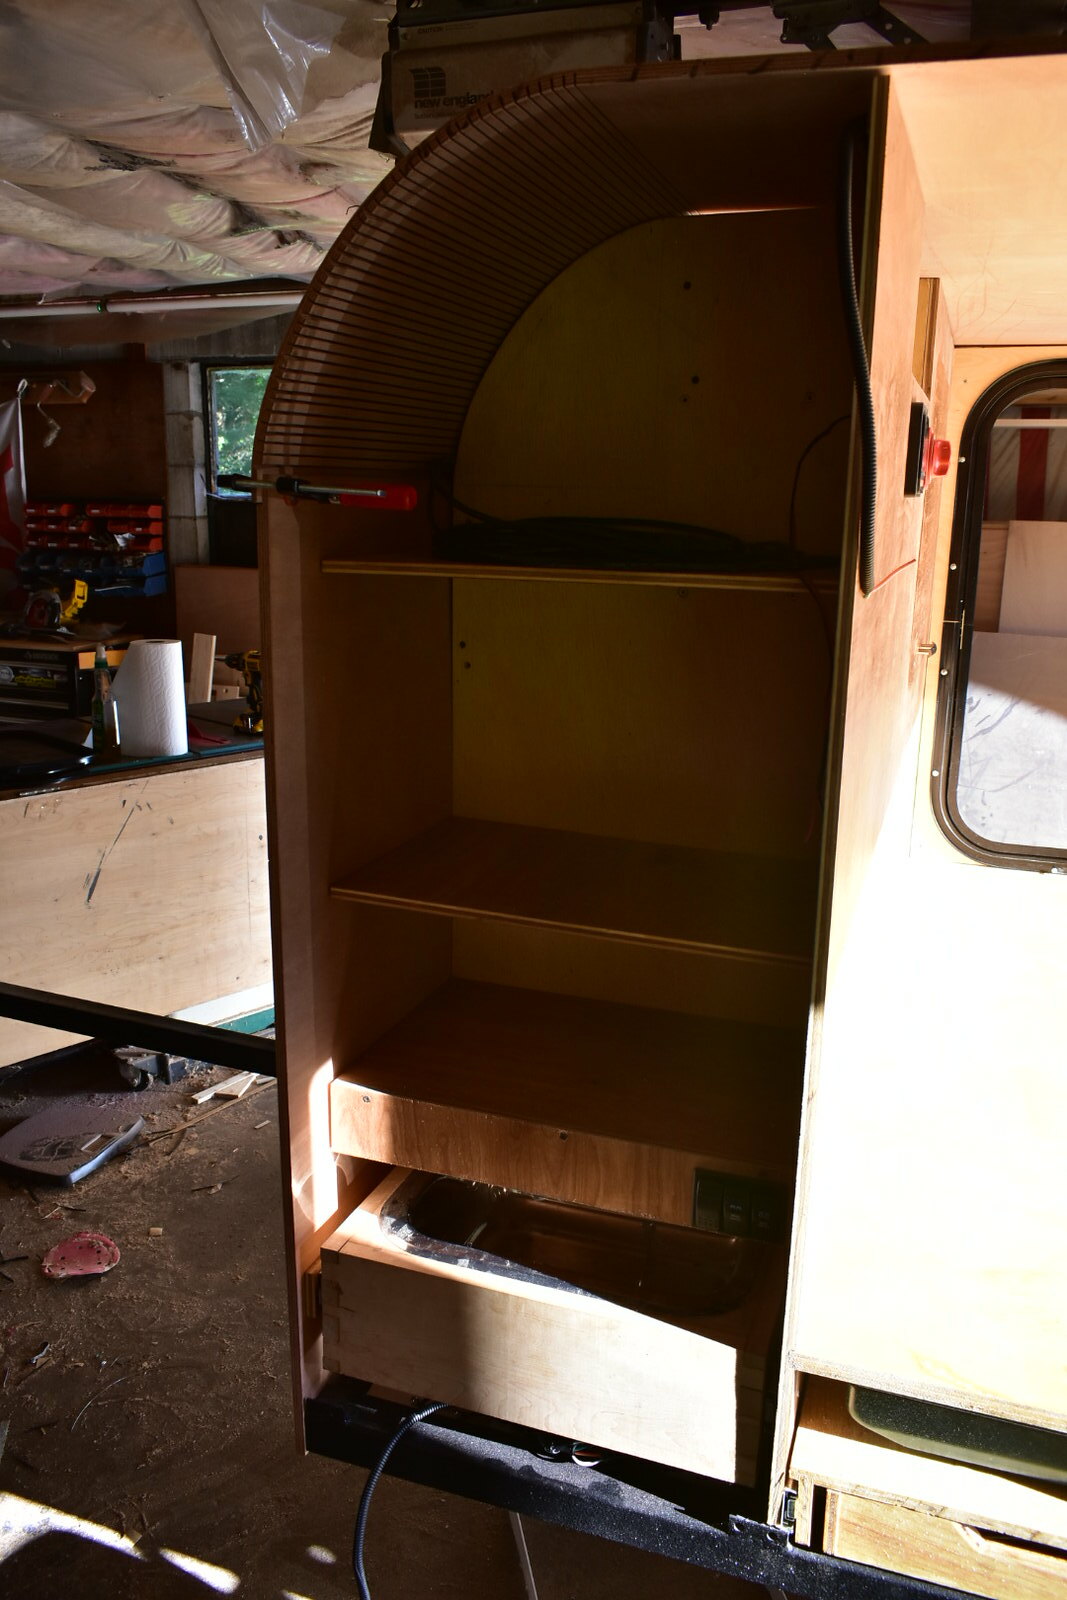
I put the roof panel on loosely just to see what it'll look like. I laid out the cuts for the ceiling fan.

I got the wall insulated and interior skinned.

I got the fridge installed 100%, electrically and mechanically. I let it run for a few hours with no issues.

I put the roof panel on loosely just to see what it'll look like. I laid out the cuts for the ceiling fan.

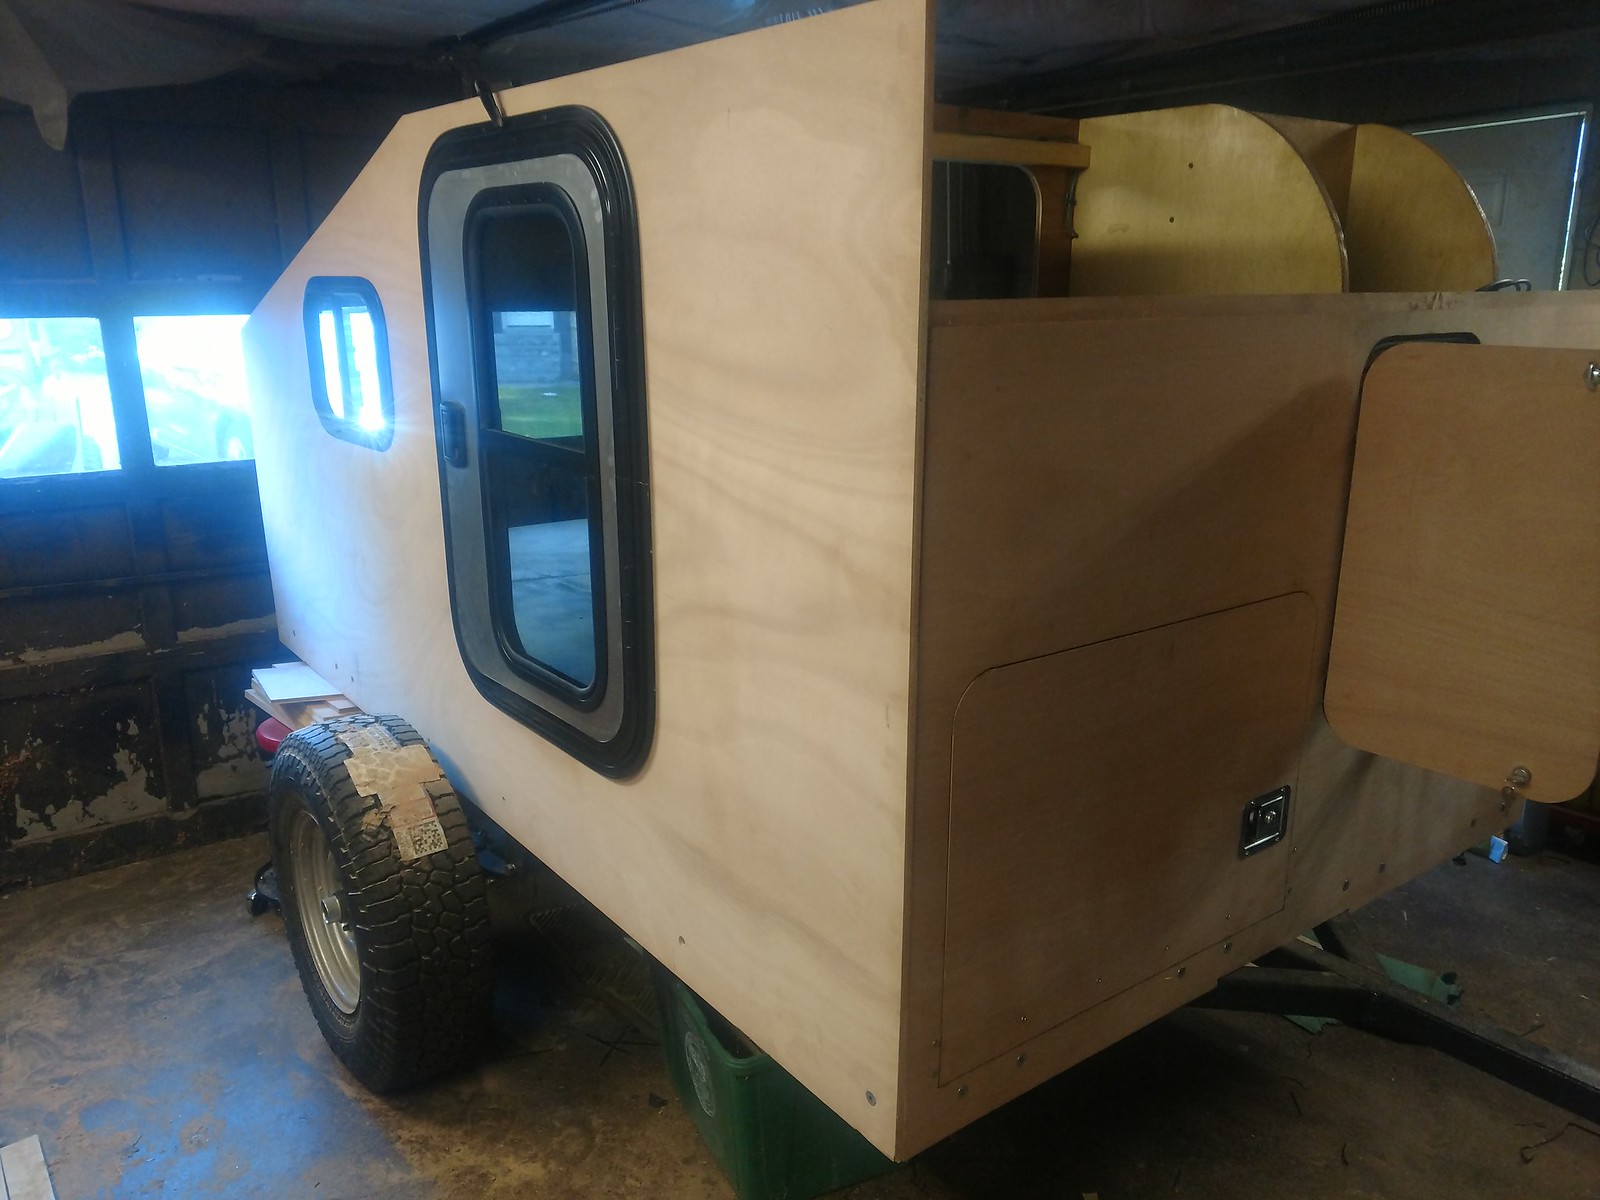
I got the driver's side wall cut. This was the most nerve-wracking thing I think, and the last of the major hurdles to overcome. The tolerances for the openings around the sink and the grill drawers are rather tight, and I didn't want a bunch of ziggy-zaggy cuts for the doors. We triple checked all the dimensions before I cut anything on this panel. It came out nearly perfectly. I need to move the grill very slightly, there's a tiny amount of contact between the grill's cover and the edge of the panel. This is a very minor adjustment. All considered, I'm ecstatic with the way it came out.
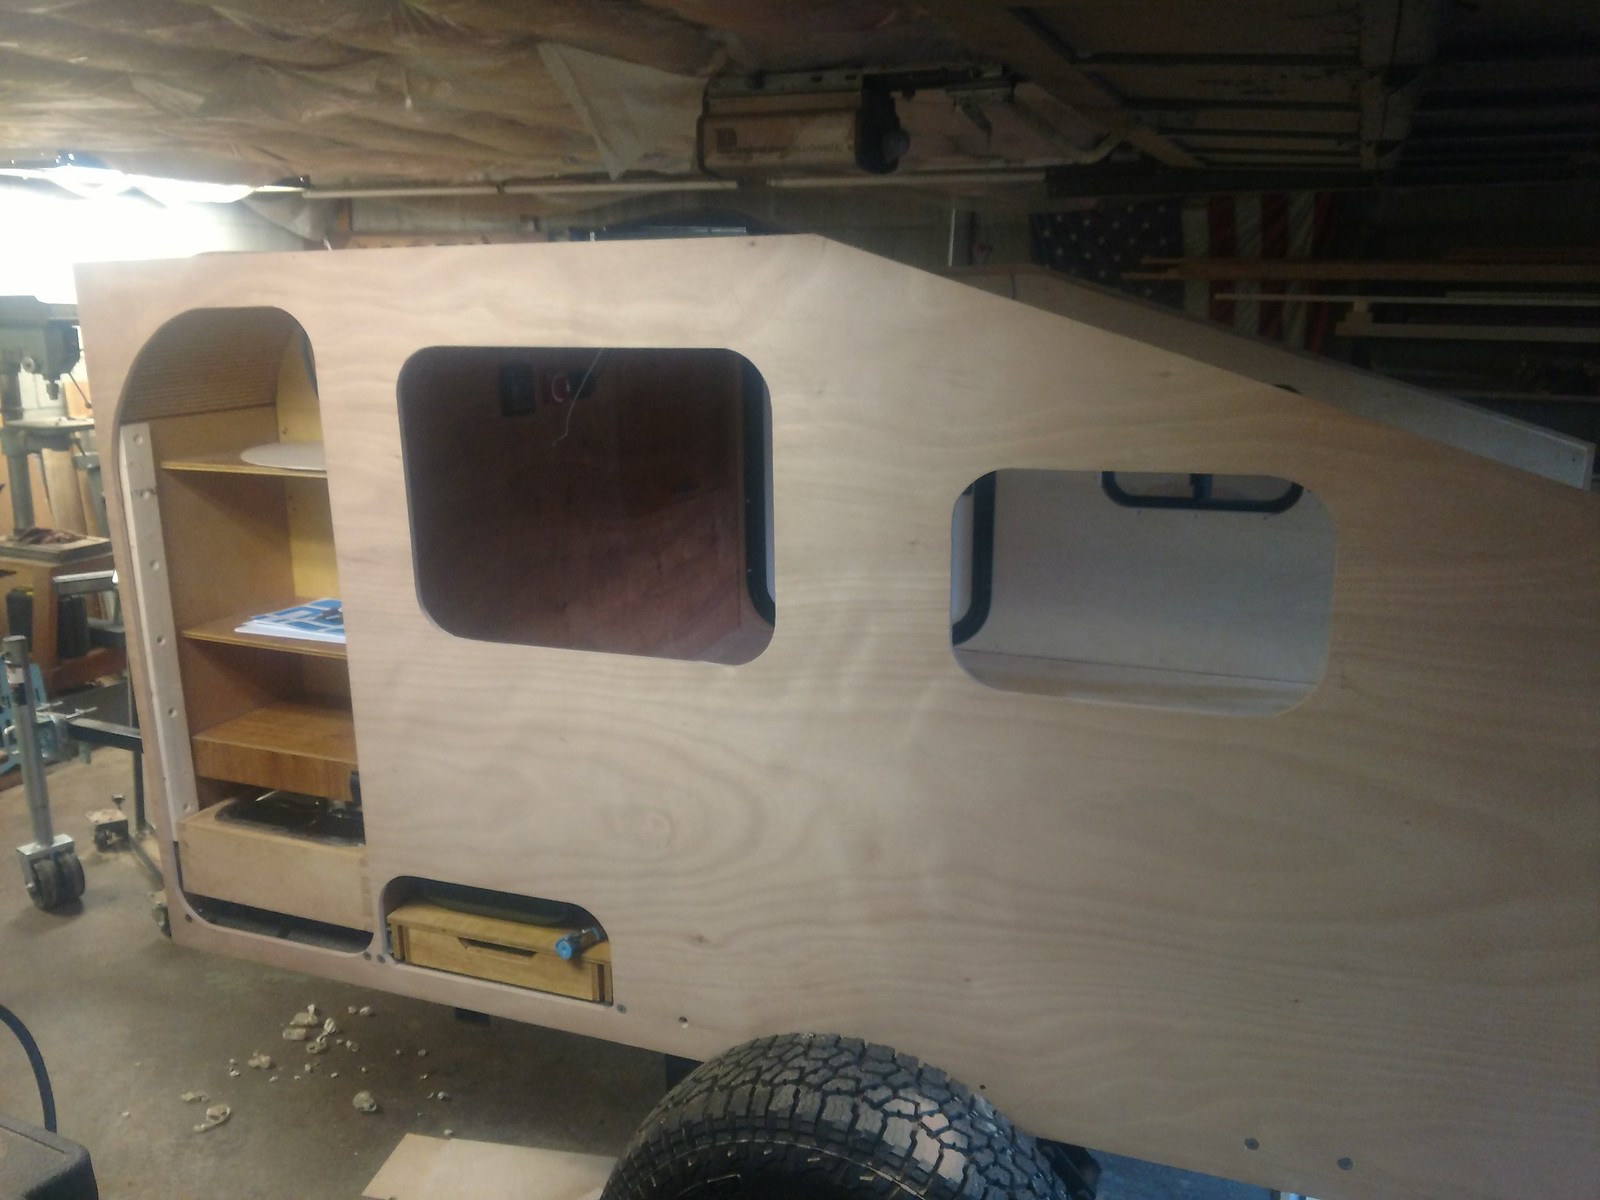
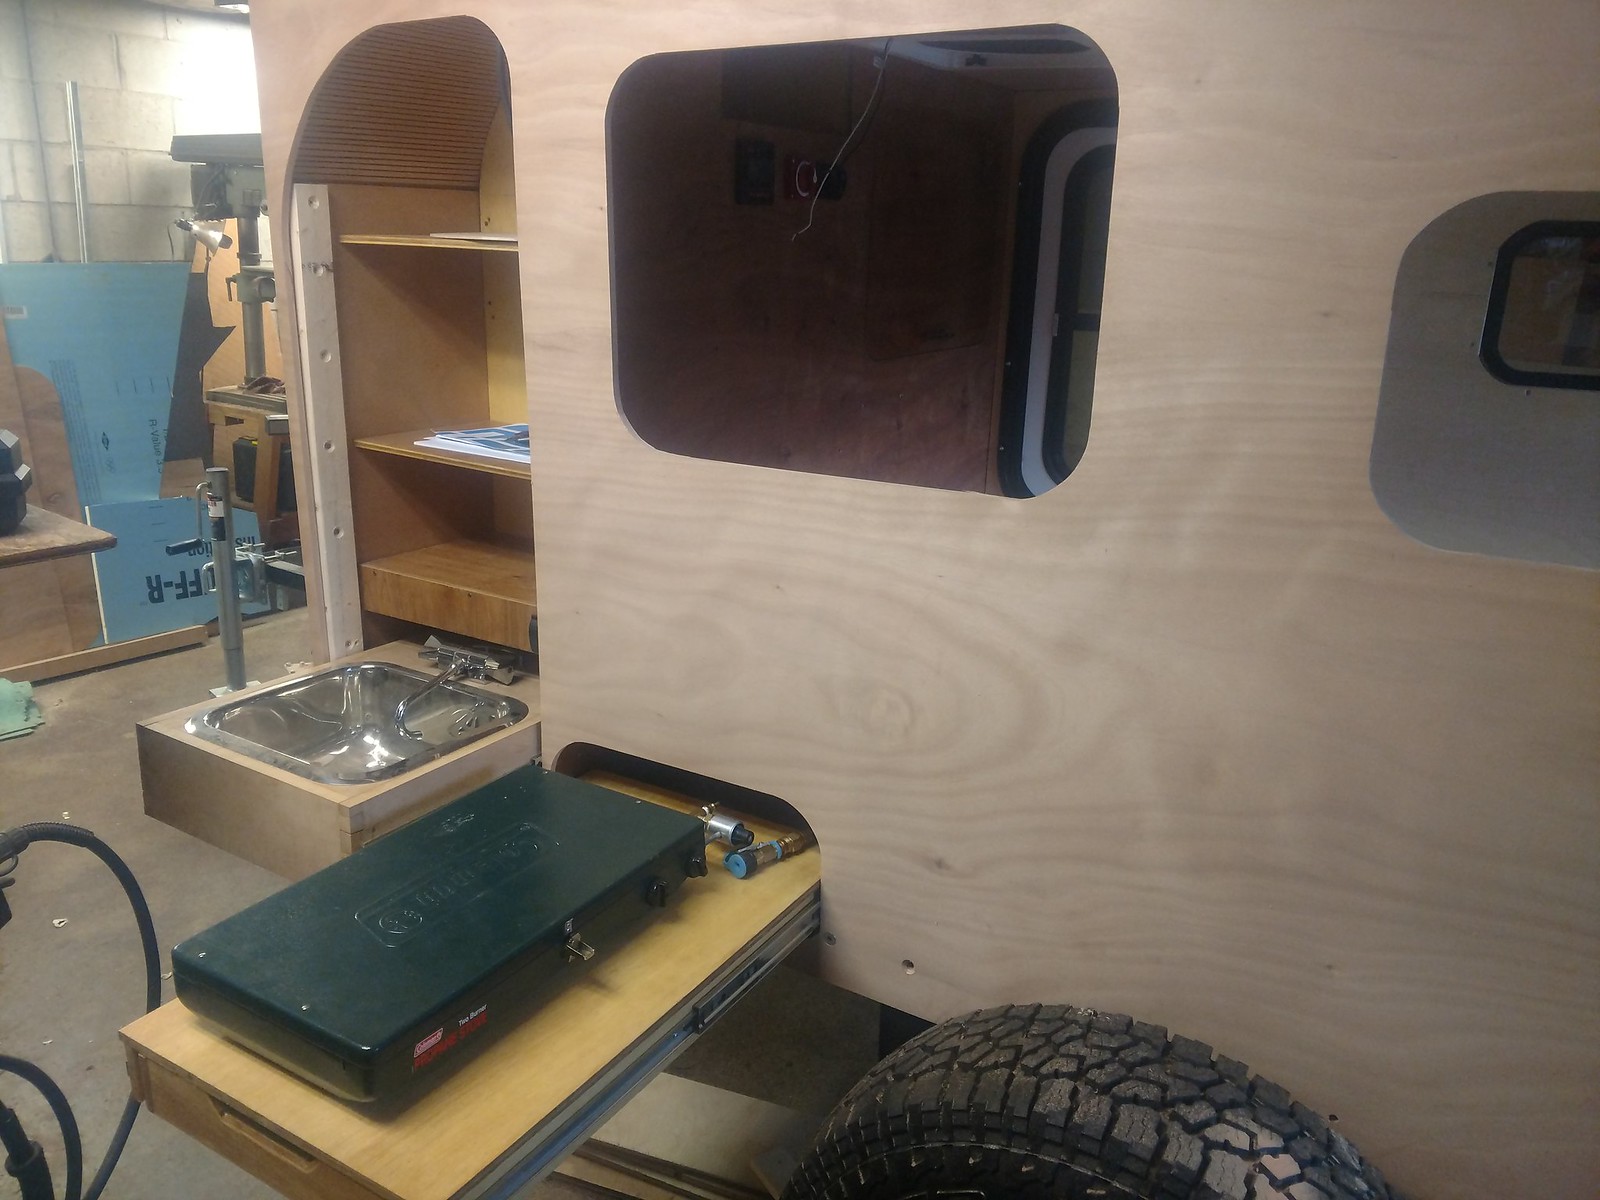
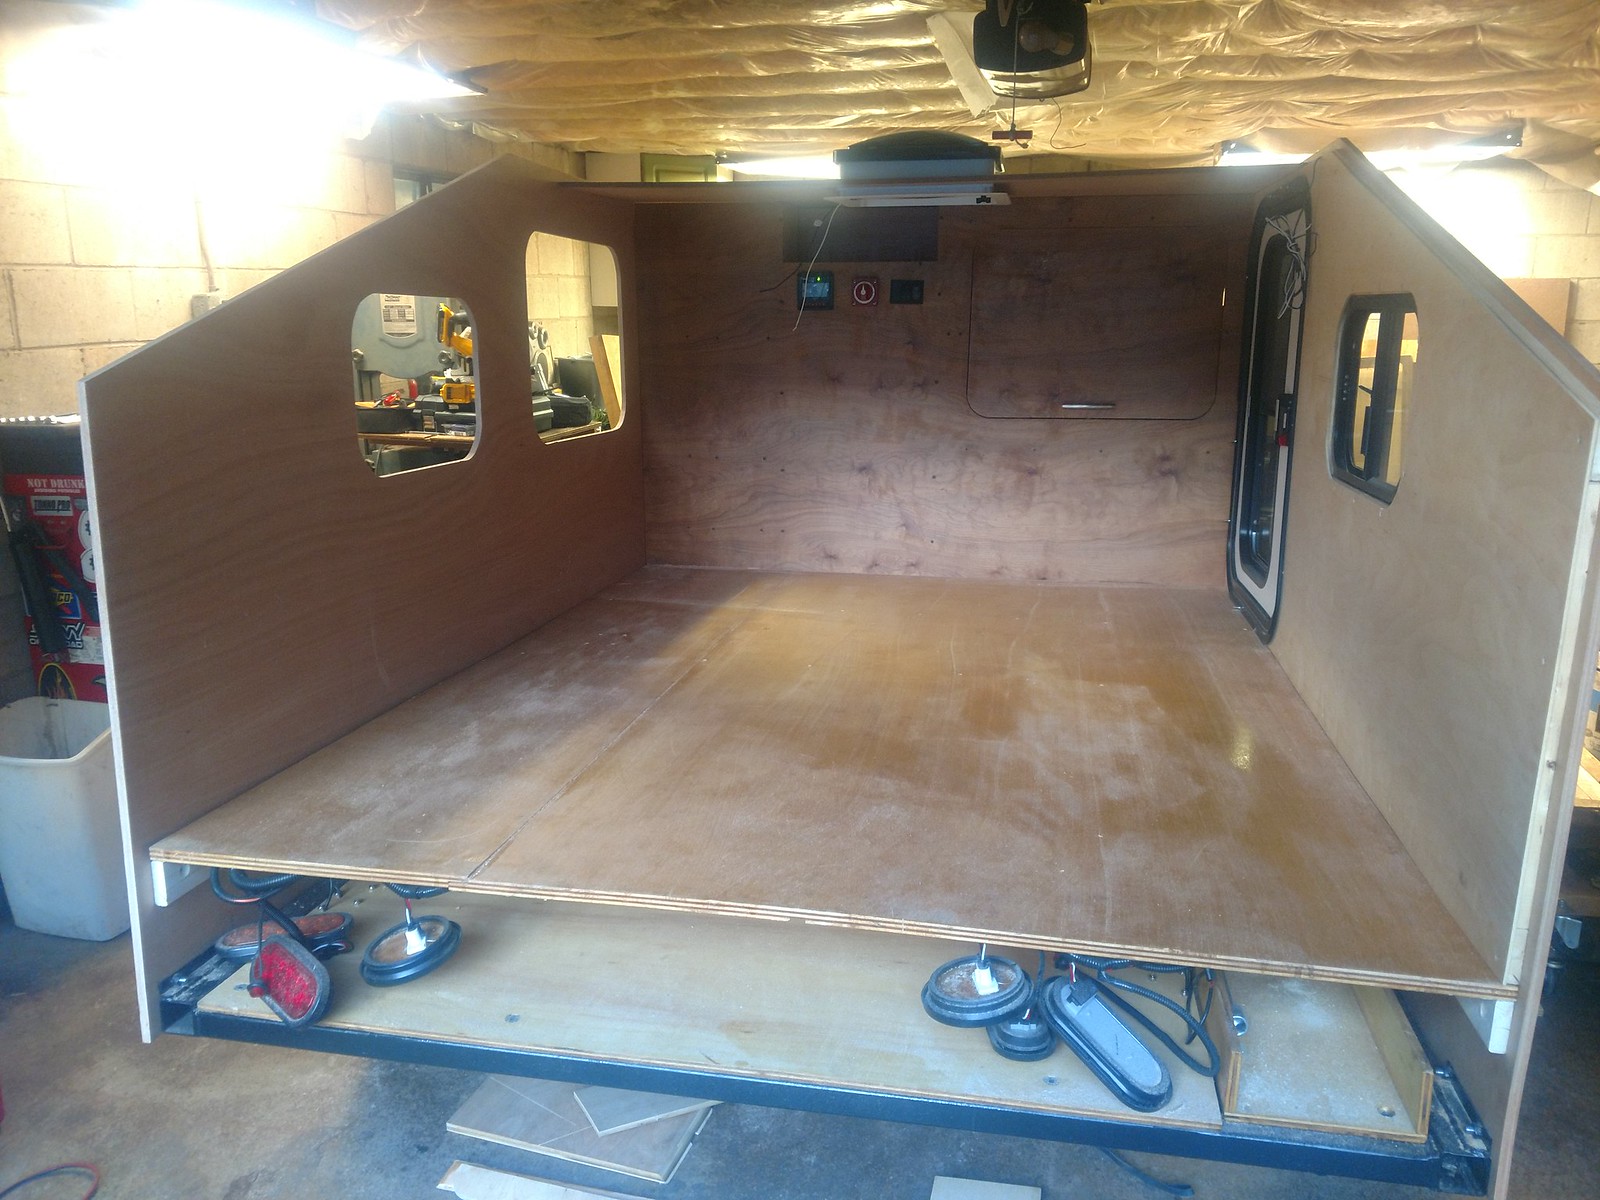
There's still a mountain of work ahead, but it's all downhill from here. Everything from here on out is easier than everything that's already completed. I just need time. I'm targeting a soft deadline of the 21st. There's a family party, and I want to show up with the trailer in tow unannounced. :laugh: I think it's doable, but it's going to be tight.


There's still a mountain of work ahead, but it's all downhill from here. Everything from here on out is easier than everything that's already completed. I just need time. I'm targeting a soft deadline of the 21st. There's a family party, and I want to show up with the trailer in tow unannounced. :laugh: I think it's doable, but it's going to be tight.
Justins_TJ
New member
Looks great man. Big milestone
Similar threads
- Replies
- 0
- Views
- 445
- Replies
- 12
- Views
- 655
- Replies
- 2
- Views
- 486

