Off Road Worthy 6x10 Cargo Trailer Camper Build

Jmanscotch

is wandering
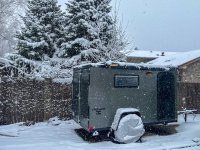
Aimed to get over a hump this weekend by putting the paneling up inside, but snow and a sick daughter kept that from happening..soon though.
IMG_1870_jpg.jpeg


Instead, I worked on a few smaller projects during her nap times. As the snow started to fall, I started fitting the solar panel mounts.

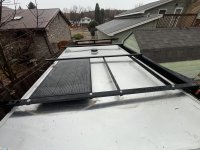
I bought two EcoFlow 100W all black panels. I was going to go for some Renogy units like last time, but these EcoFlows were nearly the same price and featured the black frame, which I though was a nice touch over the traditional aluminum…not that you’ll see it really.

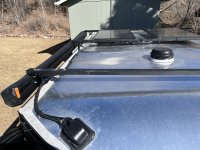
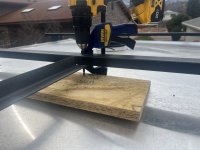
Used 1” angle iron to span between the rear two roof rack cross bars. Simply clamped them in place, drilled a 1/4” hole through the cross bars and angle iron and bolted them down. Tech tip, put a piece of wood under where you’re drilling so you don’t accidentally pierce through the roof when the drill bill punches out the bottom side of the mounts.
IMG_1843.jpeg

Panels sit directly onto the angle iron and bolt down. I though this was going to be the cleanest install, and it is, but there’s two things that make me wish I had done it slightly differently:

- it was a chore to drill the panel mounting holes in the right spot and then get all the hardware installed to bolt them down. Tight and blind spots to get to.

- I think the small crevice between the edge of the panel and the angle iron is going to collect water/snow/dirt and that’s not ideal.

IMG_1841.jpeg
IMG_1848.jpeg


The freezing rain had my hands wet and cold and I forgot to take a final picture of the second panel on. Still need to hook up all the wiring, but the cold and snow meant that’ll have to wait.

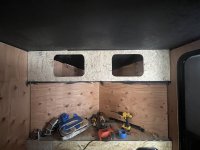
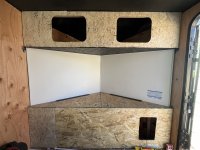
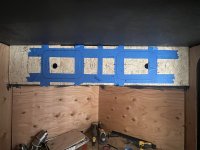
I opted to do an inside project next, cut the holes for the upper and lower cabinets.
IMG_1862.jpeg
IMG_1865.jpeg

Uppers will have either doors over them (because my jigsaw cutting ability sucks and the cuts are too wavy to display) or nets that hold gear inside.

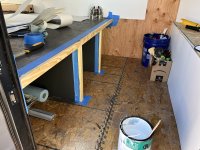
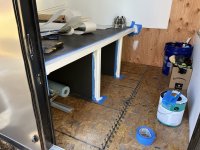
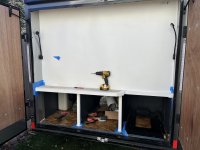
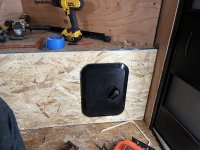
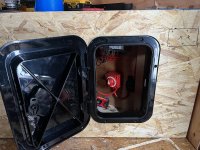
Lower cabinet/bench needed a quick access panel for the main power switch and seeing the status of the battery and such.

Opted to go with a premade marine grade door with trickier latch (relative) as my daughter loves to mess with doors, knobs and such and she would’ve always been getting into a basic hinged door panel and probably turning off the power switch to the camper…so this will maybe help keep her out a bit while she’s in this “open everything and turn every switch” phase.
IMG_1863.jpeg
IMG_1864.jpeg


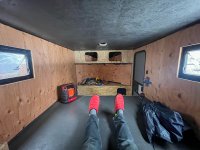
Sat back and relaxed a bit, before getting back to the kiddo. Starting to feel like a camper now.
IMG_1867.jpeg
 

Jmanscotch

is wandering
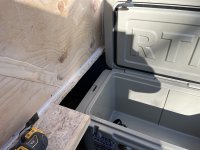
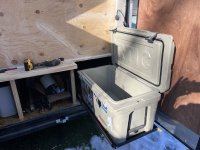
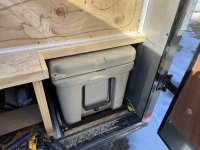
I finally cut out the clearance for the cooler to open. Less than ideal, but it works now and was easier and quicker than any alternative route.

IMG_1982.jpegIMG_1981.jpeg
IMG_1984.jpeg

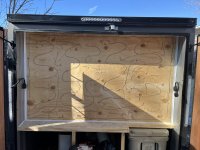
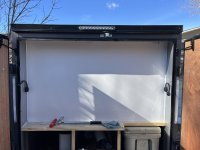
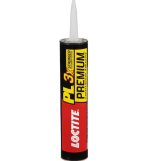
Then started in on hanging up the FRP paneling. I ended up using Loctite PL Premium 3X adhesive caulking and generally, I wouldn’t recommend it. Even with the caulking sitting in the house at 68+ degrees, I found it did not thin/spread out well behind the FRP panels and stayed in a thick line behind it, which will be fine really, but did create some clear high/low spots in the FRP panels that move a bit when you touch them.

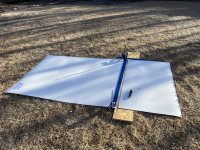
For most of the panels, I took general size measurements and used those to precut and test fit the panels, leaving some of the finer detail cuts to be made inside the trailer. Having a board backer and straight edge helped cut the panels in the yard.

IMG_1980.jpeg

Here’s the adhesive applied and then the panel in place.

IMG_1983.jpeg
IMG_1985.jpeg


I did learn that it was way easier to apply the FRP sheet, leaving a ~1” gap between the edge of the panel, and where the adhesive caulking is applied to, so you could peel back the edge and install the trim AFTER the panel was in place.

Putting the trim up, then fitting the panel into the trim, was my first try and it was the wrong way to do it.

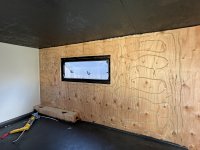
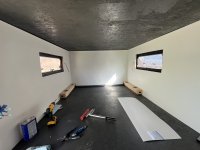
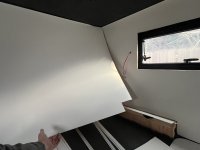
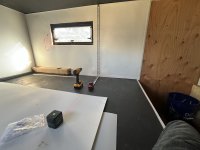
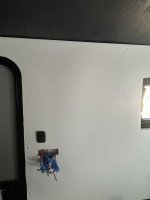
Moved onto the inside. I measure and precut the holes for the bedside light wiring, but put the panels up before cutting the window/door/light switch openings. This panelling is 0.060” thick and I found a fresh razor blade would cut it well with a single pass, so it was easy to use the wood cutouts as an edge to slide the razor blade down and cut a pretty decent reveal around those things.

IMG_1988.jpegIMG_1993.jpegIMG_1994.jpeg

I did get the rest of the v-nose area done, but forgot a picture. I only have a small section on either wall, by the v-nose, to finish now.

I’m color blind though, and ended up getting gray trim, for the trim that joins two panels, so I have to return those and make sure I find the white trim so I can put the last panels in.

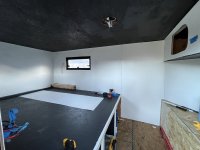
It’s a bit sterile looking inside now, but cedar (or cedar looking) ceiling slates, the bedding, the v-nose bench cushion, flooring and some other touches should help balance that out a bit and cozy it up.
 
Last edited:

Jmanscotch

is wandering
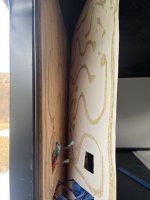
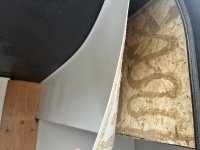
Welp, checking in on the trailer this weekend and the adhesive has failed to hold. It hasn’t completely failed but it has failed on maybe 50% of the total surface area. There’s adhesive properly stuck to the FRP and stuck to the wood, but the adhesive didn’t retain adhesion with itself and pulled away from itself.

I did a lot of reading on how to adhere FRP to the interior walls and there’s issues with lots of options (mainly temperature related for an RV) and this Loctite was suppose to be the ticket, but man does it seem like it isn’t, or there was too much user error on my part. I had heated the inside of the trailer a bit as it was 50 degrees outside during most of the application and while application temp is suppose to be above 40 degrees (per loctite) I figured the surface temp of the wood inside was slightly cold and warmed it up a bit before applying it. I also left the adhesive in the house for days to be at room temp. I can only guess that the temps dropping to the teens overnight just didn’t play well with the curing process and lead to the failure.

Wildly frustrated and planning too mope about it for week or so and see if I think I can save it or if it needs to come out.

I’m half tempted to rip it out and just paint the walls, but I just know that where the adhesive has adhered to the wood, it’ll take pieces with it when I scrap it off. Ugh.

IMG_2089.jpegIMG_2091.jpegIMG_2092.jpeg
 

Jmanscotch

is wandering
Found we had some white trim paint sitting around from years ago and went ahead and painted a bit of the trim inside the trailer.

IMG_2105.jpegIMG_2107.jpegIMG_2106.jpeg


Then tidied up the solar wiring a bit with my favorite wire loom material. I don’t love my routing and roof mounts (3M tape mounted holders with zip ties) so migh try it again down the road.

IMG_2176.jpeg


Then I decided I had cried about the interior panel situation enough and tried again…only to find the adhesive I had been using (for other wood bits on the inside, not the FRP…yet) had absolutely zero instant holding ability (not that it was suppose to, but I presumed it would for some reason). So…move right along to buying a laser level and using that to drill holes and mount the FRP to the walls with screws.

Measuring holes and using the level to ensure they line up. 24” spacing horizontally, 12” vertical spacing.

IMG_2181.jpegIMG_2188.jpegIMG_2182.jpeg

I’m not in love with it, having all these little buttons all over, but it’s functional so I’ll have to live with it. Still need to finish a few more sections, but ran out of the right size screws (always something that requires a store run).

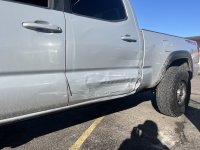
I also have bad news about the Tacoma…got hit by a stop sign runner on the way home from work, so the truck is down for a while and I need to focus on finding something to replace it…which will likely be a Tundra, so I’ll be back after figuring that out.

IMG_2220.jpeg
 

Kingsize24

Well-known member
I did wall screws in mine for the same reason. Glue never seems to be the ticket IMO. Maybe I'm rough on things, not sure, but a good solid fastener I never have issues with.

Trailer is looking good.
 

Jmanscotch

is wandering
I did wall screws in mine for the same reason. Glue never seems to be the ticket IMO. Maybe I'm rough on things, not sure, but a good solid fastener I never have issues with.

Trailer is looking good.

Yeah, I’m sure there is a more ideal adhesive out there that the RV industry uses that’d work well, but it’s likely too expensive for the DIY route, especially when the screws and screw caps are a solid $10 fix.

Wish I had committed to this route earlier as the panels without an adhesive behind them lay on the wall so much smoother/flatter than the panels with blobs of adhesive behind them…
 

Jmanscotch

is wandering
Not sure why I didn’t think to share that detail, thanks for asking.

Loctite PL Premium is what I used first, that failed. Though to be clear, I suspect it might’ve been a cold weather related failure. I didn’t really care for how thick and unspreadable it was before the failure though (even though it was stored at room temp immediately before use and used in ~50-55 degree weather), but the RV internet forums loved it in FRP repair applications (from my research). I’m just one data point for an alternative experience I suppose.


IMG_2377.jpeg

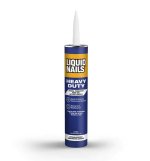
The adhesive I’ve been using for trim pieces and fitting other wood joints together is Liquid Nails Heavy Duty, and it’s been amazing. Very strong bond and easy to work with. It doesn’t, however, have any “instant grab” ability. I used it when glueing and screwing or brad nailing.

IMG_2378.jpeg

As a little side note of an update; working on Tundra deal to replace the Tacoma. Tacoma repairs are looking to be 3-5 months out, due to shop backlogs and other issues. I’m too impatient for that and need to move on with life, so we’ll see if the Tundra I just had shipped here (CarMax) is worth buying or not.
 

Jmanscotch

is wandering
Agreed! Liquid nails is good stuff. And good luck with the truck. Hopefully it's a good deal for you.

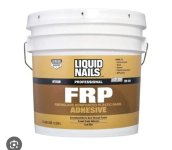
I had originally planned to use this:

IMG_2382.jpeg

I still think a full coverage adhesive like this would net you a better result. The adhesive caulking seems like it will inherently leave some waviness to the panels via unavoidable high and low spots.

I ultimately chose not to use it as I wasn’t confident in its ability to handle temperature swings and hold the FRP without breaking the bond. It’s really meant for interior home/etc use. Even though I did see some examples of people using it in shops (like a detached garage type situation), I couldn’t find information supporting it would last in those temperature swings, so I bailed on it.
 
Idk where you are but where I am CarMax is notorious for buying decent appearing fleet vehicles from the the east coast that are ungodly rusty underneath. Maybe this bothers you, maybe not...but I'd give it a good check over before you take anything home from them.
 

Jmanscotch

is wandering
Idk where you are but where I am CarMax is notorious for buying decent appearing fleet vehicles from the the east coast that are ungodly rusty underneath. Maybe this bothers you, maybe not...but I'd give it a good check over before you take anything home from them.

Indeed. I’m in central Colorado (not rust belt thankfully) and the Tundra is a one owner, bought and owned only in Arizona. Sun-fading/damage is more of the concern on it.
 

vintageracer

To Infinity and Beyond!
Idk where you are but where I am CarMax is notorious for buying decent appearing fleet vehicles from the the east coast that are ungodly rusty underneath. Maybe this bothers you, maybe not...but I'd give it a good check over before you take anything home from them.


With their own fleet of transporters and hired transport companies Carmax is well known in the car biz for moving their inventory around the country. Carmax will buy in one area of the country and move their vehicles to another part of the country IF that model vehicle is selling for "Mo Money" in another part of the country.

With all their locations nationwide they are one of the few that use this type of business plan when it comes to their vehicle inventory. Many times Carmax gets their potential customer to pay for part or all of the transport cost as they have the exact vehicle the customer wants at another Carmax location and Carmax is more than happy to move that vehicle for their customer to purchase. This is one benefit Carmax touts to their customers.

It's not matter of moving "rusty" cars from the East to the West. It' much easier to sell a "rusty" car on the East coast than out West. It's all about the money as that "rusty" vehicle sells for "Mo Money" in another part of the country!
 
Last edited:

Forum statistics

Threads
188,206
Messages
2,903,770
Members
229,665
Latest member
SANelson
Top