On-Island XJ Build

Whaler

Adventurer
My wife and I had identical twin boys last year, so you can probably guess why this thread hasn't been updated. I've been chipping away at Marge slowly and while she doesn't currently have a rear axle, she's in better shape than she has been in a long time. Last summer I did manage to install the Detours Offroad Tailbone rear bumper insert. I want to keep this XJ looking modest and OME-like, so the backbone allows me to add two recovery points and a rear tire carrier and still preserve the stock bumper. The kit is mint and fits perfectly:
IMG_7078.JPG

Take off the stock bumper and the bumper brackets, which can be discarded:
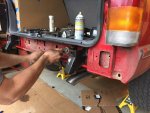
IMG_8401.jpg

I painted all the parts with Rustoleum satin black before bolting it into place. Detours provides a backing plate that mounts on the inside of the unibody, so the backbone and mounting plate sandwich that part of the frame, rather than just relying on a few bolts and washers to support the system. It's very stout, which is no surprise given that the matching front bumper ties all the way back into the unibody where the steering box is mounted. Also, the Tailbone acts a little bit like a torsion box and adds rigidity to the rear of the jeep.
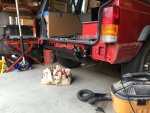
IMG_8423.jpg

I still have yet to notch the rear bumper around the Tailbone to reinstall it and so I've been driving Marge without a bumper skin for nearly a year. The swing arm and hasp mount over the bumper skin, so they haven't been installed except for a test fit:
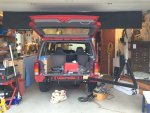
IMG_8427.jpg

I'm thrilled with the product and I'm really excited to try using the swing arm as a support for a fold down table for beach cooking this summer.
 
Last edited:

Whaler

Adventurer
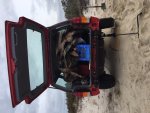
So when you don't install the spare tire carrier and live on a small island, you think its ok to drive around without a spare tire, even when you go camping in the winter, miles from the nearest real road and guess what happens?
IMG_1965.jpg
It was pretty cold and windy this particular night, so we pulled the plug on camping but on our way home... flat. We walked about four miles in a gale before friends drove out through the sand in their Rubicon to pick us up and take us home the rest of the way. Beers on us.
 

Whaler

Adventurer
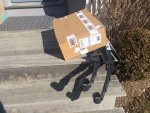
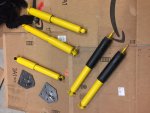
At some point this past year I swapped out the alternator but just swapped in a like-kind unit, which isn't very exciting like suspension replacement... This jeep only has 66k on it, but the suspension was all original as far as I can tell and was spent. I ordered a 2.5" OME suspension lift from Dirk at DPG offroad. It includes JKS quicker-disconnects, JKS adjustable track bar, shocks, coils, springs, U-bolts, sway bar disconnect cables and extended front bump stops.
IMG_2929.jpg
IMG_3237.jpg

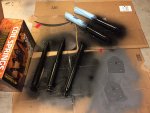
The OME shocks and steering stabilizer come in classic EMU yellow. I want this jeep to be a bit of a sleeper so the yellow had to go and I painted them all black.
IMG_3239.JPG
IMG_3240.jpg
 

Whaler

Adventurer
I started regularly applying PB Blaster to all the necessary bolts in the days leading up to the project. The U-bolts came off with a sawzall and the leaf spring bolts were so frozen that I ended up using my jack stand to lever on the end of my breaker bar. It worked but I pumped the jack with a piece of plywood in front of my body because I thought the breaker bar was going to break.
IMG_3295.jpg

Otherwise everything came out ok, except for the rear shock upper mount bolts which I've learned are notorious for breaking on XJs. I broke all four bolts but before I got started I had found a few write-ups on Naxja and Jeepforum that explain that its pretty easy to pop them out with an air hammer. $50 on Amazon and I had a pretty nice Ingersoll & Rand ready to go. IT made quick work of the bolts and I'm glad I didn't have to cut a floor in the trunk to access them front above. Here's a shot of the bolt hole once it's popped out:
IMG_3344.JPG

At some point I knocked into the rear passenger-side brakeline and broke it. I didn't notice until I saw the fluid...
IMG_3376.JPG

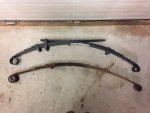
The old system had deteriorated so much that the leaf springs had actually settled into the shape of a "W" when loaded because the axle was reversing their bend in the middle. New and old comparison:
IMG_3377.jpg
One of the leafs in that new pack will come out before installation so as to only lift the rear 2.5".

This is what the rear shocks looked like:
IMG_3379.jpg

My rear bump stops had deteriorated so much they were gone...
IMG_3346.jpg
 
Last edited:

Whaler

Adventurer
Anybody have a good way to rotate a photo after uploading? Some of my iphone photos orient themselves correctly on my computer/phone and then up sideways when I upload and post them.
 

Whaler

Adventurer
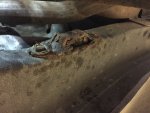
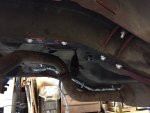
So I kept finding rust. Nothing too bad but evidence that I needed to do something to stop it or risk the jeep deteriorating beyond the point that I felt like I could save it and/or bother spending any more time and money on it. This spot where the unibody frame meets the rear is a good example:
IMG_3445.jpg

Given that I had stripped out the entire rear suspension on both sides, I had a good opportunity to access some otherwise hard to reach places and decided I would take care of some of the rust while I was in there. I did a little research and went shopping.
IMG_3369.jpg
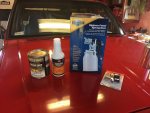
After reading reviews on a number of forums, I thought I would go with POR15, but the guys at the supply house had good things to say about Chassis Saver and the one-step process convinced me, so I took the plunge.

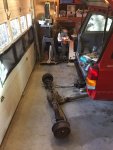
After getting all the supplies I needed, I decided the rear axle was looking a little shoddy and was kind of in my way so... "while I'm in here..."
IMG_3432.JPG

And then I figured I might as well pull the gas tank too...
IMG_3443.JPG

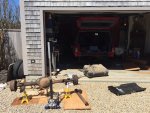
I've read that XJ axle swaps are pretty common. Some folks swap in WJ axles for the disc brakes, etc. but I only pulled mine because it was easy to do so and I wanted it out of the way. I had already removed the suspension and broken the old rusted brake lines, so it wasn't a big deal to pull the axle and drive shaft. I put the axle up on some jack-stands in the driveway so I could spray it with Chassis Saver.
IMG_3450.jpg
 
Last edited:

Whaler

Adventurer
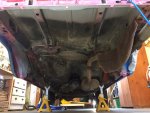
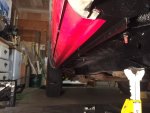
I never planned to paint the undercarriage when I first started in on this project, so while I had gone to the car wash beforehand, it was too dirty for paint. Last night I rolled out some sheet-plastic in my garage, put on a raincoat and went to town with some soap and degreaser:
IMG_3546.jpg

I needed to make sure I could paint today, so the plastic kept the perimeter of my shop dry and also allowed me to pull most of the water out last night. I set up a dehumidifier and the jeep was dry and clean this morning.
IMG_3548.jpg
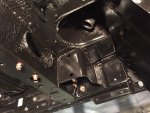
You can see that some kind of rubberizing agent was sprayed on at some point in the past. I always had assumed this was done at the factory, but the more I inspect it, the less I'm sure. I'm suspicious because the spray patterns indicate that some of the earlier brake/fuel lines blocked the spray. I would guess the factory would logically have sprayed before any of those had been installed. Either way, it has certainly helped over the years but the coverage isn't consistent and I hope the Chassis Saver will fill in all the gaps.

Then it was time to prep. I learned on a forum that tinfoil is useful for wrapping components that you need to keep clear of paint. It worked great. I covered over most of the bolts so that the Chassis Saver wouldn't freeze them in place. I already pulled most of my brake lines but you can see a fuel line in the background.
IMG_3558.jpg

Time for paint:
IMG_1566.jpg

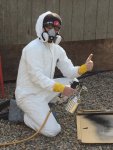
I got the paint applied today and the sprayer worked so well that I don't ever want to roll or brush ever again. I'd say I spent about six hours for prep, paint and clean-up but only painted for about an hour. Love that gun. I'll post some before and after photos tomorrow after I've had the chance to assess the results in the morning.
 
Last edited:
Whaler

Adventurer
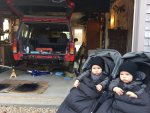
These two are responsible for the downtime between my projects and they're also the ones who I hope benefit from all this Chassis Saver work!
Fellas.jpg

Finally, with the Chassis Saver complete, I can start putting things back together.
 

JSwanson

Observer
Looking good. Jealous of that tailbone. I emailed about one since they discontinued and never heard back. Did your bump stop bolts come out? All 4 of mine broke right off.
 

Whaler

Adventurer
Looking good. Jealous of that tailbone. I emailed about one since they discontinued and never heard back. Did your bump stop bolts come out? All 4 of mine broke right off.

I think I called Mark (at Detours) when I ordered my Backbone and I asked about the Tailbone at the same time. He acknowledged that it was discontinued but was willing to make one as long as I was willing to wait. It took a long time (months) but he came through for me. I got lucky with the bump stops bolts and they all came out after a few days of PB Blaster prep, but they were in pretty bad shape by the time I got them out.
 

Whaler

Adventurer
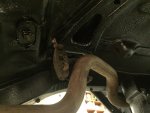
Pleased to report that the morning after the Chassis Saver looks like it is living up to its billing. I spent about ten minutes under the Jeep this morning with a warm and fuzzy feeling. I reinstalled the penultimate exhaust bracket and it really shows the difference:
5.jpg

I had covered most bolts with tinfoil and taped the perimeter of the spray-area, but I was concerned that it might be hard to remove those prep materials. Thankfully, it all peeled off easily with a clean paint line. The sheet metal seam (pinch weld?) between the lower body panels and floor hard started to rust (a bad spot for beach jeeps especially) and I think this Chassis Saver will make a world of difference.
4.jpg

This is what the rear passenger-side leaf spring shackle pocket looked like before:
IMG_3554.jpg

Here's the driver side, after:
3.jpg

Now I can finally start with reassembly.
 
Last edited:

JSwanson

Observer
I know how much of a pain in the butt that was, but totally worth it in the long run. Looking forward to seeing it with the lift.
 

Whaler

Adventurer
Thanks JSwanson.

I'm trying to pick away at this but haven't had much free time at my disposal. Last weekend I only managed to wire-wheel a few spare parts. Afterwards I hit them with a rust converter and primed them tonight. I'm painting the shackles, gas tank straps, rear axle brake line clip, rear exhaust support bracket and the e-brake splitter housing. I'm also painting the rear sway bar mount brackets, which bolt to the leaf spring plates. I'm not going to reinstall the rear sway bar, but I like the idea of having the brackets in place anyhow in case me or my boys ever decide to drive this Jeep across the country and want to put it back on temporarily for a long highway haul. Am I over thinking it?

IMG_3786.jpg

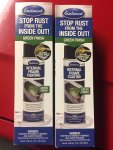
I've also been doing a little prep for an application of Eastwood's Internal Frame Coating. I'm going to spray every bit of the unibody interior on the Jeep's rear. I've been trying to use a pipe-cleaner styled tool to abrade the interior and scrap off any loose rust but the interior is difficult to access. A vacuum seems to get a lot of dust out at least. I was also surprised to find out that Eastwood's coating is green. I'm a little worried the over-spray will degrade the look of the recent Chassis Saver paint-job, but I don't want to re-mask the edges. If I had it to do over again, I would start with the internal frame coating first but didn't have that idea until later. Maybe it's a silly concern because no one else will ever see it, but it still bugs me. I'm trying to tell myself its just a beach Jeep and not a show car...

IMG_3787.JPG
 

Whaler

Adventurer
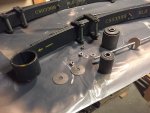
I started pressing the leaf spring bushings into the leaf springs tonight. I started with one of the smaller bushes; greased it up and used some 3/8" threaded rod and a stack of washers to fashion a makeshift press.

IMG_3795.jpg

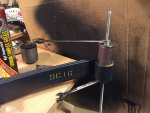
The press worked well even though I was deforming the large washers under pressure. By the time the bushing was half way into the leaf spring, I need to use a breaker bar to apply enough force to keep advancing the nut along the threaded rod. Ultimately I broke the threaded rod, twice. I'll have to give it another go with some 1/2" rod but I don't have any on hand. I measured the inside of the bushing with calipers and 1/2" rod should juuuuust fit. I hope.

IMG_3796.jpg

I took some solace in painting the spare parts I primed up a few nights ago.

IMG_3799.JPG
 

JSwanson

Observer
Put your bushings in the freezer overnight, supposedly it shinks/compresses slightly. I am not sure how much it really helps but I have read it makes it easier. It cant hurt anything.
 

Forum statistics

Threads
188,013
Messages
2,901,135
Members
229,411
Latest member
IvaBru

Members online

Top