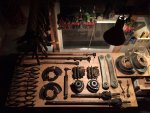
On-Island XJ Build

Anak

Stranger
The press worked well even though I was deforming the large washers under pressure. By the time the bushing was half way into the leaf spring, I need to use a breaker bar to apply enough force to keep advancing the nut along the threaded rod. Ultimately I broke the threaded rod, twice. I'll have to give it another go with some 1/2" rod but I don't have any on hand. I measured the inside of the bushing with calipers and 1/2" rod should juuuuust fit. I hope.

View attachment 398079

I don't think you will have any problem fitting a 1/2" rod through there. The factory bolts are 14mm. A 9/16" rod should fit. In the unlikely event that you get to choose thread type you will be best off with Acme threads. Of course you will also need Acme nuts to go with that. Life will also be easier if you lube the threads. Anti-seize makes an excellent lubricant (and given your climate you should be using anti-seize liberally on most of the hardware).

I do think you will have a problem getting the bushing all the way in with your setup as pictured. The bushing should be wider than the leaf spring, probably by about 1/2". You need some sort of receiver cup on the bottom side of that arrangement. The simplest solution is probably a large 1/2" drive socket. Large enough that the bushing can just fit inside it. And a 1/2" drive socket should still accommodate your 1/2" rod. Finding a socket to clear that front bushing may not be possible though. BFH?

For washers, look for thick washers, hardened washers or just take a couple pieces of 1/4" thick steel and drill 1/2" holes through them. They don't have to be round, just large enough to distribute the weight out to the perimeter of the bushing and of the socket.
 

Whaler

Adventurer
Jswanson and Anak, thanks for the insight. I'm going to use both pieces of advice. Regarding the "receiver cup" on the bottom side of the make-shift press, I think you're absolutely right, Anak. I was going to drill out a hole in a piece of hard wood and hope that would nest against the leaf spring eye while allowing the bushing to pass through the hole in the hardwood. That hardwood will also provide some backing to my thin washers, which were deforming under the stress. If the leaf spring eye starts to depress into the hardwood, I'll include a thin layer of sheet metal on top of the wood. I'm not set up to drill large holes in heavy gauge metal, so I'll make do with what I have and see if I can get the wood to work.

I'd like to get the rear end back together and on the ground this weekend (probably unrealistic) so I'm planning on getting a lot done tonight: hopefully all the internal frame coating and a successful installation of the bushings.
 

Whaler

Adventurer
I applied the Eastwood Internal Frame coating tonight on the rear 2/3rds of the uniframe. I was glad I bought two cans because I used them both completely. It made an awful mess but I had a full coverall suit on and plastic over my garage floor. The green over-spray isn't great looking on the undercarriage, but most cleaned off easily with some Xylene. Each spray-can comes with a 24" hose that goes on the end of the can's cap. On the end of the hose, there is a 360 degree applicator that sprays in all directions and works pretty well. That applicator end is metal and pretty thin, maybe 3/16" or less, so it fits through small holes. You feed the hose into the uniframe and then back it out slowly while you apply the material. I don't yet have any opinion on the efficacy of the product but I'll take a look tomorrow after it drys and report back anything notable.
 

Whaler

Adventurer
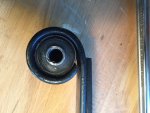
After upgrading the threaded rod in my "press" to 7/16," I still ended up breaking the rod after getting the bushings about 3/4 of the way into the leaf spring eye. You can see in the image below that the eyes were a little small and they were deforming the outer metal ring of each bushing at the point were the eye terminates and the eye radius is the smallest:

A (1).jpg

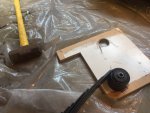
After that I decided I would start each bushing with the press and finish it with a sledge hammer. I used a hole saw to cut some voids into a piece of plywood, laid the leaf springs down on top of it and pounded the bushing ends into the void.

A (3).jpg
 
Last edited:

Whaler

Adventurer
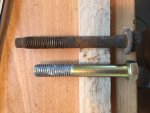
With the bushings in place is was FINALLY time to start putting things back together. My old bolts were all in pretty rough shape, I soaked them in Coca Cola (yup, seriously) and then used a dremel wire wheel to clean them up but they still looked pretty gnarly, so I ordered new ones. The factory parts websites were all pretty expensive on a per bolt basis but teamcherokee.com had a package of six bolts for $35. When they arrived, I was worried they were the wrong size, but they worked:

A (6).jpg

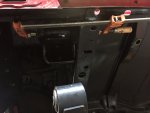
I started on the drivers side and installed the front end first. Then I attached the shackle to the leaf spring and then tried to get the shackle connected to the frame last. That was a bad idea because I couldn't get the bolt to thread and was doing it blind because you can't see the end of the bolt, not can you see the threaded hole in the unibody to receive the bolt. After that I decided I would get the shackle attached to the unibody first and then connect the shackle to the rear leaf spring eye. Getting the bolt driven through the shackle was surprisingly difficult. The confines are too tight to swing a hammer and I couldn't get a pry bar to provide adequate force so I ended up using a woodworking clamp. The bolt still fought the clamp; I would crank it down and nothing would happen and then with a "pop" it would advance a millimeter or two and I'd have to repeat the process. I lubed the heck out of the shackle bushing and bolt and still got the same result. Here's my clamp set-up:

A (10).JPG

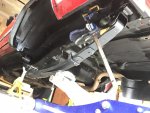
Getting the rear leaf spring eye and the shackle to line up was tricky because the new leaf springs have enough bend to them that the distance between the eyes is too short for the rear eye to reach the rear shackle unless it's under load. To put it under load and stretch the leaf out, I put my floor-jack under the leaf spring and then reversed a clamp, so that it became a spanning tool that could force the rear leaf eye away from the unibody. By forcing the middle of the spring up with the floor jack and forcing the rear of the spring back and down with the clamp, I straightened it out enough to get the eye and shackle to line up.

A (13).JPG

After both the springs were installed, I put the replacement bump-stops in because it was easy and I was enjoying checking things off the list. :) I hauled the rear axle back into the garage tonight and will start replacing brake-lines, etc. next. I need all new hydraulic and e-brake lines, so I'll have to do a little reading up.

A (19).jpg
 

Whaler

Adventurer
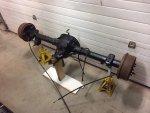
I've been chipping away on this project but haven't posted any updates. After getting the axle painted, I replaced the rear axle brake lines and hoses.

IMG_3868.JPG

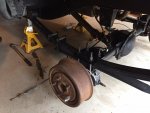
With the OME springs already installed, I hung the axle and with new U-Bolts and DPG Offroad's adjustable bump stop plates. I'm leaving out the rear sway bar, but I did reinstall the sway bar axle mounts (hard to see in the photo) just in case I ever want to install them for a cross-country highway trip, for instance.

IMG_3874.jpg

With the axle reinstalled, I reconnected the driveshaft (which I really wish I had repainted!) and used some new U-joint straps and bolts.

IMG_3879.jpg

The next step was to reinstall the rear shocks. In XJs, those rear upper shock bolts are notorious for breaking upon removal of the factory shocks. All four of mine broke on both sides, leaving welded bolt heads adhered to the unibody. After doing some research, I discovered a few different strategies for remedy, including quite a few people cutting holes in the rear floor to create temporary access from above. I really wanted to avoid that so I opted to knock the welded bolt heads out with an air hammer, which wasn't too difficult. Once the bolt hole was clear, I attached new bolts to the end of a wire and using that wire to snake the bolt into place from an access opening in the unibody. It worked great. Thanks again to those who freely share their solutions online!

rear shock nut.jpg

With the rear shocks installed, it was time to drop her back down and take a look at the new stance...

IMG_3889.jpg

It's always fun to stand back and appreciate a newly implemented project and even though I was only halfway through this one, it was a satisfying moment. While the suspension package I bought is listed as a 2.5" lift, my old suspension was really worn out and had likely sagged a full inch in the twenty years since it was installed; so this yields a net 3.5" increase in stance. That's a big difference when you've driven the Jeep for years.
 
Last edited:

Whaler

Adventurer
During the process I also took care of a few loose ends, including rehanging the the gas tank and the rear exhaust mount, which I repainted before it was reinstalled:

IMG_3884.jpg

My "return fuel vapor line" was completely rusted through and certainly wasn't returning any vapor, let alone liquid fuel, so it doesn't seem strictly necessary but I figure I'll put one back if it was designed that way originally. I've done some researching and no one sells this, nor does the dealer have access to such a part. The dealer tells me that people use vacuum hose or something like that, so I'll use something flexible and zip to it to the supply line and rear main rear brake line.
 

Whaler

Adventurer
before I started on the front end, I wanted to park the jeep in the other direction inside my garage. After the axle re-installation, I hadn't completely reconnected the main brake line so I had a buddy help me and we moved it carefully, under power. Luckily the incline outside my garage is only very slight and the gravel driveway slows the tires down a little bit...

Pulling the front axle was hard work because I was doing everything manually with a breaker bar and ratchets. The worst part was dealing with an upper control arm flag bolt. I had a hell of a time trying to keep that flag head from rotating. In the end I ended up cutting one of them with a sawzall because I was so frustrated by it. With the axle removed, I had a notice that my axle shaft u-joints were shot. Damn. Further, he told me that with twenty years on the shafts, I'd be smart to replace the entire axle shaft assembly rather than just the u-joint. I figured I'd start to take the axle apart to identify anything else that I might need to replace, but I needed a number of large sockets that I didn't have, so it's been a start and stop process. I now have the calipers, wheel hubs and axle shafts pulled out. I'm waiting on a 28mm socket to get the knuckles off tomorrow.

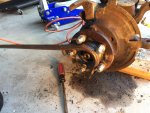
The hubs were seized onto the axle shafts and knuckles. I managed to get three bolts out on the driver's side but only one of three on the passenger side, so I cut the heads off with my Dremel:

IMG_4216.jpg

I didn't take the whole head off the bolt, instead I used a series of cuts to take off the flange around the head of the bolt in pieces. I did it that way because then the bolt head and shaft were still proud of the knuckle, which gave me something to pound on with a hammer. If I cut the heads off flush with the knuckle, I would have needed to use a punch to apply any blows to the bolts, which seemed hard to do accurately with force. It might have been more work than necessary to cut them this way but its my first time doing any of this and I'm trying to proceed carefully.

Later, I borrowed a 36mm socket in order to pull the axle shaft nut and release the wheel hub assembly from the axle shaft. Because my axle was completely removed from the vehicle, wrenching on the nut simply spun the axle because the other end of the axle and the differential weren't attached to anything and could spin freely. I tried to secure them both with some clamps to no avail before I decided to lock the wheel hub I was working on with a long pry bar. I struck the hooked end of the pry bar inside the lug studs of the wheel hub and set it up so the pry bar would lever against the floor. I put lug nuts on the wheel hub studs to protect the threads. I'm replacing the wheel hubs but will keep these as emergency spares. One spins with an audible click but the other is in good shape.

IMG_4217.jpg
 

Mr_Miyagisan

Adventurer
View attachment 401931

It's always fun to stand back and appreciate a newly implemented project and even though I was only halfway through this one, it was a satisfying moment. While the suspension package I bought is listed as a 2.5" lift, my old suspension was really worn out and had likely sagged a full inch in the twenty years since it was installed; so this yields a net 3.5" increase in stance. That's a big difference when you've driven the Jeep for years.

If you got the same pack I did, which I'm pretty sure you did. you need to remove one of the springs to get the 2.5" (3rd from the top??), DPG should've said something to you about it.
EDIT: nevermind, I read this wrong
 

Whaler

Adventurer
If you got the same pack I did, which I'm pretty sure you did. you need to remove one of the springs to get the 2.5" (3rd from the top??), DPG should've said something to you about it.
EDIT: nevermind, I read this wrong

You're still right though as I did remove one of the leaf springs in the pack to yield the 2.5" increase. I'm curious whether that extra leaf might someday compensate for a heavily loaded trunk. I plan to build out some storage and for a long trip, dedicated trip, the extra leaf might come in handy.
 

Mr_Miyagisan

Adventurer
You're still right though as I did remove one of the leaf springs in the pack to yield the 2.5" increase. I'm curious whether that extra leaf might someday compensate for a heavily loaded trunk. I plan to build out some storage and for a long trip, dedicated trip, the extra leaf might come in handy.

Exactly what i plan on doing. With the rtt mounted I didnt lose anything. But once I get the bumper, spare, etc on the rear I'm assuming ill be putting that spring back in
 

Whaler

Adventurer
I did some Dana 30 research and found this particularly helpful reference on Naxja. I believe I have a Dana 30 non-disconnect RS, which Jeep started using with the advent of the Select-Trac t-case. After an assessment, I'm replacing everything: wheel hubs, axle shafts, ball-joints, brake hoses & lines, bolts and nuts... the whole lot. It comes to the sum of $807 without any shipping. Here's the parts list:

Front Axle Parts.JPG

Is that too much money to sink into a twenty year old Dana 30? I'm hoping that I'll get some positive encouragement. Here's my thinking: with a 2.5" lift, I don't plan on ever running anything larger than a 31" tire (don't really want to cut the flares), but and will probably run a 30 tire on the stock 15x7 wheels in the immediate term. I don't have any plans to wheel it hard. Instead, I want it to be as robust and durable as possible with increased capability, while being easily maintained with readily available parts. I might put lockers in it someday, but I'll never add trusses or anything else that heavy wheeling might require. One of my favorite aspects of the XJ is that it is so light, because I spend so much time driving in the sand. As it is, I don't need to air-down to drive through deep sand on the stock tire size and I love that about the vehicle. Someday I might swap out the rear axle with a WJ's rear in order to upgrade to disc brakes, but I'm hoping I can make the Dana 30 stick up front over the long haul.

Specific notes on the parts I selected: 1) the Spicer axle shafts upgrade the u-joints to a 1/2 ton 297/760 joint which is stronger than stock, 2) the StinkyFab upper control arm reinforcement plate (another Naxja tip) is a weld-in piece that reinforces the weakest link on the Dana 30, which is the filmsy, welded and unboxed mount on the passenger side and 3) the '95 YJ brake hoses is a BleepinJeep tip that provides a little extra length to the brake hose in an OEM part.
 

Whaler

Adventurer
Out with the old...

IMG_4231.jpg


I pulled the control arms completely from the frame and also removed the sway bar mount in order to clear as much out as possible for undercarriage paint. Sunday night I wire-brushed the underside of the front end to clear loose rust. Next, I'll prep it for paint by washing it down with water and a diluted, water-based degreaser. Then I'll repeat the Eastwood internal frame coating and Chassis Saver applications that I've done on the rear end.
 

offroad_co

New member
Someday I might swap out the rear axle with a WJ's rear in order to upgrade to disc brakes, but I'm hoping I can make the Dana 30 stick up front over the long haul.

Not sure what axle the WJ has, but you should look into the ZJ disc brake upgrade. I think you have the Chrysler 8.25, which can fit ZJ disc brake backing plates with only a little dremeling of the center hole. If you search around you'll find lots of write ups and theres even a guy on cherokee forum that will go to the junk yard and grab all the parts. I did this upgrade recently and it was pretty easy.
 

Whaler

Adventurer
Not sure what axle the WJ has, but you should look into the ZJ disc brake upgrade. I think you have the Chrysler 8.25, which can fit ZJ disc brake backing plates with only a little dremeling of the center hole. If you search around you'll find lots of write ups and theres even a guy on cherokee forum that will go to the junk yard and grab all the parts. I did this upgrade recently and it was pretty easy.

Thanks offroad_co. My mistake, I meant the ZJ disc brake upgrade. I do have the Chrysler 8.25. Interesting to learn that I don't have to swap out the whole axle and can just adapt the disc brakes onto the 8.25. Thanks for the insight and I will look into it.
 

Forum statistics

Threads
188,013
Messages
2,901,135
Members
229,411
Latest member
IvaBru
Top