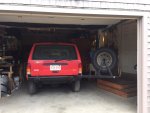
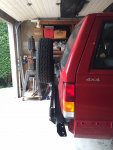
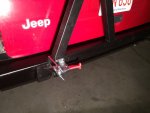
On-Island XJ Build

Whaler

Adventurer
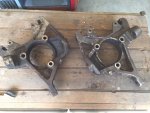
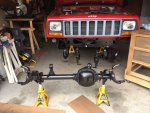
I had a hell of a time getting the knuckles off the axle. I had assumed I could pound the ball joints out: nope. I had to borrow a ball joint press from a friend, but my impact gun couldn't apply enough force for the press to pop the ball joints out. I finally used MAPP gas to heat the axle eyes and then pounded the axle eyes with a three-pound sledge while I was turning the ball joint press with an impact gun in my other hand. That worked. The borrowed ball joint press had a 6 am curfew so I ended up finishing up in the dark.

IMG_4287.jpg

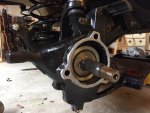
Today, I hit the knuckles, brake dust shield and axle with a wire wheel and then washed them down with degreaser to prep them for paint. They all cleaned up better than I expected.

knuckle clean up.jpg

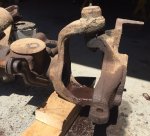
Axle condition before:
IMG_4236.JPG

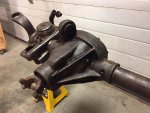
After:
IMG_4302.jpg
 

Whaler

Adventurer
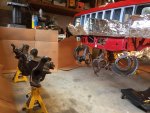
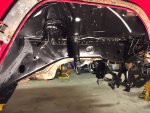
I've been working on the Jeep but haven't had time to post any progress updates. The front axle, knuckles, dust shields and front-undercarriage all were painted at once so I didn't have to clean the sprayer twice. I got a little lazy with my masking and ended up needing to clean some over-spray off some sheet-metal.

IMG_0387.JPG

I hung the small parts from the front frame for paint.

IMG_0396.JPG

IMG_0392.JPG
 

Whaler

Adventurer
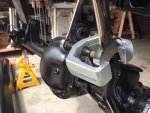
Next, I had to prep the front axle for re-installation. The suspension kit I purchased included JKS quicker disconnects. They connect to the axle at the lower sway bar link holes and the OEM bolts are pressure-
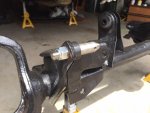
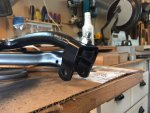
fit and difficult to remove. I heated and beat on them but couldn't get them to budge, so I bought a pitman arm puller and used it with a torch and small sled until I finally persuaded it out. I used a wrench between the pitman arm puller and the bolt's mount because the puller's jaws were to large to grab on the sway bar link mount:

IMG_0401.JPG

The JKS quicker disconnects have a tapered post that serves as the mount for the quicker disconnects. On the end of the disconnect, a sleeve slides over the tapered post and is held in place by a cotter-pin for easy removal.

IMG_0404.JPG

The disconnects use a different connection on the sway bar ends as well:

IMG_0403.JPG
 

Whaler

Adventurer
Getting the new axle installed by myself was a little tricky. I had to raise the front of the Jeep higher up on the jack stands in order to fit the new taller coils because I don't have a pair of coil spring clamps. Once I squeezed the springs in place, they fought me while I was trying to get all the control arms reconnected. Since its only a 2.5" lift, I repainted the OEM control arms and reused them but would like to upgrade them at some point. I never understood the geometry of how the shorter OEM control arms would "pull" the axle rearward until I was trying to fight those springs while reattaching the control arm bolts.

IMG_0418.JPG

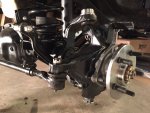
With the control arms attached and the axle back in place, I installed new ball joints and the repainted knuckles:

IMG_0415.JPG

After the knuckles, I installed the new Spicer axle shafts. The old ones came out easily but the new passenger side axle shaft didn't want to slide all the way in and kept getting stuck about 1" too far out. For some reason, the splines on the shaft weren't seating correctly inside the front diff. I was pretty sure that they were clearing the axle seal but it wouldn't budge. I did some research and learned that some shafts are installed with guides that can remain in the axle tube but the inside of the axle tube seemed perfectly clear:

IMG_0427.jpg

The grease pattern on the splines showed that they started to slide in but only to a certain point. I didn't want to use a sledge on the wheel-side end of the axle shaft because I was worried it would damage the new u-joint, but I managed to use a pry bar and 3-lb sledge to strike the axle shaft ear instead, next to the u-joint, and that sent it home the rest of the way.

IMG_0421.JPG
 

Whaler

Adventurer
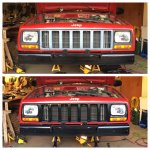
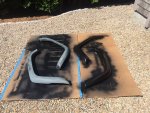
While I was working on the axle painting, I took a moment to repaint the front grill trim and fender flares with some plastic spray paint. All the plastic trim on this Jeep has faded to a dark grey and this makes a big difference.

IMG_0408.jpg

I've used some Griot's Garage trim cleaner and restorer on these parts previously but the effect doesn't seem to last. It seems t be more effective on the bumper end plastic than the flares and door guards.

IMG_0410.jpg

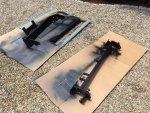
I also re-painted the Detours Offroad Backbone (front) and Tailbone (rear) bumper systems for re-installation. I had removed each of those so that I could get full coverage on my undercarriage repainting and rust sealing.

IMG_0405.jpg
 

Whaler

Adventurer
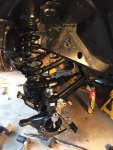
On the front end, I still had to install the front shocks, reattach all the steering linkages (reused all the OEM parts but added an OME steering stablizer) and install new wheel hubs.

IMG_0432.JPG

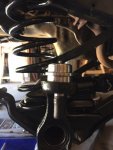
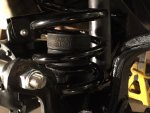
A few other odds and ends, including hockey puck bump stops inside the coils:

IMG_0433.JPG

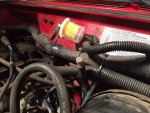
Extending the rear axle diff breather up into the engine bay:

IMG_0468.JPG

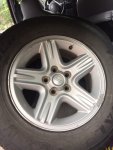
Purchased a set of 2001 16" aluminum OEM wheels and tires for $200 on a local consignment Facebook group. This '97 SE jeep came with the terrible 15" steel wheels that trap water inside and never completely drain, so they're rusted beyond measure. Before I stated this overhaul, I blew out a tire sidewall on a camping trip and when I took the wheel to the mechanic to have a new tire installed he told me there was a hole in it the size of dime. I knew I had a slow leak but he couldn't believe it held air at all. I plan to swap new tires onto these 16" but I'm running them as is for now:

IMG_0471.JPG
 

Whaler

Adventurer
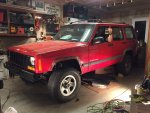
I haven't posted in a long time but progress has continued. First things first, here's a victory shot of Marge back down on the ground for the first time after her lift:

IMG_0435.JPG

This is a 2.5" lift but my twenty year old springs had certainly settled at least an inch over time, so I think the net difference was closer to 3.5". I really like the stance and expect that I can get a 30" tire on there without any trimming.
 

Whaler

Adventurer
I ran into some trouble on the one-yard line, when I discovered my caliper bleeder valve was completely seized and I couldn't get the brakes properly bled. The clock was ticking because I had an appointment for an alignment the next morning and those appointments can be hard to come by on-island in the spring, when its tourist season, because the dealer is the only shop in town that does them. I ended up having AAA tow the Jeep to the dealer for the alignment, pretty anticlimactic after all that work! The dealer couldn't get the bleeder valve out either and quoted me something like $650 to replace both calipers! ....no thanks.

The alignment was all good, but I didn't have enough brake pressure to safely drive the jeep back home and by then it was also Saturday and none of the part stores on island had any calipers in stock. I was also going to have to wait until the following week to get reasonably priced calipers delivered to the island, but I did manage to find a replacement bleeder valve. So after weeks of having the Jeep off the road and plans to use it that weekend, my buddy and I decided we'd just go ahead and jack the jeep up in the dealer lot and take the caliper home to work on it. :ylsmoke: We got a kick out of that and nobody bothered us, thankfully. A little dremel work and elbow grease back home and I finally got the old valve out. Back to the dealer lot, re-installed the caliper, bled the brakes and off we went. :smiley_drive: One of the techs even flagged us down on the way out and complemented me on the work done with the chassis-saver and lift, which was pretty cool.

I drove most of the summer with those old calipers, but one of the two finally seized up so I've since replaced the front pads, rotors and calipers recently.
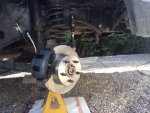
IMG_0575.JPG

When I installed the lift, I also replaced the flexible front brake lines with YJ lines for added length. They're compatible although the hard-steel portion bends awkwardly and I'm worried it might touch the shock at full turn, so I think I need to take them back off and bend them a little bit in a bench vise.

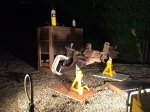
Recently, I bought a set of ZJ disc brake parts from a guy on Cherokee Forum named big Dave who pulls junkyard parts for the rear conversion because I can't get anything locally. The rear drums need work so I just decided I pull the trigger now and that's next on the docket.
 

Whaler

Adventurer
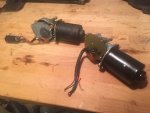
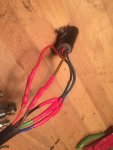
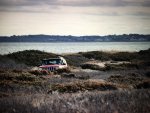
Replaced the wiper motor with a knock-off version from the internet. It works but it doesn't seem quite as zippy and the fastener heads they included were all too large to clear the action arm, plus the unit came without the factory wiring connection so I had to splice the old one on to the replacement motor.
IMG_0079.JPG

IMG_0115.JPG
 

Whaler

Adventurer
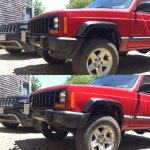
A few cosmetic odds and ends came next: reinstalled the repainted OME fender flares and front bumper end caps. I had long since removed the front air dam and spray guard fabric thingy underneath the front end, so I trimmed the bumper ends caps for better clearance. This is in keeping with the intended "modified stock" aesthetic. I want to improve the Jeep's capability and stance but in the vein of a sleeper.

IMG_0119.jpg

Along those lines, the front bumper is stock but is modified to house a Detours-Offroad "BackBone" bumper underneath the skin, which gives it recovery points and a winch mount.
 

Whaler

Adventurer
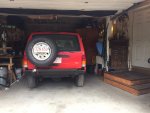
On the rear end, I had previously installed a Detours Off-Road "Tailbone" rear bumper and tire carrier, but never repainted the bumper, nor did I ever permanently install the tire carrier arm. That's now complete and it adds functionality while maintaining the stock look:

IMG_0500.JPG

IMG_0120.JPG

IMG_0004.JPG

IMG_0163.JPG
 

Whaler

Adventurer
The tailbone comes with a bracket for mounting the license plate on the spare tire, but it doesn't look very good. A friend suggested I simply offset the license plate on the tailgate, to the right hand side , where it would still be under the tailgate handle trim. He noticed that by mounting the license plate's left-side holes on the tailgate's mounting points intended for the right-side of the license plate, it perfectly offsets the plate, so that it becomes visible. This still looks like an intended location because the plate mount is still under the tailgate handle's trim. I thought it was a good idea:

IMG_0577.JPG

Overall, I'm very happy with the Tailbone product. It does just what it is supposed to do. That said, it is soooo annoying to unlatch and swing the tire out of the way every time I want to get in the trunk. It looks cool and frees up trunk space (important) but is really impractical for day-to-day use. Long term, I'd like to reinforce the rear hatch and mount the rear tire directly to the hatch, only using the swing-out mount as a platform for different, interchangeable functions. A little online research reveals that a few guys have done this on XJs already, including piston upgrades for the added weight, but this idea is just a day dream for now. I might buy a junkyard tailgate at some point to mess around with the idea.
 

Whaler

Adventurer
I've now had a few months to drive the lifted jeep and it's great. Funny though, how I now notice new things that need fixing! I'm glad to have the JKS disconnects on the front sway bar and have left the rear sway bar off entirely, but I think I might put it back on because most of my off-road driving is in the sand without much need for articulation and the rear end seems a little wobbly accelerating into a turn from a stop. Anyone know of a quick-disconnect for the rear sway bar? That would come in handy because any more serious off-road driving would only be reached after many miles of pavement.

My steering is very loose and needs some love. With a little research, I believe I understand that there are a couple adjustments on the steering box that might tighten things up, but I might just start by replacing the fluid as step one. Loose linkages/tie rods ends might be the real culprit anyhow, so I might replace/upgrade those too. Should I be seeing rotation in the tie-rod and center-link (around their long axes) when I turn the wheel from side to side?

If I replace the steering box, should I consider upgrading to the Durango box even if I never plan on running a tire larger than 30/31"?

IMG_0143.JPG
 
Last edited:

Whaler

Adventurer
Next on the docket:
  1. rear disc brake conversion
  2. diagnose a weird drive-line vibration that happens every time I step off the throttle, which started after lift and driveshaft re-installation
  3. upgrade headlight lamps and wiring harness
  4. new tires, planning Cooper AT3s

Anyone have theories on the drive-line vibration? It never happened before the lift and seemed worse immediately afterwards, but has mellowed. I tried to mark the rear driveshaft so I would install it in the same orientation relative to the rear diff's yoke, but maybe I messed that up. I replaced the u-joint straps and u-joints while I was under there. I also thought 2.5" of lift wasn't enough to overly tax the angle of the driveshaft and require a SYE, etc., but maybe it is too great a difference if my Jeep had settled into its old sagged springs and the net lift-difference is closer to 3.5"?
 

Mitch502

Explorer
Next on the docket:
  1. rear disc brake conversion
  2. diagnose a weird drive-line vibration that happens every time I step off the throttle, which started after lift and driveshaft re-installation
  3. upgrade headlight lamps and wiring harness
  4. new tires, planning Cooper AT3s

Anyone have theories on the drive-line vibration? It never happened before the lift and seemed worse immediately afterwards, but has mellowed. I tried to mark the rear driveshaft so I would install it in the same orientation relative to the rear diff's yoke, but maybe I messed that up. I replaced the u-joint straps and u-joints while I was under there. I also thought 2.5" of lift wasn't enough to overly tax the angle of the driveshaft and require a SYE, etc., but maybe it is too great a difference if my Jeep had settled into its old sagged springs and the net lift-difference is closer to 3.5"?


Since you're leaf sprung, you can shim the rear diff to help you with the angle.

Try adjusting your steering box first. However, if it's been bad for awhile, this might not work (it didn't for mine). My theory on the durango box is "why not" assuming you would be replacing it anyways.

For quick disconnects, you might try running without a rear sway bar for awhile longer and see what you think. I noticed absolutely no difference in my ZJ with or without. I'd never run without the front, but the rear didn't do much for me. Most say the rear swaybar only shows its worth when you're off road on off camber situations... Where you'd likely have it disconnected anyways.


I like the practicality of your build
 

Forum statistics

Threads
188,013
Messages
2,901,135
Members
229,411
Latest member
IvaBru
Top