Overland XJ Build. Not my first Rodeo.....(video included)

Overland History

Wanderluster
************ build so far. I'm just trying to live through you since your building my dream rig lol. Nice work!

Sent from my SAMSUNG-SM-G900A using Tapatalk

Thanks! I think you meant "live vicariously through me". ;)

If you work really hard, be kind, help others, and make sacrifices in certain areas of your life, I'm sure you'll be able to build your own dream rig within the foreseeable future!
 

Overland History

Wanderluster
Shower setup is looking pretty sweet! Nice work on the tint deal too, nice look and keep it safe and cool. Red XJ's are sweet!

Thanks Greg. The tint is not only just for security and privacy, but to also keep the interior of the vehicle cooler. A cooler interior will allow my A/C to be more effective, and also my On-Board Freezer and Refrigerator won't have to work quite as hard to keep things cool, thus drawing less power from the Aux battery setup. ;)
 

Overland History

Wanderluster
Baja,

Really diggin the build thread... Im in the process of building my YJ that was my dads before he died. Next will be my brothers 87 XJ which I will also be posting a build thread on. Keep of the great work, Im getting some great ideas I want to do to my brothers!

Thank you as well! I'm happy to get all of the compliments on the build when it inspires ideas for others! Isn't that the reason why we share all of this information in the first place?! That's what moves technology and innovation forward in our hobby/lifestyle/moneypits/escapefromthewife, etc. ;)

I really wish more of the "lurkers" on this forum would post up and get more involved in either my build thread with feedback, or start their own thread. Even those silly little mods that make something slightly more convenient or the big ones that we awe over, all contribute to the amazing archives of literature on this site. I hope this thread inspires someone even years from now to build a rig that sets a new standard for Overland vehicles. :)
 

Overland History

Wanderluster
Anyways, I promised you guys an update, and I'm sorry to disappoint, but before I post the write up for the On-Board shower, it needs to be finished off properly to really knock the project out of the park. :D

I mentioned previously that I had a pretty cool idea for the system that I thought I could make work. Well, after some measuring, I'm going to MAKE it work, even though some of you might think I'm absolutely insane. ;)

I've got parts on order to finish it up, and they should be here within the next week, so stay tuned. ;)


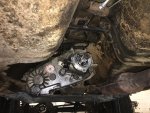
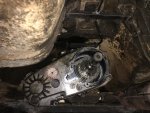
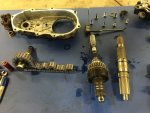
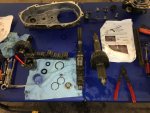
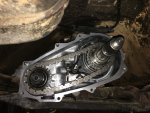
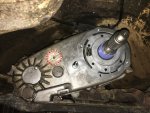
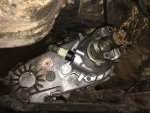
In the meantime, I'm installing my SYE kit in my spare NP231 Transfer Case this weekend, to finally get rid of my driveline vibrations completely!!
 
Last edited:

Whaler

Adventurer
Keep it coming please, this is my favorite build on ExPo right now. Having spent some time considering my own on-board hot water options, I concur that a heat-exchanger is the way to go: simple, easily removable and compact; not to mention that is leverages the vehicle's existing resources to perform the task instead of requiring a redundant heating element or extraneous electronics. Slick.

While, I plan to use mine for precious, rare trips (unfortunately), it'll mostly be used for weekend day-trip beach cooking and cleaning. The downside to doing dishes out of the trunk is that I'll be sucking fumes while I run the engine in order to supply the hot water. Once you get this system up and running, I'll be curious how long you can maintain heat after the engine is turned off. I'm wondering if I let the engine warm, turn it off and then start the dishes, can I still get a reasonable amount of hot water to judiciously clean up after a meal, so that everything gets put away cleanly before we leave the beach? I love the idea of not needing to clean anything when we get back home. I know I could get a longer hose and stand away from the exhaust, but please indulge my curiosity.
 

Overland History

Wanderluster
Well, it's about time for an update, with more coming this week as I receive the final part to complete the On-Board Hot water shower build. :D

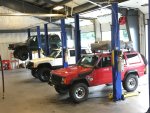
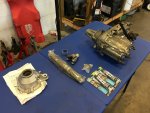
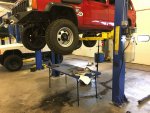
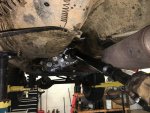
Recently had a bit of a wrenching party in the shop. The Green XJ got 4.56 gears and Lockers, and my XJ got the SYE and Lengthened driveshaft installed.

image.jpg


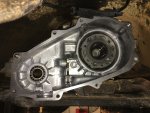
I picked up a spare NP231 Transfer Case for a song......

image.jpg


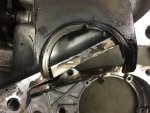
Once I opened up the case, this fell out of it....

image.jpg


It turns out that the plastic guides on one of the shift forks has worn away and destroyed the fork.

image.jpg


I decided to junk the case since it was no good to me without ordering replacement parts....

image.jpg


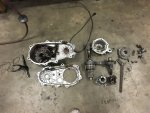
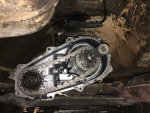
....and decided to build the existing case that's already in the XJ....

image.jpg

image.jpg
 

Overland History

Wanderluster
Since the directions that come with an SYE kit are pretty straight forward, I'll just let the pics speak for themselves. One thing I did have to do is cut the shift rod shorter to clear the back of the case, which is also outlined in the directions.

image.jpg

image.jpg

image.jpg


Old shaft with chain.....

image.jpg


New shaft with everything swapped over and ready to go back in....

image.jpg

image.jpg


The oil pump pickup tube is kinda a pain to install when the oil pump is back in place. That's really the only trouble I had during the entire install.....

image.jpg


Installed....

image.jpg


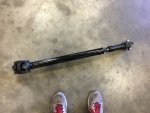
I used a spare stock front XJ driveshaft that I had out of an Automatic XJ. I compared it to my stock front Driveshaft and there was about an inch difference, since I have an AX-15 tranny. I rebuilt it with new U-joints and greased the double cardan well.

I had the spare Driveshaft lengthened exactly 3in locally by a place called Spring Menders. They did an excellent job! Balanced and out the door ran me $149. :D

image.jpg

image.jpg


More to come.....
 

Overland History

Wanderluster
Keep it coming please, this is my favorite build on ExPo right now. Having spent some time considering my own on-board hot water options, I concur that a heat-exchanger is the way to go: simple, easily removable and compact; not to mention that is leverages the vehicle's existing resources to perform the task instead of requiring a redundant heating element or extraneous electronics. Slick.

While, I plan to use mine for precious, rare trips (unfortunately), it'll mostly be used for weekend day-trip beach cooking and cleaning. The downside to doing dishes out of the trunk is that I'll be sucking fumes while I run the engine in order to supply the hot water. Once you get this system up and running, I'll be curious how long you can maintain heat after the engine is turned off. I'm wondering if I let the engine warm, turn it off and then start the dishes, can I still get a reasonable amount of hot water to judiciously clean up after a meal, so that everything gets put away cleanly before we leave the beach? I love the idea of not needing to clean anything when we get back home. I know I could get a longer hose and stand away from the exhaust, but please indulge my curiosity.


You almost answered your own question when it comes to smelling exhaust fumes. ;)

This is something I've been thinking about for a while. The simplest thing to do, would be to use a flexible accordion aluminum tubing to slide over the exhaust to route the heat/fumes out of the cooking area. . Most dealerships have exhaust tubes built into their shops, so something similar would solve that problem.

When I tested the system, I did turn the engine off to see how long the hot water would last without coolant circulating through the exchanger. Unfortunately, without the coolant moving through the exchanger, you lose hot water pretty quickly, which is not really a big deal, but it speaks volumes for how efficient the exchanger actually is! ;)
 
Last edited:

thethePete

Explorer
Looking awesome. WRT the hot water issue, when we camped at our remote cabin, we'd just fill a basin with hot sudsy water and a basin with hot clear water, and wash dishes like you would with 2 sinks at home... No need to keep the hot water running, fill 2 basins and carry on with life. Just my $.02 Canadian, so like, less than a Peso.

I love how simple and pratical this build is. Keep on keepin' on. I'm hoping to pick up an older Explorer this winter and do something similar. Nothing over the top, just practical, functional, and useable.
 

Overland History

Wanderluster
Well, I'm finally done with the On-Board Hot Water Shower System.

I've got a full write-up with pictures coming tomorrow evening.

Ya'll are going to think I'm absolutely insane, but here's a little preview pic of the final piece of the puzzle for the system. :D

image.jpg
 

Overland History

Wanderluster
Well, here goes the write-up for the On-Board Hot Water Shower:

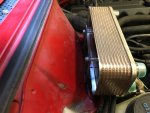
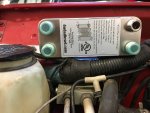
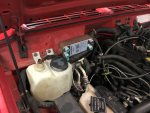
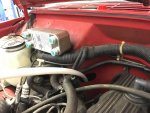
As you all saw before, I mounted my Duda Diesel 20 plate heat exchanger on the passenger side of the engine bay at the top of the firewall. I went with 1/2in Male NPT fittings on the exchanger to be able to plumb my coolant lines into one side and fresh water lines into the other.

The Heat Exchanger I used can be found here for $66.00 shipped with Prime:

https://www.amazon.com/gp/aw/d/B003...dpPl=1&dpID=412kqL8f5rL&ref=plSrch&th=1&psc=1


Since I wanted the Heat Exchanger mounted up high for easy access to plumbing, I decided that the passenger side firewall would be the best, since the entire system would reside on that side of the Jeep anyways. Also, all of the coolant lines are on the passenger side of the engine too!

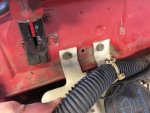
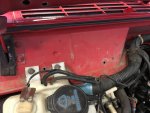
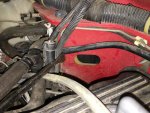
I decided to move the main wiring harness that runs above the windshield washer bottle reservoir and along the top of the firewall, down and behind the reservoir and out of the way.

image.jpg


I removed these two bolts....

image.jpg


.....and tucked it under and behind the reservoir.

image.jpg


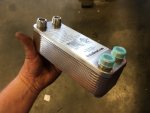
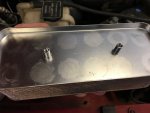
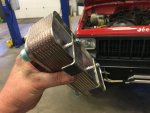
Here's the heat exchanger itself with the 1/2in Male NPT fittings.

image.jpg


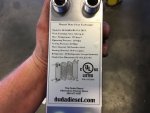
All of the specs on the exchanger. You'll notice a max temp of 225*, which the engine will only exceed if it's overheating....

image.jpg


On the back of the heat exchanger are two threaded nipples to be able to mount it.

image.jpg


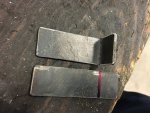
I used some 1/8in steel plate I had laying around to make 2 L-shaped brackets to mount it, keeping in mind that it needs to be mounted as low as possible to clear the hood when it's shut.

image.jpg

image.jpg

image.jpg

image.jpg
 
Last edited:

Overland History

Wanderluster
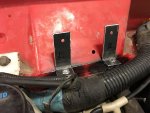
Brackets painted and final mounting....

image.jpg

image.jpg


Next up was to find a place to run my fresh water lines through the firewall and into the cabin.

Looking around, I noticed a random rubber grommet on the center of the firewall on the passenger side close to the engine. I'm not sure what accessories may have run through this grommet, but nothing does on my XJ. In the top left of the pic, you can see 2 of the fittings for the heater core entering the firewall.

image.jpg


Grommet removed....

image.jpg


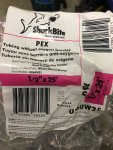
I did some research on what kind of tubing I should use to plumb the entire system, and common household PEX tube plumbing fit the description. PEX is good for potable water, and is very cheap in length at your friendly local big box store. I read a couple bits of info even saying that PEX will not crack if it freezes, but the industry doesn't want to infer that is true. If I remember correctly, the PEX I bought is rated for 200* @ 80psi sustained, which I will be well within that specification, considering my water pump has a 55psi cutoff.

I used 1/2in PEX in 25ft length, which I believe ran me around $10. I think total, I've got close to 40ft of PEX into the entire system, so it may be best to just buy 50ft to have some spare around.

image.jpg


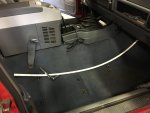
I took a piece of the uncut length PEX and ran it down through the hole in the firewall to see where it would come out under the dash....

image.jpg


I swear, Jeep must've seen me coming with this shower system, because that's damn near perfect where it popped out! ;)

image.jpg


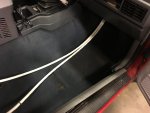
I ended up pulling the passenger seat out to be able to plumb the lines further into the cabin and also to route them underneath of the carpet.

image.jpg

image.jpg
 
Last edited:

Overland History

Wanderluster
Next up is the hose fittings that I used:

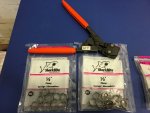
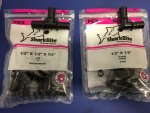
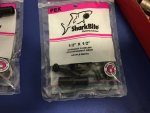
Just the same as the 1/2in hose is "Shark Bite" brand, I also used the same brand for clamps and fittings. I found them specifically at Home Depot, even though I checked Lowe's top to bottom.

The orange handled tool is ABSOLUTELY necessary to clamp the fittings. The bad news is that it is $62. No, vice grips, channel locks or whatever else you think might work, won't, so don't be cheap, just buy the tool. (I had to tell myself that....)

I picked up bags of 1/2in T's, Elbows and also Couplers, as I figured I would use all of them throughout the system. I'll also keep extra for spares.

While we're on the subject of fittings, just remember, the fewer hose unions that there are in the system, the fewer areas there are that are prone to leak, so use as few as possible. ;)

image.jpg

image.jpg

image.jpg


These fittings are just awesome, and I use them throughout the system. Apparently they have the same tolerance as the PEX tubing(200* @ 85psi), and they're also simply screw on. The little (rubber?) grommet crushes against the male side fitting itself and doesn't rely on the female thread to seal itself. It doesn't take much pressure to get them to seal, so they don't need to be death grip tight.
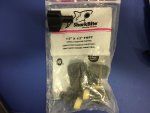
image.jpg


I used these fittings on the top of the heat exchanger for the potable water side. The reason why I chose the top side of the exchanger for water, is to try to keep the coolant lines as low as possible to prevent air bubbles in the cooling system settling in the exchanger.
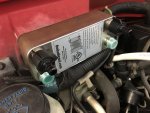
image.jpg


Before routing the PEX hose to the exchanger, I needed to make sure the firewall grommet would protect the hose properly. Here's a good pic of the grommet removed...
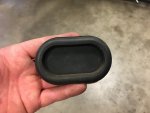
image.jpg


I drilled 2 holes in it, small enough to make sure the holes would fit around 1/2in PEX hose VERY snug. The last thing you want is heat from the engine or fumes leaking through the firewall!
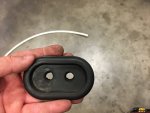
image.jpg


I pushed the lines through and ran the grommet back down to the firewall, which I will admit, was a complete pain in the Southland.....
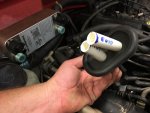
image.jpg


I then plugged the lines into the heat exchanger.

This part is very crucial, and you need to make sure you mark which lines are your "Cold line in" and "Hot line out". Water flow direction is crucial, and you want your potable water to flow in the opposite direction of your coolant. Make sure these lines are marked in the engine bay, and also in the cabin. Also, the exchanger states that there is a proper flow direction for fluids. Make SURE that is correct for maximum efficiency.
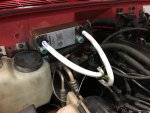
image.jpg
 
Last edited:

Forum statistics

Threads
188,362
Messages
2,906,038
Members
230,117
Latest member
greatwhite24
Top