You are using an out of date browser. It may not display this or other websites correctly.
You should upgrade or use an alternative browser.
You should upgrade or use an alternative browser.
Overlandtowater’s solid axle suburban
- Thread starter Overlandtowater
- Start date
Overlandtowater
Well-known member
LOL Jonb8 but I would like air conditioning when it 99F and 85+ humidity.
rayra
Expedition Leader
It should be the one where the passenger footwell -side tunnel meets the bottom of the dash. Below and to the left of the left end of the glove compartment, right against the rug. It's hard to get to the 7mm that goes up thru the center of the actuator pack and harder still to get it back together. You'll want a 1/4" drive ratchet and socket to do it with, there's not enough clearance for a 3/8" ratchet and adapter.Sense I'm on the HVAC system last summer I had a problem with the front air blowing warm when AC was on, the rear air blows super cold..... so I thought I would replace the Blend door mechanism when I do the blower module but I be danged at all the blend door mechanisms which one do I need?
Had to fix that on my '02 Sub
wait, 2003, has zone control, correct? separate controls for front left and front right? Which side is blowing hot? The driver side blend actuator is up in the dash near the driver's right knee. It too is difficult to work on. Replaced that on the '05 Tahoe.
Be glad it isn't the actuator for the defroster or you'd be tearing out most of the dash to get to it.
Overlandtowater
Well-known member
Yes 03 can adjust side to side and front and back, both sides in front blow luke warm, rear will cool the whole truck just takes a while, So I was hoping it was the one on the bottom but the one above the trans hump would be ok too.
rayra
Expedition Leader
The back has its own R134 and radiator coolant loops, all the 'blending' takes place behind the passenger side cargo area trim. The ceiling ducts over the 2nd row are ducted down the passenger side 'C' pillar and are completely separate from the front seat vent ducting.
The front blowing warm air all the time out of both driver and passenger dash vents (while the back blows cold) means both blend actuators are busted or were driven out of their movement range*, so their guts no longer move where the computer thinks they are. Sometimes that can be fixed by a reset of the Body(?) computer. You can brute force the whole thing by just disconnecting the battery for a while. But that will also reset your engine computer settings too.
If the actuators are busted, their drive gear inside physically cracked in half off the keyed shaft they're supposed to be driving, you can sometimes hear the actuator motor trying to drive the gear back and forth across its full movement range when you turn the key on. Sounds like a low winding-buzz noise.
I don't know of a single error condition that would cause both sides dash vents to blow warm at the same time, when you have the AC on (and while you are getting cold air in the back). In my understanding both actuators would have to be malfunctioning for that to happen.
Is your vent selection control working (regardless of temp), when you choose feet, dash or defrost, does the system respond / clunk and the air start coming out of the correct places?
The actuators are a whole lot less at rockauto or some careful local shopping, than at the dealer.
There's some pictures and repair notes in my GMT800 / Vortec topic
*when you get it working again, tell everyone that setting the system to the lowest cold temp (IIRC it's 60 or 62F) doesn't make it get colder any faster and repeatedly setting the lowest setting will screw up the actuators again, as the computer keeps trying to drive them to their max range of motion. Don't max the temp selection in either direction, cold or hot.
Overlandtowater
Well-known member
Thank Rayra you've giving me more info on the HVAC than any one else has or that I have been able to find myself! Yes floor, defrost, vent works fine.
rayra
Expedition Leader
You're welcome and I hope the info helps.
I've run thru most of these common faults in the GMT800s and when I was looking for info I found there were several common things. Too, when looking for parts in a wrecking yard I was noticing that several parts were always stripped off first, the window motors, the 4wd dash switches, the 3rd brake light, the mirror motors, the plastic door threshhold trims, a few other things. All of it led me to create that reference topic. Especially after my fiendishly clever plan to own two of the the things at the same time. It was just happenstance that I wound up with one of each series split, 00-02 and 03-06
Oh and the driver door window switches are loads of fun. The driver window on mine keeps stalling out, acts like the motor is dead while everything else still works. Have to disconnect the switch array and reconnect to get it to work. Nerving up to dismantle it and clean any electrical contacts I can get at. The replacement switch panel is more than I want to spend on it.
Overlandtowater
Well-known member
Yeah all four of mine are supper slow I think I just need to lube everything before I burn one up.
Overlandtowater
Well-known member
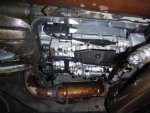
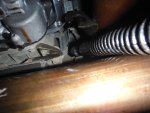
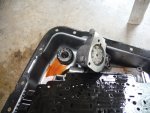
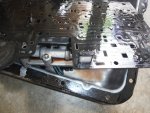
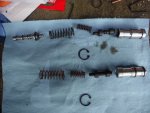
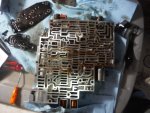
Alright last weekend I put the shift kit in.....boy what a nerve racking experience, It was simple really, should have been super easy step by step. It still was really, I bought the Oregon performance transmission stage one kit (transgo shift kit, with Sonnax goodies, and a transgo hardened separator plate), to start off the drain plug would not come out and I rounded the plug off (its soft), so I pulled the pan bolts and drain I over the front of the pan, the repair guide I have says you have to drop the exhaust to pull the pan I took one look at those bolts and thought nope! The shift linkage bracket keeps you from pulling the pan back far enough to drop it without removing the exhaust, it has two bolts on top that you cant get too so I just bent the bracket until it touched the driveshaft and the pan fell out easy. Removal of the wires and valve body is simple, I started taking things apart and realized it has aluminum actuator in it already and noticed some other signs that make e think some one has been in it already (some what rounded bolts on the valve body, clean filters in the separator plate)……...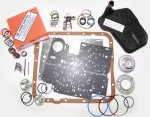


Last edited:
Overlandtowater
Well-known member
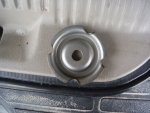
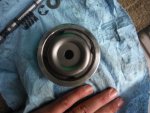
tore it all down and started back with the corvette servo, it has you cut four oil passages in the plate I started out with a large file and cut small squares in it only to find out they were covered by the snap ring when installed so I broke out the flap wheel and opened them up and still barely clear the snap ring but I didn't want to cut out the bend fearing I would weaken the plate. installed larger boost valve in the pump (very long nosed snap ring pliers needed to make it easy). Drilled the separator plate all directions was clear except for the 1-2 shift hole stock its drilled .065" but said it could be drilled to no larger than .073 well the kit does not come with a .070-.073 drill so I found one that was just barely larger than the factor hole and went for it, cleaned and replaced springs in every piston in the valve body, installed all the pin less actuator pistons, this is where it kind of got confusing,
Transgo gives one set of instructions and Sonnax gives another when it comes to how the pistons should be set in the bore....I installed it the transgo way and hoped for the best.
The transmission gasket was baked on I used the flap wheel on a 4" grinder to remove it, buttoned every thing back up (less than 12hours total) and waited a day to put fluid in it still thinking about those piston discrepancies.
Then went for it, filled it, stuck it in revers and to my surprise it went the direction it was supposed to. I cycled the shifter a few time and filled to level and took if for a drive, pulled out of the drive and when it was supposed to hit second it held for about 1-2 seconds longer, I was ready for the hard shift(remember the .073 hole I guessed on), and it shifted super smooth and crisp. So now I'm thinking what did I do wrong it was so smooth. I ran it all the way up highway speed and every shift was smooth but crisp, I stopped and pinned it to the floor, spun just a little and when it hit second this time at 6 grand it knocked stuff out of my tool box but didn't bark second (I was disappointed). I stopped and did it again, and again and again...LOL the only thing I noticed after all those hard runs was the 1-2 shift is hard but almost feels squishy like when a leaf spring rear axle is twisting the springs. Today I took it out in the rain and did the same run it shifts hard enough to break second and jump side ways... I will take it for a longer drive this weekend up in the hills to see if I burn anything up.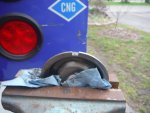


Last edited:
Overlandtowater
Well-known member
So remember the blower motor fan problem, I now have another problem...….Lets start with the trans cooler install ( see where this is going). I pulled the grill out and thought I'm going to just run the two cooler together why not, only problem is that the factory cooler needs to be moved over to the driver side. no problem I will just drill some hole in the core support and slide them over. ( do you see now?) I got the drill out and started to drill and thought that's a little too close to the condenser....( now you see.),
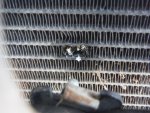
I stared over to a semi mud flap I use for situations like this when I got over there I got a phone call and forgot all about the mud flap.....I drilled the first hole smooth as butter, but of coarse with the second hole the bit threaded into the aluminum instead of cutting the hole and spishhhhhhhhhhhhhhhhhhhhhhhhhhh, what a tiny loud hole.....LOL Freon, leak seek, and cuss words spewed from the condenser.
So I thought it was small enough I could just solder/braze it up. That did not work I can only assume because I didn't disconnect the lines and by heating the area it was pressurizing the blowing the solder out. So I bit the bullet and checked rock auto and much to my surprise $50-$75 not to bad....I was thinking $200 like the last radiator I had to replace I mean it still 75 bucks that could have went somewhere else.
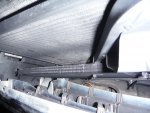
The new cooler fits pretty good with space between the condenser and the cooler, I fastened it with zip ties and weather stripping between the cooler and the core support and barely clears the bottom corner of the grill. It fits tight no wiggles but I'm sure I need to keep a check on the zip ties or possibly go with some stainless ties.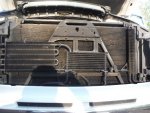


Last edited:
Overlandtowater
Well-known member
shifts are a lot quicker this was on the first test drive after the install. I've sense put about 400 miles on it and all seems good.
Last edited:
Overlandtowater
Well-known member
Its didn't break the back tires loose...….Notice the Bump Bump when it downshifts into second...… 4600 to 4200 drop as soon as it downshifts, slippage I hope not!
rayra
Expedition Leader
On the shift kit, your hot rod report is making me giggle. It's a 6000# Suburban for petes sake. 
I'm more interested in how much clutch paste you found in the pan. I'm at 145k in my Sub. The Tahoe reached 200k but I never did anything to it but partial fluid changes.
The radiator hole, well I've been warning folks about that, just recently too. Not an 'I told you so', more of a 'so many folks trying it, it was bound to happen to somebody'.
