OVRLND CAMPERS ONLY : Post your OVRLND Camper build here or a link to your build thread to inspire others!

Dave in AZ

Well-known member
You’re better off calling Deaver and giving them some info on the weight you want to support and the lift you want. Keep in mind that Deavers are designed to be very progressive and responsive for off-road performance. On my Tacoma, the Deaver 8 pack (IIRC) was great for performance when not heavily loaded for camping. Once I added more weight for longer trips I needed to put Timbrens on and fully loaded they would engage. Worked great.

On my Tundra plus camper, I spec’d a higher weight and heavier springs as a result and get a great ride, lift, articulation and off-road and on-road performance without getting engaging the bump stops.

Since you’re in Phoenix, you might want to talk to SuperDuty HQ here. They’ve done both my builds and been great. They are very good with advice and helping spec the right set ups.
Thx much
 

dirtnsmores

Active member
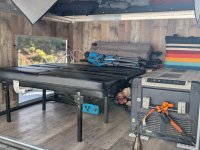
I took your idea on the unistrut and added a little spin on it - a full length bungee cord. Wanted to share as it is solving quite a few issues for us; namely a simple curtain/clothes drying spot over the front window, and ability to clock and slide items.

Harbor freight had a sale on these hanging lights, I think I paid $3 a piece. They have red/white options and have a hook and magnet for attaching as well as run on AAAs.
Great idea with the bungees... would be a good place to hang paper towels as well. I did a long bungee strung with a curtain right below the edge of the bed when it's slid out. This makes a curtain/wall for the bunk underneath where one of the kids sleep. They don't get the light and there's a bit of privacy if someone has to change.

Reminds me to do a video of all four of us in the camper. Really doesn't feel anymore cramped than a tent.
 

flydream

New member
That's where I am now but still thinking of how I want to finish the interior and do a build of some kind, getting tired of the old tote shuffle.. what did you use to finish your walls? It looks very clean and well done!
.04 ABS sheet, available at big plastic supply houses like TAP plastics.

Pros- cheap, lightweight, easy to work with as can score with utility knife, accepts VHB/velcro well, durable doesn't scratch/dent/mar like E-PVC or corrugated plastic, thin and no problems with the bed slide, easy to wipe down and no problems getting wet, doesn't hold onto pet hair like carpet (we have a golden retriever)

Cons- not the most aesthetic - white or black and the white seemed to stain with smudged dirt, can expand/shrink w/ temp changes (really only noticed on barn doors in sun before covered with molle and even then only a minor aesthetic annoyance, otherwise has been fine -10F to ~100F).

I'm satisfied with it, although I wouldn't doubt that better options may exist.
 

flydream

New member
Great looking build out!

1) I ran Airspring Airbags for a while in my Gladiator which has a rear coil linkage, YMMV. They handled great, limited my articulation some, but were awesome if you vary in load carrying a ton. Really appreciated them when I was doing "truck things" like hauling firewood. I took them out when I redid my suspension with Dobinson coils that were rated to my average load. Having springs (leaf or coil) weight matched to both the load and terrain you travel is far better for ride quality vs airbags, but airbags are more flexible. Bilsteins can be fine, but cross-shop Fox 2.0 IFPs, they have thicker shafts and aluminum housings and are rebuildable, so more expensive but will probably last longer with less corrosion.

I've ran Deavers with an Icon setup on a Tacoma, they were great, but for the F150 I'd also cross shop Dobinsons, they make stuff for F150s that is load targeted as well. The Icon lift kit on my Tacoma also handled load well and I didn't do a crazy setup (Stage 3), I like they prioritize increased travel over lift height. Any suspension upgrade you get I'd pay attention to what spring rates are offered, many brands offer optional higher spring rates, but you have to ask and installers are often ignorant of your load use case. A stiffer spring under load will be softer than a bottomed out soft spring bouncing on your factory bumpstops.

2) I completely agree with dstefan's points, but one advantage that's often missed with taller (even slightly) tires is the larger flotation, grip, and puncture resistance when airing down. More sidewall gives you all 3. You may not get much extra clearance bumping up 1" in diameter, but you will 100% feel it significantly in loose terrain when aired down. It's really up to how conservative you drive with your setup though, and you could also get similar effect by sizing down in wheel size instead (17s vs 18s). I can float on drifts with the extra ~1" on my winter setup that I couldn't with my 33s. I don't notice the power difference much in my Gladiator, but do notice the MPG hit on my 4.10 gears. For the average FS road my 33s have been great though. I'd also say increased travel+tire clearance is superior to bigger tires for backroads, ie, I'd do quality aftermarket control arms to increase droop over going with a bigger tire if I had to choose between the two.

Weight's huge, and that's my only complaint with either my summer Falken AT3s or my winter set of Grabber ATx. Either of those are hands down the best AT tire for snow, but the new AT4s are supposedly losing some of that cred to make a heavier duty tire for SD+ trucks. I've ran the original Cooper AT3s along with many of their hard core ATs land all were pretty decent on snowy conditions and very durable, Cooper AT3 XLTs are high on my list if they come in a 285/75r17 when I'm ready...
So much good feedback, appreciate you taking the time to write all that out!! Some more research to do. There is a custom spring shop that works with Deaver here in town and an overlanding vehicle outfitting shop, I'll float some of these thoughts by them.
 

dirtnsmores

Active member
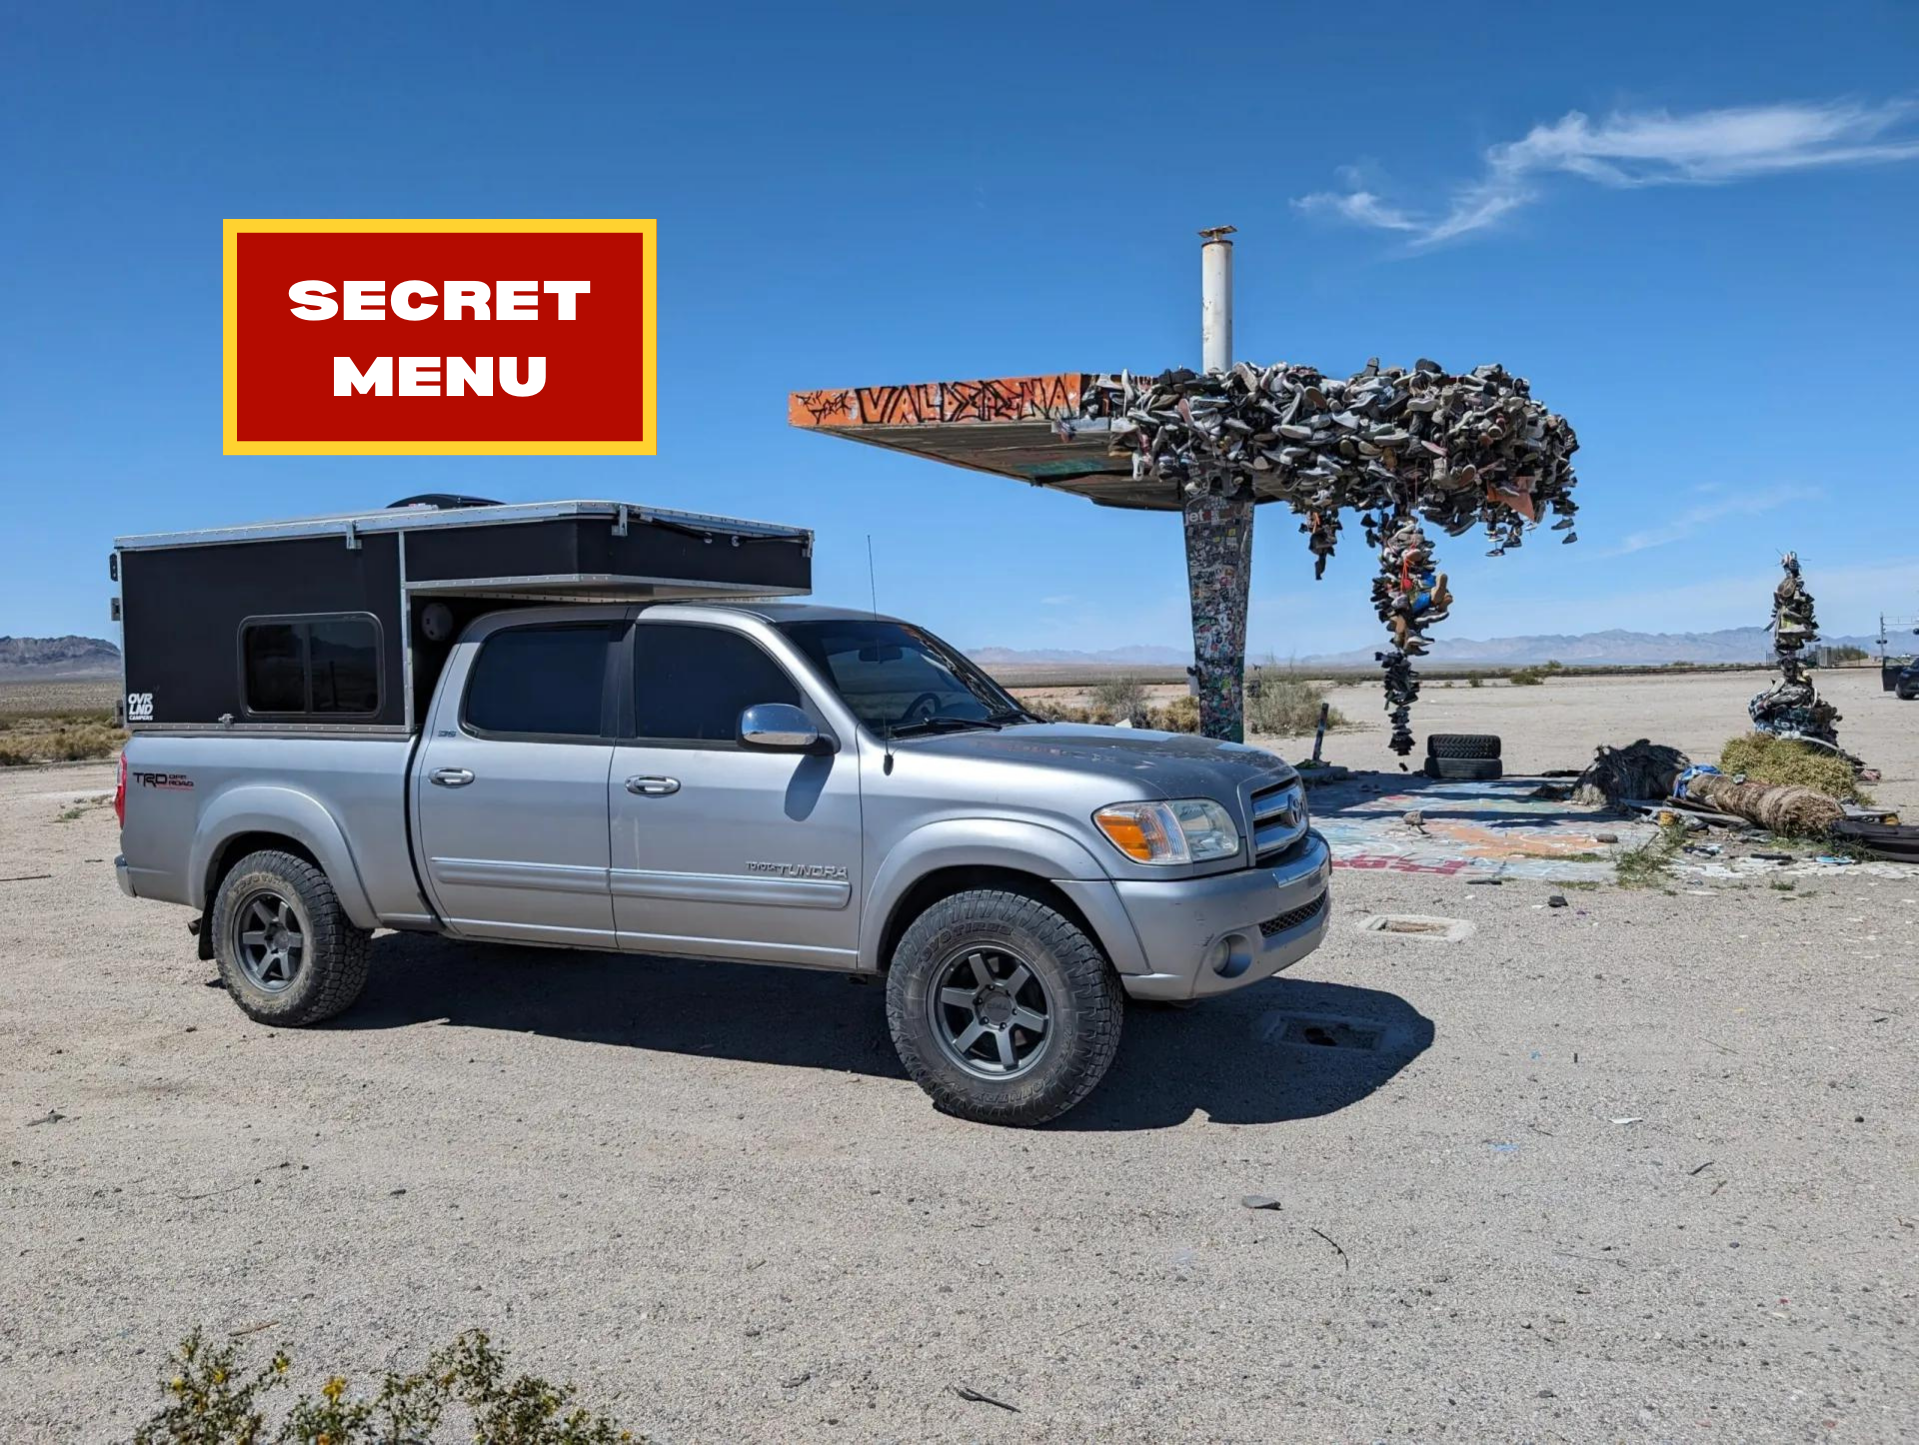
I've compiled a OVRLND Campers "secret menu" list of things that can be customized. Let me know what I should add to the list. Be sure to check out the rest of the webpage and please subscribe if you want to follow along with my build. Thanks!


What I did:

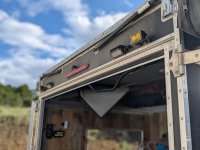
  • Taller barn door opening height for my asymmetrical barn doors. Makes getting in and out, loading tall items easier.
  • Bed support railing Unistrut extended all the way to the rear of the camper. Great for hanging accessories from the wall such as trash bins, storage baskets, hooks, fire extinguishers.
  • 11″ cabover height (that’s three extra inches) for more bedding when collapsed. Another benefit is the interior has more headroom both when collapsed and popped up.
  • Add more horizontal or vertical studs where you think you’ll need them for attaching heavy items.
  • Slide-latch lock for flip up hatch: let’s you lock the side hatch from the inside and/or get double security.
  • Requested the bed slide platform be shortened from 80″ to 74″. This gave us 6 extra inches of standing room when the bed is extended. Only works if you’re shorter than 74″.
  • Added 8020 horizontal mounting bars to barn door exterior.
What I skipped:

  • Extra space between vehicle roof and cabover of camper (makes room for a roof rack).
  • Ports and openings cut into sidewalls for diesel heater ducts, water inlets, propane hoses, electrical plugs, etc.
  • Exterior lighting, cameras (you provide), and other items you might want mounted on the outside.
  • Longer barn door catches to allow for bigger items to be mounted to barn doors. Limits barn doors from hitting the side of camper when opened.
  • Have solar gland cables wired down to either side of the camper. If you don’t specify, they route it down the rear of the driver side.
Cheers!
 

Phessor

Member
Pretty content with the build out, and getting plenty of use this spring and summer. Thanks to all for the postings, I'll add some pics in case helpful to those still planning.

Few questions for those more knowledgable:
1) suspension upgrade
Currently stock F150, . Fully loaded I'm right at GVWR, ~7000lbs. Planning on Bilstein 6112 @2" in front and 5160 in back. seem reasonable?
I expect I might be squatting after the 2" lift when loaded, not seeing much regarding add a leaf options for my particular truck, should I be looking at custom leaf or RAS system, reviews on airbags seem mixed.

2) tires - stock 32" tires (275/65/18)
I'd like a bigger tire than stock, I've tried to keep everything as light as possible, should I have the same mindset for tires? I like Falcon wildpeaks but the 285/70/18 (~34") are 69lbs and C rated, not much else I'm keen on in this size range. I could instead get plenty of AT options with 275/70/18 (33"), generally all E rated, mid 50lbs, or make a really big jump to 285/85/18 (35") but that might require some vehicle trimming and I'm worried might tank my gas mileage. Lots of all season highway miles, forest service roads to very rough road hunting and fishing mobile is my goal. Is the ~15lb/tire weight penalty of the Wildpeaks for a C rated tire not worth it and just stick to 33" upgrade now.

View attachment 847852View attachment 847853
Do you have a build thread? I really need to figure out how to do the aluminum framework.
 

jjgarrett0

New member
My wife and I are looking at getting one of these and I was wondering if everyone here is paying cash for them or did anyone get some financing?
 

dirtnsmores

Active member
My wife and I are looking at getting one of these and I was wondering if everyone here is paying cash for them or did anyone get some financing?
I did part of my build with financing just because it's 0% for a year through OVRLND Campers and I wanted to use that cash for something else. Most of it was paid for by selling my pop up camper trailer.
 

jjgarrett0

New member
I did part of my build with financing just because it's 0% for a year through OVRLND Campers and I wanted to use that cash for something else. Most of it was paid for by selling my pop up camper trailer.
You sound like me in the future. We just sold our popup camper trailer as well which will cover about half of the OVRLND. Lol. Your trailer wasn't an A-Liner was it?
 

STravis

Member
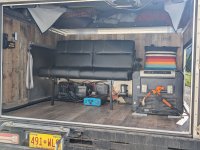
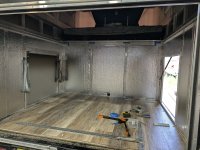
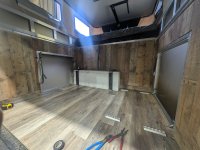
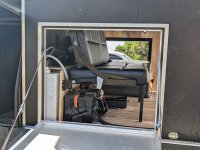
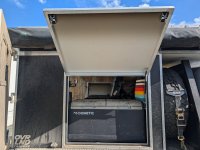
The interior build on our flatbed camper is pretty close to done. I still need to build a shelf for cooking appliances and storage but it's totally functional now. We had OVRLND put floor "joists" in and we completely enclosed the camper. We used 1/2" birch plywood covered with vinyl for the floor. Then we insulated the walls and covered it with a wood look MDF panel. The front left has a ~25 gallon water tank with a 12v pump. I still need to put in a couple quick connects for the water through the walls of the camper, but I'm not sure which ones I'll use for that yet. We have 400 watts of solar on the roof running through a renogy 50a dc-dc/mppt controller into a 200ah renogy lithium battery. We have easy fridge access from outside via the flip up hatch and it is still easily accessible from inside. Bags and chairs can be stored behind the back of the couch. The couch rolls over into a bed for our 3 year old. I'm going to add some molle panels to the outside of the rear doors for propane storage and a box for our water heater.

We used it for 6 straight nights with our 3 year old and 9 week old with no issues at all. It has way more room than our previous AT camper.
PXL_20240813_230618139.PORTRAIT.ORIGINAL.jpg
PXL_20240813_230917009.PORTRAIT.jpgPXL_20240813_230928718.PORTRAIT.ORIGINAL.jpgPXL_20240813_230618139.PORTRAIT.ORIGINAL.jpgPXL_20240723_182140773.jpgPXL_20240813_230754404.PORTRAIT.jpgPXL_20240724_171337873.jpgPXL_20240813_230648191.PORTRAIT.jpgPXL_20240813_230433310.jpg
 

flydream

New member
Do you have a build thread? I really need to figure out how to do the aluminum framework.
Nah, I'm new at all this so didn't think I'd have much to share.

It's a bit of a learning curve and expensive, but all things considered, definitely the direction I would go if I had to do it again.

I got a small free sample kit from 80-20 and it was helpful to see how everything came together at joints and visualize how each module was going to bolt together, Ie the fastners at the various corners wouldn't interfere.

I ordered all my hardware from T Nutz, shipping was less expensive to have the extrusion mostly precut to size.

Some modules I built on the fly because dimensions were too difficult to predetermine, and the others I had precut to size and machined by T Nutz and just bolted together.

I used anchor fastners and end fastners primarily, all 10-series. Order 3x as many drop in T nuts as you think you will need.
 

dstefan

Well-known member
+1 on TNutz, and other good advice from @flydream.

This is a (kinda long) post on how I built my extrusion structure if it helps. Its easier if you can do your own cut to length and drill\tap as needed. I used a table saw with steel demon blade and had a drill press which really helped.

Dewalt makes a great 1/4-20 tap/drill combo if you want to use end threads (eg, 3-way corner pieces) . If you can’t cut/drill easily or precisely and are going to to order pre-cut to exact lengths and/or tapped, then plan carefully and mock up first, and measure a lot. 10 series is sufficient for nearly everything. 80/20 is too expensive for sure, but their website has great short videos and good tools, like a deflection calculator.

OK, now the camper built-ins.

After dust sealing the truck bed, the two things I did before getting the camper and putting in the Bedrug that I was really glad to have done first were:
1-- Take pictures of the naked truck bed with measurements for where the ridges, flat spots, bed bolts and other features were. This has been super helpful as I've added things and needed to know where to anchor them and where flat spots, etc were. Don't forget interior bedsides too. Of course, if you're not doing a Bedrug or are laying a baseplate over, never mind . . .

2-- Fitted the fridge slide and drilled holes in my truck bed to through bolt it, as well as rivnut and VHB'd short pieces of L-track to spots on the bedside where I planned to have some cam straps terminate (Rollercams -- really great product. Holds way better than others I've used). I also VHB'd a couple of 12" long, 1/2" single lot 8020 pieces to the floor in front of the wheel wells. All this was covered with the Bedrug, but then easily accessible through slots and very useful later. Bedrugs, BTW are tough to cut through, though no problem, and you end up making some big flaps. You can add rivnuts or VHB that way, but if you can plan out anchor points, etc its just a LOT easier.

I knew I wanted a shelf/bench across full the bed width that allowed the full 78 inches of bed length to be used. Most builds I had researched built a free-standing structure with legs, put it in place and stabilized it against the bedwall or bedrail. I decided to make a hanging bench from the Toyota bedrail system (which I added). It's rated for 800lbs, kept the build light, and could be made pretty stout with 8020. I purposely avoiding tying any structure to the camper. It's quite rigid, but the Tundra beds flex, as do most truck beds, though the Tundras flex more. Having structures anchored to both is a bad combo off road. Even with bed stiffeners.

We purposely keep the P-side corner of the bench and cabinet open for storing tall vertical things -- full sized Maxxtrax, shovel, camp chairs, etc.

View attachment 700295

I bought the all the extrusions and hardware from Tnutz, not 8020. 8020's website and catalog are great for research, but their prices and wait times (this was Aug/Sept '21) are ridiculous. Tnutz has a more limited, but still great selection, they are a 1/3 to half the price, the extrusions are the same and they were shipping within 2 weeks or less vs 80 to 90 days from 8020.

I went with 10 series extrusion and standardized all hardware to 1/4-20. Many people will say use 15 series, but I've worked with it and it's unnecessarily heavy and expensive.
For the attachment ledger strips to the Toyota bedrail system, I used 1"x 2" 10 series and on the D-side 1"x3". For two reasons:
1-- I trialed a scrap piece of 1" and it was just barely too narrow to securely bridge the Toyota bed rail width and would slip under pressure.
2 -- My 1"north/south crossbars could be held with a gusset on each side AND one underneath in the second or 3rd slot. They easily hold the combined 300lbs of me and my wife on the bench

The front rail of the bench that stretches completely across the bed is 1x2" as it has a long unsupported span. 8020 has a great deflection calculator that you can model stuff like that with.

I decided to keep the plywood "step" over the P-side wheel well as it's very stout and I could avoid legs.
View attachment 700306

Got these bed rail nuts on Amazon. Bomber! 3/8" tapped stainless. Had to shim them up for my ledger rails with 1/8" aluminum bar. I used Grade 8 bolts in holes drilled through the extrusion. It's all very stout, no deflection and still pretty lightweight. ALL of the extrusion and hardware from Tnutz was 40lbs (I weighed the package) and that included 18' of additional extrusion for another project Plus, I cut a lot down (using a table saw). I estimate the weight of 8020 in the project was about 30lbs, plus the plywood, which weighs 43lbs for a 5x5 12mm sheet. I used a sheet and a half. So all told about 90-ish lbs.

I've worked with 8020 before (rack system), but never something complicated. This wasn't hard, but took a lot of planning and multiple revisions on paper. The time spent ahead is worth it, as well as living with a minimal build for a few trips to figure out what we really wanted.

Also, either a chop saw or table saw is critical if you're going to custom fit pieces as you go (I did for several reason). A drill press or drill stand is also super helpful if you're drilling though the extrusion. It tends to catch a hand drill for larger holes.

Made the bench top liftable to access the battery.
View attachment 700313

Here's the final finished product
View attachment 700314
View attachment 700316
View attachment 700317
Made the counter extension a flip up so the heater is still usable where it is. We also found it's very handy to have a surface reachable from the pulled out bed, sort of like a night table. Also put a very low shelf for the propane to allow my slide out tailgate cooking counter to fit under. Used a large quick fist with a 1" ratchet strap laced through the quick fist.

The middle compartment has 1/4" baltic birch cutouts slid into the 8020 slots with a liner from my wife's unused yoga mat. I made another coroplast drawer, using an even easier technique. The stove is sitting on top of the counter since that's where we store it strapped down while traveling.

Here's the pack bag I mention we put under the rear seat platform. We love this thing. Holds a ton, very organized. It's like a lightweight chest of drawers. Hangs from the camper bedrail. Also, you can see where I move a water jug for gravity feed water. The spigot hose isn't attached. Works great. If it's freezing no pump or plumbing to worry about. I also use a Rollercam strap vertically to hold the jug to the platform. I can leave the hose/spigot attached and it's solid enough to bounce around offroad and off camber.

I should also say the bench cushions were custom cut 3" medium firm foam from https://www.foamorder.com/ with a Dacron wrap. We got the sunbrella fabric from https://www.sailrite.com/ (great DIY resource). It's super durable. Very easy to cover your own cushions IF you use a solid base so you wrap the fabric around and staple the bottoms. No sewing!

If we need to stealth camp or close down the top, my wife can sleep on the bench and I can sleep north/south under with my Thermarest. Our goal with this was NOT to have it built out inside like a FWC, but to be able to retreat inside as needed for a day or two. Mostly it's tailgating for us, sitting outside, and retreating in for bed. That said, the bench is comfortable seating with a pillow behind us, and there's enough room with the top down to clear my head, so I'm sure we'll hang out inside more than we think.
View attachment 700322

One last organizational issue is the kitchen.
View attachment 700329
This lives on the inside D-side barn door that's reinforced. You can see it stowed in my electricals post. This is ALL of our kitchen stuff. Saw it on iKamper's website, and hoped it would work. The pockets surprised us with the roominess. Holds our pot set, dishes two Yeti mugs, a GSI skillet plus everything else. Eliminates need for more storage construction and super handy.

I'll post a little more I'm sure on odds n' ends, but that's the bulk of it. I left out some details, sources, links, etc so as not to hog this thread (at least too much!:rolleyes:). Happy to answer questions or provide more info. Just ask.

We're going somewhere in about 3 weeks (still figuring where). I'm going to try to force myself to get it weighed again fully loaded, and I'll post that if I do.

Good luck on your builds!
 

KellyM

Adventurer
Pretty content with the build out, and getting plenty of use this spring and summer. Thanks to all for the postings, I'll add some pics in case helpful to those still planning.

Few questions for those more knowledgable:
1) suspension upgrade
Currently stock F150, . Fully loaded I'm right at GVWR, ~7000lbs. Planning on Bilstein 6112 @2" in front and 5160 in back. seem reasonable?
I expect I might be squatting after the 2" lift when loaded, not seeing much regarding add a leaf options for my particular truck, should I be looking at custom leaf or RAS system, reviews on airbags seem mixed.

2) tires - stock 32" tires (275/65/18)
I'd like a bigger tire than stock, I've tried to keep everything as light as possible, should I have the same mindset for tires? I like Falcon wildpeaks but the 285/70/18 (~34") are 69lbs and C rated, not much else I'm keen on in this size range. I could instead get plenty of AT options with 275/70/18 (33"), generally all E rated, mid 50lbs, or make a really big jump to 285/85/18 (35") but that might require some vehicle trimming and I'm worried might tank my gas mileage. Lots of all season highway miles, forest service roads to very rough road hunting and fishing mobile is my goal. Is the ~15lb/tire weight penalty of the Wildpeaks for a C rated tire not worth it and just stick to 33" upgrade now.

View attachment 847852View attachment 847853
Hey there flydream. Nice build out. I have a 2018 F150 6.5 bed, Supercrew with the Eco Boost engine. I went with Bilstein B8-5100 @ 2" increase for the front because the 6112s had a lower spring rate than what was already on my truck. I did B8-5160s in the rear. I the like the set up. I had Boise Spring Works make a new custom leaf pack for me rated at 2000lbs. No sag, no air bags and the truck drives great with it. The leaf pack was around $500 (they reused a couple of the stock springs in the new pack, but it is not an add a leaf).

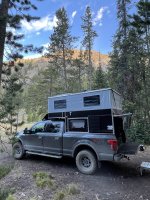
I'm running 315/7017 KO2s (34.4")on Method 705 bead grip wheels. I have the stock 3.55 gearing with a rear locker. The eco boost and 10 speed transmission handles the weight and increased tire size just fine. I'm sure 4.10 or 4.30 gearing would result in better mpg, but I don't want to spend the money. I'm getting mid to low 17s mpg on the truck calculator with mostly around town, forest roads and 65 mph two lane highways. We also have done some fairly technical trails, well as technical as a 160" wheel base truck with a 2" lift can do. I really like the ~35 inch tires and the Bilsteins. By the way, I get no rubbing with this setup. Here is a photo from a recent trip.IMG_7240.jpg
 

montechie

Active member
Hey there flydream. Nice build out. I have a 2018 F150 6.5 bed, Supercrew with the Eco Boost engine. I went with Bilstein B8-5100 @ 2" increase for the front because the 6112s had a lower spring rate than what was already on my truck. I did B8-5160s in the rear. I the like the set up. I had Boise Spring Works make a new custom leaf pack for me rated at 2000lbs. No sag, no air bags and the truck drives great with it. The leaf pack was around $500 (they reused a couple of the stock springs in the new pack, but it is not an add a leaf).

I'm running 315/7017 KO2s (34.4")on Method 705 bead grip wheels. I have the stock 3.55 gearing with a rear locker. The eco boost and 10 speed transmission handles the weight and increased tire size just fine. I'm sure 4.10 or 4.30 gearing would result in better mpg, but I don't want to spend the money. I'm getting mid to low 17s mpg on the truck calculator with mostly around town, forest roads and 65 mph two lane highways. We also have done some fairly technical trails, well as technical as a 160" wheel base truck with a 2" lift can do. I really like the ~35 inch tires and the Bilsteins. By the way, I get no rubbing with this setup. Here is a photo from a recent trip.
Sweet build! Did you do any different control arms with the 2" lift? If so how do you like what you went with? With the Methods, so you remember the offset? Any rub or trimming needed? I know Ford opened up the wheel wells more in '20+ but generally F150s usually had a nice amount of space already.
 

montechie

Active member
The interior build on our flatbed camper is pretty close to done. I still need to build a shelf for cooking appliances and storage but it's totally functional now. We had OVRLND put floor "joists" in and we completely enclosed the camper. We used 1/2" birch plywood covered with vinyl for the floor. Then we insulated the walls and covered it with a wood look MDF panel. The front left has a ~25 gallon water tank with a 12v pump. I still need to put in a couple quick connects for the water through the walls of the camper, but I'm not sure which ones I'll use for that yet. We have 400 watts of solar on the roof running through a renogy 50a dc-dc/mppt controller into a 200ah renogy lithium battery. We have easy fridge access from outside via the flip up hatch and it is still easily accessible from inside. Bags and chairs can be stored behind the back of the couch. The couch rolls over into a bed for our 3 year old. I'm going to add some molle panels to the outside of the rear doors for propane storage and a box for our water heater.

We used it for 6 straight nights with our 3 year old and 9 week old with no issues at all. It has way more room than our previous AT camper.

With your flatbed, how long of a bed did you do? How much of that length does the forward garage take up? We've been thinking about going back to a full-size light duty and doing something similar flatbed-wise + OVRLND. Probably with a 6' flatbed on a short bed chasis. Originally I was thinking toolboxes on the side with an OVRLND on top, but seeing yours has me rethinking that since we could do simpler storage through the OVRLND side hatches.
 

Forum statistics

Threads
188,025
Messages
2,901,300
Members
229,411
Latest member
IvaBru
Top