Pre birth of a camper - No laughing!

ianc

Adventurer Wannabe
Anthony - I've not been back to the burner yet to follow those lines of enquiry. However there was plenty of air in the system as I could hear it. I didn't think it would affect it though since the burner was at the lowest point in the circuit.

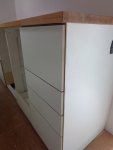
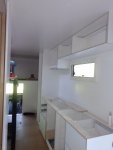
Kitchen carcases are now fully installed. The external faces are 12mm Birch ply laminated. Ply is purposely visible on edges. The gables are typically a 4 or 6mm sheet with a 12mm ply x 80mm frame for weight control vs strength. Of course I buggered up all the weight saving by then putting a solid Beech worktop on it!
Units are screwed to the floor and Sikaflex'd to the wall. The overhead units are just glued up with a small number of screws into the roof and walls. I've ended up with 1.8m of countertop (incl. cooker and sink), 4 under counter units of 550,500,400 & 400mm with a lot of it configured as deep drawers. There's also a full height wardrobe (for my party dresses) and a unit that takes 8 of those Ikea fabric storage boxes.


DSC00639 (768x1024).jpg
.
DSC00641 (768x1024).jpg

Any of the woodwork which is not laminated is spray painted with white pigmented pre-catalysed lacquer. This was my first time spraying in about 20 years. I used to drive rust buckets which required some spraying skill to look have decent. 2-3 layers of hi build primer sanded down and then 2 thin layers of the white lacquer. It's hard to see the finish in the photos, but it's difficult to tell the lacquer from the laminate. I'm very happy with the result. Special thanks to my mate in NAA (http://naa.ie/) for the advice and supply of the “paint” and the preassembled drawer units.

A carpenter friend made the kitchen stuff.

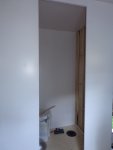
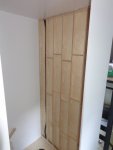
The bathroom walls are all finished too and it's just about ready to be “Tanked”.
DSC00635 (768x1024).jpg
.
DSC00640 (768x1024).jpg
 
Last edited:

andylod

Tea Drinker :-)
Love the drawers Ian ....... I am interested in the way you have fixed the runners ??

We have drawers in ours and the runners are simply screwed to the carcass, we also have the push button locks to stop them sliding out. Now this seems great at the outset..... but after a prolonged bumpy drive our screws come loose, the drawers drop very slightly and then the push button catches fail to reach there latch .... the draw flies open ggggrrrr :(
I am thinking of fitting some small wedges under the body at the front edge of the drawers so that when they are closed the weight of the front edge of said drawer is held firmly thus stopping any movement and keeping the latches in place. Or maybe a different catch ..... :confused:
 

ianc

Adventurer Wannabe
Andylod, Good to know. The drawer runners are each held in with 4 x 5mm diameter x 15mm long screws. These positively locate the runners rather than relying on the taper at the head of the screw (such as a 4m Spax screw). I'm not sure if that's enough to protect against what's happened to yours. There is scope to fit a further 4 screws per runner. I'll also be fitting the push button catches.

What are your carcasses constructed from?
 

andylod

Tea Drinker :-)
The carcasses are all ply .... our runners are fixed to the edge of the carcass and sit on a cross brace, they can't move on the carcasse fixing just the draw fixing .... i suppose i could glue and screw another piece of ply above the runner where it fixes to the drawer .... that would stop it.
Ours is screwed with similar screws as yours as well as a longer one drilled through the end of the runner and screwed into the drawer side and through into the end grain of the front panel.

I think the theory of relying on the runner not to flex or wear which in turn keeps the catch located is flawed. I'm trying to think of a more positive catch that is fixed to the carcass and keeps the drawer in and is independent of any flex or movement in the draw.....

:beer::beer::beer:
 

ianc

Adventurer Wannabe
Progress has been made albeit it slowly. Apologies of the lack of updates.

All windows are now in as are the roof lights (one in main area plus one in bathroom). I have one more but I don't think I'll need it.
WP_20130710_001 (1024x577).jpg .
I also redid the bumper and wheel covers in a matt Gray. I Think I'll redo the mirrors, grill etc in the same colour.

WP_20130710_004 (1024x577).jpg .
WP_20130710_006 (1024x577).jpg .

I also fitted gas struts to the "garage" door.

WP_20130710_005 (577x1024).jpg .

Kitchen units and presses are finished

WP_20130710_013 (577x1024).jpg .

Seating area is completed and belts have been fitted to the two forward facing seats.

WP_20130713_002 (577x1024).jpg .

WP_20130713_004 (1024x577).jpg .

Bunks are pretty well completed. I just need to fit some lights and build the foot lockers

WP_20130713_009 (1024x577) (2).jpg .

Same for the main bedroom. All done except for lights and head locker.


New suspension seats fitted in the cab. I'm not going to get the cab redone this summer. Not enough time.

WP_20130710_003 (577x1024).jpg .

Electrics are getting there. Here's the fuse and distribution panel. LHS is 12V, RHS is 220v.

WP_20130710_008 (1024x577).jpg .


Items left to do on electrics are:
- Fit proper batteries – I'm using a spare one from one of the cars at the moment
- Commission the second Alternator and controller. The heavy wiring is done
- Most of the light fittings have yet to be fitted

The Heat Pump has been commissioned and is working fine.
 
Last edited:

andylod

Tea Drinker :-)
Loving your work Ian looks great :) Great finish to the kitchen units ..... do you have a deadline and trip planned yet ?

Andy
 

ianc

Adventurer Wannabe
No "proper" trips planned yet.

Hoping to go to the Adventure Overland show in the UK at the end of September.
 

Ullie

Adventurer
New suspension seats fitted in the cab.


Which brand are these seats and where did you buy them?
We are also planning to change the seats in the front (3 places now and willing to replace them by 2 suspensions seats in the future)

Nice job by the way!

Ulrich
 

ianc

Adventurer Wannabe
Ullie they are "cheap" seats from this company http://www.jennings-seats.co.uk/

The model is JS100450 and £220 +VAT per seat. They are comfortable but not as good as the ISRI driver's seat fitted as standard. As you can see they have a large selection and they were very helpful. Shipping to Ireland was ~£45.

My driver's seat is still in good condition (all the adjustments still work fine) but does need to be recovered - the material is very dirty and there is a 10cm rip. I was going to stick it on ebay.
 

mmmartin

New member
I bought an ISRI chair from a Mercedes Breaker in Bradford, with ours being left hand drive the seats he had worked well as they came out of UK vehicles being converted. Un-used chairs were £120 for cash and he had a truck body full of them, all in as new condition. If your interested I will try and get his contact details
 

ianc

Adventurer Wannabe
lorry/truck/van went through the first inspection hurdle today and was passed as definitely being a campervan or righteous provenance. Now the paperwork has been sent to the Revenue who will decide how much vehicle registration tax (VRT) I should pay. It's normally around 13% of whatever they think it's now worth. Finger crossed!

After than I have to pay the VRT!, get it DoE certified roadworthy (not necessarily straightforward) and pay the tax for that, then I have to have the DoE cert reissued and pay for that and then I'll be allowed to pay the road tax!

Still tonnes to do but it was better to get it on the road and get at least a little use out of it before the summer ends.
 

Forum statistics

Threads
188,203
Messages
2,903,750
Members
229,665
Latest member
SANelson
Top