Get your tickets to THE BIG THING 2026!
You are using an out of date browser. It may not display this or other websites correctly.
You should upgrade or use an alternative browser.
You should upgrade or use an alternative browser.
Pretty Ugly... 1835, The Build Begins
- Thread starter Madoxen
- Start date
Madoxen
Active member
Am I seeing this right....it was tested it with the rectangular tube verticial but it's being built with the tube horizontal?
Hi Alloy it was tested the same as it will be built with the same size od tube etc in the final tests shown below in pic
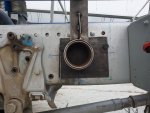
The material used was of much lighter guage than the final build will be though.
Did this answer question or did i mis understand it?
Alloy
Well-known member
Did this answer question or did i mis understand it?
Tube here looks to be vertical.
View attachment 669537
Tube here looks to be horizontal. Orienting vertically has more resiance to torsion.
View attachment 674597
Madoxen
Active member
Tube here looks to be vertical.
View attachment 669537
Tube here looks to be horizontal. Orienting vertically has more resiance to torsion.
View attachment 674597
Ahhh now i follow you the tube in moc set up was 75mm heigh x 50 wide
The tube i have used is 75 heigh x 125 wide.
The reason behind this is purly a max height V torsional stiffness v flex/sag resistance . See below for a comparison .

I could have tryed to save weight with the 100x50 x 6 tube but decided the height and bigger allowance left on stress with equal deflection was the way to go. She was made to carry alot more load than i will ever be putting on her.
&
Due to my chassis already being massivly heigh i could not really go for anything heigher than the 75 mm and keep under my goal height of 3.7mtr all in with an acceptavle amount of head room in the hab. As with everything in these builds it is all a compramise / give n take / pleasure n pain
Alloy
Well-known member
Ahhh now i follow you the tube in moc set up was 75mm heigh x 50 wide
The tube i have used is 75 heigh x 125 wide.
The reason behind this is purly a max height V torsional stiffness v flex/sag resistance . See below for a comparison .
View attachment 676777
I could have tryed to save weight with the 100x50 x 6 tube but decided the height and bigger allowance left on stress with equal deflection was the way to go. She was made to carry alot more load than i will ever be putting on her.
&
Due to my chassis already being massivly heigh i could not really go for anything heigher than the 75 mm and keep under my goal height of 3.7mtr all in with an acceptavle amount of head room in the hab. As with everything in these builds it is all a compramise / give n take / pleasure n pain
Hmmm....is the "mid-piont mm" with both tubes oriented with the 75mm wall being vertical or does it compare the 125mm vertical to 75mm vertical?
Madoxen
Active member
Hmmm....is the "mid-piont mm" with both tubes oriented with the 75mm wall being vertical or does it compare the 125mm vertical to 75mm vertical?
Hey. They are both with the tube at 75mm heigh if i flipped it to 125 h it would be significantly less deflection mid point mm. In the chart it states 1st measurment is H 2nd is W and 3rd is T.
Alloy
Well-known member
Hey. They are both with the tube at 75mm heigh if i flipped it to 125 h it would be significantly less deflection mid point mm. In the chart it states 1st measurment is H 2nd is W and 3rd is T.
The 50% reduction in mid point deflection from the 75mm wide to 125mm wide is surprising considering there is 70% more weight. What is the span?
Madoxen
Active member
The span is 2.6 mtrs ish. I must say the numbers suprised me but i had two engineers look at them the one that did the maths for me and another just to check all drawings and numbers etc
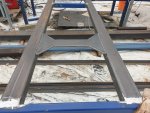
Managed to get the 12mm plate cut today for the middle and rear pivot plates. Needs to be tidied up etc but getting there
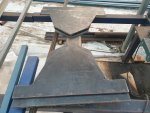
Managed to get the 12mm plate cut today for the middle and rear pivot plates. Needs to be tidied up etc but getting there

alexcrofford
New member
Wouldn't a 48v system allow you to use a 48v 2nd alternator and charge the battery's faster than a 24v or 12v system?
Madoxen
Active member
Wouldn't a 48v system allow you to use a 48v 2nd alternator and charge the battery's faster than a 24v or 12v system?
That is correct which is why i have the 48v 200amp 2nd alternator with external regulater and controller ready to go in to truck ?
Madoxen
Active member
Have managed to get some more work done on the pivot sections.
Middle section almost all done. On the lower plate i milled a 2mm deep 12mm wide slot for the 2 plates to slot into and hold in place at exact angle.
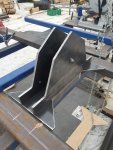
Middle and rear sections need to be flipped upside down and welded in place
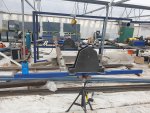
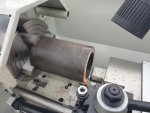
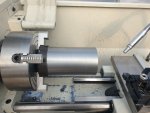
Running the front 100mm od 75mm id pivots through the lathe

Middle and rear pivot ultrabush sat on its new home. Just need to fab the rest of the middle and rear lower housing setup

M24 bolt with the 2 outer sleaves over the rear pivot plates. The bottom ultrabush is just holding the 2 plates at the 93.3mm spacing the actual placement will be much lower/higher when its flipped right way up.

Front lathed pivot pin sat in place in the 12mm plate housing / still have a few more bolt holes to do.( the mill sufferd a massive problem dyring the boaring of the plate and i had to drill/cut out the rest and then die grind it to fit so not the best finish here but it worked

All the bolt holes in place . The 6 upper holes seems like over kill but i had to remove 4 rivets and every hole must be bolted where a rivet was removed
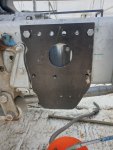
Next on list take the front pivot pins in place and then fab up new mounting set up for the air box and exhaust silencer as the pins push them out from the chassis byabout 60mm.
Middle section almost all done. On the lower plate i milled a 2mm deep 12mm wide slot for the 2 plates to slot into and hold in place at exact angle.

Middle and rear sections need to be flipped upside down and welded in place

Running the front 100mm od 75mm id pivots through the lathe

Middle and rear pivot ultrabush sat on its new home. Just need to fab the rest of the middle and rear lower housing setup

M24 bolt with the 2 outer sleaves over the rear pivot plates. The bottom ultrabush is just holding the 2 plates at the 93.3mm spacing the actual placement will be much lower/higher when its flipped right way up.

Front lathed pivot pin sat in place in the 12mm plate housing / still have a few more bolt holes to do.( the mill sufferd a massive problem dyring the boaring of the plate and i had to drill/cut out the rest and then die grind it to fit so not the best finish here but it worked

All the bolt holes in place . The 6 upper holes seems like over kill but i had to remove 4 rivets and every hole must be bolted where a rivet was removed

Next on list take the front pivot pins in place and then fab up new mounting set up for the air box and exhaust silencer as the pins push them out from the chassis byabout 60mm.
Madoxen
Active member
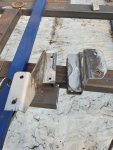
Ok a little progress that i find amusing the time to reward ratio feels good to get it done but when u look at it you think why did that take so long lol.
The newly re sized re fabbed air box mounts offsetting the box to clear the new front pivot while still allowing it to marrie up to the in and out ports
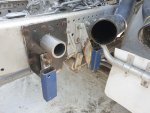
Exhaust box also stepped out for clearence and the lower mount reshaped to bolt lower down as its original location was right in the middle of the front pivot
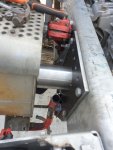
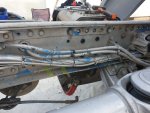
The side wings for the subframe in place checking on diamentions for the vertical plate sits in correct place for the front pivots

The newly re sized re fabbed air box mounts offsetting the box to clear the new front pivot while still allowing it to marrie up to the in and out ports


Exhaust box also stepped out for clearence and the lower mount reshaped to bolt lower down as its original location was right in the middle of the front pivot


The side wings for the subframe in place checking on diamentions for the vertical plate sits in correct place for the front pivots

Similar threads
- Replies
- 51
- Views
- 9K
- Replies
- 8
- Views
- 1K
- Replies
- 16
- Views
- 3K
- Replies
- 18
- Views
- 4K


